Thursday, December 24, 2015

Snowflake Cookies Tutorial

Snowflake Cookie Tutorial, 5

These might be my favorite Christmas cookie, though it's been a while since I made them! They look super fancy, but are easy to make. I think it took me about 15 minutes to cut the stencil and decorate the entire batch of cookies! Follow along with the steps below to make your own ~

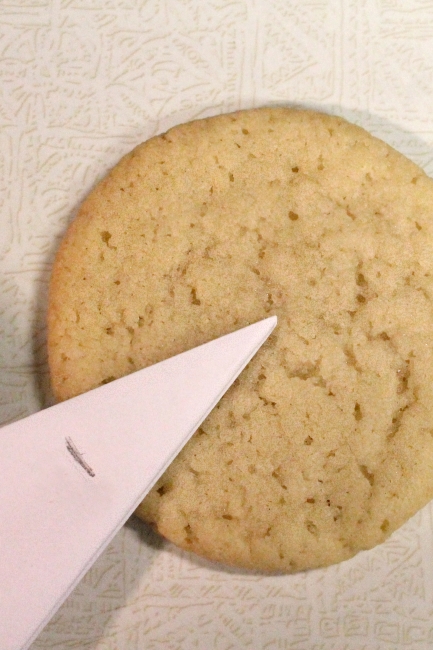
1) Start with some plain sugar cookies. You can make them from scratch, slice & bake, or even just buy some pre-made. 

2) Follow my snowflake cutting tutorial to fold the paper for your stencil (through step 5). One you have it folded, hold the point to the center of a cookie and make a mark where the edge is. 

Snowflake Cookie Tutorial, 1

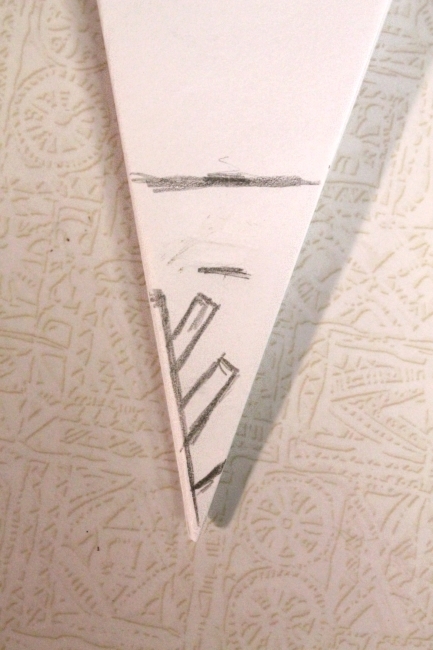
3) Follow the template below to draw your snowflake shape. Along one edge, draw a thin bar, ending just below that mark. Draw two angled bars coming off of that, about twice the thickness of the first bar. (You can see I made a little halfway mark on my bar to gauge the size) Below those, draw another angled line that goes all the way across. And then about an inch above your original mark, draw a line all the way across. 

Snowflake Cookie Tutorial, 2

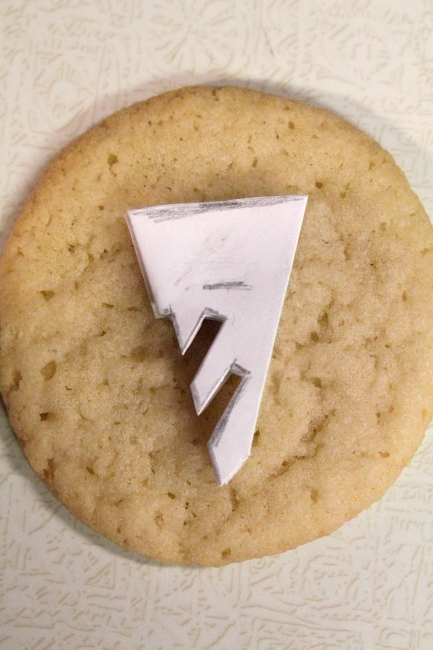
4) Cut out your stencil along those lines, and it will look similar to this. Carefully erase your pencil lines before unfolding (optional).

Snowflake Cookie Tutorial, 3


5) Unfold your stencil and bend the folds in the opposite direction to help flatted it out. If you want it super flat you can iron it, but it is OK if it is a little wobbly.

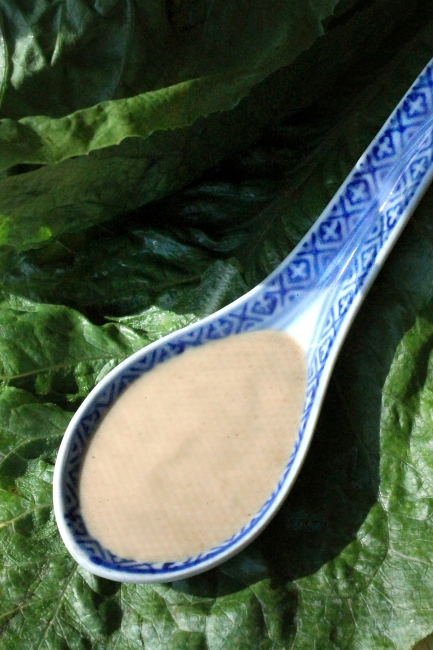
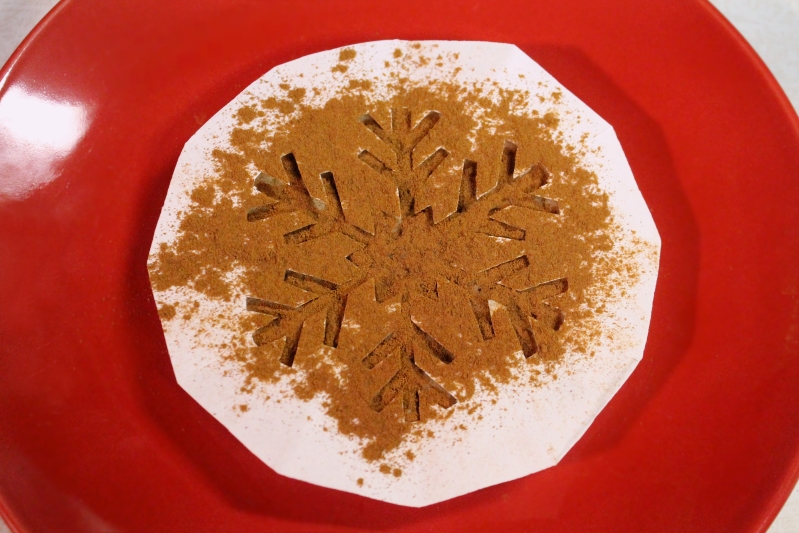
6) Lay your stencil on top of a cookie and sprinkle cinnamon over the top. (If needed, you can hold it down a little, just try not to shift it.) Make sure you've filled in all of the little 'branches' before removing.

Snowflake Cookie Tutorial, 4

7) Carefully lift the stencil off of the cookie and dump the cinnamon from your stencil in a bowl. I like to quickly flip my cookie upside down over the bowl too, and then blow on the cookie with a quick 'puff' to remove the excess cinnamon. When you are done, you can pour the cinnamon from the bowl back into the shaker to use later. The cinnamon on the cookie will darken a bit as it sits.

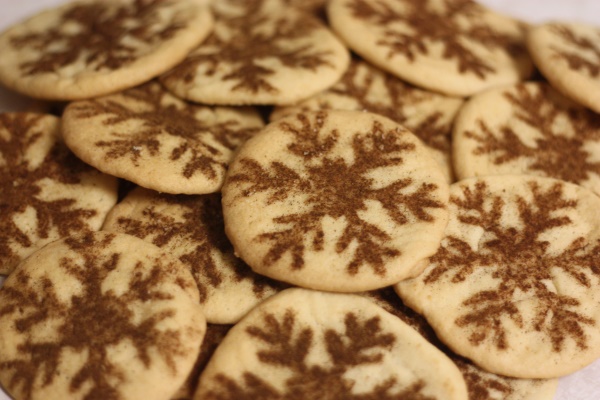
Repeat on the rest of your cookies & you are done! I always seems like these shouldn't be so simple, like the stencil won't work for some reason, but after three+ batches I haven't had one cookie get messed up yet.

Snowflake Sugar Cookies

While I normally encourage experimentation with ingredients, on my first batch I tried making half with powdered sugar and kept inhaling it and choking every time I tried to eat one! Colored sugars may work, but are much larger & might need icing to stick. The cinnamon works wonderfully though, and gives the cookies a lovely Snickerdoodle flavor. Let me know if you give it a try!

Tuesday, December 22, 2015

Our Decorated Gingerbread Houses


In the last post I shared how I assembled the base of these houses step-by-step and let them dry out a bit. Now for the fun part ~ the decorating!

My husband picked up a few candies from the store, like M&M's, gumdrops, butter mints, etc. I would have killed for some soft candy canes, but they were out! We also raided our candy basket, the baking supplies (sprinkles!), and we even used some cereal. Anything's up for grabs!

Here is Orson's house ~ 

12-15 Orson's house

We applied the icing for both of the kids, using these decorating bottles again. The kids showed us where to put the icing, then they chose & attached the candy. 

And Pandora's house. I could not get her to stay still! ~

12-15 Panda's house

When they were done we let them eat some of their house. Before we realized it, Panda had cleared off most of her candy!

Justin had the slightly broken house, but still managed to craft an awesome chimney, paved with M&Ms. I love the cookie shingled roof too! (Cookie Crisp cereal)

12-15 Justin's house, 1

And a nice, big back window ~

12-15 Justin's house, 2

I added a small covered porch on the front of mine ~

12-15 Tiffany's house, 1

The roof is shingled with Cinnamon Toast Crunch cereal and I tried to add a little 'snow' along the edges. There is a sour gummy candy called "Rips" that is the perfect shape for the door, and I also cut up some to make shutters.

12-15 Tiffany's house, 2

On the back I made some stairs out of graham crackers & railing from Pringles Stix. I also stacked up some pink Good & Plenty 'logs'.

12-15 Tiffany's house, 3

This was my first time decorating a graham cracker house and it was a lot of fun. I think it needs to be a new Christmas tradition!

Sunday, December 20, 2015

Easy (Graham Cracker) Gingerbread House Assembly, Step-by-Step


We celebrated the first day of Christmas break by making some fun 'gingerbread' houses with the kiddos. They are pretty obsessed with candy, so they could not wait to start decorating! My kids are 2.5 and 5.5, so we went with small graham cracker houses and store bought frosting to keep things easy. 

'Gingerbread' house step-by-step, 12

Since my kids are little I made sure to assemble the houses early & let them dry out to become a little sturdier.  I had a little trouble assembling the first house, but felt like a pro by the fourth one, so I took step-by-step pictures to share the tips I learned along the way.

To apply the icing, I'm using these awesome cake decorating bottles I got for my birthday. Pastry bags have always felt super awkward to me, but these were easy to use!


1) To start, ice three edges of a cracker and place it on your plate (facing away from you). It's OK for the perforation to run horizontal or vertical, but make sure to place all of the crackers the same way. This will be the back of your house.

'Gingerbread' house step-by-step, 1

2) Ice the bottom edge of another cracker and place it to the right of the first one, against the outer edge. (You want the side crackers to be on the outside of the front & back or you will have trouble placing your roof later!)

'Gingerbread' house step-by-step, 2

3) Ice three edges again and place that cracker in the front (inside of the right cracker).

'Gingerbread' house step-by-step, 3

4) Ice the bottom edge of another cracker and finish off your four walls by placing this on the left, outside.

'Gingerbread' house step-by-step, 4

5) Now let's cut a triangle shape to hold our roof. This may differ a little based on the size of your crackers, so figure out your angle by holding a cracker from the bottom corner to the center line. Notice where it hits the center line, then choose a spot a little lower so that your room can overhang the edges a bit. The lower the spot, the bigger the overhang.

'Gingerbread' house step-by-step, 6

6) My cracker was about as tall as the top line of dots, so I chose to mark the height between the top two lines of dots. Using a serrated knife, saw a little to mark a line, and then connect that center spot to your bottom corners.

'Gingerbread' house step-by-step, 7

7) Now lightly saw through the cracker to create your triangle. You will need two for the house.

'Gingerbread' house step-by-step, 8

8) Before we attach our triangles, add a line of icing along the top of the side crackers. You'll be glad this is already done in a minute!

'Gingerbread' house step-by-step, 5

9) Ice all three sides of the triangles and balance them on the front and back. Don't worry if one falls in, just stick it back on there. 

'Gingerbread' house step-by-step, 9

10) Add a cracker for the roof. Remember that it will overhang the walls a bit, not rest on top of them. 

'Gingerbread' house step-by-step, 10

11) Add a line of icing along the roof top...

'Gingerbread' house step-by-step, 11

12) And slap the last cracker on there. If the roof is uneven (hangs lower on one side) you can shift & adjust them now. There will be some gaps between the roof and bottom of the triangle, so squeeze a little icing in there and you're done!  

'Gingerbread' house step-by-step, 12

If you get the chance to stop by Walmart or a craft store, I love Our Best Bites' suggestions of making royal icing (with meringue powder) to assemble the house & really cement it together, and to use cake rounds for the base. We built ours on paper plates and the rim made it hard to decorate the base of the house. Next time I think I'll try both of tips, but this year we had to make do with regular icing.

Even with buttercream, we only had one house try to fall apart ~ when I brought my son his, the first thing he did was pull his house off the plate! Daddy switched his house with Orson's and I patched the broken house a little, but it was a bit unsturdy after that. Kids are full of surprises!

I'll share our decorated houses in the next post!

Tuesday, December 15, 2015

Low-cal Creamy Asian Peanut Dressing (14 calories per Tbsp.)

I have tried out about a dozen low calorie Asian style dressing recipes, and ended up tossing all of them and making up my own. I learned what ingredients and amounts I liked from the others and tweaked it until I came up with this yummy peanut dressing. PB2 helps give the dressing a peanutty flavor at a fraction of the calories, and is well worth buying for sauces & dressings.

Whenever I make a batch of this I label it "CRAP" (for CReamy Asian Peanut) to amuse myself. But it certainly does not taste crappy! If you are craving a sweet & creamy dressing, you'll love this one.

Low-cal Creamy Asian Peanut Dressing (14 calories per Tbsp.)

(For those of you counting calories, I've added the amount for each ingredient so you can easily make tweaks without having to re-calculate everything. Anything marked with an asterisk* may vary a lot based on what you buy, so make sure to compare your label.)

Creamy Asian Peanut Dressing  

2 Tbsp. PB2 (45)
1 Tbsp. Hellman's light mayo (35)
1/2 Tbsp. rice vinegar (8)
1 tsp. soy sauce (3)
1/2 tsp. minced garlic (0)
1 packet or 1/2 tsp. Splenda or Stevia (0)
1/4 tsp. grated ginger (0)

1/4 cup reduced fat buttermilk (28*)


Directions -
Stir together all of the ingredients except for the buttermilk. Add the buttermilk (you may want to do 1/2 at a time) and stir until well mixed.

Makes about 1/2 cup, 14 calories per Tbsp.

Tuesday, December 8, 2015

Low-cal Creamy Italian Dressing (15 calories per Tbsp.)

Over the last year I've played around with many different low calorie salad dressing recipes, tweaking existing recipes and making up my own. I now have a few that I love and make regularly, and it was high past time that I share them.

I thought I would start off by posting my current favorite: Creamy Italian. Rich and tangy, this dressing packs a lot of flavor! And at only 15 calories per Tbsp. (compared to 50+ for most store brands, even the low fat varieties!), you can load up your salad and still keep it light.

Low-cal Creamy Italian Dressing (15 cal/Tbsp.)

(For those of you counting calories, I've added the amount for each ingredient so you can easily make tweaks without having to re-calculate everything. Anything marked with an asterisk* may vary a lot based on what you buy, so make sure to compare your label.)


Creamy Italian Dressing (15 calories/Tbsp.)

2 Tbsp. Hellman's light mayo (70)
2 Tbsp. grated Parmesan (75)
2 tsp. vinegar (0)
1 tsp. lemon juice (2)

1/2 tsp. minced garlic (0)
1/2 tsp. dried parsley (0)
1/2 tsp. dried basil (1)
1/4 tsp. dried oregano (1)
1/4 tsp. black pepper (2)
1/4 tsp. salt (0)
1/8 tsp. red pepper flakes (1)

1/2 cup reduced fat buttermilk (56*)


Directions -
Stir together all of the ingredients except for the buttermilk. Add the buttermilk (you may want to do 1/2 at a time) and stir until well mixed.

Makes about 3/4 cup, 15 calories per Tbsp.

Thursday, December 3, 2015

5:2 Shirataki Pad Thai (203 calories)

Recently I talked about how to prepare tamarind paste for recipes. Now I can share the yummy Pad Thai that I made with it!

I posted a low-cal Cabbage Pad Thai on here before, but this time I wanted to see how Shirataki noodles would work in a stir-fry noodle dish. I've only used them in soups before, but I'm happy to say they worked just as well on their own! And since they have a chewy texture, similar to the rice noodles that are normally used in Pad Thai, I think they are perfect for this dish.

5:2 Shirataki Pad Thai (203 calories)

Shirataki Pad Thai

1 Tbsp. tamarind paste (40*)
2 tsp. lime juice (2)
2 tsp. soy sauce (7)
2 tsp. brown sugar (30)
1/2 tsp. Sriracha (3)

1 pack (7 oz.) shirataki noodles, rinsed well (0)

1/2 cup minced onion (30)
1 tsp. minced garlic (0)
3 oz. firm tofu, frozen then thawed & crumbled (or one scrambled egg, 70) - see notes below
5 oz. cooked, chopped chicken (170)

1 green onion, thinly sliced (5)
2/3 cups bean sprouts (15)
2 tsp. crushed dry-roasted peanuts (33)


1) Press softened tamarind through a strainer to remove pulp and get nice, smooth paste (see link above). In a small bowl or mug, mix together the tamarind paste, lime juice, soy sauce, brown sugar, and Sriracha. Set aside.

2) In a microwave safe bowl, add the noodles and cover with water. Microwave for 3 minutes and drain. Trim into 3" pieces (I like to lift some noodles up & snip off pieces with kitchen scissors).

3) Heat a large non-stick skillet over medium heat and add the minced onion and garlic. Cook for 5 minutes, stirring occasionally. Add the tofu and chicken and cook 1-2 minutes to warm through.

4) Add the noodles to the skillet and cover with the sauce. Stir everything together well and heat through. Divide between two plates and garnish with the green onions, bean sprouts, and crushed peanuts. Serves 2.

Calories - 203 for 1/2


5:2 Shirataki Pad Thai (203 calories)

Notes ~

Tofu - Frozen tofu has a firmer, meatier texture than regular. It also keeps for a long time in the freezer, so I always store leftovers there! If you aren't able to freeze it ahead of time for this recipe, just add it before the chicken and cook for a few minutes to dry it out a bit.

Egg - We tried this recipe both ways, with scrambled tofu or egg, and the difference was not really noticeable. Luckily the calories are the same too! If you'd like to use an egg instead, scramble it in a small non-stick pan and add it to the pan along with the chicken. (The top picture shows the dish with egg, and the one just above is with tofu)