Thursday, May 29, 2014

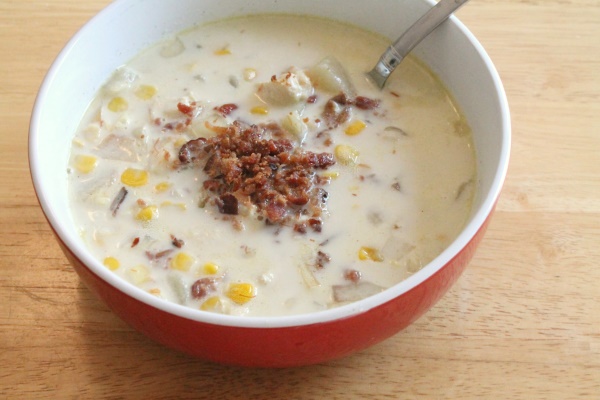
Roasted Potato, Chicken, & Corn Chowder

One of my favorite recipes from the Japanese recipe blog Just One Cookbook isn't Japanese at all! Occasionally she'll share other recipes, and the Chicken & Corn Chowder with Roasted Potato looked too good to pass up!

Roasted Potato, Chicken, & Corn Chowder

We've made this one many times & it is definitely a winner! If you follow the recipe exactly there is way too much broth though, so now we use 3 cups less (5 cups water, 4 tsp./cubes bouillon). When I checked the recipe she based it on they used about the same. Not sure why she added more broth and photographed it with hardly any, but it's delicious either way!

Last time I made it I threw the potatoes & onion in the oven earlier in the day to roast, and dinner went together in about 15 minutes! (We garnished with 'real bacon bits' instead of cooking bacon) After that I had some extra potatoes and onion, so I went ahead and roasted another batch to store in the freezer for next time. The whole thing would work well as a freezer meal, and you could even add the canned corn later to save room. Yummy!


Saturday, May 17, 2014

Haircut

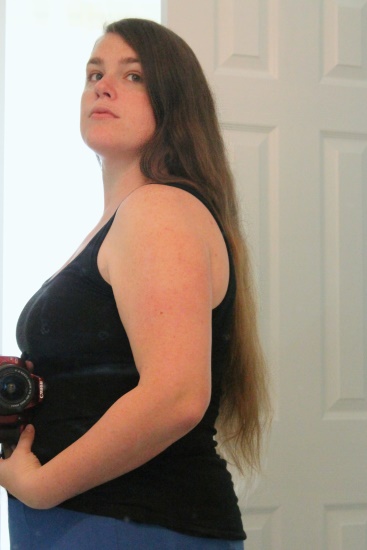
Thursday I went in for a major haircut. It was down to my butt before (Sorry for the crappy pics. I had to aim at the mirror & shoot until I caught myself in a pic!) ~

5-14 Haircut, before

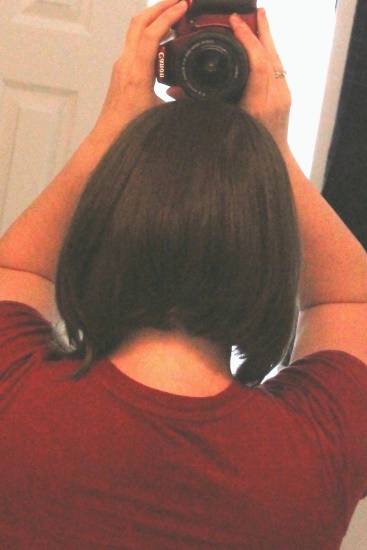
And then I chopped it all off in the back ~

5-14 Haircut, after2

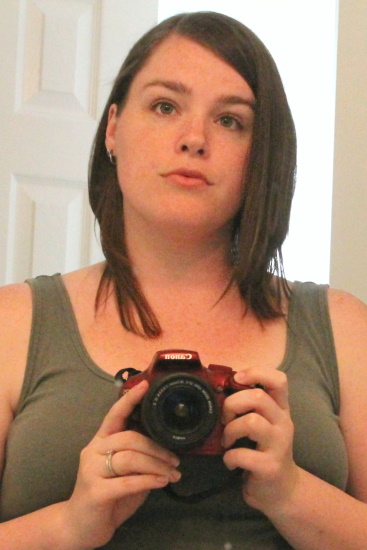
Then it angles down & is longer in the front ~

5-14 Haircut, after

It was *supposed to* angle down smoothly (here is the picture I brought in, minus the bangs) but the lady cut it straight across the back & then dropped it down from there. The right side isn't bad, but the left side is embarrassing & I'll have to to keep it tucked behind my ear until it grows out. I'm still glad I had it done though!

Thursday, May 15, 2014

1st Birthday Party, the food

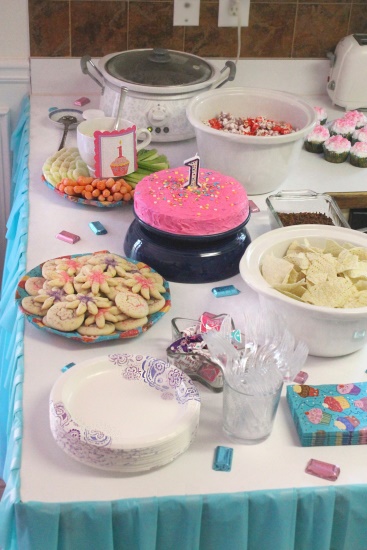
Here you can see a closer shot of the food table. I don't feel like I made that much food, but somehow I was cooking from 7:00am until 2:00pm with no break!

p5-14 Party food

In the back we've got a crockpot with (frozen) meatballs & a sauce that is half grape jelly, half Heinz chili sauce. My husband's family makes something similar with grape jelly & yellow mustard, and I think I like that one even better (as long as I don't think about what went into it!). Our crockpot has 3 different inserts (2, 4, and 6 quarts) and I used the extra two for the white bowls on the right!

In front of the crockpot is the veggies & dip ~ one packet of Knorr's Vegetable soup mix + 16 oz. sour cream + a heavy dose of Parmesan cheese.

To the right is Jell-o Popcorn!. I used grape for purple and cherry for pink, but that one turned out more red. This was the recipe I almost decided to scrap last minute because I was throwing it together as the guests arrived. I'm glad I didn't! I was munching on it all night and it's a new family favorite. (There are also some cupcakes my mom brought from a bake sale off to the side of that.)

In the center is the cake!

p5-14 Birthday cake

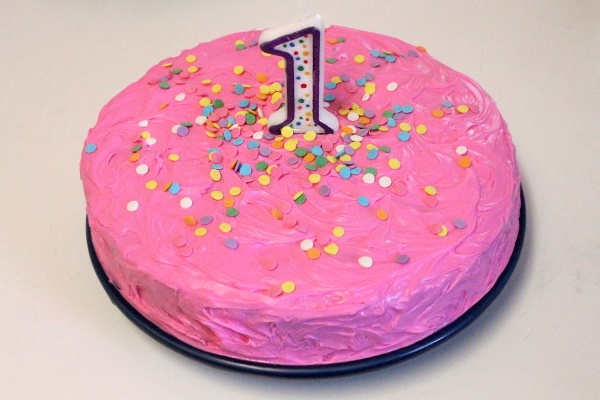
I scanned the box mixes, trying to come up with something fun I could do, and was pleased to find a bright teal "Blue Velvet" cake mix. I topped it with neon pink (canned) icing, a #1 candle, and a few colorful circle sprinkles. The teal center was fun, unexpected, and went perfectly with our colors!

Finding a plate for the cake was the most difficult because I couldn't use our red plates or the napkin covered plates. We did have one dark blue plate I kept from our last dinner set, and it didn't look too bad (but was a little small). Once I decided to use that, I pulled out a large serving bowl that matched, planning to use it for chips or something similar. But the cake sat so low on the counter, I ended up flipping the bowl over & putting the plate on top for an impromptu cake stand!

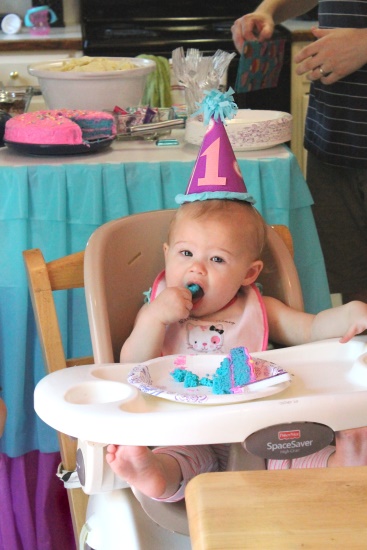
Pandora, like her brother before her, had no interest in eating any of her 1st birthday cake. She popped a piece in her mouth and promptly spit it out.

p5-14 Bite of Cake

To the right of the cake is a favorite ~ Hot Bacon & Swiss Dip served with tortilla chips. Unfortunately we didn't get a chance to eat it warm this time, but it was still good.

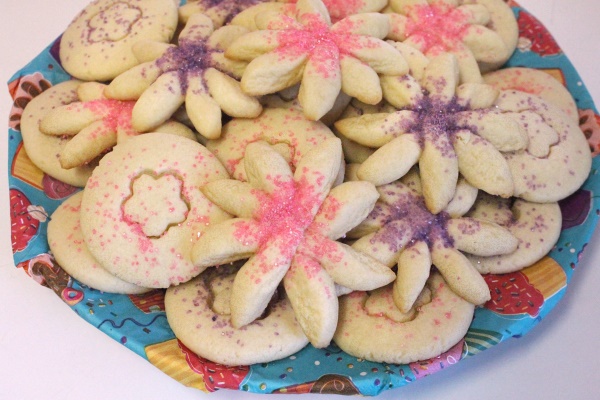
And to the left are the cookies that occupied a lot of my cooking time!

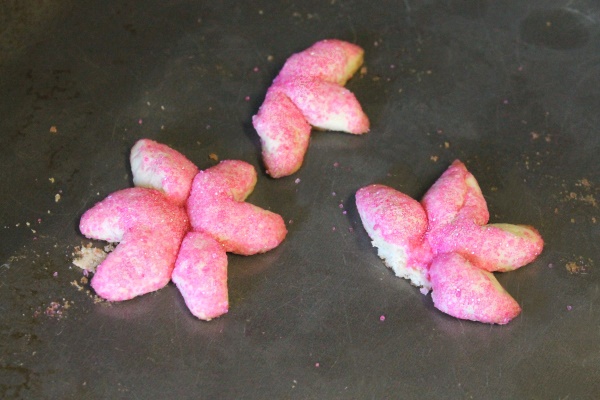
Has anyone else seen the photo where they roll a ball of cookie dough in colored sugar, snip it with scissors & open it to make a lovely flower shaped cookie? Yeah, that didn't go so well! Luckily I tested a few before baking a whole batch. I flipped mine so the sugar was on the top, but they were way too fragile & didn't even make it off the pan without breaking apart.

p5-14 Flower cookies, broken

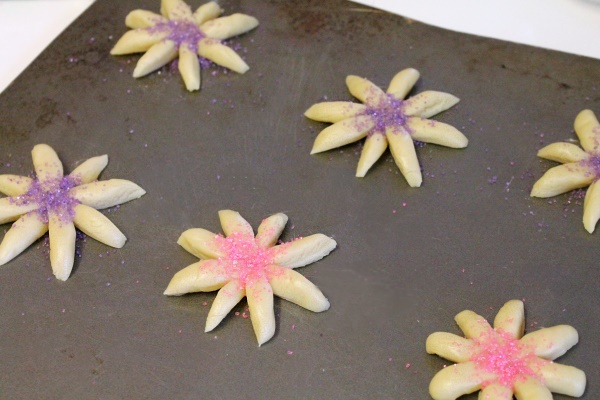
So then I decided to snip the petals all the way through and lay out the flower myself, overlapping the center & pressing it together. I thought 8 petals looked better than 6, so I made about nine flowers & added a sprinkle of pink or purple sugar to the center of each. Before baking ~

p5-14 Flower cookies, pan

After that tray I was tired of forming flowers, so I rolled balls of dough and pressed them flat with the bottom of a glass. Then I used two of my flower shaped vegetable cutters and pressed a flower in the center of each cookie, topping each with a light sprinkle of pink or purple sugar. Not as pretty, but so much quicker!

p5-14 Flower cookies, plate

And at the very front are the paper goods. I saved a lot by using clear utensils (white is also good) and a pack of 45 plates with a purple & white print. That big pack of plates was the same price as an 8 count of the colored 'party' plates! It looks like our son's upcoming party will involve some license character, but buying the character plates + napkins + cups + decorations can really add up! I plan on keeping the cost down by using only character plates or napkins, then filling in the rest with color coordinated stuff.

Behind the utensils you can see a star shaped dish peeking out, which was filled with some cheap butter-mints I found in the birthday supply aisle in our colors. To finish things off I scattered around a few of the pink & teal mini chocolate bars from a bag of closeout Easter candy I had on hand!

We ended up with *way* too much food, partly because we were originally expecting more people. Next time I will definitely tone things down a bit and make or buy more ahead of time!

Friday, May 9, 2014

1st Birthday Party, decorations

Last weekend was Pandora's 1st birthday party and all week I was busting my butt prepping & cleaning. Too often we just shut our bedroom door when we clean for visitors, but this time there were guests who hadn't seen the house before, so I wanted to tackle all of those long-neglected areas. After all of that work, I was so busy finishing up the food when the guests arrived that I totally forget to give them a house tour and no one even went upstairs! Uggh. (Of course I'm glad it's done, but it really could have waited until summer break!)

I'm generally pretty cheap & was not eager to spend a lot of money on things that were going to be used for just one day. With some thrifty-ness I was able to get the invitations, decorations, paper products, and food for about $100, so I wanted to share a few things I figured out along the way!


I'd originally planned on doing a cat themed party because that is one thing I know our little girl loves. Other than "Hello Kitty" I couldn't find much, so I just went with a pink, purple, & teal color scheme. These 1st Birthday cupcake invitations were perfect & much cheaper than the cat options. (For their true color see my pic below)


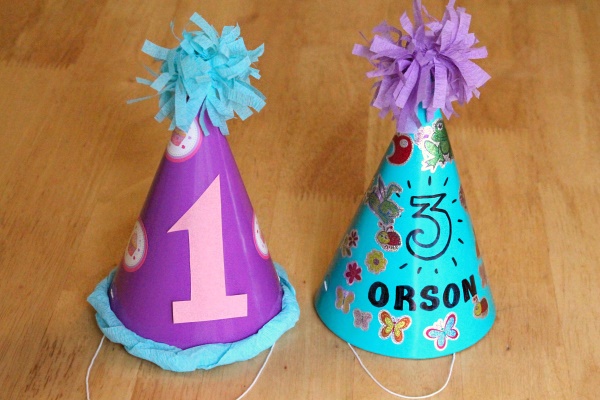
I was eyeing this party hat, but decided to make my own. I used a blank party hat, cut a "1" out of construction paper and taped it on the front. The invitations came with lots of cupcake stickers (seals), and I dotted the rest of the hat with the extras.

I could have left it there, but I wanted some kind of pompom on top. I grabbed the crepe streamers and cut 8 pieces about 3" wide, stacking them up. I cut lots of small strips from the sides, keeping the center intact, then twisted the center together tight with a twist tie (if you've ever made a yarn pompom you can probably picture this!). I stuck the twist tie through the top of the hat & taped it in place inside. Along the bottom I used some double sided tape and lightly twisted the streamer, taping it down as I went.
Panda's party, hats

When my son saw me working on the hat he wanted to make his own. I wrote on the front with a Sharpie & he went to town with a sheet of stickers. (And of course he wanted a pompom!) At his next party I think I'll set out blank hats & stickers as an activity for the kids. The hats + stickers probably cost the same as the licensed character hats, but it's a lot more fun to let them personalize them!

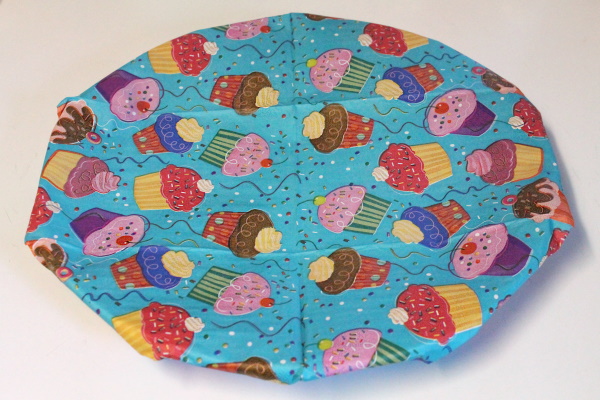
Soon I realized I couldn't put out food on my normal red rimmed plates. They would not work with the girly color scheme, and I didn't find any disposable options at the grocery store. I started racking my brain and realized I could cover a few plates to make do. Luckily the cute cupcake napkins I bought were extra large, so I sacrificed two of them, folded the edges around the back & taped them in place. Not too bad!
Party, napkin covered plate

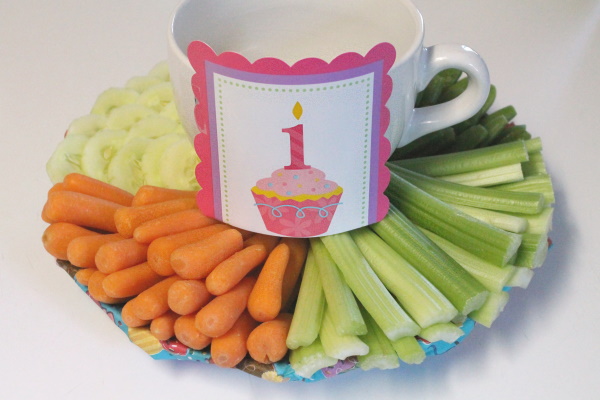
Next I needed something to put dip in. I had a large white mug that would work, but it had writing on one side. I realized the invitations were wide enough to cover that up, so I cut the bottom off of an extra and taped it to the front.
Party veggie tray, front

I set the mug on top of a small white ramekin to lift it up a little so it wouldn't be buried in veggies. This also let me store the plate & mug separate without messing up the veggie arrangement.
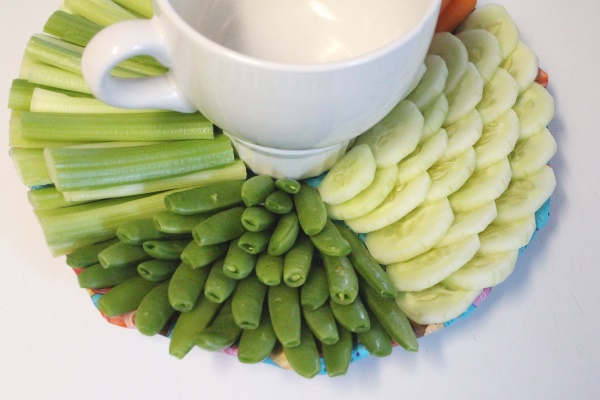
Party veggie tray, back

For the food area I bought two $1 tablecloths and used this idea to create some ruffles along our counter. I cut the tablecloths in half longways to give me lots of length. I started with half of the purple cloth, taping one end to the left edge and the other edge halfway along the counter. Then I taped the center of the cloth to the center of those two points, just eyeballing it, and kept dividing the sections in half & taping until I had some nice gathers. I finished up the right side with the other half of the purple then added a teal layer over that.
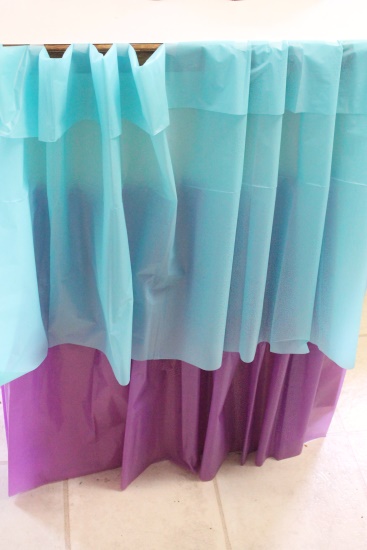
Party, gathered tablecloth

The teal was going to cover too much of the purple on its own, so I flipped the top edge down a little and taped it in place the same way. I decided not to cover the countertop, so to make the teal cloth look a little nicer I folded each section to the side to make a pleat. (See the gathers on the left, pleates on the right) This all took some time and a lot of tape, but it was definitely worth it!

And here you can see it all finished. So pretty!
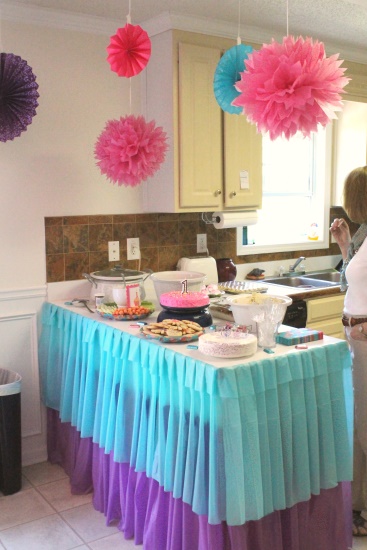
Panda's party, table

A lot of the hanging decorations I found came in a 12 pack of one color & size, but I wanted a little more variety. So I was thrilled to find this pack of 6 fans with all of my colors in various sizes. (I was prepared to cover those princess centers if needed, but they were optional!) The poofy balls were from here, and I fully intend to hang them in her room afterward! Maybe all of it.

Some more hung in the other corner along with some bunting along the doorway ~
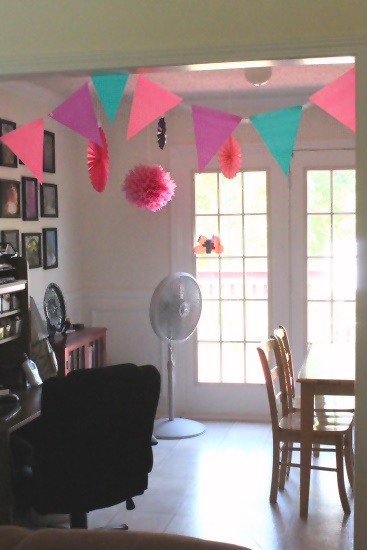
Panda's party, corner

In the next post I'll show you a closer view of the food table & talk about the recipes I made. I cooked way too much food! I've got a few more tips on cheap paper products and food set-up, so check back!
Thursday, May 1, 2014

Hot Pink, Purple, & Teal

This week we are madly cleaning, shopping, & decorating to set up for our little girl's 1st birthday party on Saturday. It's about to look like an 80's Barbie aisle exploded in my kitchen! Pictures to come...