Last month I
talked about how tough it was to put together a supply list for the metal necklaces I wanted to start making. This time I thought I would share which supplies I decided to buy along with some links of where to get them. The supplies you need will differ, based on what you want to make and how you want to make it, but hopefully you can find a few good items from my list.
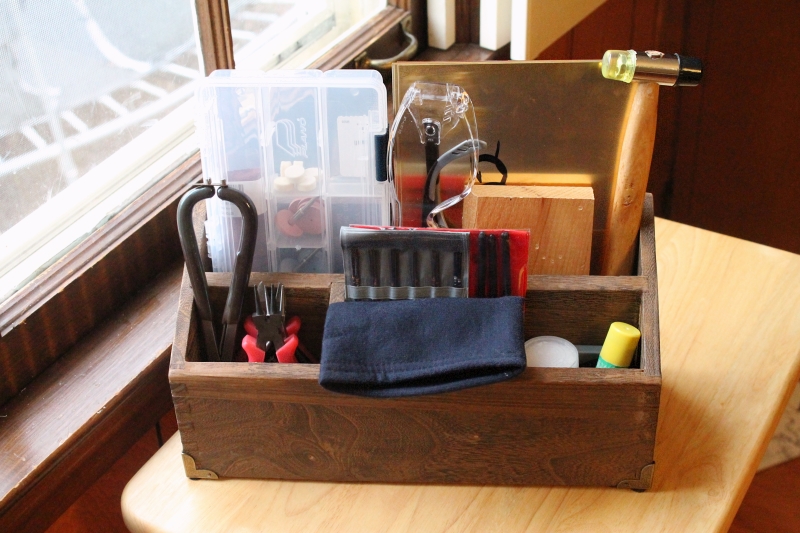
Luckily nearly all of my supplies fit in this handy wooden organizer. I originally bought it at Target to turn into a charging station for iPads and phones, but then it turned into a mail organizer and eventually was just holding some envelopes & stamps. I probably won't keep it crammed this full for long, but until I set up a nice work area it's doing a great job of holding everything.
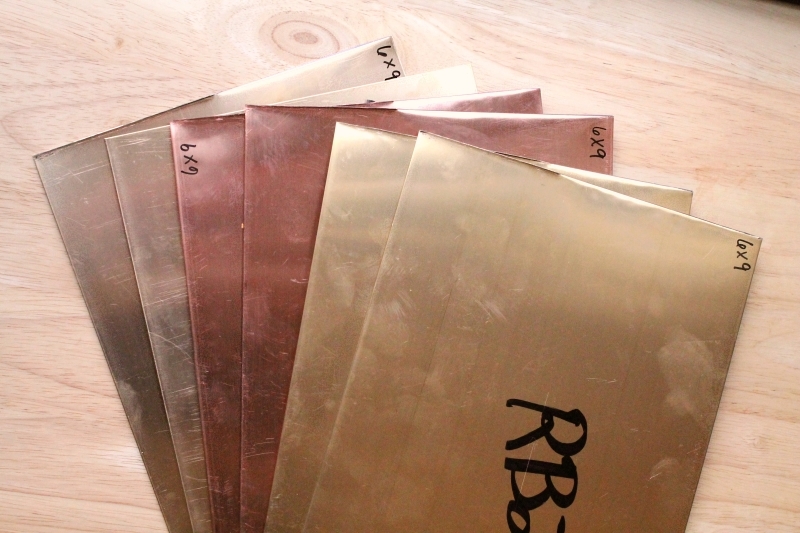
I suppose the most important supply to start with are the metal sheets ~
I quickly learned that gold and silver are *way* out of my price range. For silver you are talking at least $20 per inch, and gold is about 100 times that amount. I researched a lot of different metals and ended up buying a sheet of brass (in two colors) and copper in 22 guage thickness. They come 18" long, so I've cut them in half for easier storage. Soon I'd like to get some aluminum as well for a silver color.
My sister-in-law's boyfriend works with metal sheets and he recommended the site
Monster Slayer. Honestly the site is so old school, I was a little turned off at first, but after pricing it out from at least half a dozen shops, I realized they really do have the best price for nearly everything! They don't carry every metal though, so if you want bronze or titanium, head to Rio Grande. And for aluminum you'll need to go to Metalliferous or Etsy.
My only small complaint about the shop is that I'm about 90% sure they mislabeled the yellow (far left) and red (far right) brass, and I was planning on using those samples to choose my favorite of the two and only order one color in the future. I finally took a picture and emailed them to ask, but they've recently switched the red color and she couldn't really answer for sure. I've read that red is generally the jewelers favorite, so I've decided to go with that one anyway. I won't have to worry about the mislabeling in the future, but was a little disappointed about the uncertainty.
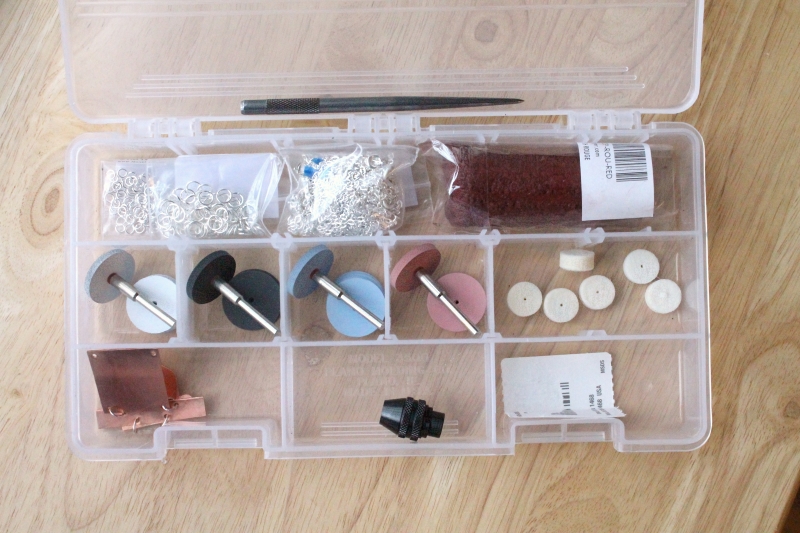
Moving on, let's crack open that white tackle case!
Case - For the organizer I stopped by Walmart's sporting area and grabbed the
Plano 3500. It's a great size, but I wish it had more dividers! I did find an off brand of dividers that I think might fit.
On the lid - Center punch - You need to make a little mark on your metal before drilling or else the drill will skitter over the smooth surface. This is basically a pokey tool that you tap with a hammer to mark a dot. (I can't link to items on
Monster Slayer individually, but I'll give you the item code so you can search for it.) From Monster Slayer, HT-PUN-CENT.
Top left - Jump rings & chains. Also from Monster Slayer. The have a huge selection!
Center row - "Silicone Softies" polishing wheels, four colors - I decided that I would rather polish with these wheels instead of sandpaper or polishing compounds. Whichever you use, you'll have to get varying degrees of coarseness and work your way to the finer polishers. The polishing wheels are color coded, with white being the coarsest. I ordered these from MS (search "Silicone Softies") along with 4 mandrels to fit them on (MT-MAN-SC3321E). Since the pic, I've also picked up some 240 grit sanding bands (eBay), so I have something on hand if the white is not coarse enough.
Right side - Polishing wheels and red rouge - After working your way through the polishing wheels, you finish off with some rouge (CP-ROU-RED) on a felt pad. I bought these
Dremel 1/2" wheels, not realizing it was the smaller size. They are really only good for the tiniest of projects, because I've gouged my metal several times trying to polish the center of a 1" square! I found some larger
1" wheels in my husband's stash and will be mostly using those.
Bottom center - Dremel adjustable chuck - I bought
this so that I could fit any tool in my Dremel, mostly with drill bits in mind. Since then I've realized all of my tools have the same shaft size, so I want to pick up this set of
collets next to make tool changes even quicker. The adjustable chuck is still nice to have on hand just in case though!
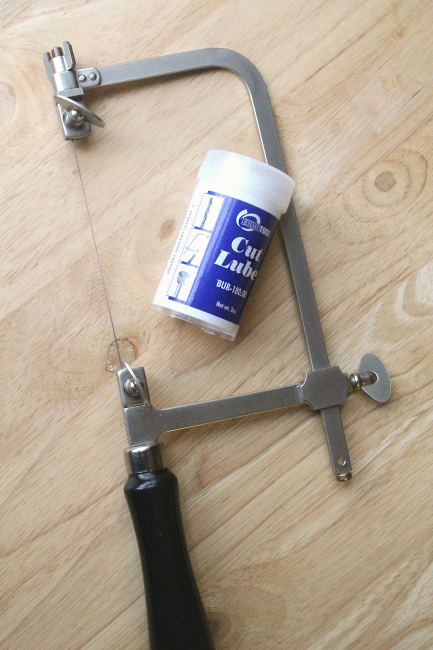
To cut the metal into intricate shapes, you'll need a
jewelers saw. This one came with a bunch of saw blades too (shown later) though I hear you don't necessarily want to go with the cheap-o ones.
Saw lubricant keeps your blades from overheating and prolongs their life so they won't break as often. It's also good to use on drill bits.
To saw, you hold your metal on top of a
bench pin and the saw blade can move up & down inside of the V-shaped cut out like
this. I found a small alligator spring clamp helpful to hold the metal down on the left side too, because I was getting bad hand strain trying to hold it steady. That might be something that goes away with experience though!
If you are cutting straight lines,
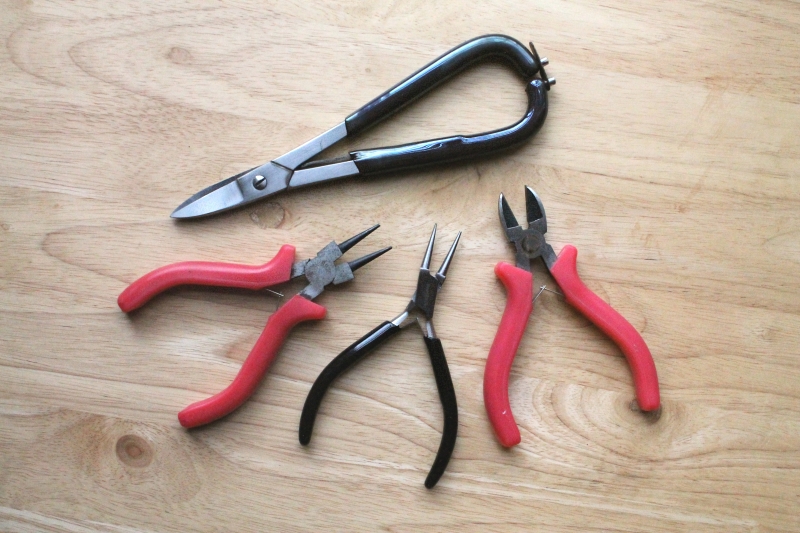
metal shears will make things a lot easier. Honestly I'm not liking these that much, and will probably pick up a pricey pair someone recommended. Along the bottom I've got two pairs of round nose jewelry pliers for attaching jump rings, and one pair of flush wire cutters. All three of these were from Hobby Lobby, though I've had the pink ones for years.
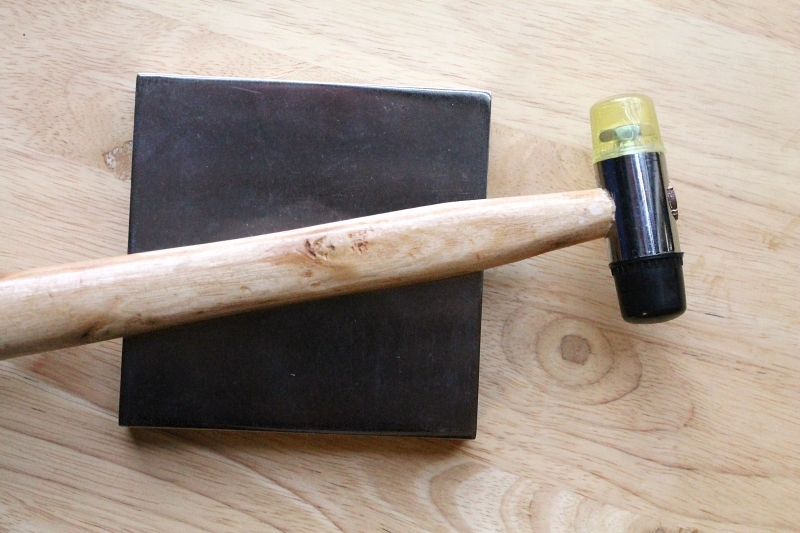
After cutting the metal, you may need to hammer it flat. The
bench block gives you a super hard & smooth surface to pound on. I keep this in a soft blue bag to keep it from getting scratched by the other tools, but probably don't need to bother! For the hammer I chose one with plastic on one side and rubber on the other (
HA-MAL-PLRBR). One day I may also pick up a large
leather one, though I do already have a large rubber one I could try too.
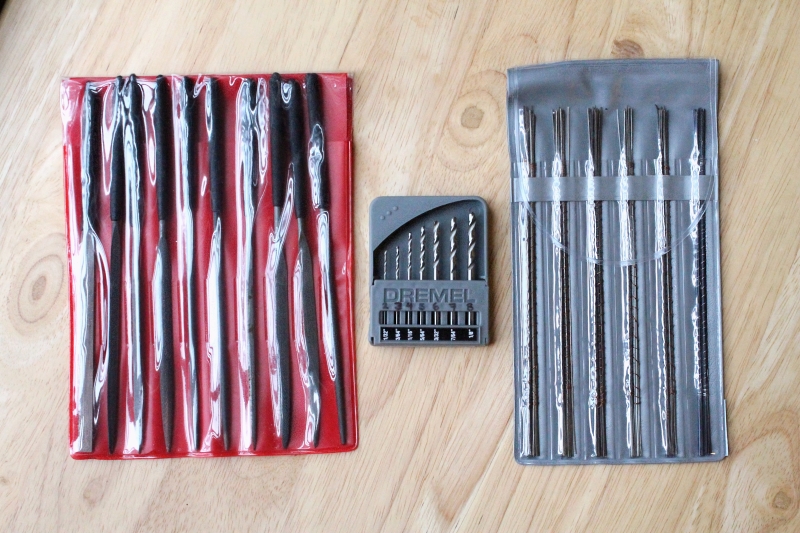
On the left is a
10 piece needle file set, which are basically just very narrow files. I bought these thinking they would be good to get inside of drilled holes & other tight areas where the polishing wheels might not reach. On my practice piece I filed off the rough edges that the drill left on the top & bottom, but the scratches were so bad that they didn't all come out with polishing (one reason I bought the 240 grit sandpaper). In the future I'll stick to filing the sides of a piece and leave the front alone.
On the right side are the 144 saw blades that came with my saw above, and in the center are the
Dremel drill bits. I wasn't planning on buying Dremel brand for these, but after testing out sizes with my husband's drill bits, I realized this was the exact size range that I wanted! Unfortunately, my Dremel was pretty miserable at actually drilling the holes, so I'll have to use my husband's gigantic drill for all of those tiny holes (unless I decide to shell out $30 or so for a smaller drill one day).
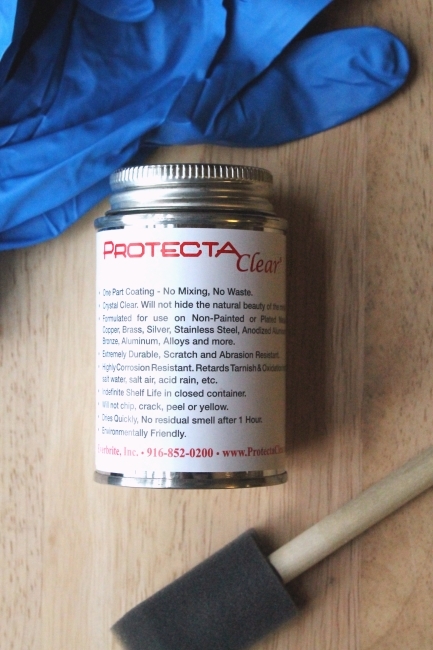
Since the base metals can react with people's skin and sweat, I really wanted to seal my finished pieces somehow. There are a lot of options, but most have their issues. Wax needs to be reapplied and a lot of clear lacquers can get scratched and peel off over time. I eventually decided to go with
Everbrite ProtectaClear based on
Nancy Hamilton's recommendation. She said she ran a coated piece through her rock tumbler for hours to test it and it never did get a scratch (eventually it just got a little milky colored from all of the abuse). Nancy chooses to leave her work uncoated, but I really don't want to deal with green, grumpy customers!
In the photo you'll see the ProtectaClear came with some gloves and a foam brush. To use it you will also need some Xylene or Denatured alcohol (Home Depot) to wipe down the piece first, and a metal or glass bowl (Dollar store) to pour the PC in. I used this for the first time a few days ago and decided to dip my metal instead of brushing it on. So far I'm pleased with the results, but it's still curing so I can't really judge it yet. My only small complaint about Everbrite is actually the over zealous customer service. They have sent many emails offering information, tips, asking if I'd tried the product yet and how did it go... they are trying to be helpful, but 8 emails in one month is a little much.
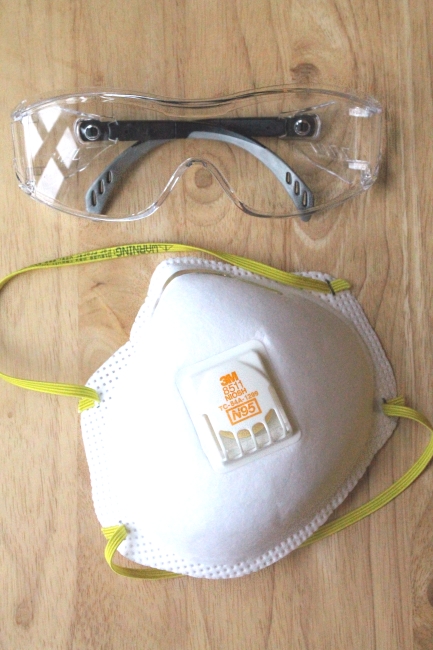
Here's the part that I hate, but it's necessary. I can't stand wearing masks and goggles, so I tried to get an upgrade for both. These
3M Particulate masks (8511) have a valve in the front to keep the air from getting so stuffy and hot inside, which is normally my main complaint. It does seem to help, though I'm not loving the crazy tight straps. For the
safety glasses, I picked something that could slide one & off so I didn't have to deal with... crazy tight straps. You win some, you lose some.

So far my supplies have cost just over $200, but that doesn't include a few things I already had on hand. The largest item would be a Dremel, which runs about $50. I really lucked out on this one! I knew my husband had a cordless Dremel I'd used years ago, but he reminded me that it was slightly broken & would only run at the fastest speed. I started researching Dremels and decided to buy a 200 model with a cord, because cord-less models (of anything) are generally much weaker. My husband searched through his workroom to get the old Dremel, and found that he also had a corded 200 model he didn't even know he had!!
Also not pictured is a drill, a block of wood for drilling into, and probably a few other small items I'm forgetting. And of course there are even more things I'd love to buy sometime soon (bracelet mandrel!). But for now, I need to focus on practicing and getting a work area set up.
Any must-have tools or great shops I'm missing? Anyone else shop at Monster Slayer?