Monday, January 21, 2019

Can iPad Pro Replace a Wacom Intuos?


While I do have a Wacom drawing tablet that I use with my computer for ambigram work and photo editing, it's not that great for *actual drawing*. The pricier Wacoms (Cintiqs) come as screens you can draw on, but mine is basically a blank slate that moves the cursor on your screen. It's still better than trying to draw with a mouse (yikes!), but I really need something I can turn at angles for more natural drawing. 

Wacom Graphics Tablet
Wacom Intuos 3

And then a year or two ago I had to replace my older model (Intuos 3) for a newer one (Intuos Art), and it really does not work as well. My old tablet felt very natural, and I used it constantly, even for things like browsing online. With the new tablet, I find myself relying on my mouse instead and only grabbing the tablet when I absolutely have too. I won't even get into all the problems it's had with the wireless adapter, and both tablets have terrible driver issues. ðŸ˜ž

 
Wacom Intuos Art, pic from procartoon

And so I drew all of the sketches for my book with pencil and paper, scanned them, and then ended up spending a ton of time cleaning them up on the computer. After that I was pretty eager to upgrade to a screen I could draw directly on, but with all of the Wacom driver issues I was hesitant to spend a ton of money on an even pricier one. I started researching other brands of tablets like Huion, but the consensus was that Wacom really is the best.

Meanwhile I kept seeing people rave about a drawing program for the iPad Pro called Procreate ~

 
iPad Pro & Procreate, pic from techadvisor

I didn't think there was any way I could justify the price of an iPad, but as I researched I discovered some awesome apps called Astropad (Mac) and Duet (PC) that let you mirror your computer screen (or use it as a 2nd monitor), basically turning your iPad into a drawing tablet! 

Duet Pro, pic from slrlounge

That made the decision pretty easy! I started saving up money from my "survey" sites, Swagbucks & Insta GC and was able to buy a new iPad Pro (9.7", largest storage size) from eBay for $450! The Apple Pencil is another $75-100, and I found this adorable case! ~


So how does it work? 

Unfortunately the Duet app did not turn my iPad into the magical drawing tablet I'd hoped for. It lags too much for me to use, though you may have better results with your computer (especially with Astropad on a Mac). 

However Procreate *is* wonderful, and makes up for the fact I can't use my computer programs on the iPad. (I mostly do vector work on the computer anyway, I don't have Photoshop.) I find myself drawing all the time now, and am already seeing a lot of improvement from all of the practice. And since the iPad can run all sorts of other apps, it is getting used way more than a Wacom would be. 

While the iPad Pro did not work as a Wacom replacement for me, your results may vary. And more & more I'm seeing the artists I follow on Instagram buying them to use in addition to their computers & Photoshop. Either as a replacement or in addition, I'm loving my iPad Pro and would highly recommend it! 

Thursday, December 13, 2018

Poetry, Paper Art, and Publishing


For years my husband has been suggesting that I write & illustrate a children's book. I played around with a few plots & characters, but coming up with the story was daunting. Should it have a moral? Or just be silly? With all of the possibilities out there, how do you narrow it down to one story? 

Sunset with a Friend - Cut paper art

And then one night (early this year) he mentioned that we should write a book of children's poetry, Shel Silverstein style. My mind was immediately flooded with story ideas and rhyming lines of verse. I started writing the next day, and continued for months. My husband and I worked through countless edits, and I relentlessly researched the world of children's books and publishing.

Lake Dragon - Cut paper art

I also did a lot of drawing. For an illustrated book, you have to create a complete mock-up with sketches, and about 2-3 'finished' pieces. I've worked with a lot of art mediums over the years, and decided to use cut paper artwork with painted details for the book.

Woman in White - Cut paper art

While I can't share the poetry or artwork I created for the book (yet), after I finished my mock-up, I started creating other pieces of cut paper art which you'll find in this post. These samples will help me put together a gallery of my work to share with potential agents and publishers.

Flamingo Friend - Cut paper art

Most of these pieces are also available as prints and/or originals in my Etsy shop, and I'll continue to add to the collection next year.

Feud - Cut paper art

This year I discovered that the publishing world is much more complicated than you'd expect, and pretty hard to get started in (especially for a poetry collection!). But I have also found that publishing a children's book is something I really want to do now, and I'll continue to chase hard after that dream in the coming year. 

Lovely Lady Locks - Cut paper art

Monday, December 3, 2018

Metal Patina Bracelets


I don't post often in my blog anymore, but I am very active on Instagram. You can find my current artwork on my art account (and I also have a personal account for pics of my kids and food and such). But sometimes you need more room to write, and I've been itching to post about a few projects on here lately. 

First I wanted to go back and bit and update on what I've been working on the last year or two. A long time ago I shared my idea to make some nerdy fan art necklaces, and talked about the metal supplies that I bought to make them. While I was researching metal work, the thing that actually appealed to me the most was playing with patinas, and so when I started working with the metal that is the first thing that I explored.

I created patinas on copper and brass cuffs with just salt and ammonia or vinegar. It was so fun to dry different combinations and techniques and see the results, which were always a surprise! 

Wrap the copper with ammonia soaked paper towels and a sprinkle of salt, and you can create swirling teals ~

Patina Bracelet - Sirene

Let it soak for a long time, and you get deep black with teal peaking through ~

Patina Bracelet - Bellatrix 1

Or, spray it on directly every few hours and the teals become intense!

Patina Bracelet - Alcyone 1

You can also coat brass in salt and then suspend it above the ammonia to let the fumes do the work. This creates some lovely spotting ~

Patina Bracelet - Cytherea

Using large, coarse salt gives you a completely different look ~

Patina Bracelet - Aurum

This one I fumed covered with fine and coarse salt, and added some vinegar in there for fun  ~

Patina Bracelet - Ferrogold

Fuming copper instead of brass brings out the teals again, as well as some flecks of white ~ 

Patina Bracelet - Phanerite

While I had a lot of fun experimenting with the patinas, my real thrill was in trying different combinations and methods to reveal something new. I did not really enjoy the actual metal work (cutting, polishing, coating), and just creating the same bracelets over & over would have gotten old for me quick. Going beyond the teals to new colors would have required the use of some potent, special-ordered chemicals, and I wasn't really ready to go down that route. The patinas can also be very frustrating themselves, because you often can't replicate something when you want to. I often tried to copy the swirling teals of the first bracelet, only to end up with the deep, black second bracelet. 

Once a had a large stock of bracelets, I figured I needed to move on and work on some of the fan art pendants - but they brought me nothing but frustration! Any design I wanted to work on seemed to need $50 of more supplies. There was one issue after another, like discovering my jump rings were spotted with tarnish. And *all* of the work was the cutting, polishing, and coating work that I did not enjoy. I quickly dropped that idea.

The bracelets turned out lovely, but in the end I moved on from the metal jewelry to a new project. While I may make more one day, I probably won't be making more soon. You can still find a few of the bracelets in my Etsy shop.

Sunday, May 27, 2018

Spicy Sausage & Pasta Skillet

Spicy Sausage & Pasta Skillet, 1

Slices of smoked sausage, pasta covered in warm, bubbly cheese, with a hint of spice - pure comfort food! The unique shape of the campanelle pasta gives the dish an elegant look, and the ruffles are perfect for scooping up the cheesy sauce (but you can always sub with penne or bowties if needed). And don't skip the turkey keilbasa if you haven't tried - my husband is always skeptical, but it tastes just like the real thing with a fraction of the calories and fat. Adapted from this blog, based on an America's Test Kitchens recipe.

Spicy Sausage & Pasta Skillet, 2

(For those of you counting calories, I've added the amount for each ingredient so you can easily make tweaks without having to re-calculate everything.)


Spicy Sausage & Pasta Skillet

1 tsp. olive oil (40)
13 oz. (-16) smoked turkey sausage, sliced thin (650) 
1 cup diced onion (60) 
1 tsp. minced garlic (1) 

2 cups water (0)
2 tsp. chicken bouillon (or use broth in place of water, 10)
1 (10 oz.) can Rotel tomatoes, mild, drained (63) 
½ cup heavy cream (200) 
8 oz. dry campanelle pasta (800) 
½ tsp. salt and pepper, each (3) 

1 cup shredded sharp cheddar cheese (440)
2 green onions, thinly sliced (10)


1) Heat oil in an oven-safe skillet* over medium-high heat. Add the sausage and onions and cook until lightly browned, about 4 minutes, stirring frequently. Add garlic and cook 30 seconds.

2) Add the water, bouillon, Rotel, cream, pasta, salt and pepper and stir. Bring to a boil, cover the skillet, and reduce heat to medium-low. Simmer until pasta is tender, about 15 minutes.

3) Remove the skillet from heat and stir in 1/2 cup cheese. Top with the remaining 1/2 cup cheese and broil until cheese is melted and bubbly with brown spots. Sprinkle with green onions and serve.

Serves 4. Calories -  569 for 1/4


*Tip - If you don't have an oven-safe skillet, you can cook this in any covered pan and then spoon it into a casserole dish to broil the cheese at the end.

Spicy Sausage & Pasta Skillet, 3

Thursday, October 19, 2017

Halloween Pokeball Candy Bucket Tutorial

Halloween Pokeball Candy Bucket Tutorial

This year my son wants to be a Pokemon for Halloween. Not just any Pokemon - Greninja. Naturally there are no ready-made costumes for that one, so I've had to get creative.


I figure most people will have no clue what he is, so I wanted to give him a Pokeball to hold so they can at least maybe recognize what franchise he is from. I thought about buying a plush ball... then I was all ready to sew a plush ball... and then I realized - why not just decorate his candy bucket? I snapped some step-by-step photos along the way so I could share this easy tutorial with you!

All you will need is a round candy bucket similar to the one below, red and black construction paper, white printer paper, and some scissors and tape. (I highly recommend using Satin tape for this because I started with normal Scotch tape & it got ugly quick. The Satin tape was nearly invisible.)

Halloween Pokeball Candy Bucket Tutorial

First we'll cover the top half of the bucket with red. I was able to cut my paper in half lengthwise for this, but the size will depend on your bucket (as will any dimensions I list below. Adjust as needed!). My paper would not quite wrap halfway, so I ended up using 3 half-sheets and left a seam along the back. Tape the red paper along the bottom until you've wrapped all the way around the pumpkin.   

Halloween Pokeball Candy Bucket Tutorial

Next you'll want to cut a slit right behind the strap, from the top edge of the paper down to the handle, so we can wrap around it. I also had to cut a little hole out right where it met to fit around the cord. Overlap the paper so that it lies flat along the curve of the bucket and tape together. (Ignore the 'slit' to the left of my hand, that's just where two pages met.)

Halloween Pokeball Candy Bucket Tutorial

Cut a slit down the front center of the paper, leaving a couple inches at the bottom uncut. Then cut slits halfway between that and the straps, and cut in half again so you have 8 strips.

Halloween Pokeball Candy Bucket Tutorial

Overlap the strips so that they follow to curve of the bucket and tape in place. Repeat along the back side.

Halloween Pokeball Candy Bucket Tutorial

Along the top you can either cut the paper off flush with the edge of the bucket, or fold it over and tape in place. I opted to tape mine.

Halloween Pokeball Candy Bucket Tutorial

Now it's time to cover the bottom in white! I wanted to wrap all the way to the bottom so I needed a full sheet of paper this time. You may be able to get away with a half sheet again, just make sure it covers enough. Tape along the bottom edge.

Halloween Pokeball Candy Bucket Tutorial

Cut the slits like before and tape into place. I taped these at the end, so all the tape is on the bottom of the bucket. Repeat to cover the back. (This time I just worked one sheet at a time - whatever works!)

Halloween Pokeball Candy Bucket Tutorial

And flipped back over...

Halloween Pokeball Candy Bucket Tutorial

Now you will need two or three long strips of black paper, about 2" wide. (I probably could have gotten away using two by leaving a gap in the front, but I wrapped all the way around.) Tape the strips around the center of the bucket, covering any gaps between the red & white papers. I put my black strip slight above the center line, because it looked a little too low otherwise.

Next, find a large cup or small bowl to trace a circle about 4-4.5" wide from black paper. Tape it on the front, centered on the black strip. Trace & cut a white circle about 2-2.5" wide, tape it in the center, and you are done! Enjoy Trick-or-Treating with your little Pokemon and fill this thing up with some candy!

Halloween Pokeball Candy Bucket Tutorial

Sunday, October 8, 2017

The Secret Code in The Lego Ninjago Movie

Tonight my family went to see "The Lego Ninjago" movie, which was pretty good, but a little pale in comparison to the amazing-ness of "The Lego Movie". (And probably a step down from Batman ~ if you're only going to see A Lego movie, see THE Lego movie.) There were some very funny/cute parts mixed in though, so it's definitely a fun family flick!

I've picked up my Japanese study again lately, so at some point in the film I started paying attention to the lettered sashes that each of the main ninjas wear, thinking it would be fun to see if I could pick out some Kanji or Kana. I quickly realized the letters weren't Japanese at all, but some made-up lettering. 

I noticed one 'letter' repeated on the main ninja's sash, and I wondered, could this be the word "ninja" in a simple letter replacement code?

The Secret Code in The Lego Ninjago Movie

With that in mind, a glance at the ice ninja's sash showed the letters I _ _, so I figured I was on the right track. 

The Secret Code in The Lego Ninjago Movie

The A, I, and E all matched up with the "water", "fire", and "Earth" ninja's sashes, giving us more letters in the alphabet ~ 

The Secret Code in The Lego Ninjago Movie

But it was hard trying to catch glimpses of the sashes during the action, so I looked up some images when I got home. And sure enough, there were several pics with the whole alphabet charted out too!

Ninjago Alphabet

The lightning ninja is the trickiest to figure out, since part of his sash is covered, and it uses only one letter we've seen so far. Checking the chart we can decipher that his sash reads "spark".

The Secret Code in The Lego Ninjago Movie

I think this secret alphabet is a fun little detail in the movie, and I'll definitely pay more attention to the buildings next time to see what some of the signs reveal. I also feel like a big nerd for noticing the code and trying to crack it in the midst of fight scenes, but I'm sure I wasn't the *only* one who caught it. Right??

Friday, May 12, 2017

Disney Princess Party - Food & Decor

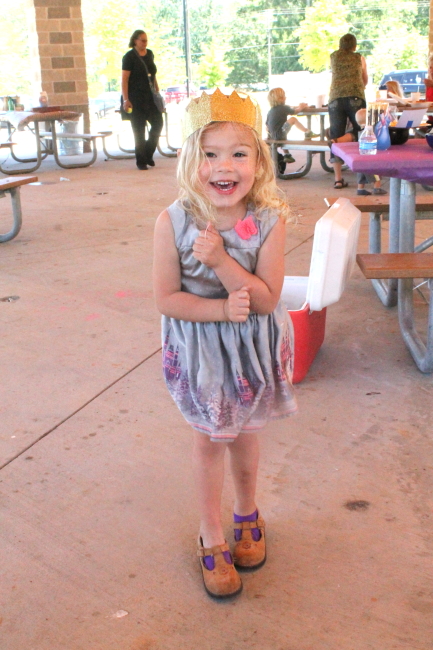
This little girl turned 4 this week, and it was her year for a party! (We alternate years with her brother) Of course Pandora picked a pink and purple princess theme. I decided to base the decorations and food on the Disney princess movies instead of just going fully 'princess' with tiaras and pearls, and ended up having a little too much fun browsing Pinterest and planning everything out.
 Happy Bday Girl

Whole parties have been planned around each princess, so there were a lot of ideas out there. I tried keeping a list of our definites and maybes, but soon I was desperate for something more visual, and I started slapping together an image to sort everything out. The top section shows everything for the table, and the bottom section is for the goodie bags (since some things could be on either). The picture ended up being a great help as we planned, because I could easily see how many sweets, salty foods, and healthy options we had. I even ended up marking which plates and decorations I wanted to use beside each food, since I had to bring it all with me, and it was so easy to reference.

Party food & goodie bag planning


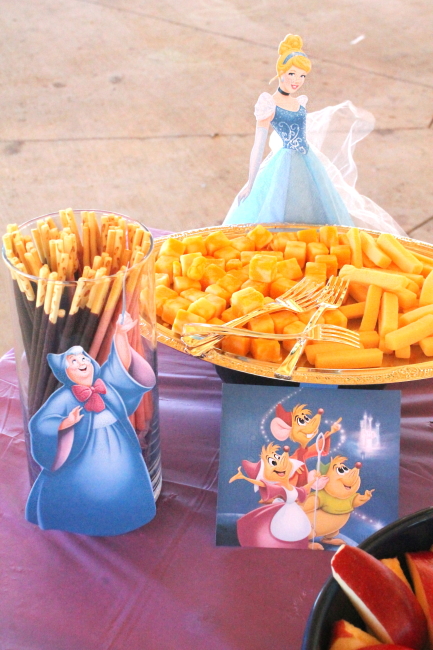
First we'll start with Cinderella, who's Fairy Godmother got some Pokky sticks for magic wands. I saw this idea done with chocolate covered pretzel sticks, which is also cute, but sometimes those things are just too big. When I saw the Pokky I thought the size would be better for snacking, and was also excited I wouldn't have to make anything! Then I bought some cheese cubes for her little mice friends. I found an ornate metal tray at the Dollar Tree, and set it on top of a bowl of ice to help the cheese stay fresh through the party. It didn't get sweaty, just a little dry, so I'd call that a success. 

Cinderella with Pokky wands & cheese cubes

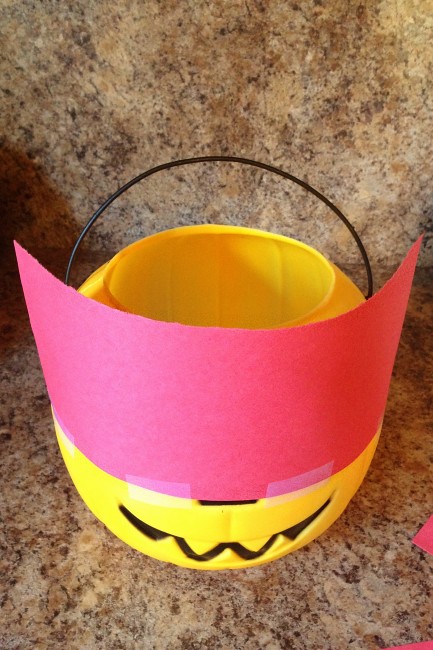
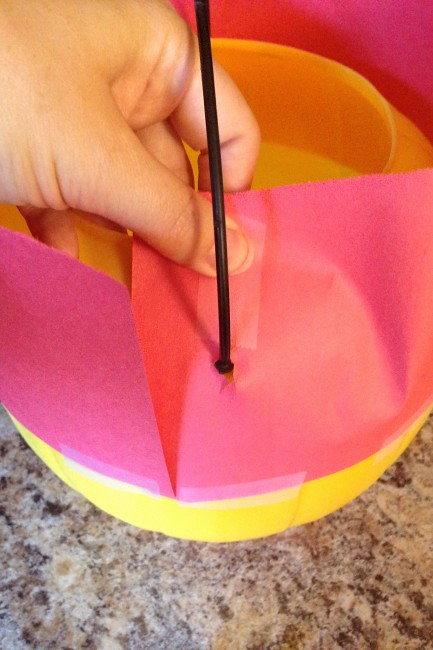
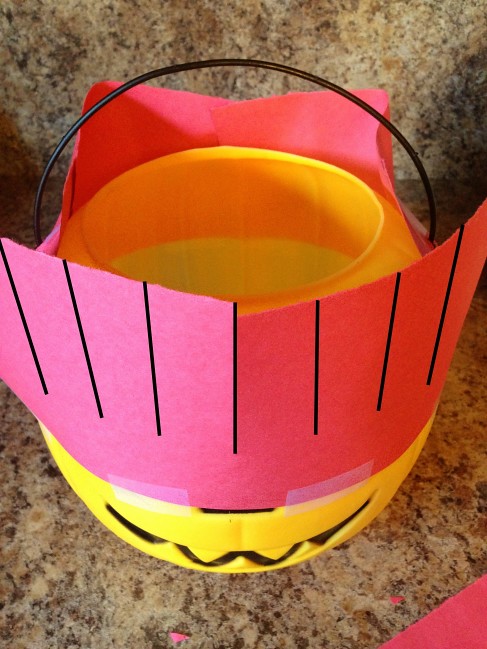
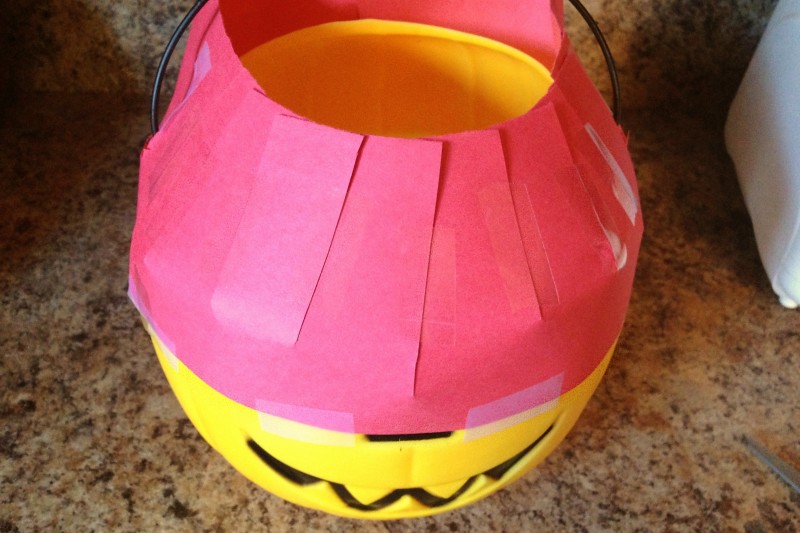
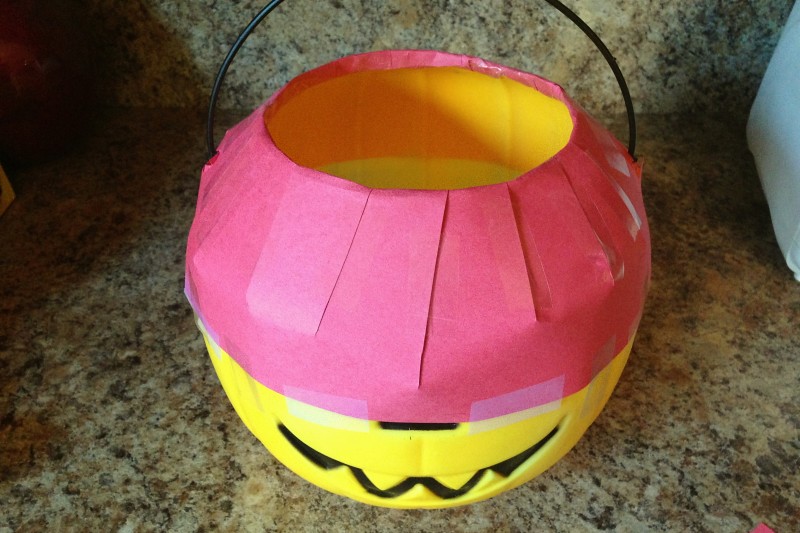
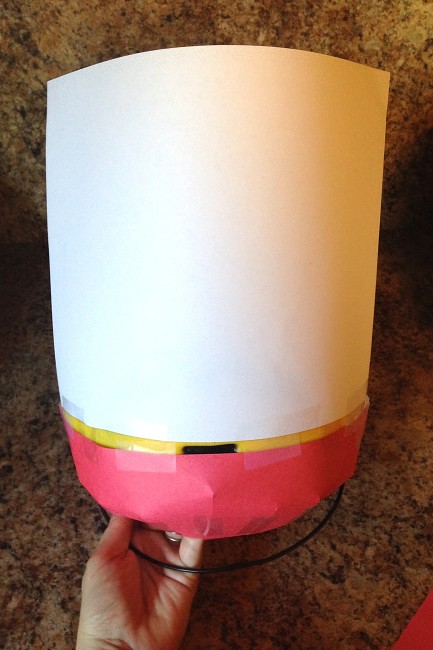
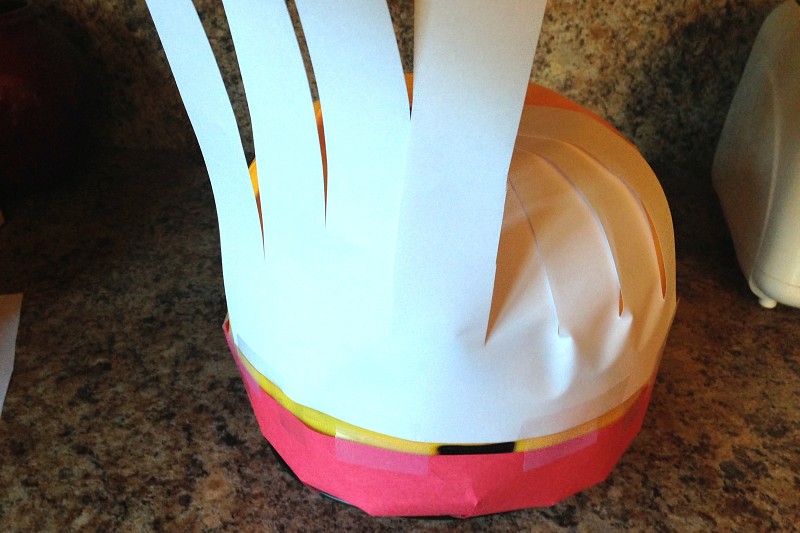
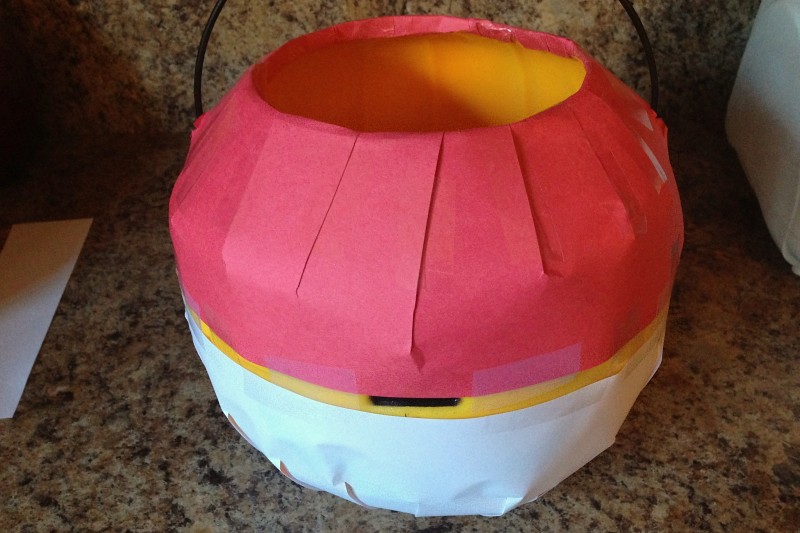
The Fairy Godmother and mice pictures I just printed out and taped to the vase/plate. I made the standing Cinderella (and the other skirted princesses below), and will be posting a tutorial for those soon!

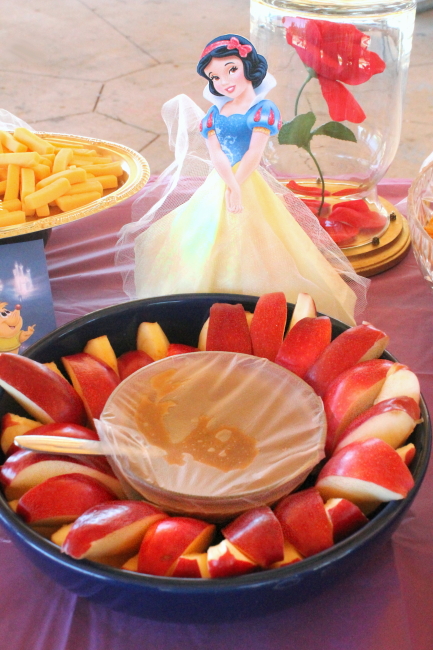
Of course Snow White *had* to have some nice red apple slices, and I made this caramel dip to go with them. I soaked the slices in club soda to keep them from turning brown.

Snow White, red apples, & caramel dip

Behind Snow White you can spy Belle's rose, which I'll also share a tutorial for soon ~ 

Belle & rose

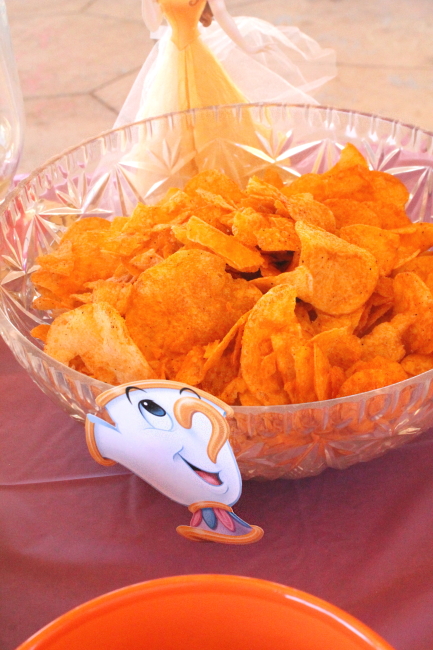
And Belle's food was Chip's chips!

Belle & Chip's Chips

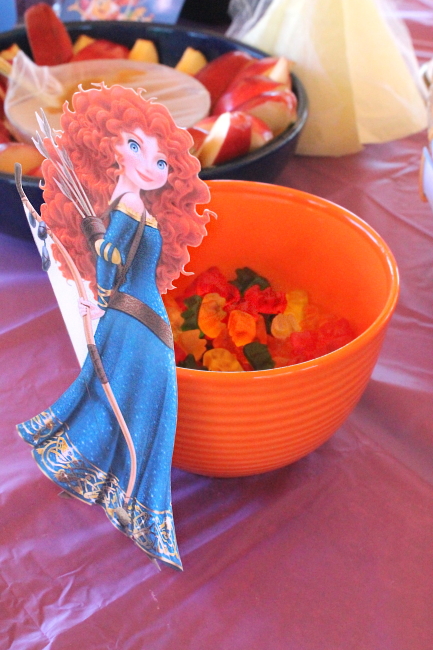
On this side of the table we also had Merida with some gummy bears. I had printed out a picture of the little bears from the movie and forgot to stick them on beside her, oh well ~ 

Merida with gummy bears

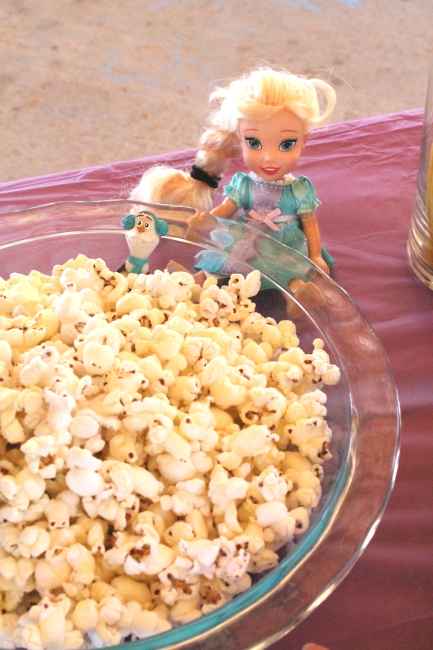
On the other half of the table we had an Elsa and Olaf doll with some white cheddar popcorn for 'snow'. I looked everywhere for white cheese balls to use as snowballs, but could find them no where, so I finally had to settle for something a little less obvious. ~ 

Elsa & Olaf with popcorn snow

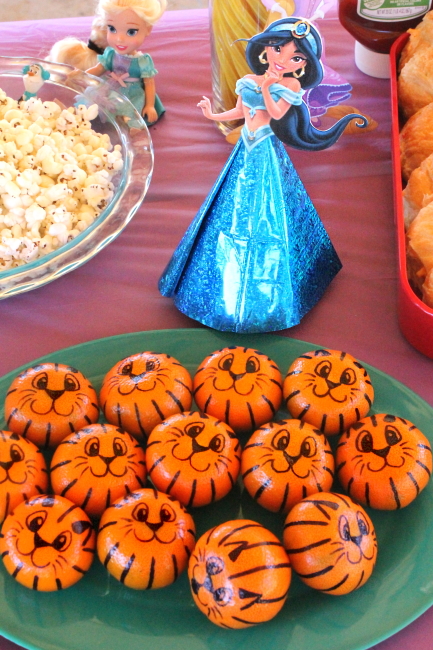
Jasmine was a hard one, since the only food ideas I saw for her were chocolate golden coins as 'treasure'. Finally I remembered the cute tiger oranges a mom had made for cub scouts, and so we have her friend Rajah ~

Jasmine with tiger oranges

The oranges are a simple idea, but ended up being a big pain to do. The oil from the orange peel kills Sharpies, and I ended up with one pen after another dying on me. As I struggled with the pens it took forever to do a dozen tigers, and so I gave up and left the rest of them blank. I wouldn't recommend this one!
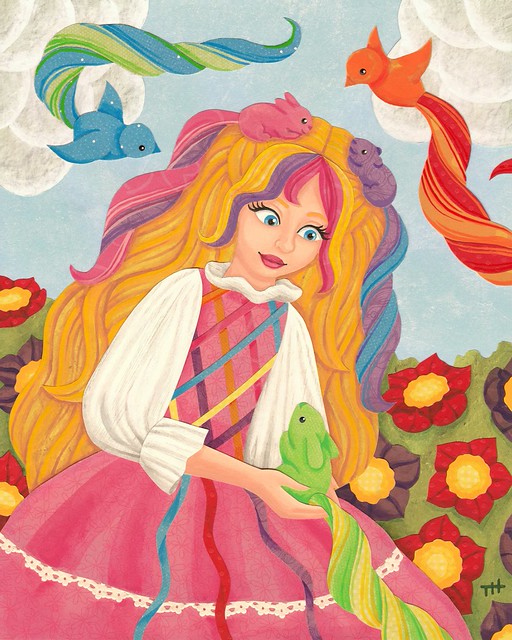
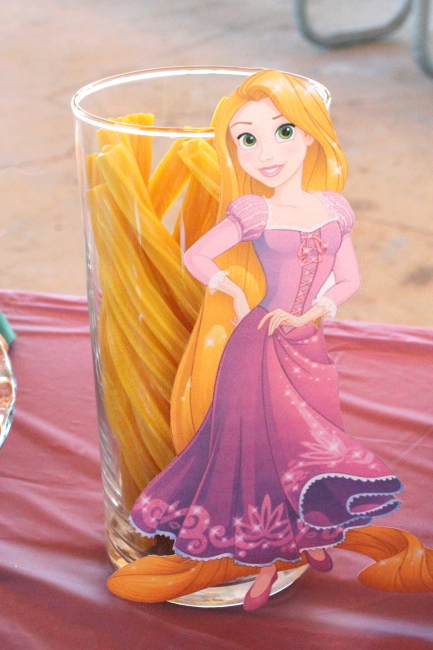
These sour filled Twizzlers look incredible as Rapunzel's hair! Better yet, the package comes with only red and yellow colored Twizzlers, and you can buy them lots of places, so they are an easy addition. (I used 2 packs)

Rapunzel with yellow twizzler hair

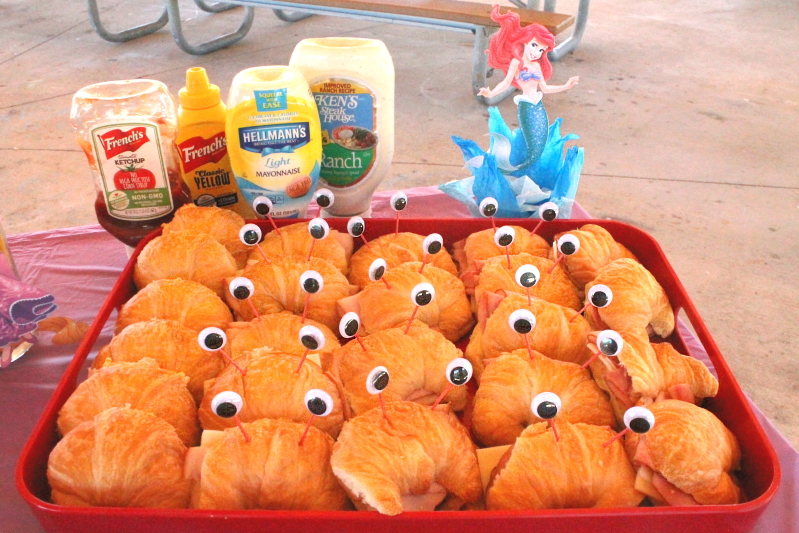
I saw so many awesome ideas for Ariel, it was hard to narrow down! With all of the cheese cubes and apple slices we had tons of kid-friendly food, so we chose these crab shaped sandwiches with the adults in mind. We had pimento cheese, ham & swiss, and turkey & swiss, with a range of condiments on the side. I searched several stores before I found sew-on google eyes, which have a tab sticking out on the back the perfect size for a toothpick. I finally found two sizes at Hobby Lobby, and the search was worth it in the end when I was able to pop them right on the toothpicks and avoided gluing on 30+ eyes.

Ariel with crab sandwiches

The Ariel decoration was created a little differently than the skirted princesses, so I'll have a separate tutorial for her.


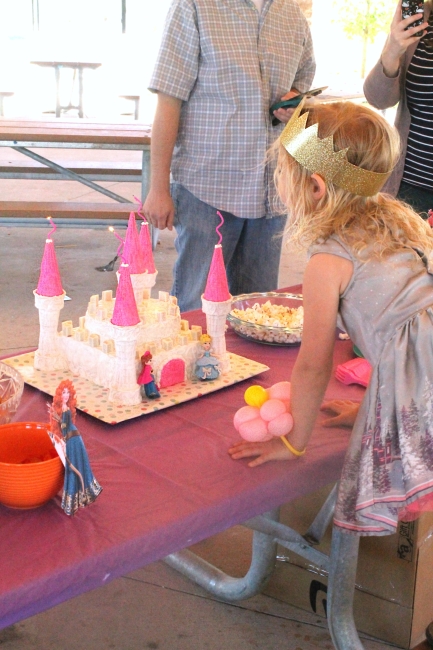
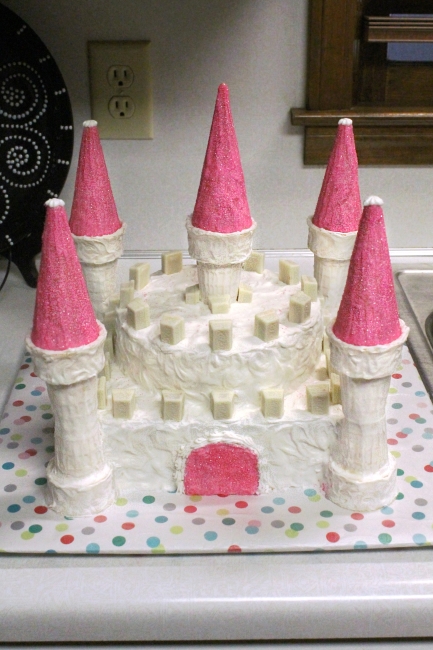
We waited to reveal the best part, an awesome castle cake!

Castle cake - at home

This cake is actually simpler than it looks, as the towers are created with two stacked ice cream cones (cake cones), and then topped with a pointy cone (sugar cone). I covered all of the cones with frosting and rolled the pointed cones in pink sugar. They ended up looking super glittery in person and prettier than I'd expected! For the actual cake part there are two layers of a square cake on the bottom and two smaller circle layers on top (I just used a normal circle pan and then cut them down to size). This is topped with another cake cone and sugar cone in the center.

Castle cake - at party

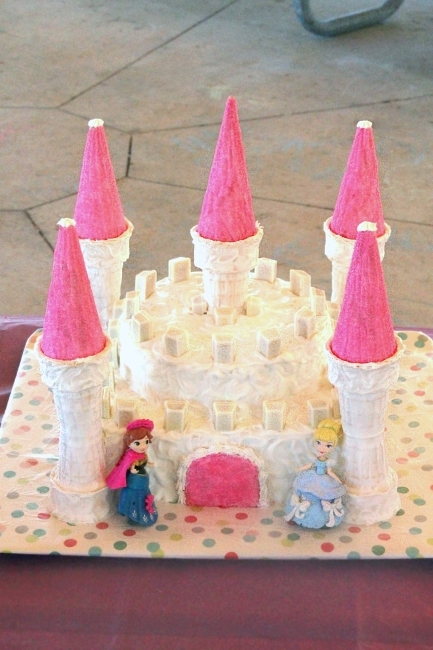
I debated for a long time what to use for the rectangle shapes around the edges, and had heavily considered using pink wafer cookies or mini marshmallows. In the end I couldn't find cheap wafers, and the marshmallows were too irregularly shaped, so I searched the candy aisle and found some perfect mini white chocolate Kit Kats! For the door I cut a graham cracker into shape and covered it with the pink sugar, piping a little white frosting around the edge. I cut the tips off the corner cones until I had a hole big enough to fit some slender candles, then piped a little icing over the hole. The four towers were perfect for our 4 candles!

Blowing out candles

I built the cake on a large, sturdy air bake pan we have, which was first covered in wrapping paper and then a layer of Press'n Seal. I cut a cardboard box down to size to transport it, having the box open at the front so I could slide the tray in & out. It traveled well, other than the center tower, which kept toppling over. If I were to do it again, I'd mix up some royal icing to really cement the side towers together, and then take the center tower off when the cake needs to be moved. (Cutting a small hole in the top of the cake might have helped too)
The party went really well, other than having to battle the wind to set everything up. The wind was ripping things from my hands, and actually blew gifts off the present table!! I was able to get everything well secured, and it mostly calmed down for the party. Everything went really well, and I think our little one definitely felt like a special princess for her birthday.