Showing posts with label cooking. Show all posts

Sunday, May 27, 2018

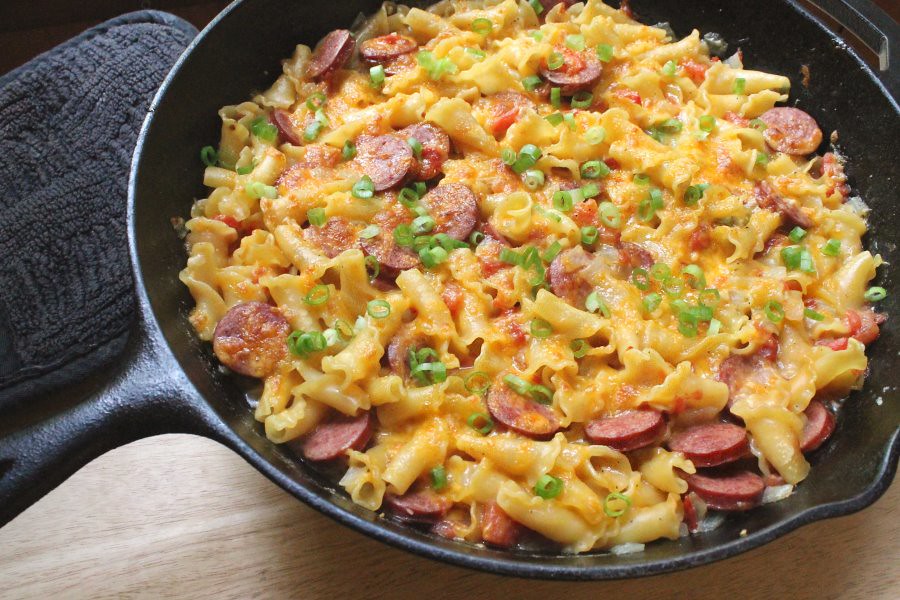
Spicy Sausage & Pasta Skillet

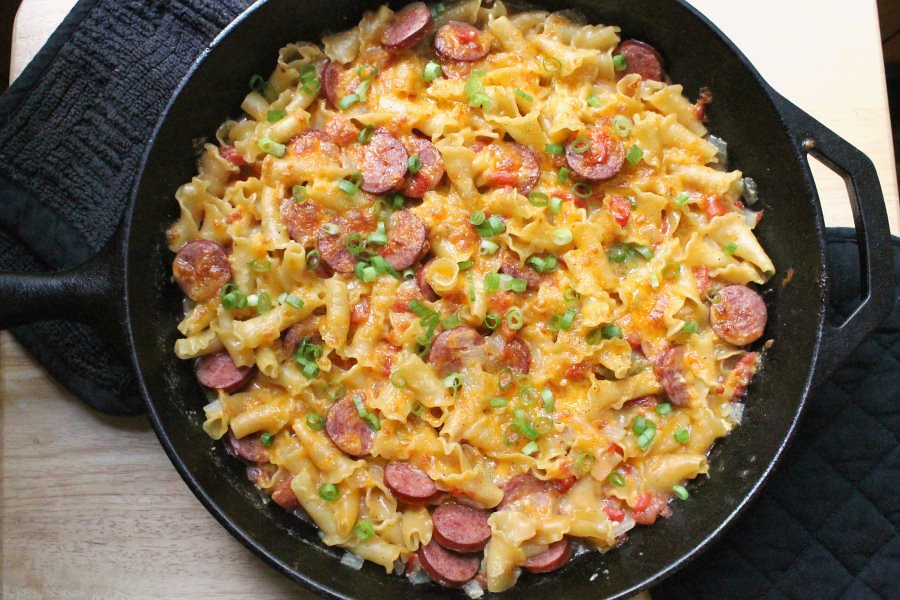
Spicy Sausage & Pasta Skillet, 1

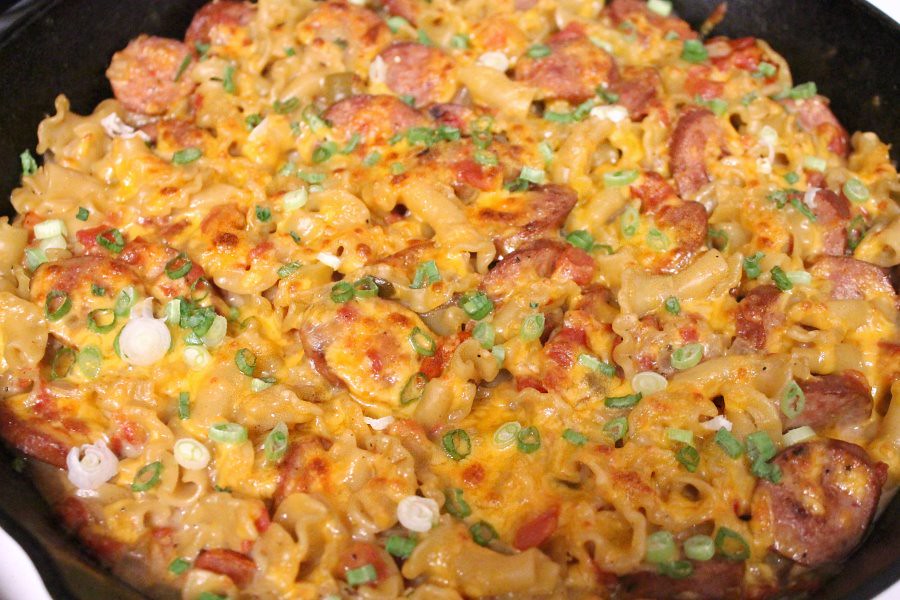
Slices of smoked sausage, pasta covered in warm, bubbly cheese, with a hint of spice - pure comfort food! The unique shape of the campanelle pasta gives the dish an elegant look, and the ruffles are perfect for scooping up the cheesy sauce (but you can always sub with penne or bowties if needed). And don't skip the turkey keilbasa if you haven't tried - my husband is always skeptical, but it tastes just like the real thing with a fraction of the calories and fat. Adapted from this blog, based on an America's Test Kitchens recipe.

Spicy Sausage & Pasta Skillet, 2

(For those of you counting calories, I've added the amount for each ingredient so you can easily make tweaks without having to re-calculate everything.)


Spicy Sausage & Pasta Skillet

1 tsp. olive oil (40)
13 oz. (-16) smoked turkey sausage, sliced thin (650) 
1 cup diced onion (60) 
1 tsp. minced garlic (1) 

2 cups water (0)
2 tsp. chicken bouillon (or use broth in place of water, 10)
1 (10 oz.) can Rotel tomatoes, mild, drained (63) 
½ cup heavy cream (200) 
8 oz. dry campanelle pasta (800) 
½ tsp. salt and pepper, each (3) 

1 cup shredded sharp cheddar cheese (440)
2 green onions, thinly sliced (10)


1) Heat oil in an oven-safe skillet* over medium-high heat. Add the sausage and onions and cook until lightly browned, about 4 minutes, stirring frequently. Add garlic and cook 30 seconds.

2) Add the water, bouillon, Rotel, cream, pasta, salt and pepper and stir. Bring to a boil, cover the skillet, and reduce heat to medium-low. Simmer until pasta is tender, about 15 minutes.

3) Remove the skillet from heat and stir in 1/2 cup cheese. Top with the remaining 1/2 cup cheese and broil until cheese is melted and bubbly with brown spots. Sprinkle with green onions and serve.

Serves 4. Calories -  569 for 1/4


*Tip - If you don't have an oven-safe skillet, you can cook this in any covered pan and then spoon it into a casserole dish to broil the cheese at the end.

Spicy Sausage & Pasta Skillet, 3

Friday, May 12, 2017

Disney Princess Party - Food & Decor

This little girl turned 4 this week, and it was her year for a party! (We alternate years with her brother) Of course Pandora picked a pink and purple princess theme. I decided to base the decorations and food on the Disney princess movies instead of just going fully 'princess' with tiaras and pearls, and ended up having a little too much fun browsing Pinterest and planning everything out.
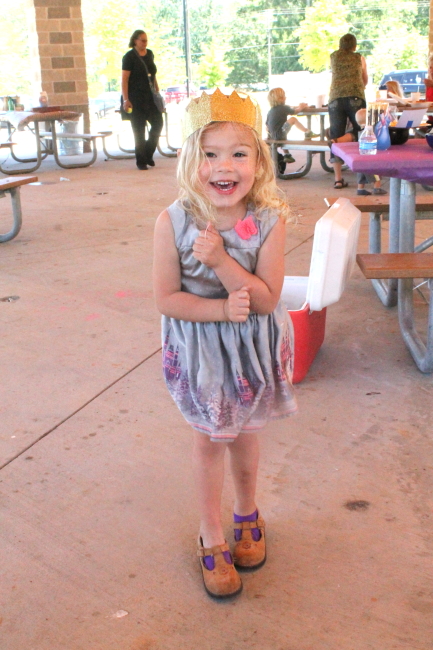
 Happy Bday Girl

Whole parties have been planned around each princess, so there were a lot of ideas out there. I tried keeping a list of our definites and maybes, but soon I was desperate for something more visual, and I started slapping together an image to sort everything out. The top section shows everything for the table, and the bottom section is for the goodie bags (since some things could be on either). The picture ended up being a great help as we planned, because I could easily see how many sweets, salty foods, and healthy options we had. I even ended up marking which plates and decorations I wanted to use beside each food, since I had to bring it all with me, and it was so easy to reference.
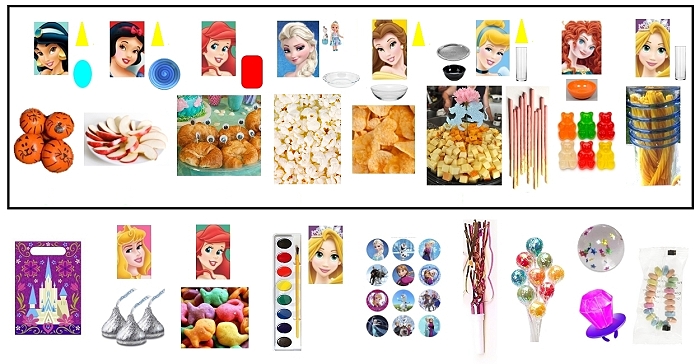
Party food & goodie bag planning


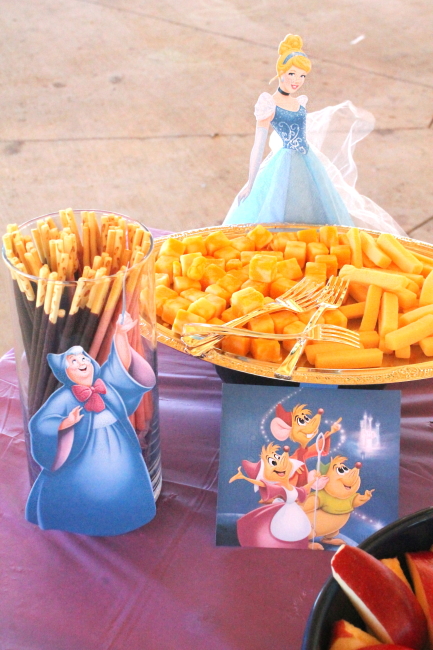
First we'll start with Cinderella, who's Fairy Godmother got some Pokky sticks for magic wands. I saw this idea done with chocolate covered pretzel sticks, which is also cute, but sometimes those things are just too big. When I saw the Pokky I thought the size would be better for snacking, and was also excited I wouldn't have to make anything! Then I bought some cheese cubes for her little mice friends. I found an ornate metal tray at the Dollar Tree, and set it on top of a bowl of ice to help the cheese stay fresh through the party. It didn't get sweaty, just a little dry, so I'd call that a success. 

Cinderella with Pokky wands & cheese cubes

The Fairy Godmother and mice pictures I just printed out and taped to the vase/plate. I made the standing Cinderella (and the other skirted princesses below), and will be posting a tutorial for those soon!

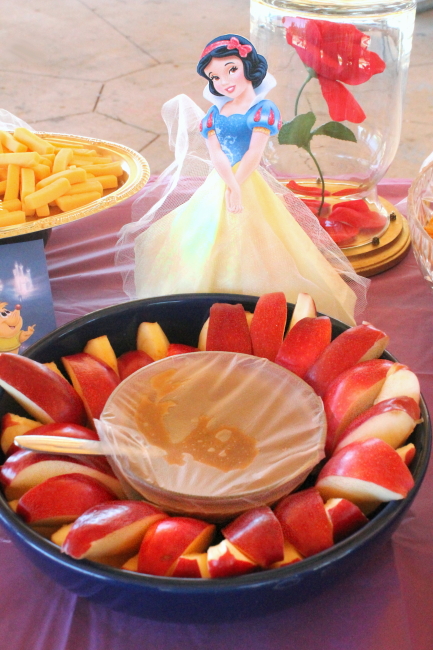
Of course Snow White *had* to have some nice red apple slices, and I made this caramel dip to go with them. I soaked the slices in club soda to keep them from turning brown.

Snow White, red apples, & caramel dip

Behind Snow White you can spy Belle's rose, which I'll also share a tutorial for soon ~ 

Belle & rose

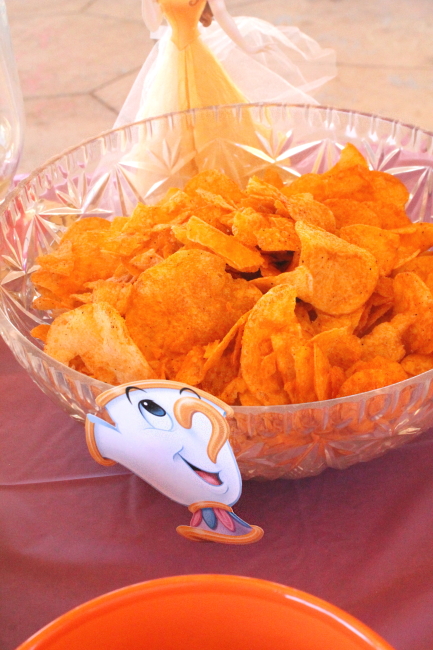
And Belle's food was Chip's chips!

Belle & Chip's Chips

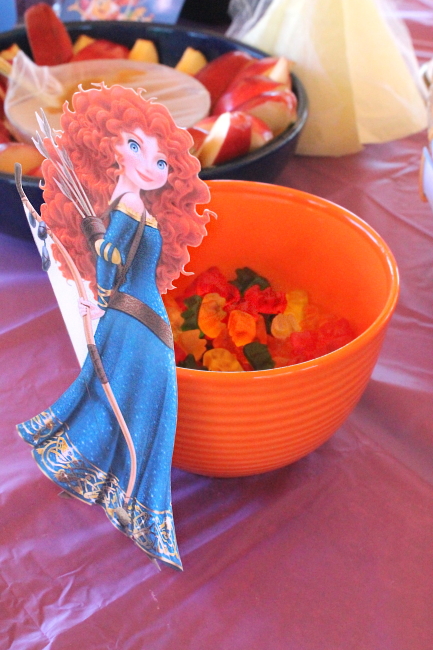
On this side of the table we also had Merida with some gummy bears. I had printed out a picture of the little bears from the movie and forgot to stick them on beside her, oh well ~ 

Merida with gummy bears

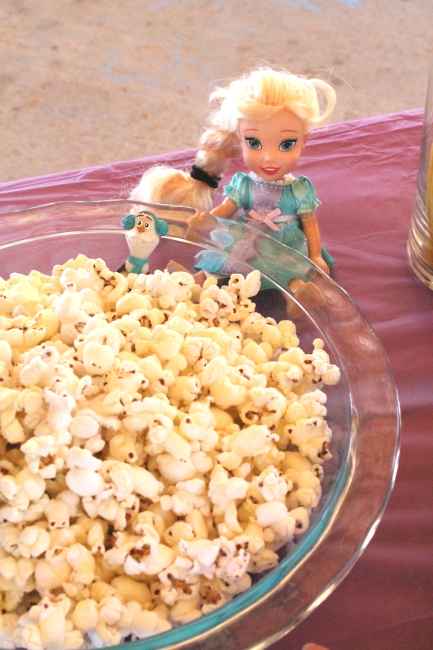
On the other half of the table we had an Elsa and Olaf doll with some white cheddar popcorn for 'snow'. I looked everywhere for white cheese balls to use as snowballs, but could find them no where, so I finally had to settle for something a little less obvious. ~ 

Elsa & Olaf with popcorn snow

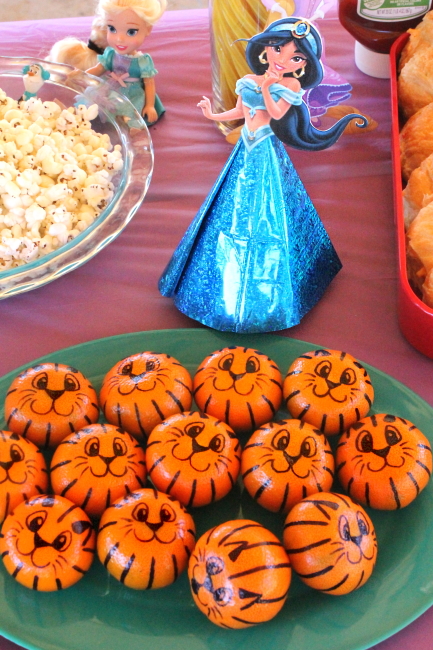
Jasmine was a hard one, since the only food ideas I saw for her were chocolate golden coins as 'treasure'. Finally I remembered the cute tiger oranges a mom had made for cub scouts, and so we have her friend Rajah ~

Jasmine with tiger oranges

The oranges are a simple idea, but ended up being a big pain to do. The oil from the orange peel kills Sharpies, and I ended up with one pen after another dying on me. As I struggled with the pens it took forever to do a dozen tigers, and so I gave up and left the rest of them blank. I wouldn't recommend this one!

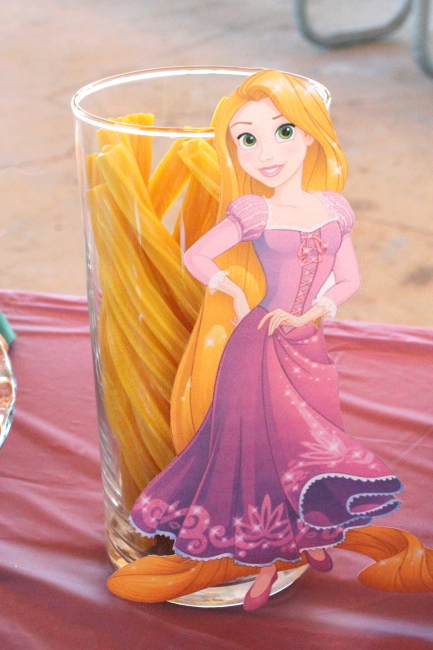
These sour filled Twizzlers look incredible as Rapunzel's hair! Better yet, the package comes with only red and yellow colored Twizzlers, and you can buy them lots of places, so they are an easy addition. (I used 2 packs)

Rapunzel with yellow twizzler hair

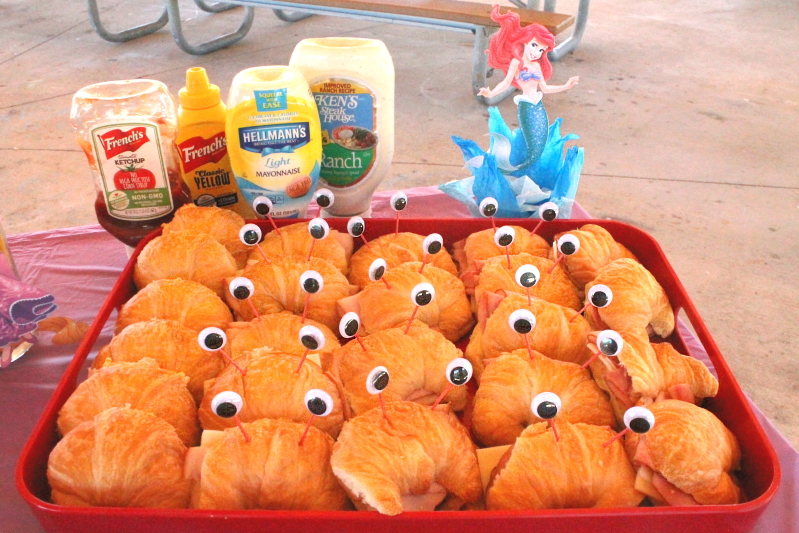
I saw so many awesome ideas for Ariel, it was hard to narrow down! With all of the cheese cubes and apple slices we had tons of kid-friendly food, so we chose these crab shaped sandwiches with the adults in mind. We had pimento cheese, ham & swiss, and turkey & swiss, with a range of condiments on the side. I searched several stores before I found sew-on google eyes, which have a tab sticking out on the back the perfect size for a toothpick. I finally found two sizes at Hobby Lobby, and the search was worth it in the end when I was able to pop them right on the toothpicks and avoided gluing on 30+ eyes.

Ariel with crab sandwiches

The Ariel decoration was created a little differently than the skirted princesses, so I'll have a separate tutorial for her.


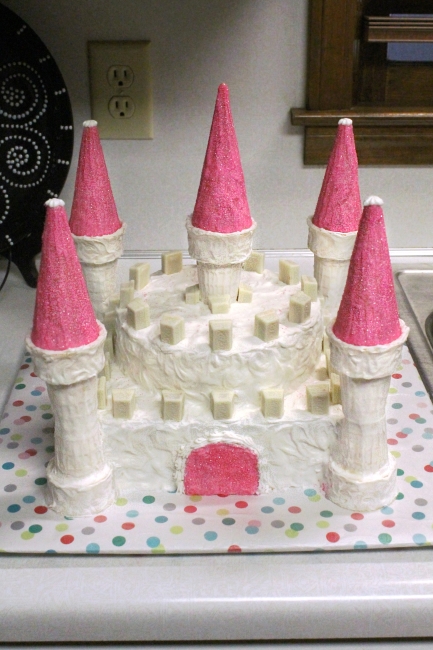
We waited to reveal the best part, an awesome castle cake!

Castle cake - at home

This cake is actually simpler than it looks, as the towers are created with two stacked ice cream cones (cake cones), and then topped with a pointy cone (sugar cone). I covered all of the cones with frosting and rolled the pointed cones in pink sugar. They ended up looking super glittery in person and prettier than I'd expected! For the actual cake part there are two layers of a square cake on the bottom and two smaller circle layers on top (I just used a normal circle pan and then cut them down to size). This is topped with another cake cone and sugar cone in the center.
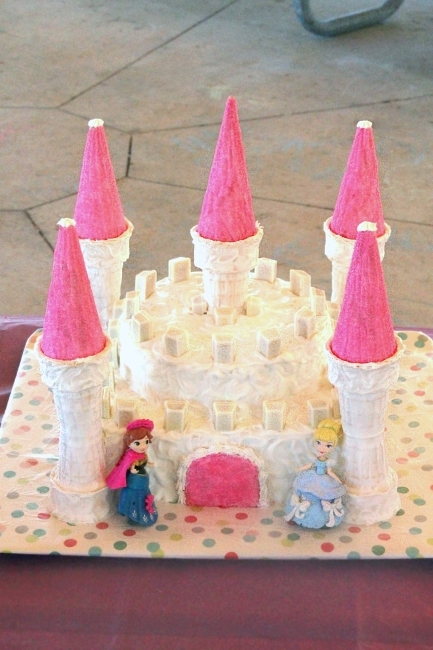
Castle cake - at party

I debated for a long time what to use for the rectangle shapes around the edges, and had heavily considered using pink wafer cookies or mini marshmallows. In the end I couldn't find cheap wafers, and the marshmallows were too irregularly shaped, so I searched the candy aisle and found some perfect mini white chocolate Kit Kats! For the door I cut a graham cracker into shape and covered it with the pink sugar, piping a little white frosting around the edge. I cut the tips off the corner cones until I had a hole big enough to fit some slender candles, then piped a little icing over the hole. The four towers were perfect for our 4 candles!
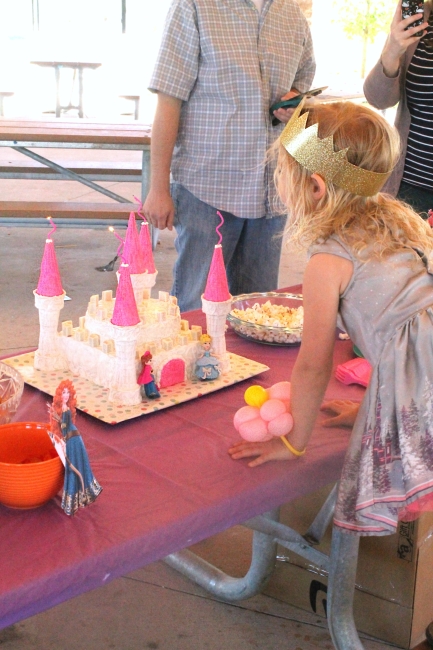
Blowing out candles

I built the cake on a large, sturdy air bake pan we have, which was first covered in wrapping paper and then a layer of Press'n Seal. I cut a cardboard box down to size to transport it, having the box open at the front so I could slide the tray in & out. It traveled well, other than the center tower, which kept toppling over. If I were to do it again, I'd mix up some royal icing to really cement the side towers together, and then take the center tower off when the cake needs to be moved. (Cutting a small hole in the top of the cake might have helped too)
The party went really well, other than having to battle the wind to set everything up. The wind was ripping things from my hands, and actually blew gifts off the present table!! I was able to get everything well secured, and it mostly calmed down for the party. Everything went really well, and I think our little one definitely felt like a special princess for her birthday.

Monday, October 17, 2016

Crispy Oven Baked Wings (and Sweet & Savory Sauce)


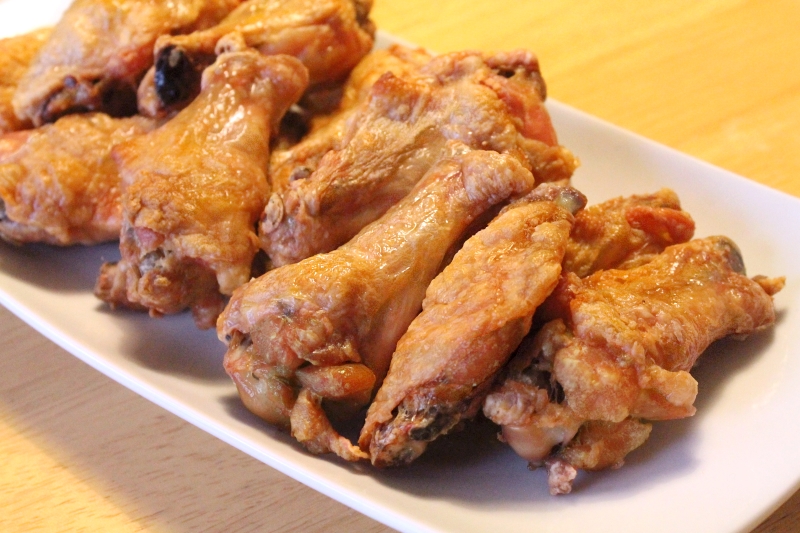
Crispy Oven Baked Wings

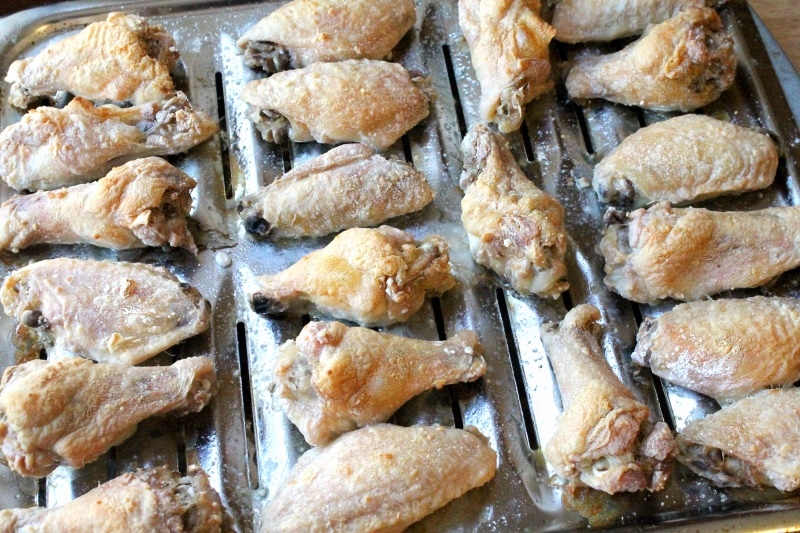
I was excited to try Our Best Bites' tip for getting crispy oven baked wings, and we were really blown away with the results! They have the same nice crunch as restaurant wings, but without all of that oil for frying. And you don't even have to worry about continously basting, just toss them in your choice of sauce afterward.


Crispy Baked Wings

4 lbs. chicken wings (separated)
2 Tbsp. baking powder
1/4 tsp. salt 

1) Move your rack to the lower middle spot and pre-heat your oven to 250 F. Line a baking sheet with aluminum foil and top with a wire rack or slotted pan. Spray with oil or non-stick spray. 

2) Pat the wings with paper towels and toss with the baking powder and salt in a large bowl. Arrange the wings skin side up on the rack in one layer and bake for 30 minutes.

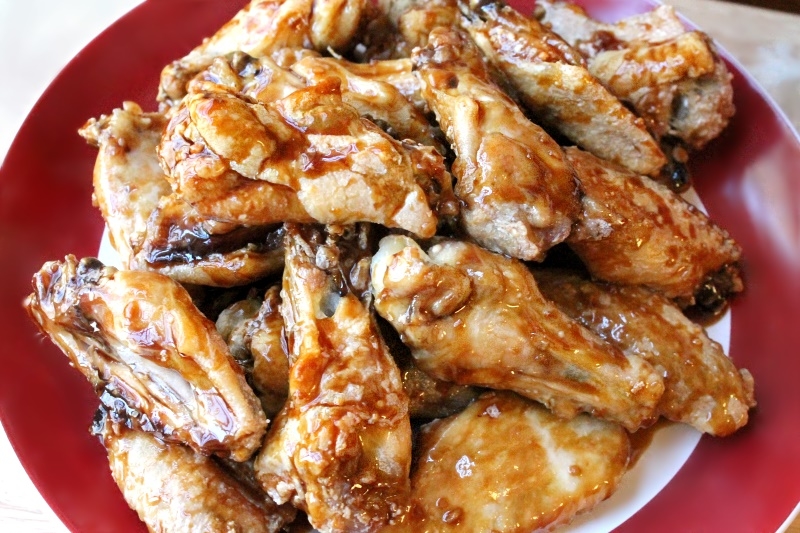
3) Move the oven rack up one spot (upper middle) and increase the temperature to 425 F. Bake the wings for 50 minutes, rotating the pan halfway through. Toss finished wings with your choice of sauce and serve!


Crispy Oven Baked Wings

I like to make a few sauces (and maybe set out a few bottles of pre-made sauce) when I make wings, so everyone can choose how many they'd like of each flavor. We've tried out lots of sauce recipes, but the only one we've been wowed by so far is this Sweet & Savory sauce.


Sweet & Savory Wing Sauce

1 tsp. cornstarch
2 tsp. water

2 Tbsp. brown sugar
2 Tbsp. honey
2 Tbsp. soy sauce
2 Tbsp. ketchup
1 Tbsp. white vinegar
1 tsp. minced garlic (2 cloves)


1) In a small bowl or cup, mix the cornstarch & water. Set aside.

2) In a small pot over medium heat, mix the rest of the ingredients. Bring to a low boil, then stir in the cornstarch and cook for 3 minutes to thicken.

Sweet & Savory Wing Sauce

Monday, August 22, 2016

Low-cal Ranch Dressing (12 calories per Tbsp.)


I seem to be in such a slump lately! The summer put me behind on everything, and while I'm slowly getting caught up, there are still so many things to chip away at on my to-do list. Today I noticed somehow it has been a month since I've done a blog post, even though I normally try to post once a week! Ugh. Thankfully in two weeks my little one starts half-day school twice a week, so I'll have a little more free time soon.

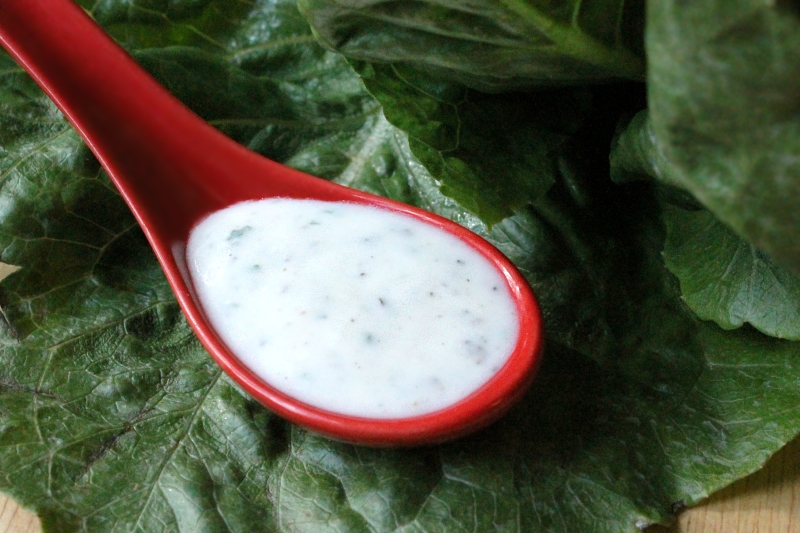
Last year I posted two variations of a super low-calorie Ranch dressing. For both I mixed in a packet of ranch mix ~ one with a cottage cheese & milk base, and the other with a buttermilk & mayo base. Since then I've played around and created lots of variations with the buttermilk version, like my Low-cal Creamy Italian Dressing and the Low-cal Creamy Asian Peanut Dressing. I also created this from-scratch version of the Ranch dressing, using seasonings instead of a pre-made mix. This is pretty much the only Ranch I make anymore (though I do love the  Italian & Asian dressings a little more, and am more likely to mix one of those up!).

5-2 Low-cal Ranch Dressing (from scratch, 12 cal per Tbsp.)

(For those of you counting calories, I've added the amount for each ingredient so you can easily make tweaks without having to re-calculate everything. Anything marked with an asterisk* may vary a lot based on what you buy, so make sure to compare your label.)

Low-cal Ranch Dressing

1/2 cup reduced fat buttermilk (56*)
2 Tbsp. Hellman's light mayo (70)

1/2 tsp. minced garlic (0)
1/2 tsp. dried parsley (0)
1/2 tsp. dried basil (0)
1/4 tsp. onion powder (2)
1/4 tsp. black pepper (2)
1/4 tsp. salt (0)
1/4 tsp. sugar (4)


Directions -
Stir together all of the ingredients except for the buttermilk. Add the buttermilk (you may want to do 1/2 at a time) and stir until well mixed.

Makes about 3/4 cup, 12 calories per Tbsp.

Wednesday, July 27, 2016

My 1st Year of Packing Lunch

Before Orson started Pre-K, I worried about packing lunches for him everyday. I bought a lot of cute bento supplies & practiced adding a few cute touches... and made a few complex bentos, just for fun. Unfortunately Orson was not really excited about the intricate lunches, and often would not eat them. When we learned his Pre-K provided lunch, I was a little bummed, but relieved too.
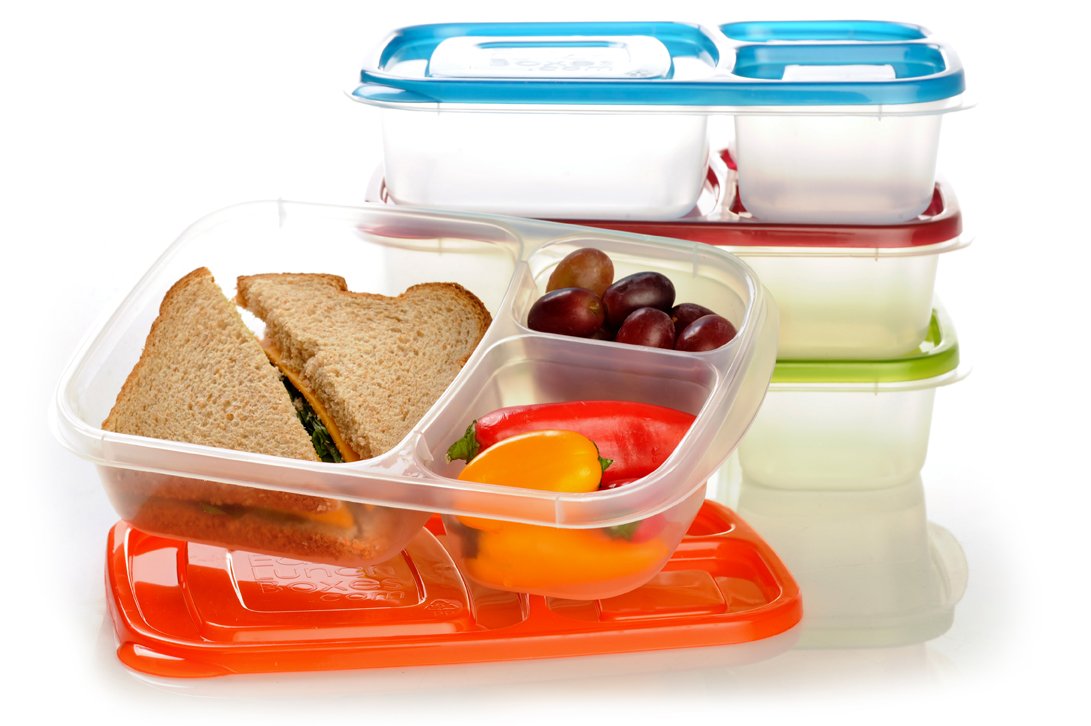
The next year he started Kindergarten, and I had to prepare again. After much debate I bought a set of Easy Lunch Boxes, because I liked that they have a few divided sections but only one lid for the whole box. (My son really loves that too.) I did have a hard time finding a lunchbag to fit them however, and really had to cram it into a standard size bag. The big box also left no room to add a water bottle, and I had to search forever for something narrow to fit in there.... And then it leaked several times and soaked everything in his bookbag, so I had to hunt again! (I finally found some small bottles from apple juice that fit OK, but by the end of the year I tried putting it in his bookbag pocket instead. Of course he forgot to grab it for lunch it every time.)


Unfortunately the standard lunchbags tip the Easy Lunch Box on its side, so putting cute bento-style details are pretty much out of the question because they would be instantly up-ended. Maybe one year I can find a lunch box with a handle on the top, but for now I'm getting two young kids ready in the morning and don't know that I'd have time to try anything creative anyway!

Once I had my lunchbox/bag situation figured out, it was time to plan the food! I started by making a list of everything I could think of that Orson will eat. Then I scoured some lists of lunchbox ideas, and added new ones to my list. I was planning on having him buy lunch twice a week, so I looked at the school lunch calendar and picked out two school lunches each week that he'd like, then filled in the calendar the rest of the way with lunches I would make.

The school cafeteria is on a three week rotation of lunches, and considering there are not *that* many things a 5 year old will eat, that ended up being perfect for my lunches as well. Bringing lunch three times a week, that means I needed 9 ideas for lunches to pack. I planned the main meal and veggie, but then would add whatever fruits we had on hand for the 3rd section. I was also pretty flexible with the schedule, rearranging meals if needed, or swapping something out if I was missing an ingredient.

So, here are the 9 lunches I made throughout the year!

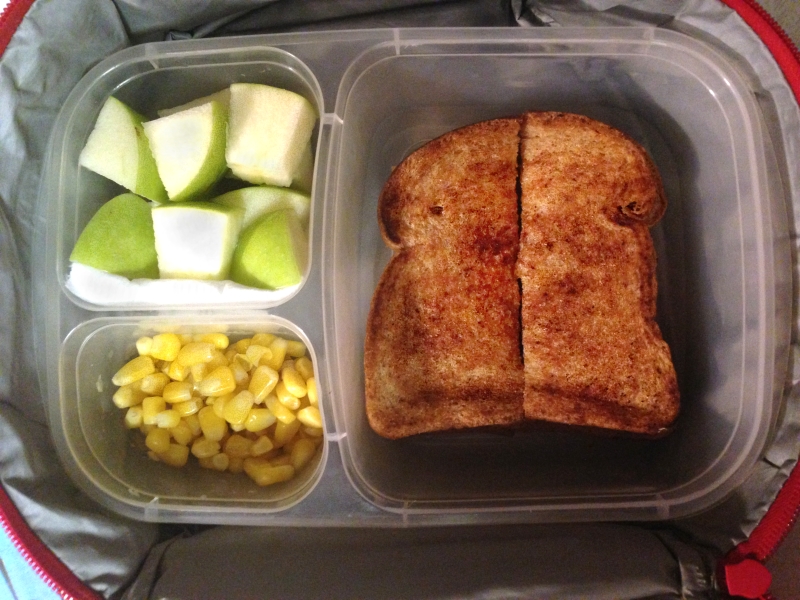
Grilled cheese with corn ~

Grilled cheese, apples, & corn

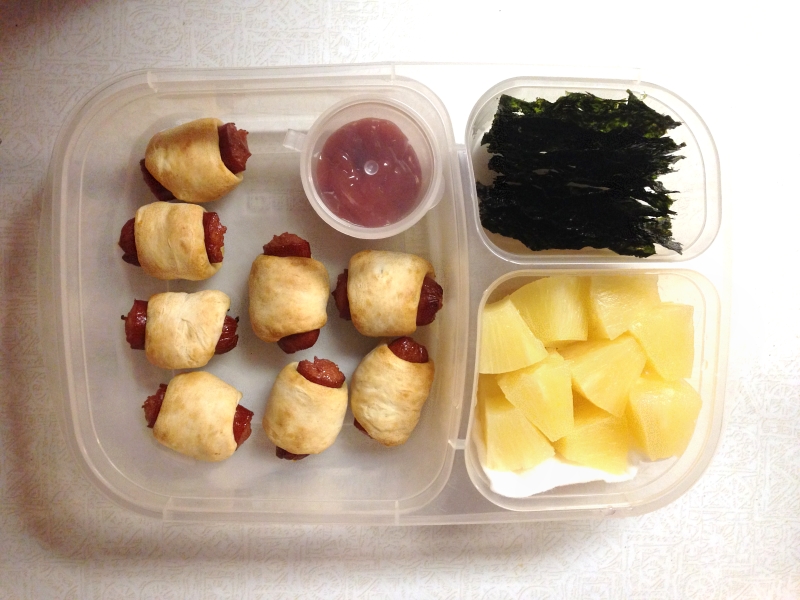
Pigs in a blanket with roasted kale (seaweed snacks pictured) ~ I started out buying cocktail sausages, but they are pricey and I never needed the full pack. After a few months I tried cutting up hot dogs instead, and 1/3 of a hot dog cut in half lengthwise work perfectly! I also stopped buying crescent roll dough and started thawing out 1 frozen Grand biscuit cut in 1/8ths. I hardly ever have extra kale on hand and usually ended up adding the seaweed snacks he loves instead. Kids love those things!

Pigs in a blanket, seaweek, & pineapple

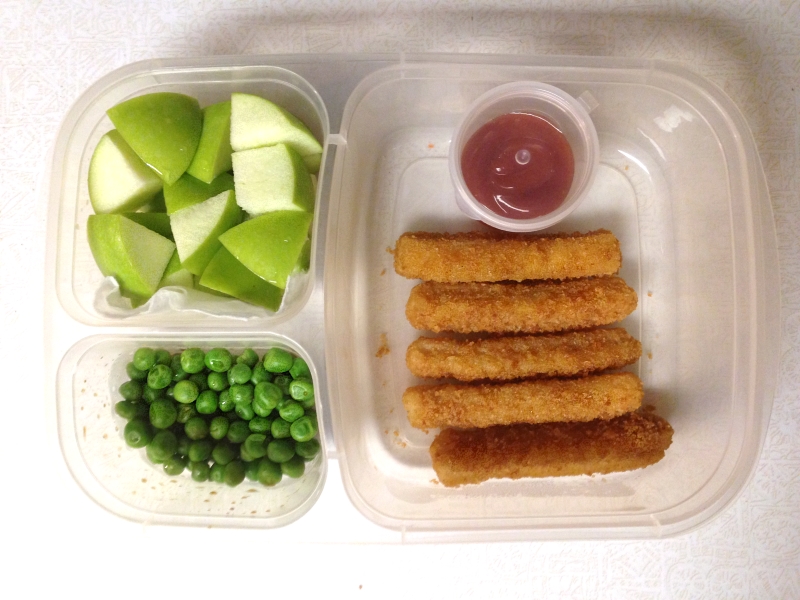
Fish sticks with green peas ~ I found the little container for the ketchup next to the salad dressings at our grocery store! Perfect fit.

Fish sticks, apples, & green 
peas

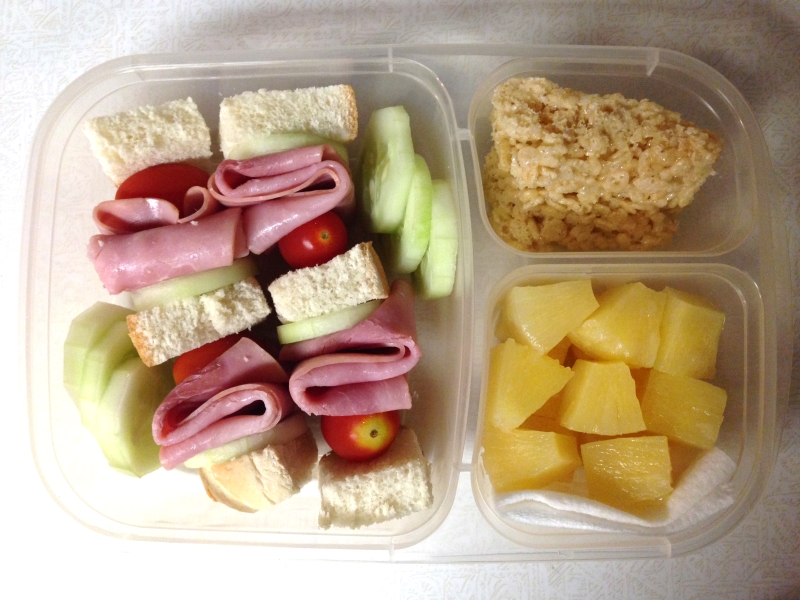
Sandwich on a Stick ~ Bread, lunchmeat, cucumbers, and mini tomatoes loaded onto skewers. A fun twist on a sandwich! If you want to add cheese slices, I found that it works best to cut a hole in the cheese slice with a straw first, or else the skewer hole cracks the cheese and it falls apart. I love that you can use pretty much any leftover bread (like hamburger or hot dog rolls) for these! He won't touch the cherry tomatoes, but I can't resist adding them.

Sandwich on a stick, rice krispies, & pineapple

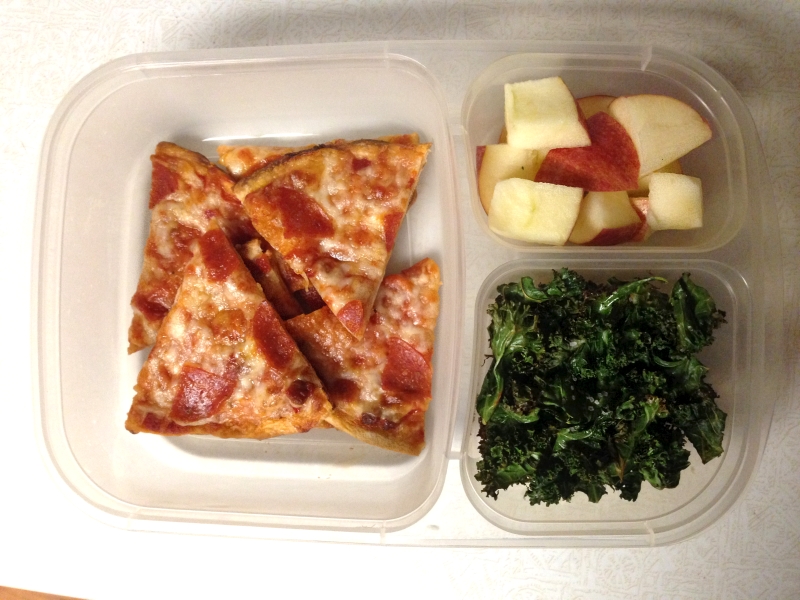
Mini biscuit pizzas with carrots & dip (roasted kale pictured) ~ 

Mini pizzas, apples, & roasted kale

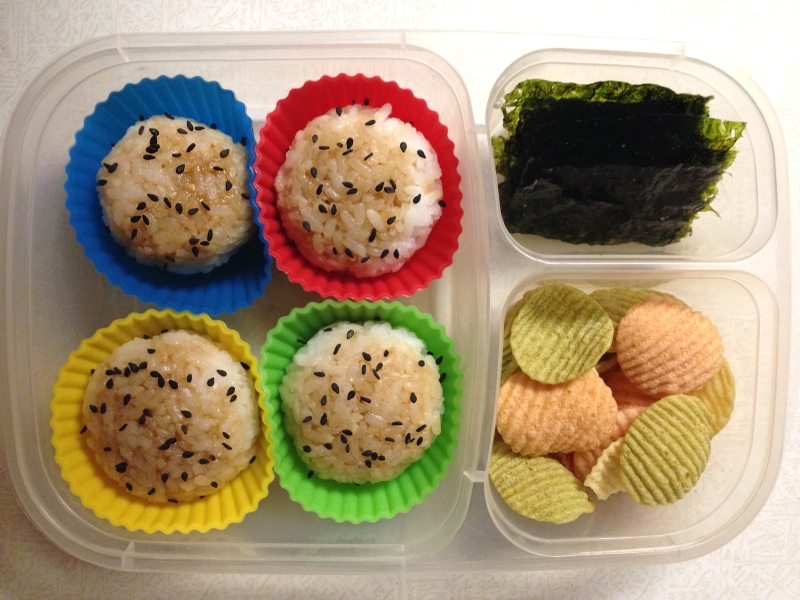
Rice balls with spinach goma-ae (seaweed snacks pictured) ~ At the start of the year, I made sushi rolls (with cooked imitation crab), but Orson got sick one day after eating them & then was afraid to eat them after that. I switched to stuffed rice balls, which is probably the most complex lunch on the rotation, but if you have the sushi rice & filling made ahead of time and frozen, each ball only takes a few minutes. I quickly learned not to try to do it all in the morning! That goma-ae recipe is a little different than mine, but I don't have mine written up yet. It also freezes well, I just ran out!

Stuffed rice balls, seaweed, & veggie chips

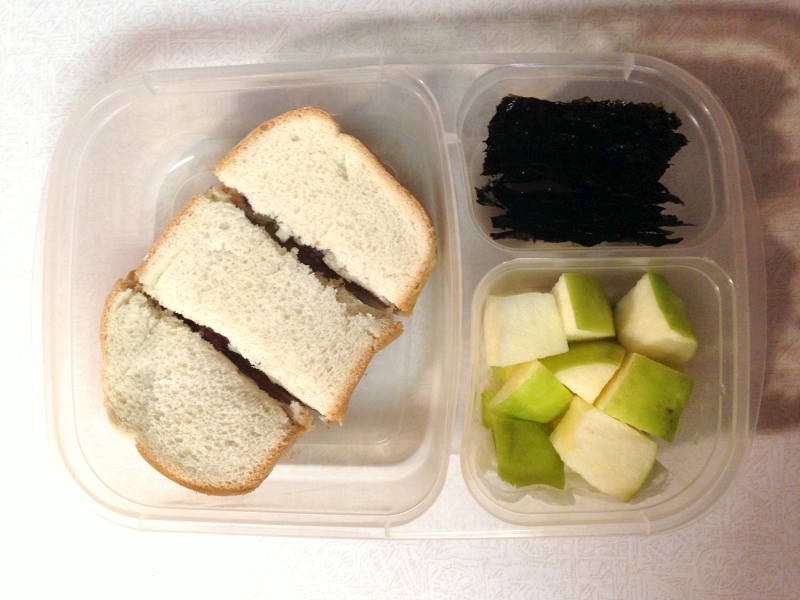
PBJ & seaweed snacks ~ 

PBJ, seaweed snacks, & apples

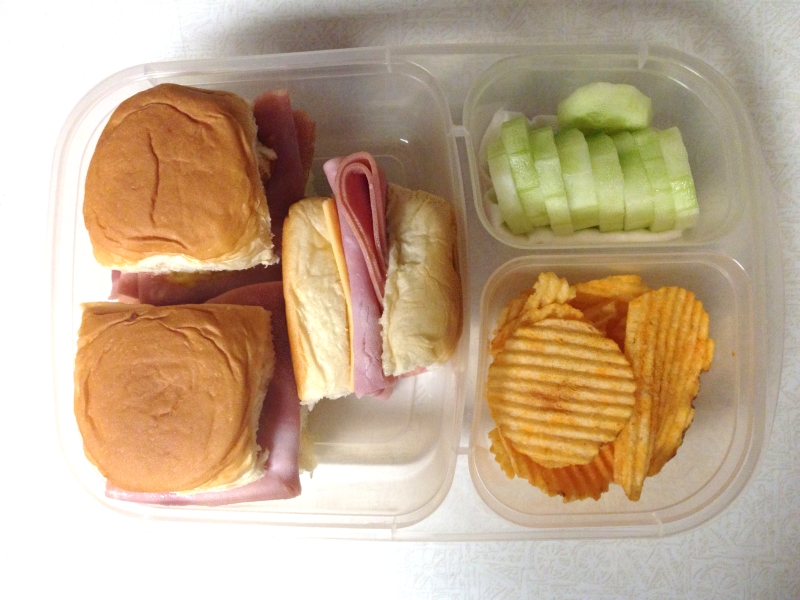
Mini sandwiches with cukes ~ Hawaiian rolls with lunchmeat, cheese, and mayo. Later in the year he had me start adding ketchup & mustard too.

Mini sandwiches, cukes, & chips

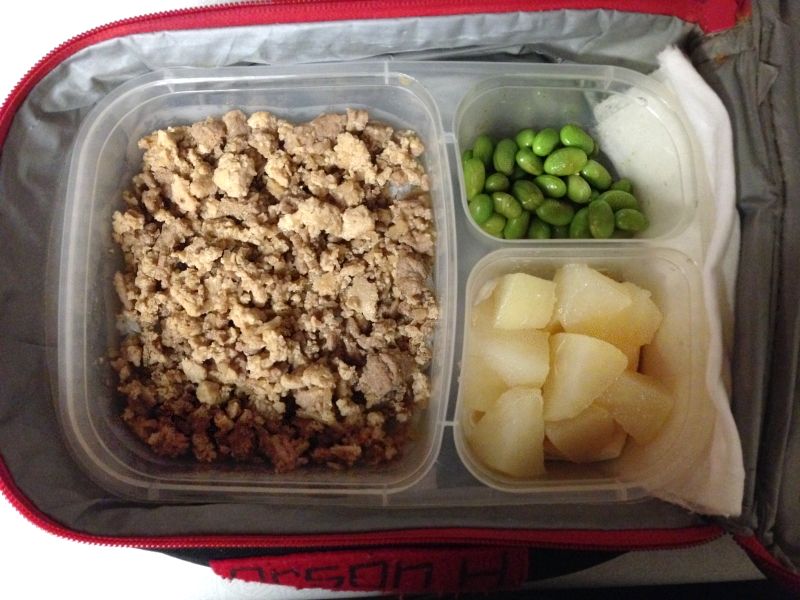
Tofuniku with edamame ~ Another Japanese recipe my son loves! The meat is simmered in a sweet sauce then served over rice. This is another one where I make a big batch and then freeze small servings for his lunches. I always try to keep frozen rice in the freezer too, and it tastes just like fresh rice when you reheat it.

Tofuniku, edamame, & pears

These pictures were all taken at the end of the year, and I packed in a few more sweets & chips than I normally would. Orson stopped eating pears, peaches, and oranges this year, so I'm having a hard time coming up with fruits for him! 

The Easy Lunch Boxes are not leak-proof, so any time I had something liquidy, I tried to drain it off as good as I could and then tucked a paper towel along the bottom edge of the box ~ 

Paper towel to catch drips in lunchbox

This worked pretty well, but the pineapple often leaked a bit and made his lunch box smell horrible! I started throwing his lunchbag in with our towel laundry (which soak in ammonia before washing). It does a great job of killing the smell. 

This year his 3-year-old sister starts 2 day preschool and will need to bring her lunch too. Unfortunately she hardly eats anything, and her school is nut free (no PBJs), so I have no idea what I'll pack for her! It's time to pull out the calendar and start planning again!

Friday, July 8, 2016

Coconut Cabbage (99 calories)

Have you ever come across a recipe picture that looks so tasty, but when you glance over the ingredient list, it's not what you imagined at all? And then you decide to make the recipe you *thought* it was? I know I've done it a few times, and that is how this recipe came about.

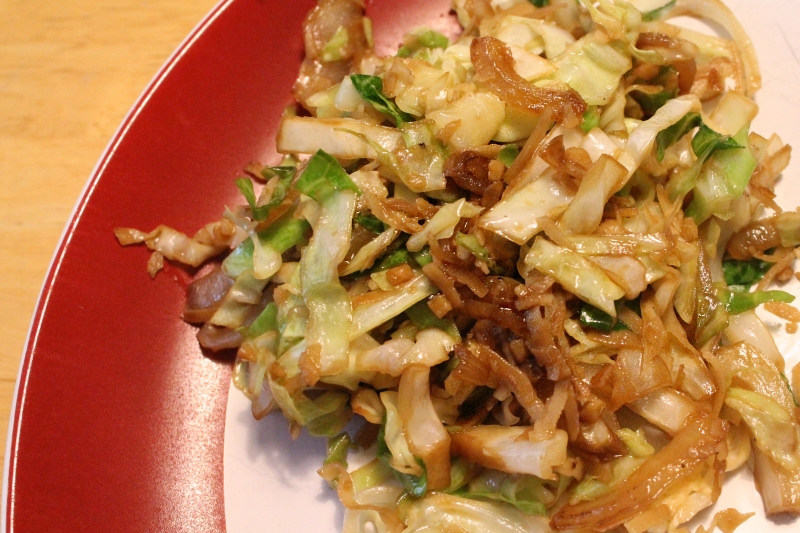
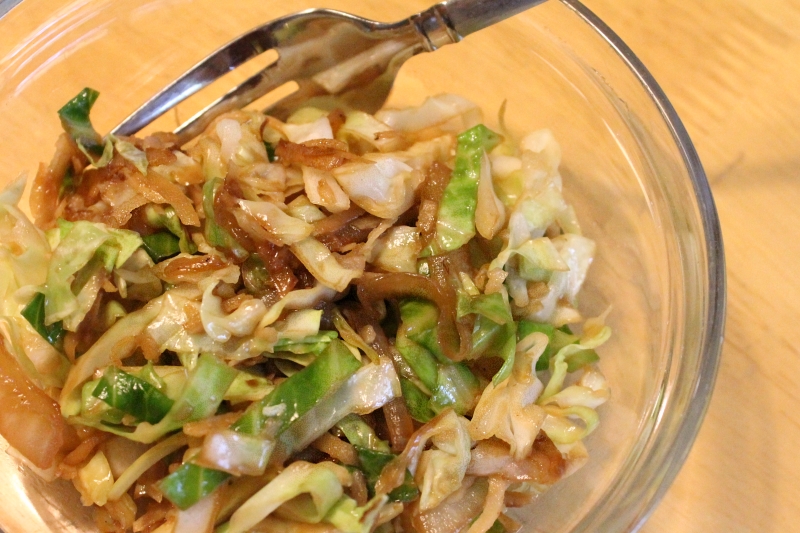
I'm glad I gave it a try, because the coconut, onion, and cabbage work together so well, and this simple side dish comes together quickly. The perfect veggie side for an Asian meal! I wasn't expecting it to be too healthy because of the high-calorie coconut, so I was excited to see that each serving is just under 100 calories.

Coconut Cabbage, 1 (99 calories)

(For those of you counting calories, I've added the amount for each ingredient so you can easily make tweaks without having to re-calculate everything. Anything marked with an asterisk* may vary based on what you buy, so make sure to compare your label.)


Coconut Cabbage

  • 1/2 Tbsp. vegetable oil (60)
  • 1 cup onion, sliced (60)

  • 1) In a large pan or wok, heat the oil over medium-high heat. Add the onion and cook for 7 minutes, stirring occasionally.

  • 1/3 cup shredded coconut (sweetenend, 186*)
  • 1 tsp. grated ginger (1)
  • 1 tsp. minced garlic (0)

  • 2) Add the coconut, ginger, & garlic and cook for 3 minutes, stirring frequently.

  • 4 cups shredded green cabbage (80)
  • 1 Tbsp. soy sauce (10)
  • 1/4 tsp. salt (0)

  • 3) Add the cabbage, soy sauce, and salt. Cook until cabbage is wilted, about 2-3 minutes. Serves 4.

    Calories - 99 for 1/4

    Coconut Cabbage, 2 (99 calories)

    Friday, June 24, 2016

    Recipe Trials

    Once again I'm rounding up some old pictures from recipes we tried ~

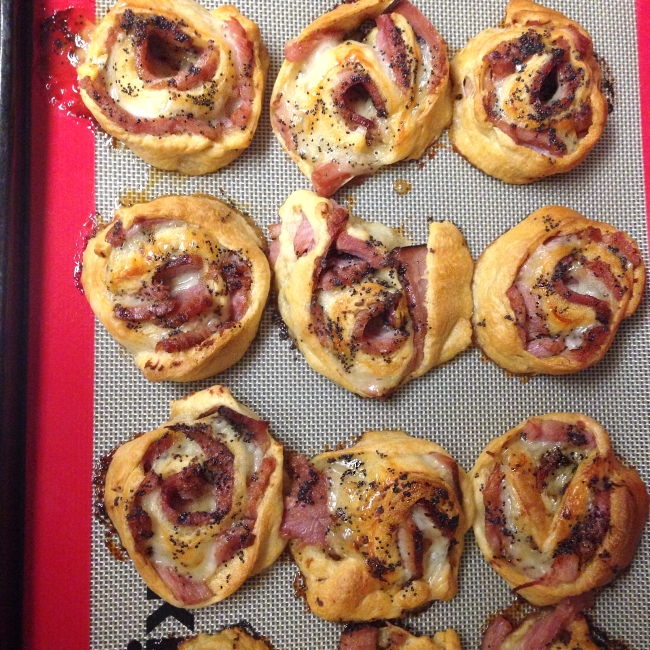
    Ham & Cheese Pinwheels

    Hot Ham & Cheese Party Rolls - This one was from way back in January, when a friend sent us home with spiral-cut ham leftovers. We'd already had ham a few times over the holiday, so I wanted to try something different with it. I varied from the recipe a little by using crescent rolls, and did change up the sauce a bit (dropping the mustard, using about 1/4 the butter and 1/2 the rest). It was hard to work with such thick ham slices, and it ended up ripping some of the rolls apart. I'd recommend using lunchmeat slices normally, but it was a great use for leftovers. These turned out so good, and 5-year-old couldn't get enough of them, so I need to make them again soon!


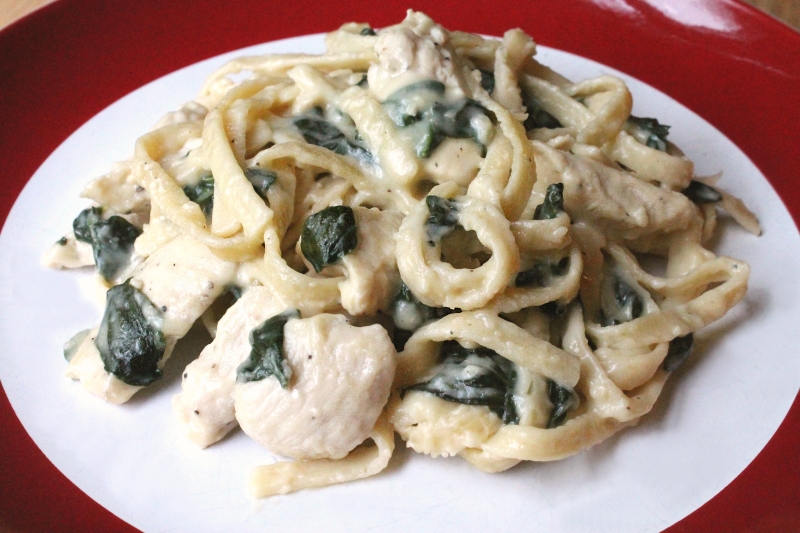
    Chicken Florentine Pasta

    Chicken Florentine Pasta - Really good, nice & creamy. I barely changed this recipe & have it typed up ready to share, I just need to get a better photo first!


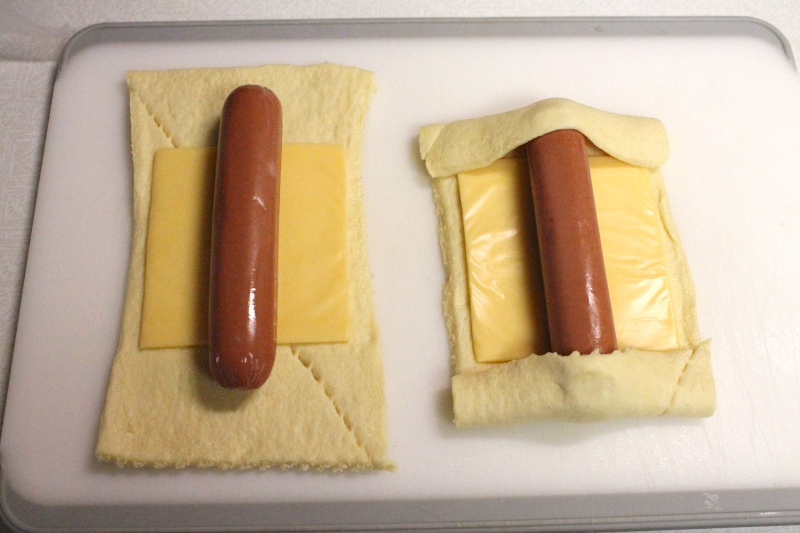
    Dorito Dogs, wrap

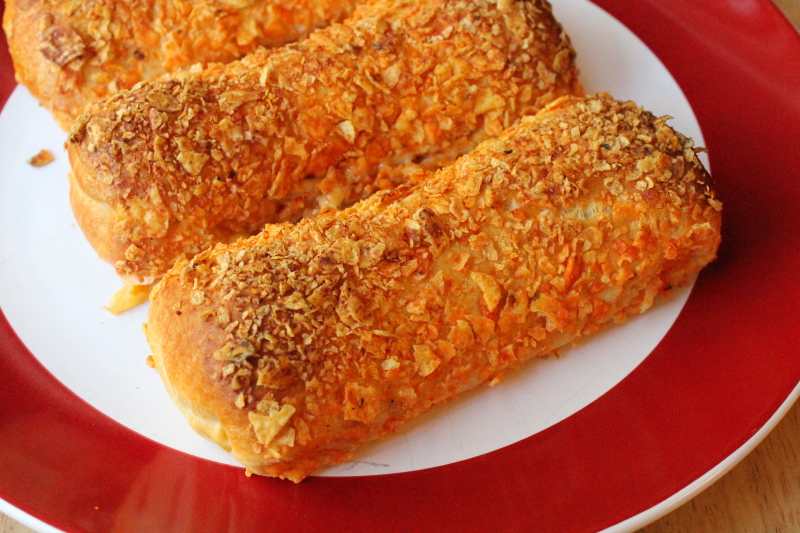
    Dorito Dogs

    Dorito Dogs - These were really fun! You wrap hot dogs and cheese slices up in crescent roll rectangles, then roll them in crushed Doritos before baking. I made sure to snap some nice step-by-step pics of this one, but in the end I felt like there was a bit too much cheese and it would actually be better with half of a slice, so I need to re-take the pics to match.


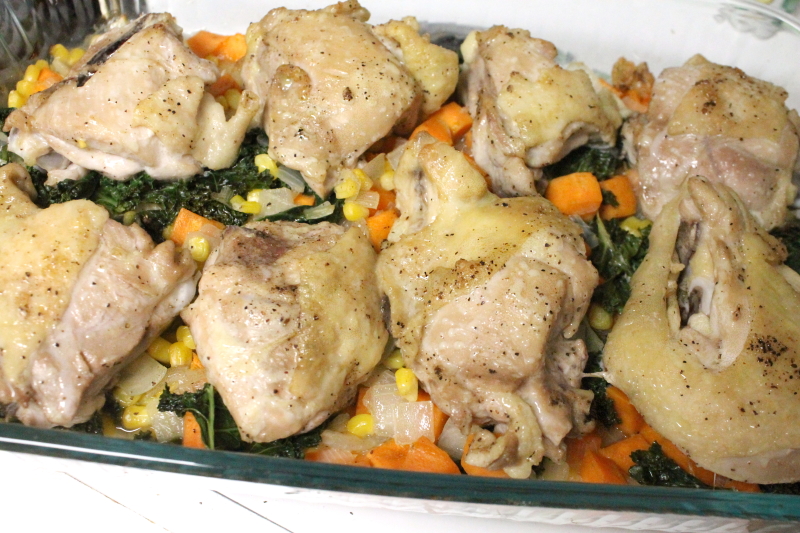
    Chicken with Sweet Potatoes, Kale, & Corn

    Chicken with Sweet Potatoes, Corn, & Kale Bake - We weren't wowed by the chicken on this one, but the corn, kale, onion, and sweet potato mixture was actually shockingly good. We'll definitely keep that in mind for a future side dish.


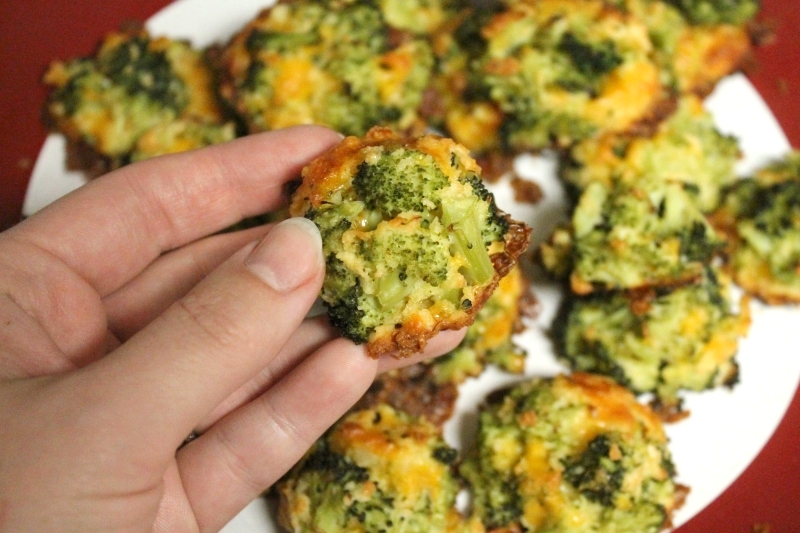
    Broccoli Bites

    Broccoli Bites - My kids aren't always the best at eating their veggies, but they will often eat roasted veggies that you wouldn't expect, like kale or Brussels sprouts. I searched around for some new veggie recipes I thought they might like, and found lots of mini muffins and 'bites' like these. They were pretty good, and I feel like the kids ate a few when they were fresh, but were not interested in the leftovers at all. So, might be good for a dinner side, but not something I can stick in a lunchbox! (I think next time I would use the chopper and mince the broccoli up so it is small dots instead of giant obvious chunks.)


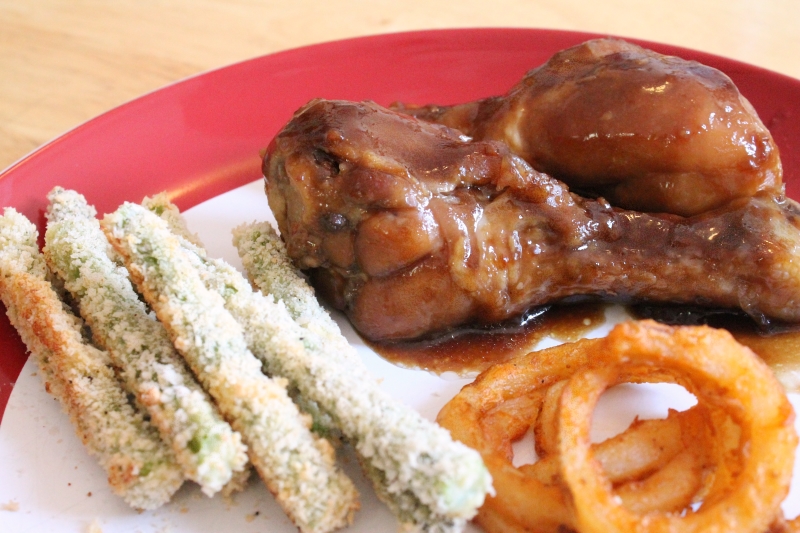
    Sticky Sweet Chicken & Breaded Asparagus

    Sticky Sweet Chicken & Breaded Asparagus - These drumsticks were supposed to bake in the sauce until it 'caramelized', but I never noticed a change. They were tasty, but from what I can remember the sauce was a little too lightly flavored & might have been better over wings where there is more surface area? Breading the asparagus took way too much work for very little payoff, so I wouldn't bother with that again!


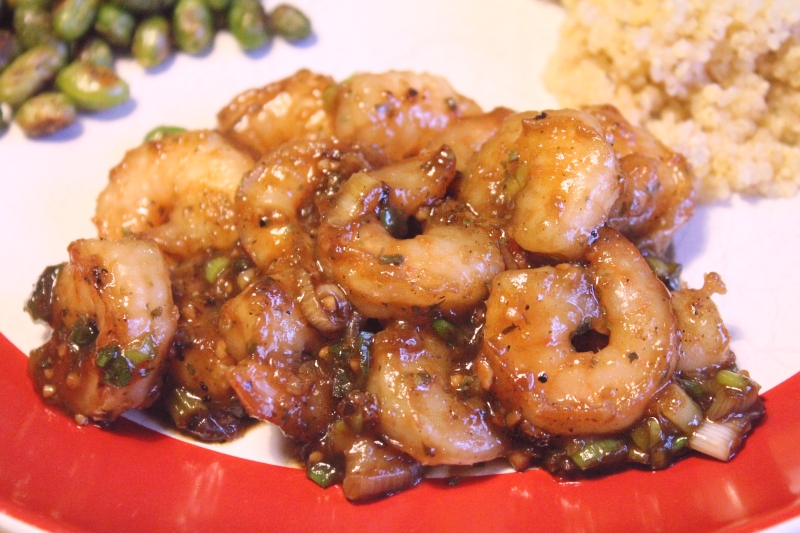
    Garlic Ginger Shrimp

    Garlic Ginger Shrimp - I feel like this one was tasty, but there was way too much sauce & the flavor was too strong. Might be worth trying again with some tweaking.


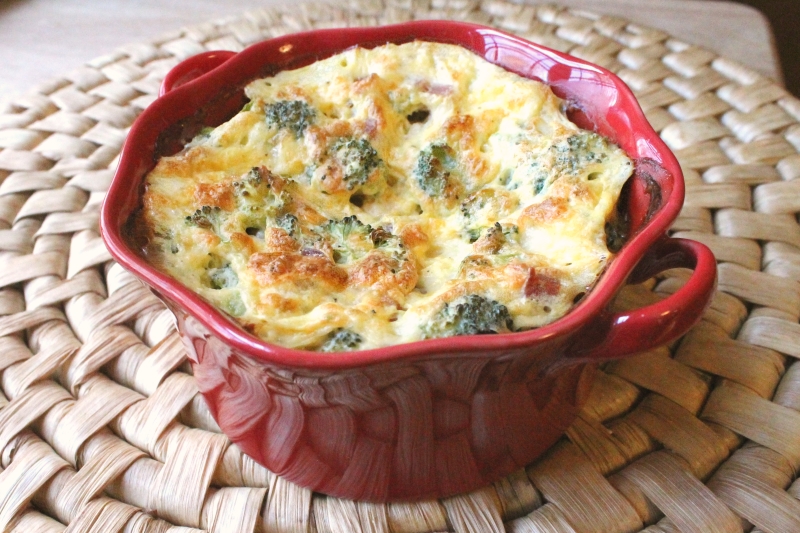
    Skinny Quiche

    Skinny Quiche - I added more broccoli to this recipe & divided it into 4 ramekins for individual 200 calorie mini quiches. They were OK, but I started playing around with numbers from our normal quiche recipe, and I think I might be able to make a 200 calorie version using real eggs and less of the low-fat stuff. If they work, I think they would be much better. We'll see!

    Tuesday, May 3, 2016

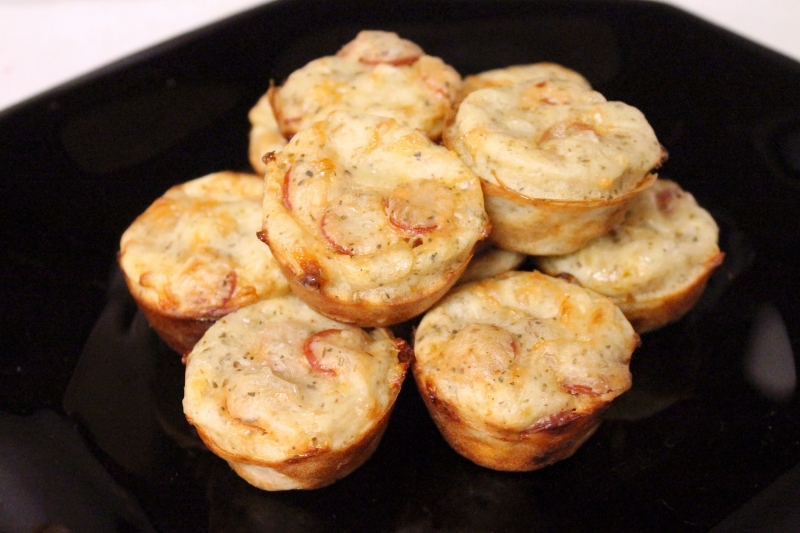
    Pepperoni Pizza Puffs

    It's been so long since I posted an actual recipe! This recipe is a rare instance when I tried tweaking things a few times (like adding a layer of sauce in the muffin), but apparently I didn't write any of my changes down. So I went back & made the recipe as-is, and it was perfect! You can serve them with a side of pizza sauce for dipping, but they are so tasty on their own, we never bother! These savory little bites are a crowd pleaser, and they are so easy to make, I always let my kids help.

    Pepperoni Pizza Puffs


    Pepperoni Pizza Puffs

    3/4 cup flour
    3/4 tsp. baking powder
    1 Tbsp. Italian seasoning
    1/4 tsp. salt
    1/8 tsp. red pepper flakes (optional)

    3/4 cup skim milk
    1 egg, lightly beaten
    1 cup mini pepperoni (or chopped pepperoni slices)
    1 cup shredded mozzarella cheese
    1/4 cup Parmesan cheese

    Pizza sauce or spaghetti sauce for dipping (optional)


    1) Preheat your oven to 375 F.

    2) In a large bowl, whisk together the flour, baking powder, Italian seasoning, salt, and red pepper flakes. Stir in the milk, egg, pepperoni, mozzarella, and Parmesan cheese. Let sit for 10 minutes, and grease/spray a 24 cup mini muffin tin.

    3)  Divide the batter evenly among the mini muffin cups, about 3/4th full. Bake until puffed and golden, about 20-25 minutes. While they are still warm, use a table knife to gently push them away from the sides of the tin until loose (they will stick if you let them cool.) 

    Saturday, March 5, 2016

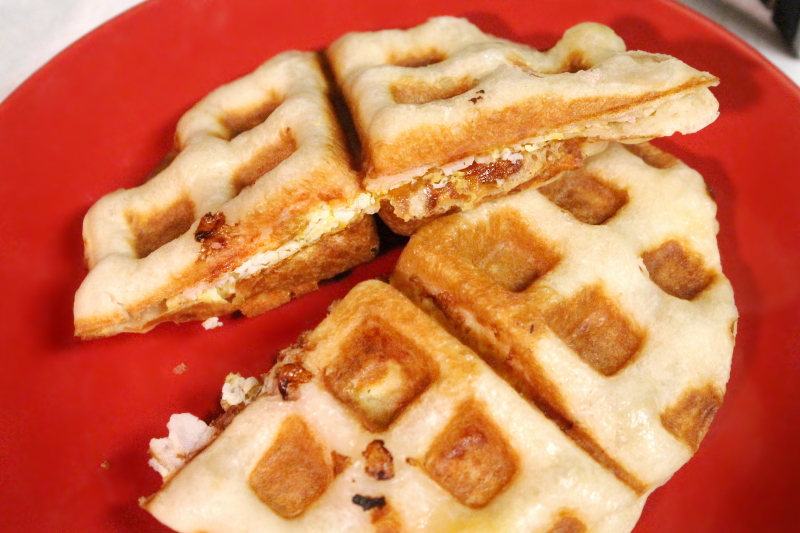
    Stuffed Breakfast Waffle-wiches

    I kind of hate one-use kitchen items, so I'm always thrilled to see people making unusual things in a waffle maker. I've been meaning to try a recipe forever ~ I think we might have tried crisping some mashed potatoes in there years ago with little luck? These Ham, Egg, & Cheese Biscuit Wafflewiches caught my eye recently & I couldn't wait to give them a try.

    Stuffed Breakfast Waffle-wiches

    First, scramble 6 eggs (to make 8 waffle-wiches) in a non-stick skillet and pre-heat your waffle maker. You'll also want some Grands Flaky Layer biscuits, sliced or shredded cheese, and some sliced ham or other lunchmeat.

    Separate a biscuit in half, and flatten each half a bit with your hands to stretch them out. Place them on a flat surface like your counter (or a plate or silicone baking mat) and press each with your fingers until they stretch out about 6" wide.

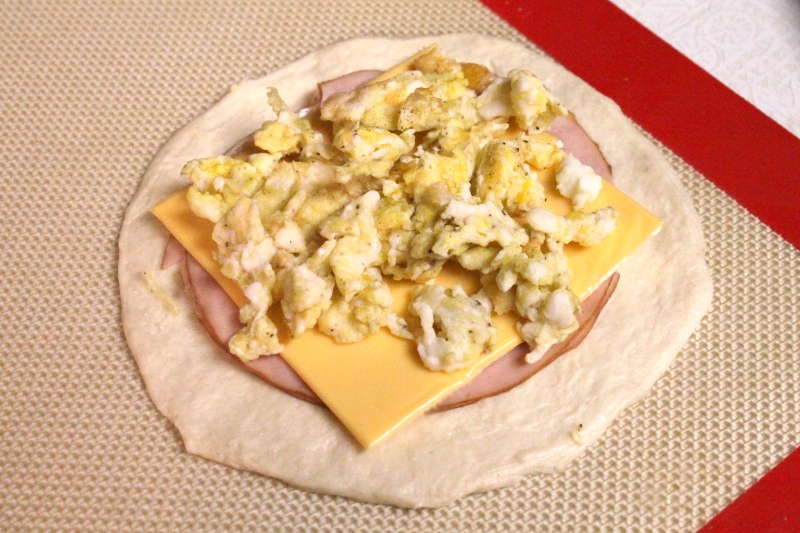
    Waffle-wiches - sliced cheese

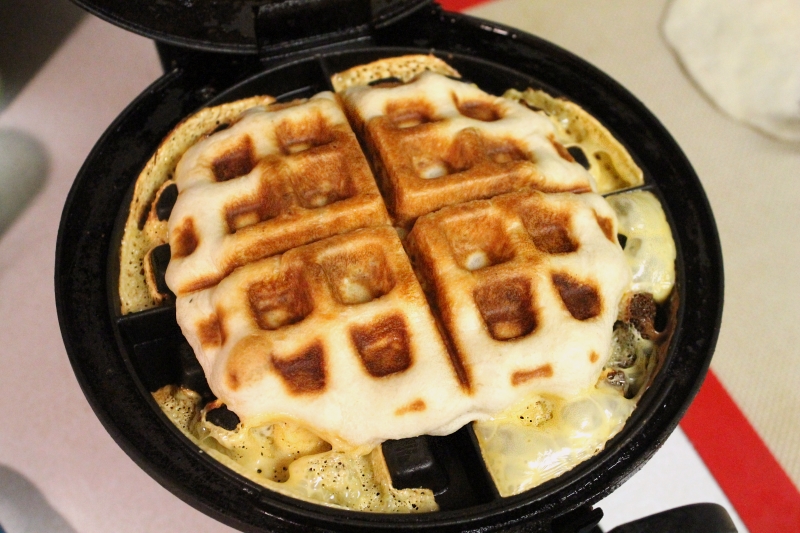
    On one half, layer some lunchmeat, cheese, and 1/8 of the egg. If you are using sliced cheese, avoid Kraft Singles or the cheese will all melt out of the waffle and burn no matter how well you seal the edges! We learned the hard way...

    Waffle-wiches - don't use Kraft singles!

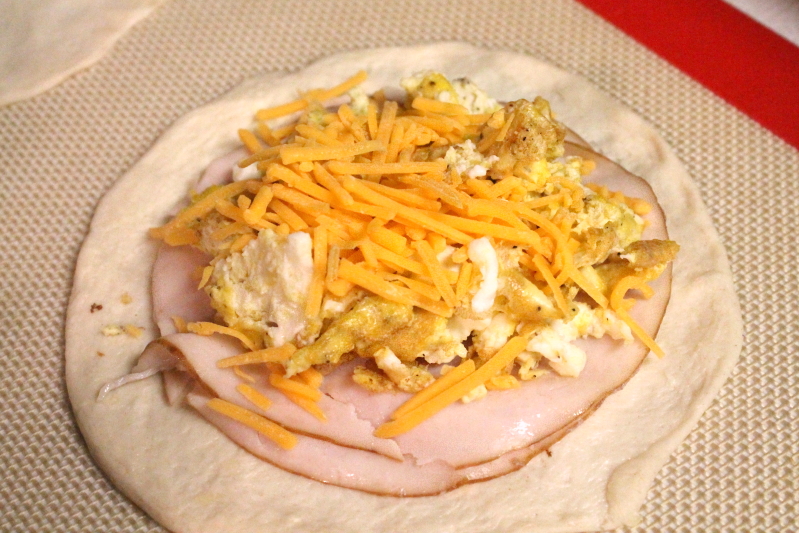
    We switched to shredded cheddar with no problems, but I'm sure normal sliced cheddar would work fine.

    Waffle-wiches - shredded cheese

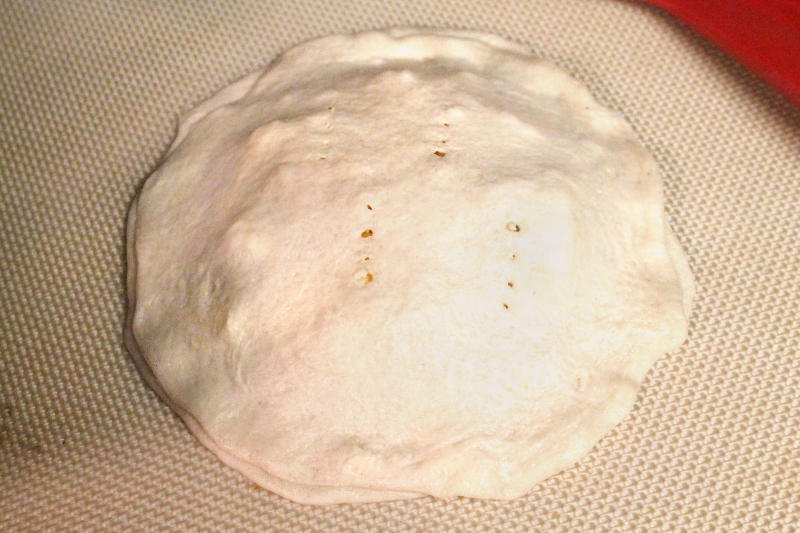
    Peel up the other flattened half of the biscuit & stretch it over the top, pinching the sides shut. Poke the top with a fork a few times to let out air when waffled. 

    Waffle-wiches - covered

    Spray the warmed waffle maker with a little cooking spray. Peel up the whole waffle-wich and set in the middle of your waffle maker. Close the lid (as far as you can) and cook until the indicator light goes off. Meanwhile, you can start stretching the dough and prepping the next one. Cut in half and enjoy!
    Stuffed Breakfast Waffle-wiches

    Each waffle-wich only takes about 5 minutes to cook, but it's going to take you a while to get through all 8, so plan accordingly. If you have leftovers, they warm up well in the toaster!