Showing posts with label home dec. Show all posts

Monday, June 6, 2016

The Painted Couch Project

Painting couches?! I know it sounds a little crazy, but it is possible. Painting our couch showed me that you can get a good result, but unfortunately ours was not a very good candidate for painting (I'll explain why below). The finished couch looks decent in the living room, but if you get up close, it has some flaws. I actually finished this project a long time ago, but was too bummed with the finished job to take pics.

And Target is pretty much to blame for the whole thing! It all started with this lovely settee that we ordered from Target's website ~ 

Target pic - Velvet Canary Settee

Now, I know color varies a little bit on your computer screen, but that picture was so far off the mark! Instead of a bright, vibrant yellow, we ended up with a pale, pastel color. See below. It's not a terrible color, but definitely not what I had in mind for the room.
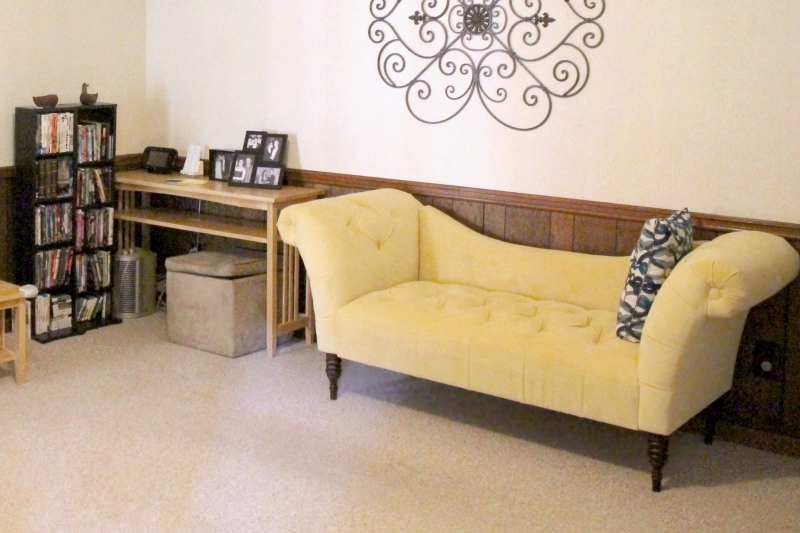
Couch, pale yellow, before

I hadn't really found any similar couches to replace it with, and I didn't want to deal with trying to ship such a huge thing back to return it, so I dealt with it. I thought maybe the color would grow on me, but weeks later I was still grumbling every time I walked past it. Finally I started doing a little research on painting furniture, and decided I needed to give it a try. It was a little nerve-wracking to test it out on a brand new couch (that we just paid hundreds for), but my research had me pretty confident about the whole project, especially since we just needed to change the color a little!
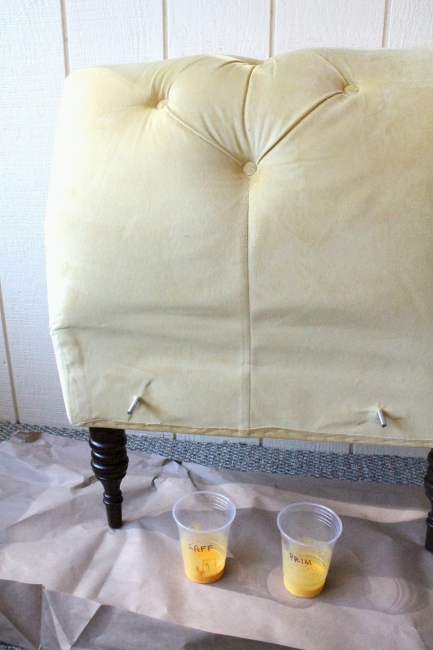
Painting couch, 1

First I perused the craft paints and picked out my favorite two yellows. I took apart the couch, tried them out on a hidden area, and was getting pretty excited. 
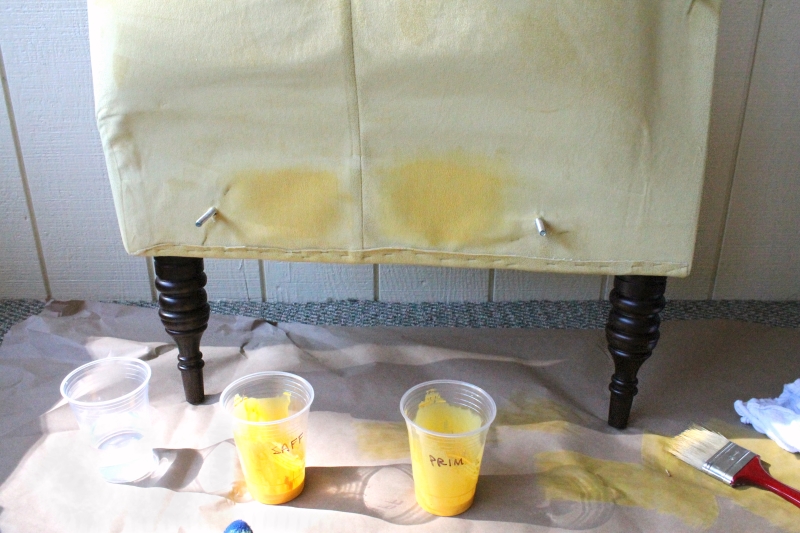
Painting couch, 2

From all of the tutorials I read, for each coat you want to mix 1 part paint, 1 part textile medium, and 1 part water. The textile medium makes the paint a little more flexible, and it will adhere to the fabric a little better. For the first coat, you may want to spray the fabric with water first, or use more water in your mixture. I didn't notice much of a difference at the time, so I skipped that step.
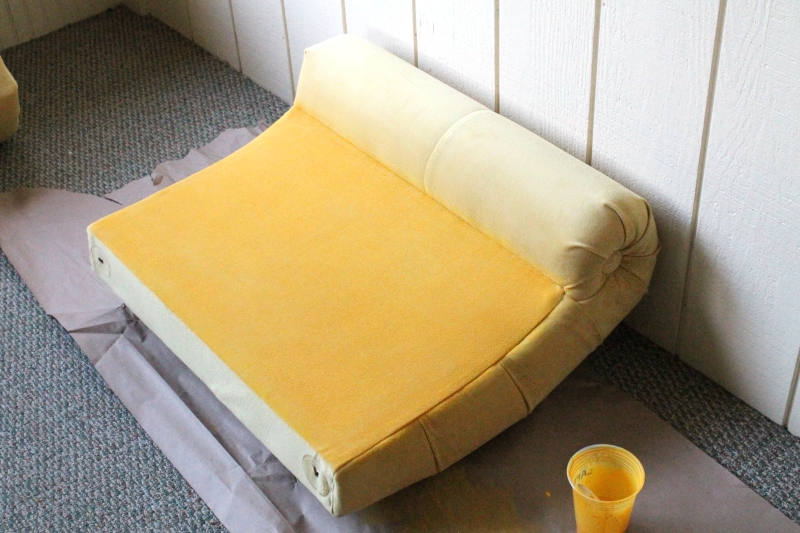
Painting couch, 3

Once the paint dries, you rub everything down with sandpaper to soften it up a bit, then do another coat or two until opaque. Simple enough? Naturally I had a few unexpected problems!

1) Hobby Lobby only stocked about 3-4 bottles of the yellow craft paint at a time, and it didn't take me long to get through those. The store wouldn't re-stock for a week, and sometimes missed a week (maybe I bought it after they'd sent in the order for the week). I checked the other craft stores in town, and didn't have luck with those, so then I started driving to every Hobby Lobby in nearby towns. I was having to hit store after store for weeks, and the project dragged on. I probably should have just asked the employees to order a big batch for me, but I kept thinking I only needed 4 more bottles & I'd be done (I was wrong again and again). In the end I needed about 20 bottles of paint, though I wouldn't have needed quite so much if I hadn't made a mistake (see #4).

2) Apparently velvet is not a great fabric to paint, with its longer, fuzzy fibers. This might not have even been a problem if the couch was mostly large, flat areas, because the flat back & sides of the couch turned out pretty nice & soft. But everywhere there was a pleat or tuft, I ended up with rough edges that would just not sand down to get soft. :( And with a tufted, velvet couch, I was pretty much doomed from the start!
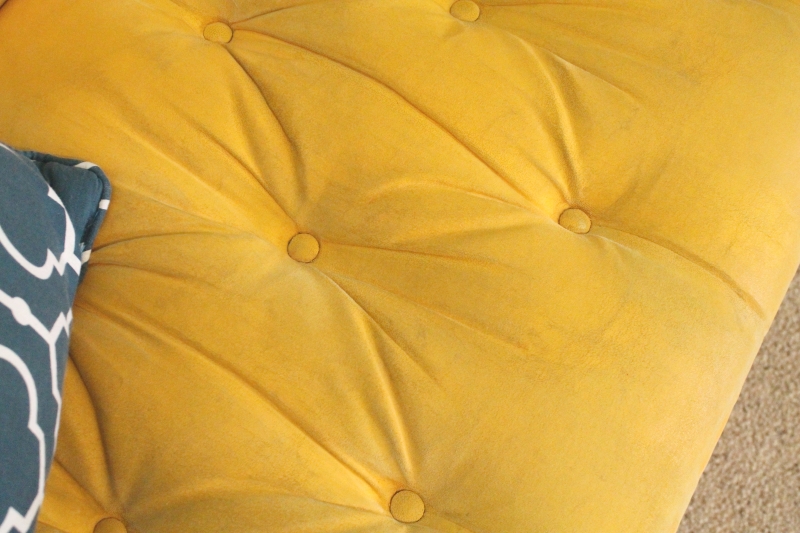
Painted couch close-up (dingy)

3) Since the tufted seat of the couch still had a lot of rough spots, I pulled out a coarser sanding block to see if that would help. Unfortunately all it did was leave a gray color on the fabric that I couldn't remove, making the seat area look pretty dingy.

4) After I'd done about 2 or 3 coats on the whole couch, and was ready to be finished, I realized that the paint had not gotten down to the bottom of the fibers, and the pale yellow was peeking through in some spots (especially in cracks along the pleats). Remember how I skipped that extra watery coat for the first step? Yeah, that probably would have helped it really sink down there. I ended up having to buy even more paint for another coat and really soaking the thing. 
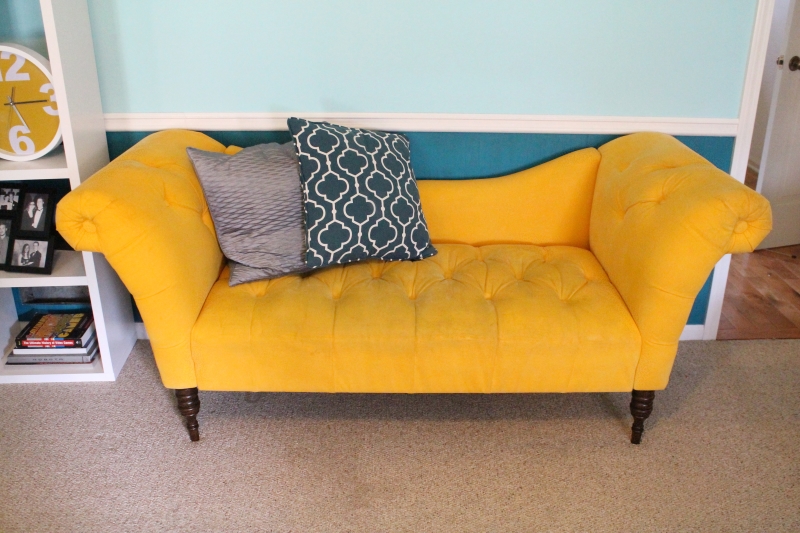
Painted couch

In the end, I love the color, and we do get lots of compliments on the couch. Just don't look at it too close! While the paint job is a little rougher & more uneven than I would like, I suppose I would be even grumpier with the couch if it were still that pale yellow color. But I don't know that I would recommend furniture painting unless it is a very flat, and not a plush fabric!

Tuesday, April 26, 2016

Office Space Makeover - Finished!
Last month I shared the inspiration pics for my office area makeover, as well as the furniture & supplies that I bought to start the project. And last week I posted about the decor & organizers I picked up for the new shelving. Well, I'm happy to say my pretty office space is all finished, and today I'm sharing a few in-progress pics as well as the final results.

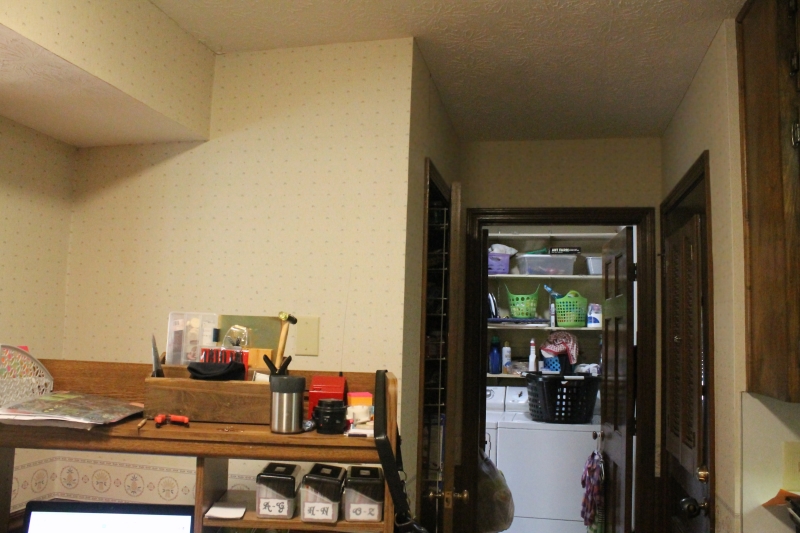
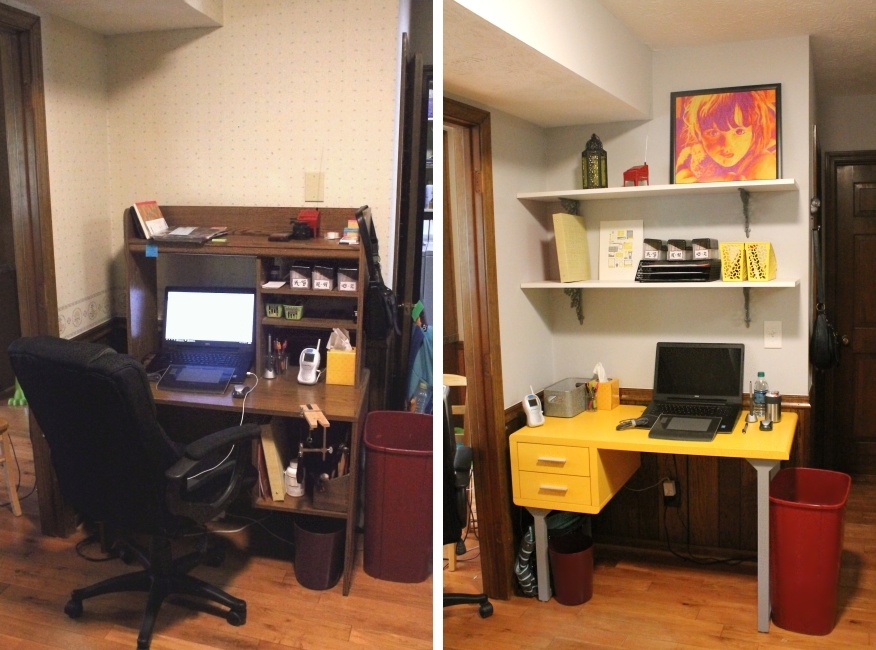
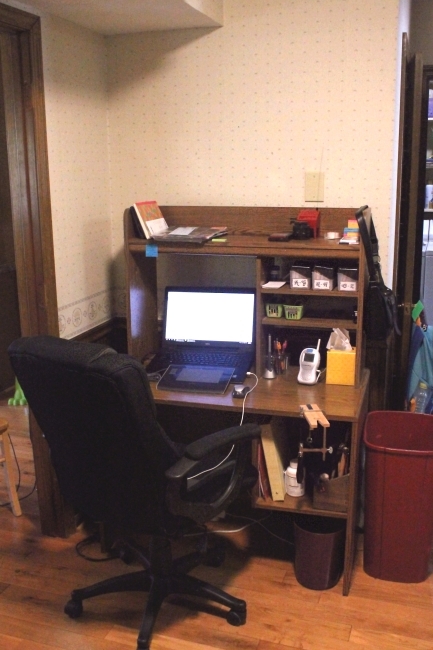
Once again, here is the before shot of my cluttered desk, in front of the old fashioned wallpaper. *shudder* ~ 

Desk, before

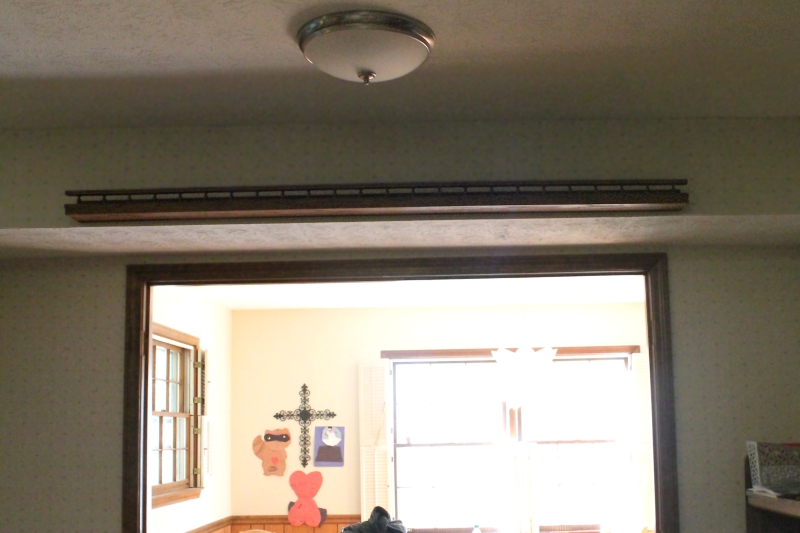
I really wanted to paint the wall before putting up my new shelves, but my husband was hesitant. So naturally I had to rip down the old wallpaper and get things rolling! First though, I had to remove this random long shelf over the dining room entrance. It might have been useful if I could fit serving platters up there, but it's so narrow & short you can only display tiny plates. 

Too narrow plate rail

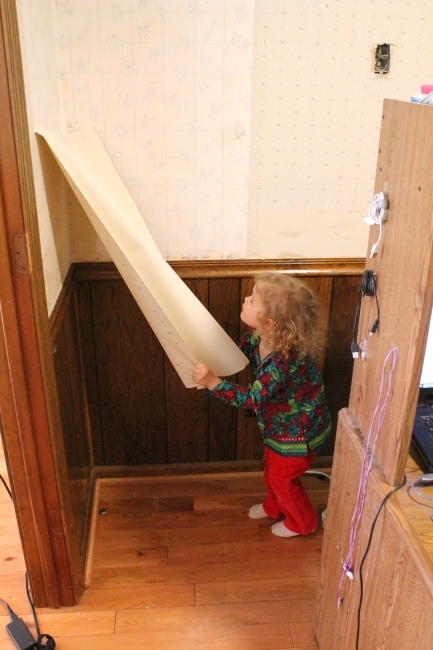
My nearly-3-year-old was very happy to help with the wall paper removal. She loves peeling! ~

Panda peeling wallpaper

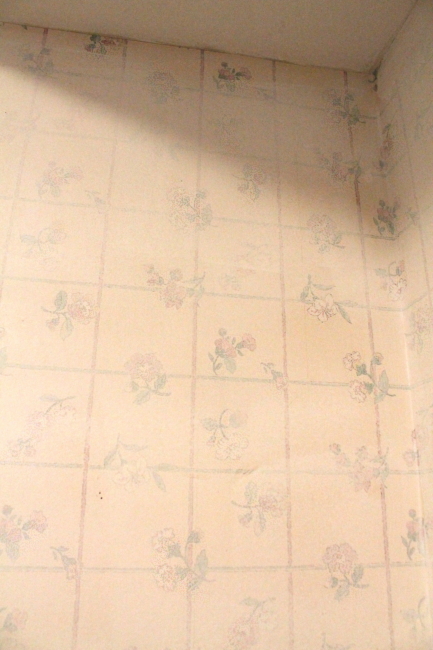
And of course pulling down one layer of wallpaper revealed an even uglier wallpaper underneath!

2nd layer of wallpaper

The 2nd layer of wallpaper was apparently impenetrable. I attempted to scrape some off, but to even remove a tiny bit meant completely marring the wall underneath, so I decided this was a case where we just needed to paint over it. I'm usually not a big fan of painting over wallpaper, but this is such a small area (and most of it is just above doorways), that seams are not going to be a big issue.

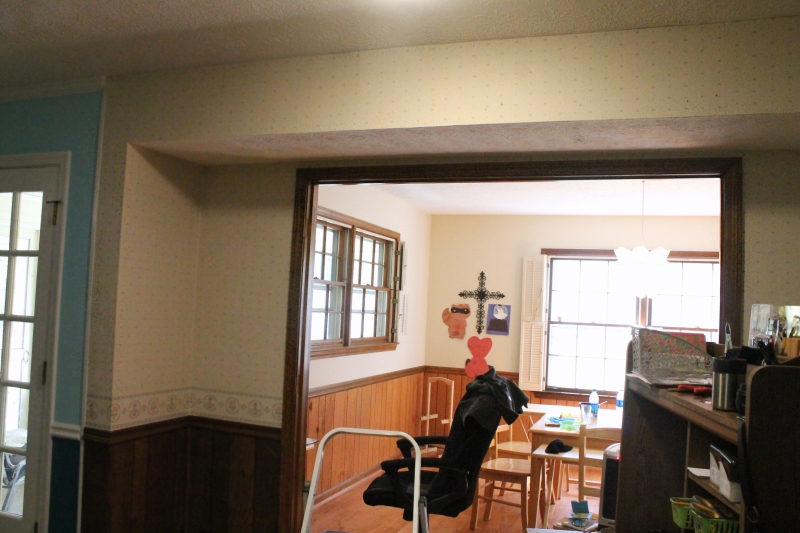
To show you the area I'm working with, my desk sits between the dining room and kitchen (with a nice view of the living room too). I'm painting around the door of our dining room...

Dining room entrance

then turn to the right & my desk goes on that left wall, and then you have this little nook with doors going to the pantry, laundry room, and garage.  ~

Desk wall & door nook

While we working on the walls,  my new desk arrived, and the kids had a great time un-packing the box!

3-16 Desk unpacking

They really wanted to help me assemble it, and we finished everything except the drawers before bed. But that gave me the perfect chance to add a special touch! I fell in love with the picture below and really wanted to add black stripes to the sides of my drawers ~ 


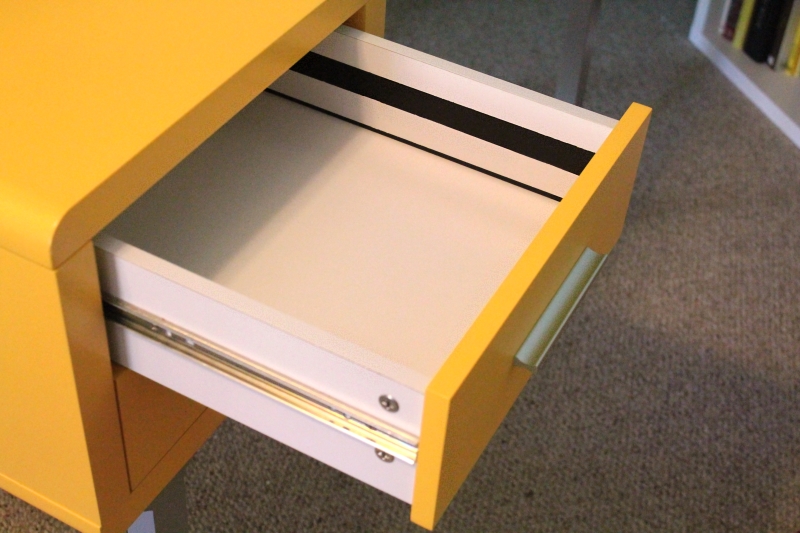
While they were still in pieces, I measured and taped off my stripes, and painted them in with some black craft paint. Unfortunately it turns out the outsides of those drawers look just like the *inside* of my drawers, so I didn't even realize my mistake until I sat down to assemble them the next day. So dumb!! (Also the outsides of my drawers have giant metal tracks on them, which pretty much throws out the stripe idea. Oh well!)

Drawer stripe fail

So, now that our house is covered in styrofoam packing bits, and we have two desks sitting around, let's get back to the walls....

After pulling down the 1st layer of wallpaper I washed the wall to remove the glue residue, puttied & sanded many holes, and then we applied 2 coats of Bullseye 1-2-3 water based primer to make sure the wallpaper pattern was well covered.

For the paint I chose a light gray - "White Metal" by Behr (mixed in the i300 flat base). Which looks nothing like this, of course ~ 


In the end I'm not loving my color choice. It's not terrible, but the gray has a slight purple tint in this room, which isn't great with all of the yellow details, and I wish it was a shade darker to pop more against the white. But it's going to be a long time before we'll have any interest in painting it again! 

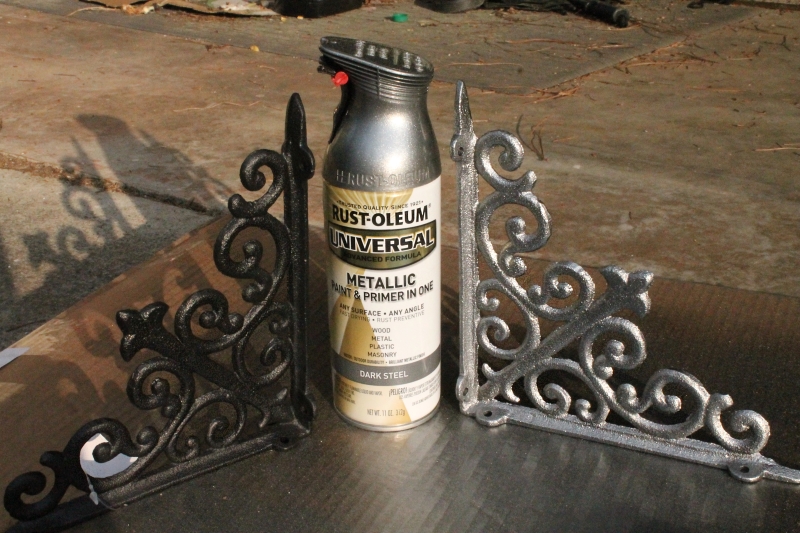
In between coats of paint & touch-ups, I also worked on spray painting some stuff. I had originally planned on painting the brackets yellow, but after a quick photo mock-up, my husband and I definitely agreed that would be too much yellow. Silver looked the best, so I grabbed my trusty Rust-oleum Metallic spray in "Dark Steel". I love this stuff!

Painted brackets

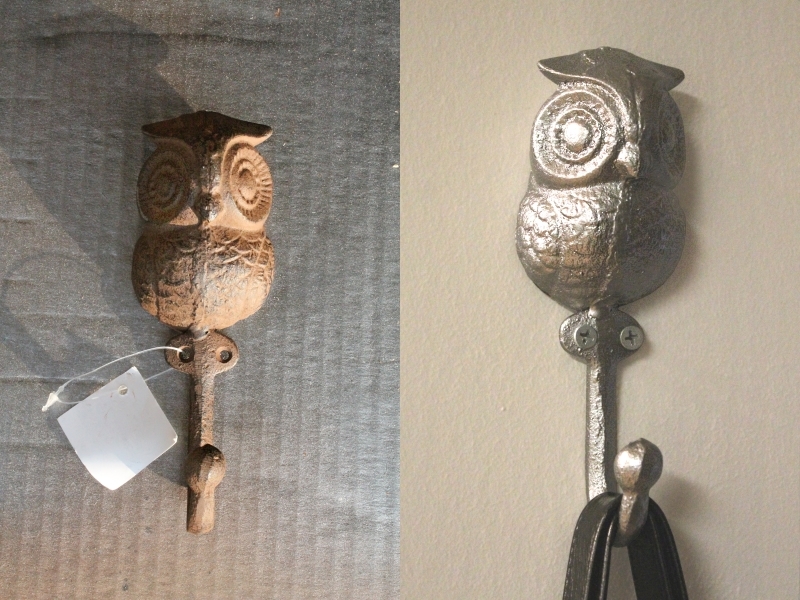
I also picked up an owl hook from Hobby Lobby to hang my purse on, and gave him the silver treatment too ~ 

Painted owl hook

And this is the part of the project where we had to visit Home Depot 5 times in one week, and every time I turned around we were spending another $20. Each bracket has 8 holes in it, so Justin had to buy a pack of screws for the bottom holes (deep) and another for the top holes (not so deep). I had to buy another gallon of the primer and another can of silver spray paint. The studs for our shelves were not where we expected them to be at all because that wall is where they built the expansion on the house, so we had to go back for some dry-wall anchors for one side. One of the brackets was a little warped (make sure to eyeball them!), so I picked up a new one. We needed new, white outlet covers and switches. And the original shelves I had delivered to the store were trashed, so I had to return those & buy a new set. Ugghhh!

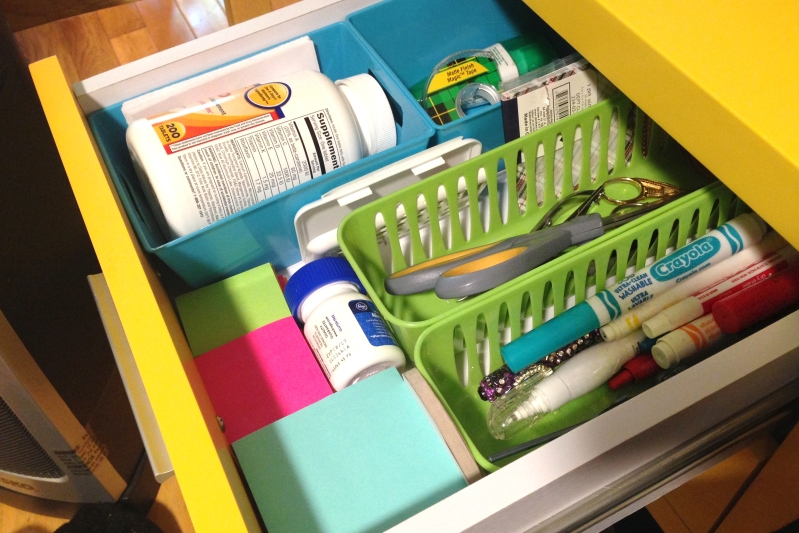
Once the brackets & shelves were *finally* up and the outlets were replaced, I worked on cleaning everything up and getting my desk in place. I arranged my drawers with some small dollar store bins I already had on hand. Not so glamorous, but free ~ 

Desk drawers

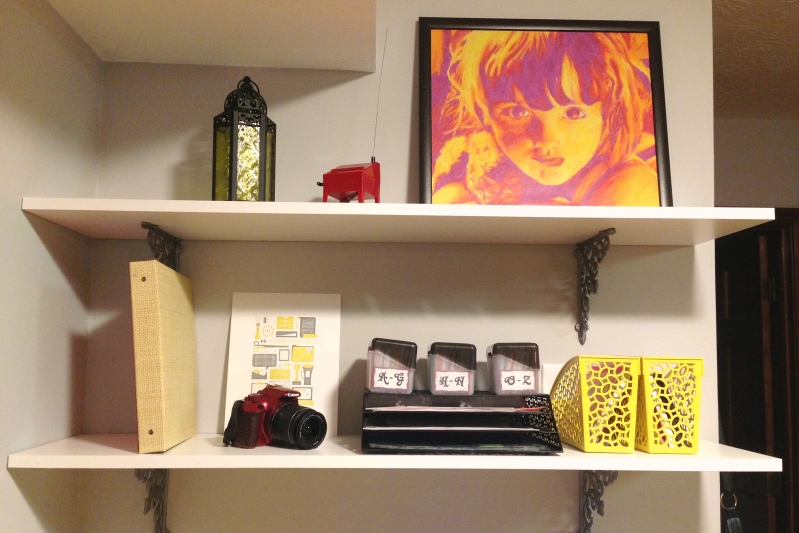
With that stuff stored away, we realized the shelves were really, really empty! Time to begrudgingly throw some more money at it. (Details about the stuff I got for my shelves here.)

office_shelves

Desk, fabric tote

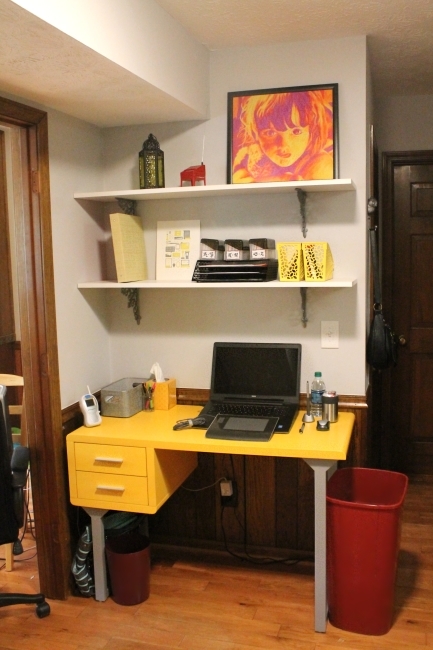
After some more touch-ups and a little caulk, everything was finally finished! 

I'm loving my pretty, new office space ~

Office area makeover

It's amazing how out of hand even a small remodling project can get, and we definitely felt like our house was upside down for a few weeks there. I'm so happy to have a desk again, and now I can even do crazy things, like easily unplugging my laptop, or using the light switch without taking something off the shelf, haha. Of course I still have a few small office items I'd like to add to it soonish, but for now I'm enjoying having a very functional and lovely work space for once!

Finishing off this project has also motivated me to get back into the living room and finally do all of the caulking and touch-ups I've been putting off in that room. The living room has been about 95% finished for months now, so I'm hoping to knock out the rest of those jobs soon and get another nice set of 'after' pictures. I want to paint everything!

And I'll leave you with a side-by-side before & after pic to enjoy!

Office area makeover - Before & after

Tuesday, April 19, 2016

Office Space Makeover - Decor & Organizers

We worked our butts off over Spring Break priming & painting the walls, then hanging the shelves over my new yellow desk. I am still waiting on one more thing to come in the mail before I can take the official 'after' pictures, so for now I thought I'd share some links for the decor & organizers I picked up along the way.

I was able to store most of my essentials in the two small desk drawers, but that left those new shelves very, very empty! I set out to find some new decor, but after visiting 7 stores, the only yellow thing I saw were some citronella candles. Such a hard color! Then I searched for about as long online and finally found this pretty Moroccan style lantern on Amazon for only $15 (click the pic for the link) ~ 


I poked around through my college artwork and decided to finally frame a pastel piece that's always been one of our favorites but has been tucked away all this time. I headed over to Hobby Lobby to get a frame, but of course the art ended up being an unusual size! I turned to eBay and picked up a custom frame from myusart*com for $25 (counting shipping). I ordered a custom frame from them for a small poster years ago and both frames turned out great.


While I was searching the stores for decor, I also had my eye out for a nice paper tray and a small tote (storage box) to help corral any clutter on my desk. Thank goodness I finally had some luck at Target and found both. I wanted a 3-tiered paper tray with narrow slots, and was about to buy this clear one from Amazon for $25. So of course I was thrilled to find this patterned one at Target for only $13!  


It's even a cousin to that yellow magazine file I was obsessed with, haha. I thought I might paint the black silver, but the lantern and frame added in some black, so it's looking good as-is.

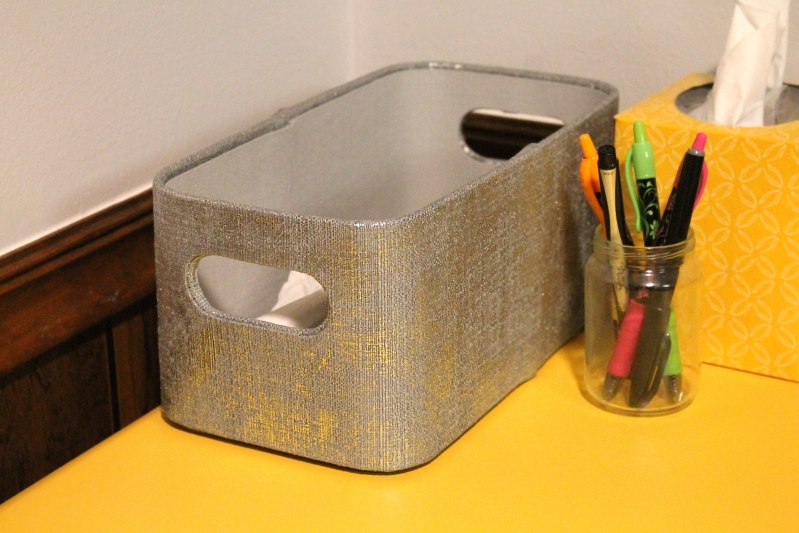
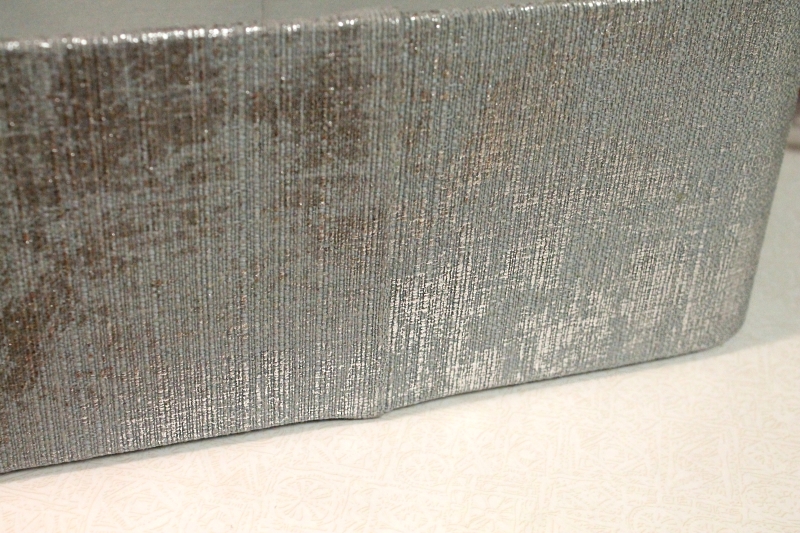
I also had a hard time finding a small tote that I liked because everything smallish had short sides. I wanted something a little taller that was going to hide my junk a little! This pretty $6 tote is covered in gray & silver woven fabric and the size is just right. It's not listed online, so you'll have to hunt for it in the store.

Desk, fabric tote

The metallic silver is reflecting yellow off my desk in that picture, so you can see the fabric better here ~ 

Fabric tote detail

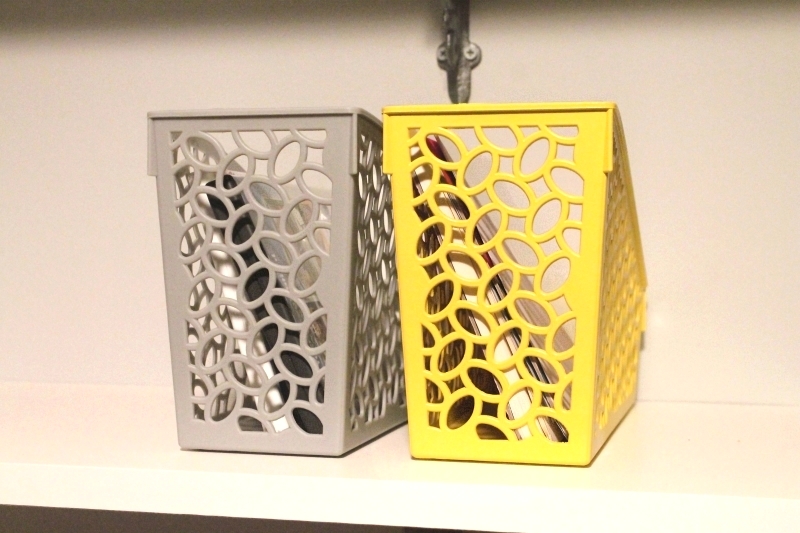
I grabbed those old plastic, gray magazine files I mentioned in the last post and gave them a good coating of Rust-Oleum 2X spray paint in "Gloss Sun Yellow". I was a little worried about the durability, so I thought I might just paint one to start with, but the yellow looked *so* much better that I painted the 2nd one right away.

Painted magazine files

And for my final splurge, I picked up this adorable letterpress print of office supplies in yellow and gray. I fell in love with it a while ago, but it took me a while to hunt down the source, and when I did I was bummed to see that it was $25. Not that $25 is pricey for an art print, but at this point I'd already spent *so much more* on this whole project than we intended, and so it went onto my wishlist. But of course, as I arranged all of my new goodies on the shelves, there was a perfect empty spot that really needed an 8x10 print. It was meant to be.


The print should be here in the next few days, and then I can finally take some pics of everything all together. 

Wednesday, March 30, 2016

Office Space Makeover - Plans


At the start of March I put about 200 items into a kid's consignment sale. I've sold through this sale twice in the Fall, but this was my first time doing the Spring sale. I've learned to start early and started prepping for it back in January, just sorting through boxes occasionally or stain treating & washing clothes. Surprisingly I didn't have a ton of clothes this year, so I dove deeper and started going through all of the toys, shoes, socks, bibs, baby carriers, blankets, etc. Some of those actually sold really well, and in the end I brought back considerably less stuff and just over $200!

Normally I would put that money towards new kid clothes, but naturally I also *shopped* at the consignment sale and had already bought them both new wardrobes. My husband wanted me to spend it on myself after all of the prep work I'd done, but I had recently bought myself some clothes as well. I decided the money would be better spent on a larger item, and it didn't take long to choose... I really needed a new desk!

Desk, before

My old particle board desk was handed down to us when we were married 11 years ago. And considering I work at home (and am an internet addict), this thing has gotten a lot of use! The desk worked great in my sewing workroom, but when I switched to ambigrams & we had kids, it moved out to a more prominent spot near our living room. While the desk is functional, it's not that pretty to look at. The open shelving makes it worse, since there is a lot of clutter going on, and the supports for the upper shelving make my workspace very crowded. I can barely plug cords into my laptop! I've wanted to replace it for years, but there is always an endless supply of more important things we need for the house. Finally, the time had come!

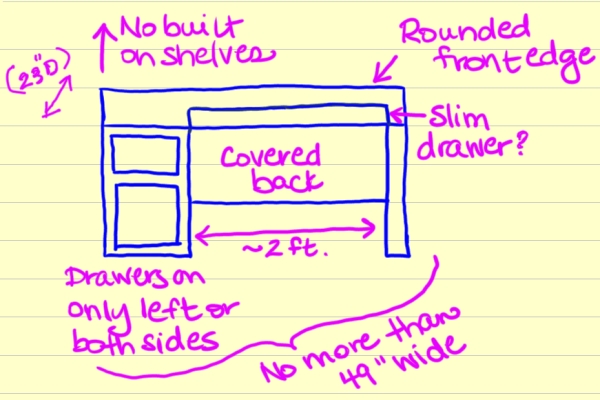
New desk plans

I'd previously planned out my ideal desk, and while I don't require much, past searches had shown me that it wouldn't be easy to find. My main requirements were drawers on the left side (or both sides), some leg space at least 2 feet wide (I usually sit cross legged in my chair!), no keyboard drawer above the chair, and overall not wider than my wall. Oh, and it had to have an interesting look and not be too pricey! I thought I might have to give up after I found nothing at Target, Walmart, Craigslist, or Wayfair, but I finally spotted this funky desk on Overstock (an exclusive item) ~ 


The yellow runs around $160-175, depending on the day. I used a 12% off coupon code & got it for about $155. It comes in teal and white too, which run a little pricier. I was also pretty impressed with this more traditional desk, but it looks like it's out of stock for good.

Along with a new desk, I needed to get some wall shelves to replace the attached shelves I was losing. I really love the look of 2-3 floating white shelves above a desk, like these ~


via "HGTV"

And they need to be topped with some color coordinated office supplies & deco! ~


Unfortunately, all of the 48" floating shelves that I found either had terrible reviews, were crazy high priced, or both. I decided I didn't want to risk it, so I bought these white melamine shelves from Home Depot, $17 each ~ 

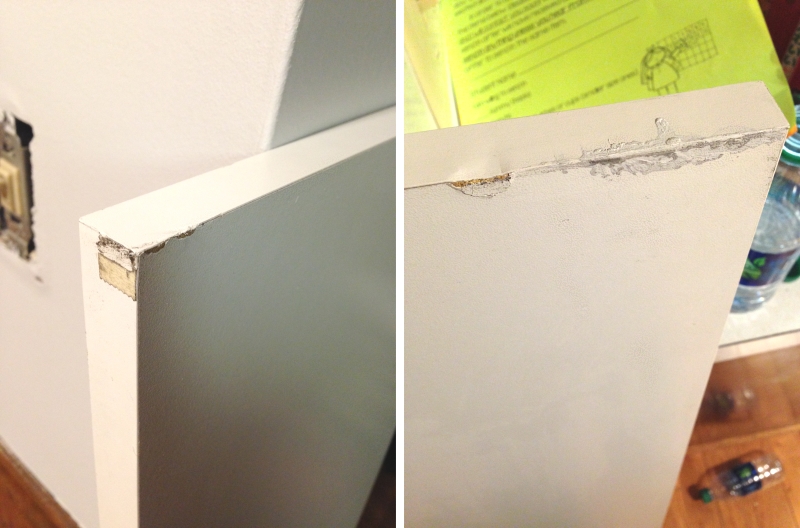
Edit: Do not buy shelves from HomeDepot.com!! They arrived covered in a thick layer of dust, banged up all over, and with black marks that wouldn't clean off. I ended up taking them back to the store, and found nearly identical 48" inch shelves in the store for $7.50 each! Less than half the cost! Ridiculous.

Shelves from HomeDepot.com

The brackets were a real challenge. I wanted something a little decorative, without breaking the bank. At first I was eyeing these wooden scrolls from Home Depot ($17 for 2), but then I realized that the scroll was cut out of a flat piece of wood & not carved with rounded edges like I was picturing. My next choice was these pretty silver art deco style brackets ($8 each) ~


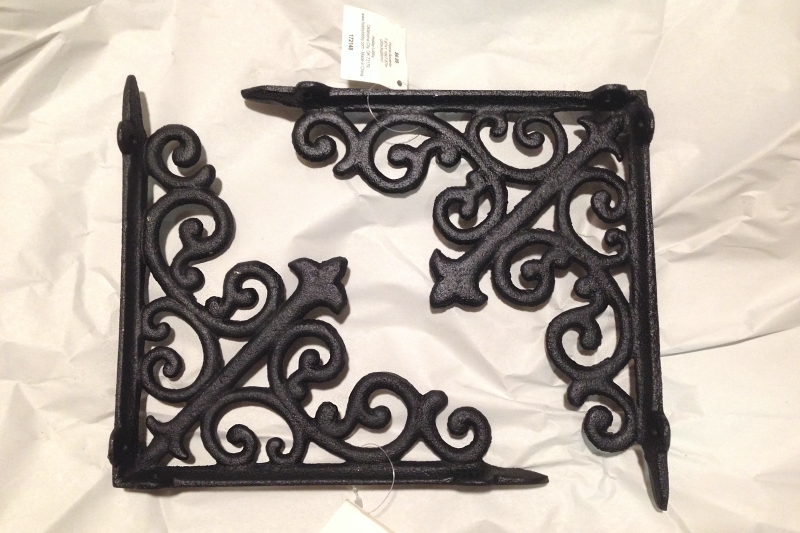
But I wanted to check Hobby Lobby before buying anything. They actually had a pretty good selection of cheap, ornate metal brackets, and luckily they were 50% off that week! I chose these for $7 each, $3.50 after the sale. Score! I'm planning on painting them either yellow or silver before hanging them. 

Metal Brackets

My current desk is normally quite cluttered, and my husband was a little worried when he saw the new desk only has two small drawers. I'm pretty excited about those two drawers though, since that will finally give me a spot for my pens, Pots-its, scissors, tape & such. I realized there is not actually a lot of stuff on my shelves, but the surface of the desk accumulates papers and random things. I'm definitely going to buy a nice paper tray and basket to collect those things.


I was super in love with this bright yellow magazine file from Target for $8, and the only other similar files I could find were $20 and the wrong color (and I didn't even like the design as much). It was only in stock at two stores though, so the next day I drove 40 minutes (with my two kids) to the nearest store, which now said "limited stock". It had apparently had been put on clearance and was nowhere to be seen. I begrudgingly drove another 40 minutes to the 2nd store, where it was still "in stock", but it was missing there as well. The employees were polite, but the only help they could offer me was suggesting I walk around the entire store to check the back of every aisle where they keep their clearance. Uggh! We went home exhausted and empty handed. In the end I remembered I had two plastic gray files I bought years ago at the Target $1 section with a decent pattern that I could paint, but if I had found that metal one on clearance for $2 it would have been glorious!

After I fill the drawers, I won't have much left to put on the wall shelves at all, so I'll need some pretty decorations. I'd like to do yellow, silver, and white, but I have a lot of red/burgundy things too, so I might add orange to help tie things together. Otherwise yellow + red is gong to make me think of McDonalds! I already know from our living room that yellow decorations are hard to find, so I might have to paint the yellow and orange stuff myself.

 I'd also like to rip down the wallpaper and paint the wall gray *before* hanging the shelves, but we'll see!

Wednesday, March 16, 2016

Staining a Mid-Century Modern Dresser

You may remember way back in September I used  Miniwax Polyshades to darken some nightstands for our bedroom. I actually bought a dresser at the same time as those, but after my horrible experience with the Polyshades, I was hesitant to start another staining project. 


This time I made sure to read lots of reviews and chose to buy General Finishes Gel Stain in Java, satin finish. And for the topcoat, an oil based wipe-on from the same brand, Arm-R-Seal Topcoat. I bought a quart of each, but ended on only using about 1/4, so you could definitely go with smaller size.

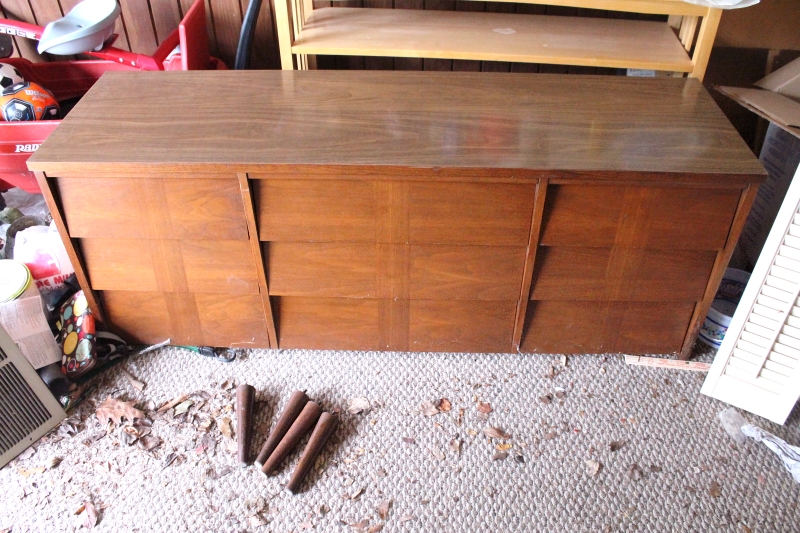
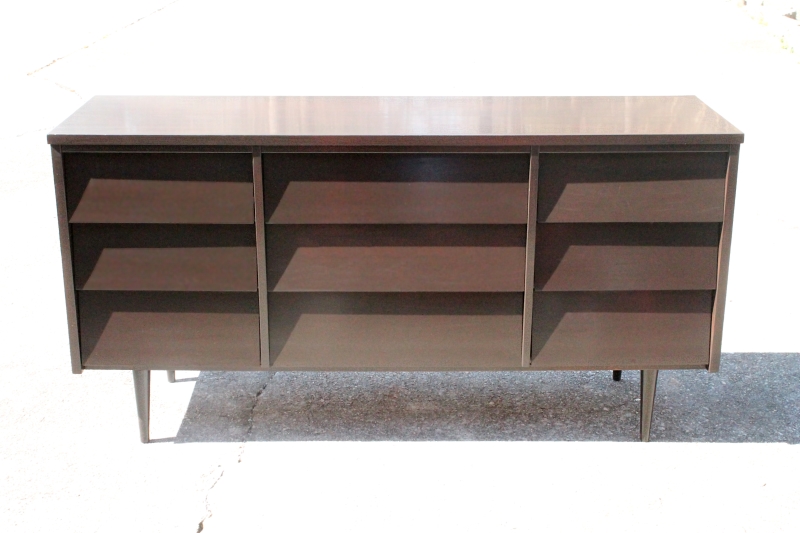
Here is the dresser after sitting untouched in our garage for nearly a year!

Dresser, before

I read & re-read this and this tutorial, along with the back of the cans. You'll want to start by giving everything a light sanding with 120-150 grit sandpaper, just enough to rough the surface up a little. Wipe off all of the dust with a cloth.

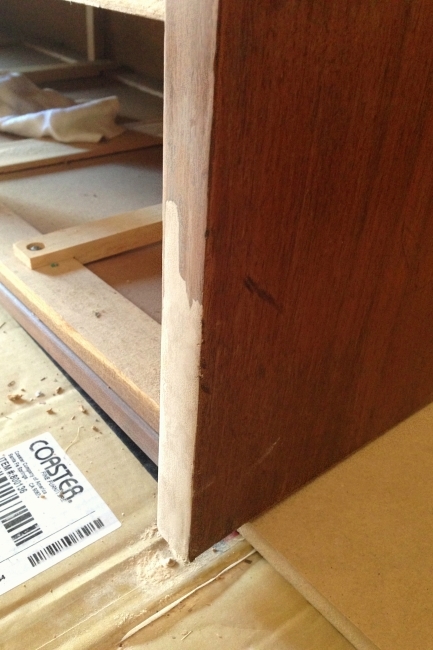
As I was sanding, I realized there were a lot of dings and nicks in the dresser, as well as a few missing chunks. They could probably be ignored, but I decided to do things right and filled them all in with wood putty and sanded them smooth before staining. Naturally this added many hours onto my project! The worst were two sections like this, where the paneling had broken off of an edge and had to be reconstructed ~

Dresser, missing chunk

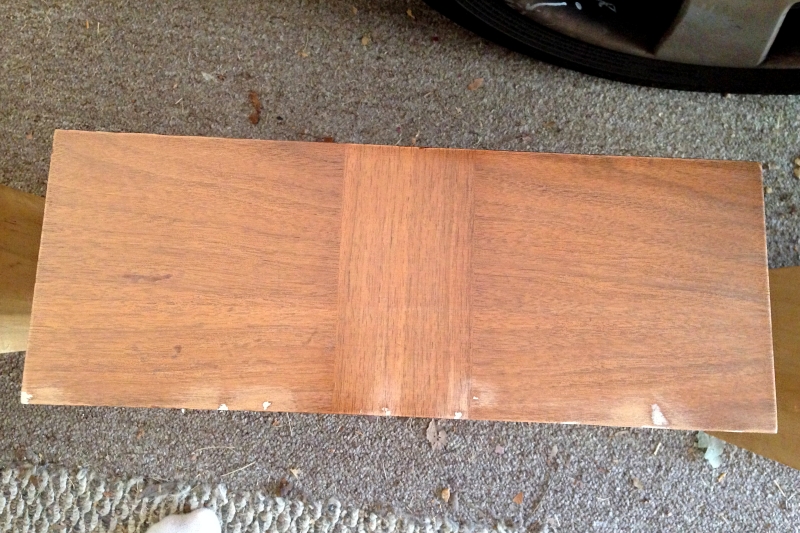
And most of the drawers had small nicks like this along the bottom edge ~

Dresser drawers, nicks

After everything is sanded and wiped clean, you'll want to stir the stain well, put on some gloves, and grab an old sock, t-shirt, or some other clean rag. The tiniest dot of stain will lightly darken the wood and cover your putty like this (stained on the right) ~

Dresser drawers, tint

I loved how smoothly it went on this way, without any trace of streaking, but after about 4 super light coats (drying 1-2 days in between) I realized I was not making much progress towards the dark, dark brown that I needed. I started dipping my hand in there a bit and slopping on a thicker coat of stain, and after 2 more coats I had that nice espresso color. I put one more thin coat on a couple of drawers that looked lighter and let it dry well for a few days before starting with the topcoat.


The topcoat went on smoothly, but I was unhappy with the light streaking I was seeing when light was reflected off the surface. This video came highly recommended, and he makes it look easy, but I tried out the type of rag that he uses and went back to a sock for the next coat. Supposedly the streaks are caused by going over the top with too much pressure, and in the end I got the best result by slopping on enough to cover the surface well, then wetting my sock/rag again with more topcoat and going over the surface as light as possible in the direction of the grain.

Dresser, sheen on top

I put on about 4 coats of the topcoat and the sheen on the drawers was fine, but the large top was giving me the most trouble. After two more coats I had one I was happy with, and I didn't mind the extra durability on the top! When the light hits from a certain angle you can still see some light streaking, but that ended up just looking like woodgrain. And honestly, it's dark enough in our bedroom that you would never be able to see that anyway!

The very top of the dresser was covered with some sort of laminate (or maybe something else, we have no idea!), but I'm happy to say the stain covered the wood and laminate wonderfully! The top is also the only spot I bothered lightly sanding between coats of stain or topcoat, just to remove any light bumps from dust that stuck on the surface.

Naturally it was very hard to photo the super dark brown, so here is one washed out shot to show the detail of the dresser ~ 

Dresser, washed out (for detail)

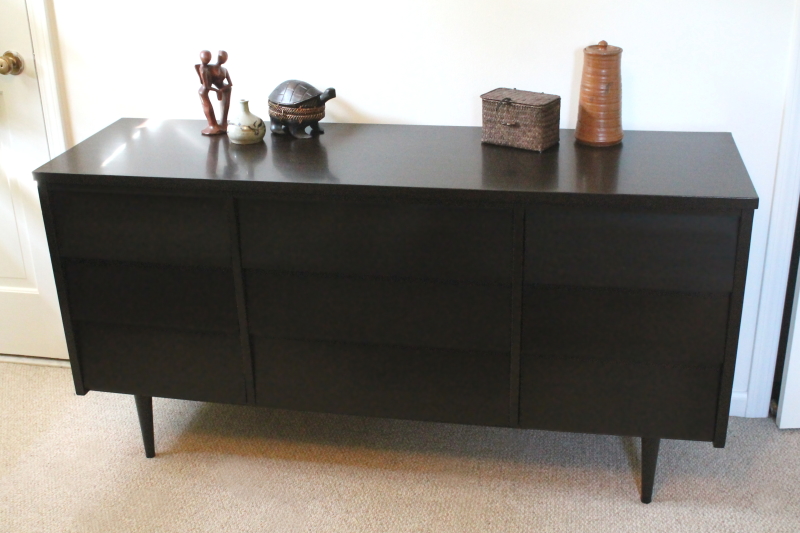
And a shot in our bedroom, with a few random things thrown on top. We definitely need some new knick-knacks!

Dresser, after stain

The stain and topcoat together ended up costing about $55, but I only used about 1/4 of each and have tons left over for other projects. We spent about $170 on the dresser, so we were very happy to add this retro beauty to our bedroom for less that $200. The General Finishes gel stain worked wonderfully, and the Arm-R-Seal was good, but I feel like there has to be something even better out there. In the end we were very pleased with the final results!