Showing posts with label getting things done. Show all posts

Thursday, September 22, 2016

Hectic September


This month has been insane! We managed to avoid extracurriculars until now, but this month Orson (1st grade) started soccer ~

9-16 Orson soccer

And boy scouts ~

9-16 Orson Cub Scouts

Our little Pandora started preschool (twice a week, 4 hours) ~

9-16 Panda's 1st day of preschool

We also started a small group at our new church, and I had to prep clothes for the Fall consignment sale!

Our calendar has basically exploded with meetings upon practices upon games. And the fees for everything have been ridiculous, because there always seems to be another one popping up that we didn't know about. (I'm looking at you, Cub Scouts! Somehow that jumped from '$65 for the year' to $220+. Not cool.)

On the plus side, orders have also picked up, which is busy-in-a-good-way!

Wednesday, July 27, 2016

My 1st Year of Packing Lunch

Before Orson started Pre-K, I worried about packing lunches for him everyday. I bought a lot of cute bento supplies & practiced adding a few cute touches... and made a few complex bentos, just for fun. Unfortunately Orson was not really excited about the intricate lunches, and often would not eat them. When we learned his Pre-K provided lunch, I was a little bummed, but relieved too.

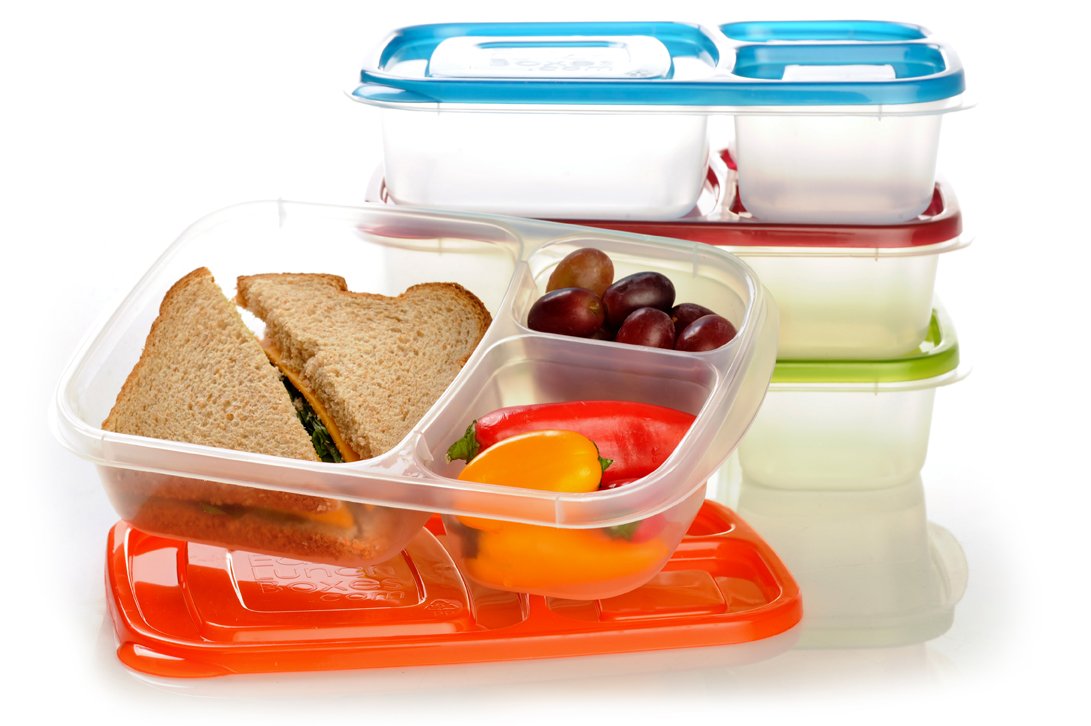
The next year he started Kindergarten, and I had to prepare again. After much debate I bought a set of Easy Lunch Boxes, because I liked that they have a few divided sections but only one lid for the whole box. (My son really loves that too.) I did have a hard time finding a lunchbag to fit them however, and really had to cram it into a standard size bag. The big box also left no room to add a water bottle, and I had to search forever for something narrow to fit in there.... And then it leaked several times and soaked everything in his bookbag, so I had to hunt again! (I finally found some small bottles from apple juice that fit OK, but by the end of the year I tried putting it in his bookbag pocket instead. Of course he forgot to grab it for lunch it every time.)


Unfortunately the standard lunchbags tip the Easy Lunch Box on its side, so putting cute bento-style details are pretty much out of the question because they would be instantly up-ended. Maybe one year I can find a lunch box with a handle on the top, but for now I'm getting two young kids ready in the morning and don't know that I'd have time to try anything creative anyway!

Once I had my lunchbox/bag situation figured out, it was time to plan the food! I started by making a list of everything I could think of that Orson will eat. Then I scoured some lists of lunchbox ideas, and added new ones to my list. I was planning on having him buy lunch twice a week, so I looked at the school lunch calendar and picked out two school lunches each week that he'd like, then filled in the calendar the rest of the way with lunches I would make.

The school cafeteria is on a three week rotation of lunches, and considering there are not *that* many things a 5 year old will eat, that ended up being perfect for my lunches as well. Bringing lunch three times a week, that means I needed 9 ideas for lunches to pack. I planned the main meal and veggie, but then would add whatever fruits we had on hand for the 3rd section. I was also pretty flexible with the schedule, rearranging meals if needed, or swapping something out if I was missing an ingredient.

So, here are the 9 lunches I made throughout the year!

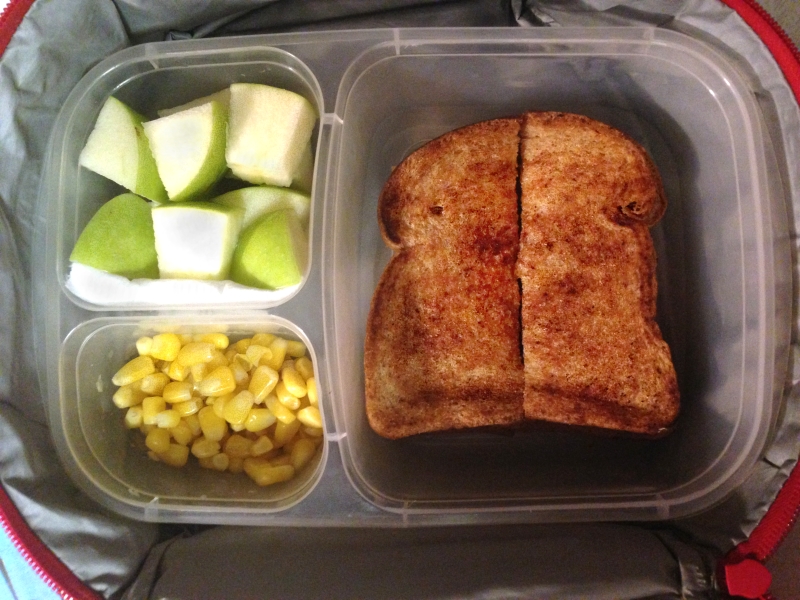
Grilled cheese with corn ~

Grilled cheese, apples, & corn

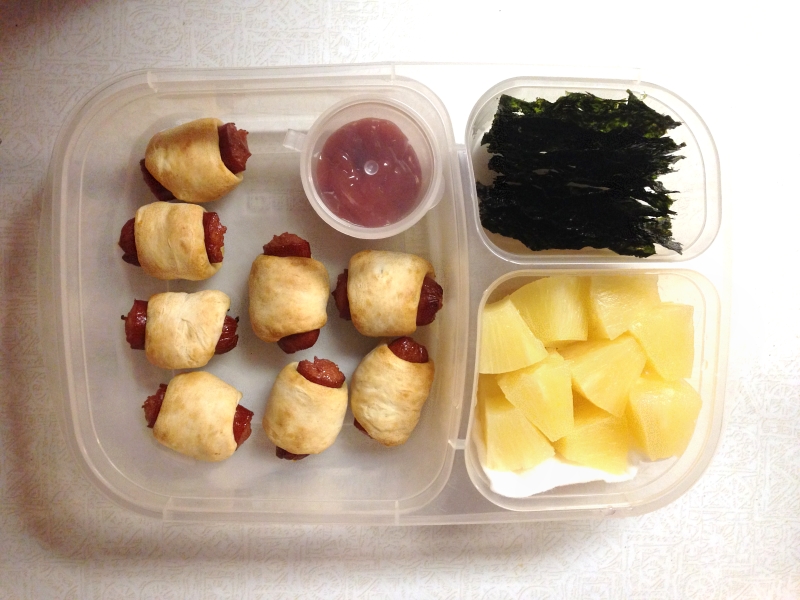
Pigs in a blanket with roasted kale (seaweed snacks pictured) ~ I started out buying cocktail sausages, but they are pricey and I never needed the full pack. After a few months I tried cutting up hot dogs instead, and 1/3 of a hot dog cut in half lengthwise work perfectly! I also stopped buying crescent roll dough and started thawing out 1 frozen Grand biscuit cut in 1/8ths. I hardly ever have extra kale on hand and usually ended up adding the seaweed snacks he loves instead. Kids love those things!

Pigs in a blanket, seaweek, & pineapple

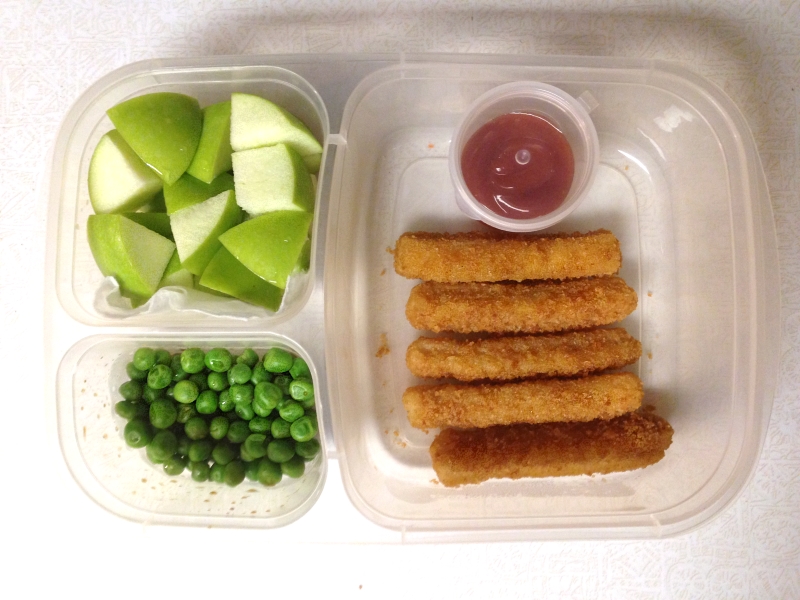
Fish sticks with green peas ~ I found the little container for the ketchup next to the salad dressings at our grocery store! Perfect fit.

Fish sticks, apples, & green 
peas

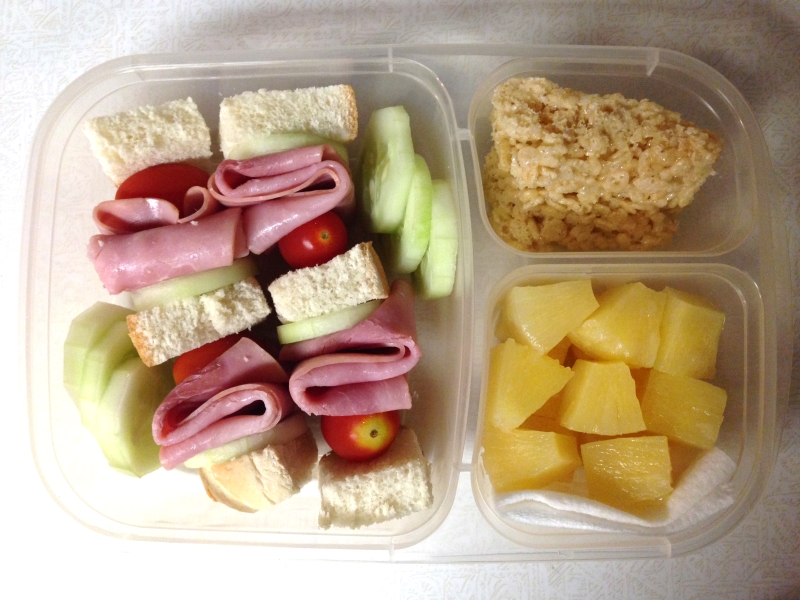
Sandwich on a Stick ~ Bread, lunchmeat, cucumbers, and mini tomatoes loaded onto skewers. A fun twist on a sandwich! If you want to add cheese slices, I found that it works best to cut a hole in the cheese slice with a straw first, or else the skewer hole cracks the cheese and it falls apart. I love that you can use pretty much any leftover bread (like hamburger or hot dog rolls) for these! He won't touch the cherry tomatoes, but I can't resist adding them.

Sandwich on a stick, rice krispies, & pineapple

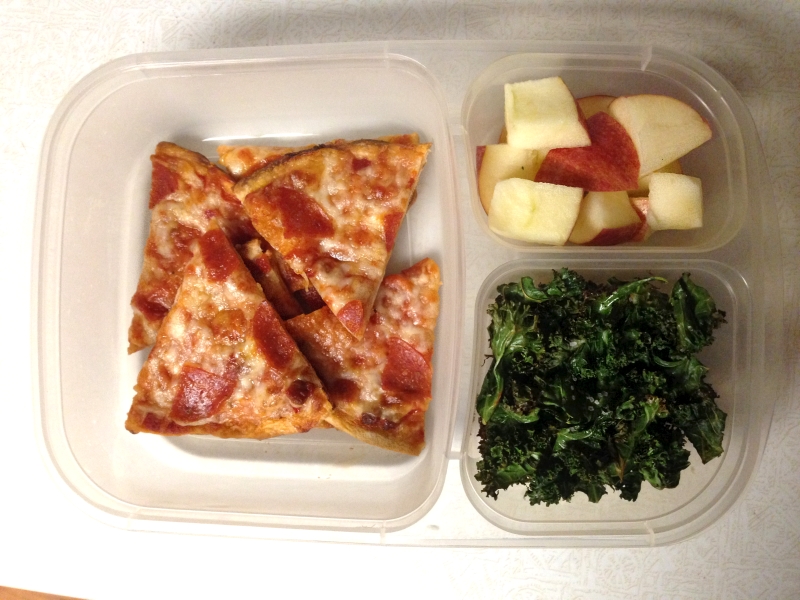
Mini biscuit pizzas with carrots & dip (roasted kale pictured) ~ 

Mini pizzas, apples, & roasted kale

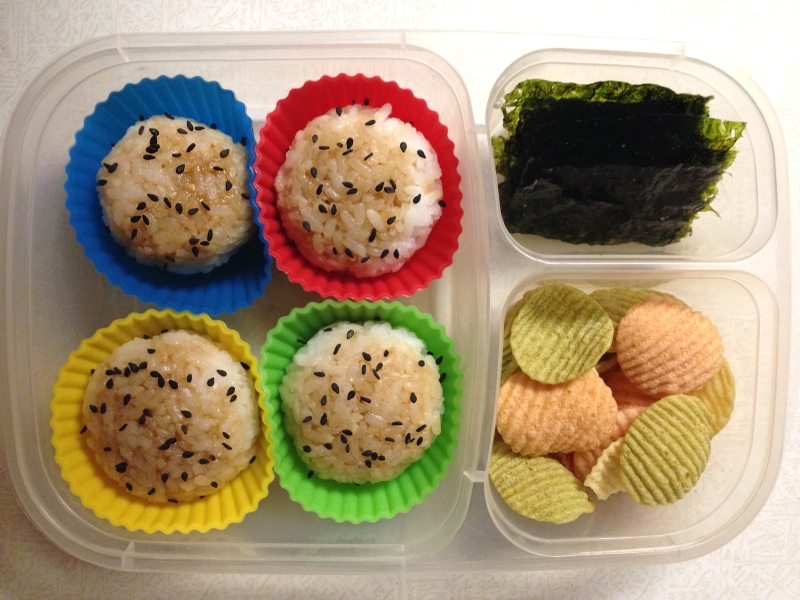
Rice balls with spinach goma-ae (seaweed snacks pictured) ~ At the start of the year, I made sushi rolls (with cooked imitation crab), but Orson got sick one day after eating them & then was afraid to eat them after that. I switched to stuffed rice balls, which is probably the most complex lunch on the rotation, but if you have the sushi rice & filling made ahead of time and frozen, each ball only takes a few minutes. I quickly learned not to try to do it all in the morning! That goma-ae recipe is a little different than mine, but I don't have mine written up yet. It also freezes well, I just ran out!

Stuffed rice balls, seaweed, & veggie chips

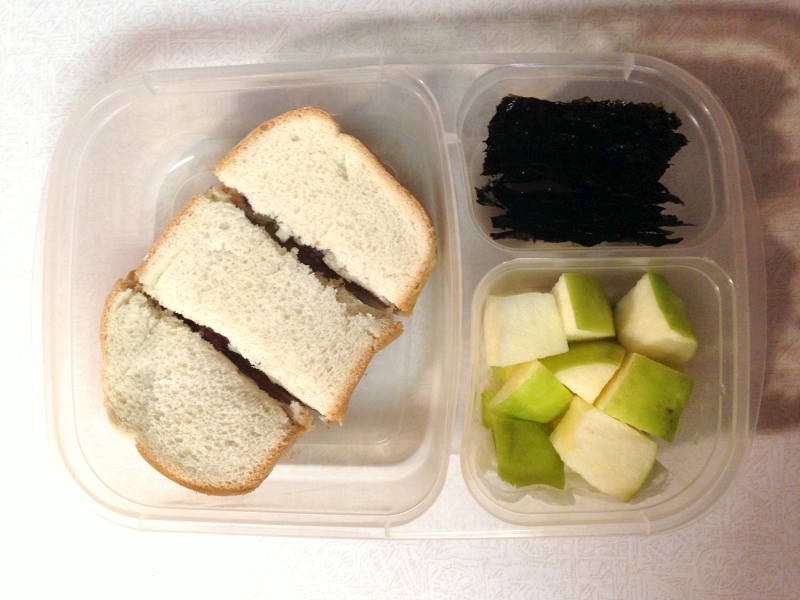
PBJ & seaweed snacks ~ 

PBJ, seaweed snacks, & apples

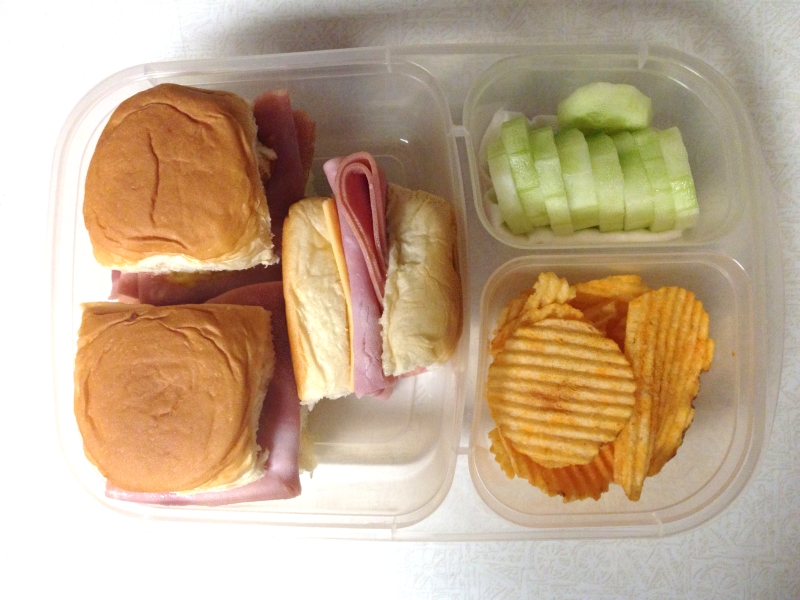
Mini sandwiches with cukes ~ Hawaiian rolls with lunchmeat, cheese, and mayo. Later in the year he had me start adding ketchup & mustard too.

Mini sandwiches, cukes, & chips

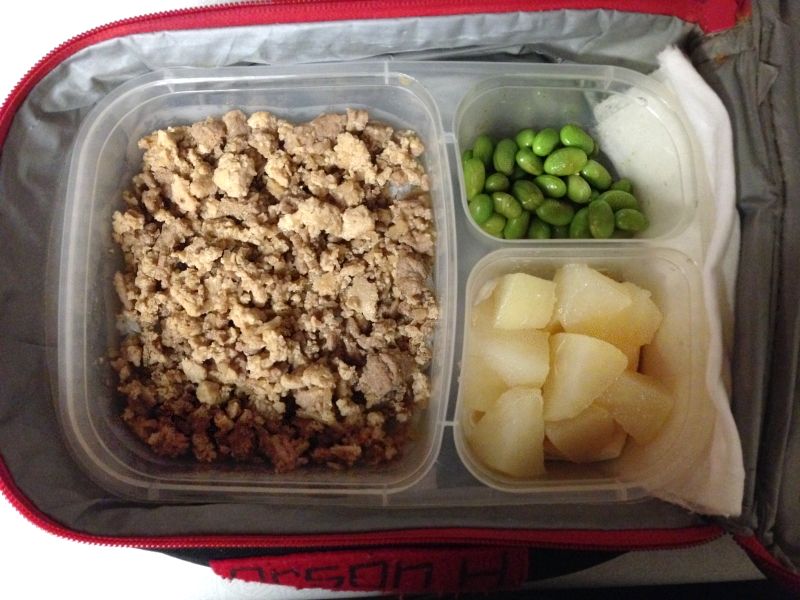
Tofuniku with edamame ~ Another Japanese recipe my son loves! The meat is simmered in a sweet sauce then served over rice. This is another one where I make a big batch and then freeze small servings for his lunches. I always try to keep frozen rice in the freezer too, and it tastes just like fresh rice when you reheat it.

Tofuniku, edamame, & pears

These pictures were all taken at the end of the year, and I packed in a few more sweets & chips than I normally would. Orson stopped eating pears, peaches, and oranges this year, so I'm having a hard time coming up with fruits for him! 

The Easy Lunch Boxes are not leak-proof, so any time I had something liquidy, I tried to drain it off as good as I could and then tucked a paper towel along the bottom edge of the box ~ 

Paper towel to catch drips in lunchbox

This worked pretty well, but the pineapple often leaked a bit and made his lunch box smell horrible! I started throwing his lunchbag in with our towel laundry (which soak in ammonia before washing). It does a great job of killing the smell. 

This year his 3-year-old sister starts 2 day preschool and will need to bring her lunch too. Unfortunately she hardly eats anything, and her school is nut free (no PBJs), so I have no idea what I'll pack for her! It's time to pull out the calendar and start planning again!

Monday, July 18, 2016

Rebate Apps & Coupons - 1 Month of Freebies


Last month I told you about how I started using a few rebate apps, which basically give you back money after you shop when you buy certain items - kind of like a coupon you use afterward. Even better, you can use the rebates on top of sales or coupons. Over the last month I've realized sales, coupons, and rebate apps are not that amazing on their own, but if you pair them together you can get stuff super cheap, even free! I've always loved a good puzzle, so I've been having fun looking for the best combinations.


Coupons ~

I've never been very good at coupons. I always go through the newspaper (and the Kroger digital coupons) and just clip the coupons for things we often buy. But then I either leave them at home, or the generic brand is cheaper, or I get all the way up to the register & forget to use them. I'm pretty terrible at keeping up with them, but seeing how you can match them up to get much lower deals has got me super motivated to use them now!

The best coupons are usually the ones from the newspaper, but you can also find tons of printable coupons on coupons.com. (Unfortunately there is no search, but chose "Brands" from the category drop down menu & you can see the coupons for each brand.) Printable coupons are especially nice when you are just starting out & don't have a lot on hand. Now I still clip my normal coupons for stuff we buy a lot, but I also clip anything that I wouldn't mind getting for free and sort those alphabetically so I can quickly check different brands when I see a sale or rebate.

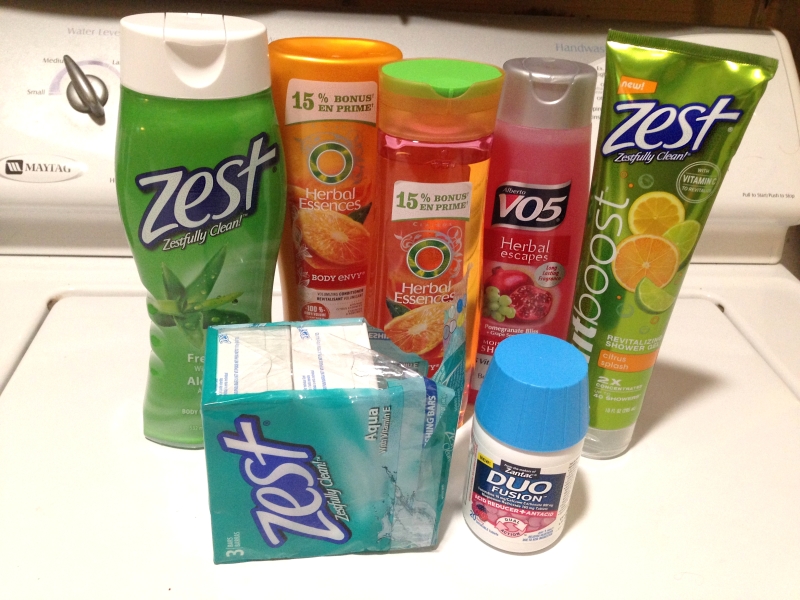
My first two weeks I had no idea what I was doing, but I did notice a few coupon/rebate 'match-ups' and got all of this for free (that's a 3 pk. of bar soap, but my husband snatched one already, haha) ~

Coupon Freebies - Week 1&2


Couponing Sites ~

After that I started looking around for sites that posted lots of match-up deal ideas. My favorite two places to look are Krazy Coupon Lady's freebies category and under $1. Souther Savers posts similar weekly list for grocery store deals here (she calls them "Top Acorn Deals" because she marks the best deals on her site with a little acorn icon). She also posts some of the top pharmacy deals here.

By week 3 I was finding lots of good freebies this way, and finally braved some of the pharmacy deals I'd been passing over before. I'll tell you about that next!

Coupon Freebies - Week 3

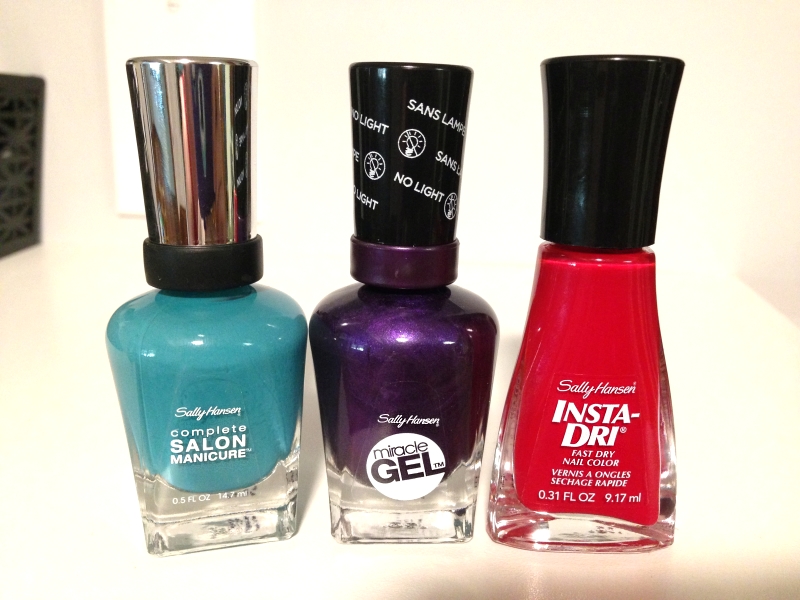
I couldn't resist going back for $25 of free nail polish ~

Coupon Freebies - Week 3


Pharmacies ~

I've always ignored the CVS, Rite Aid, and Walgreens flyers before, but if you look close you can find some unbelievable deals. I've found most of my freebies there! On lots of items you can earn 'bucks' or 'points', which you can either spend right away or on your next trip. They are also always running $5 off $15 type sales (that's the total before coupons), and they print out or email you similar coupons, both of which you can use together. Add some newspaper/printable coupons on top of those, and prices get crazy low. I recently found an awesome site where you can preview the pharmacy sales flyers 2-3 weeks in advance!

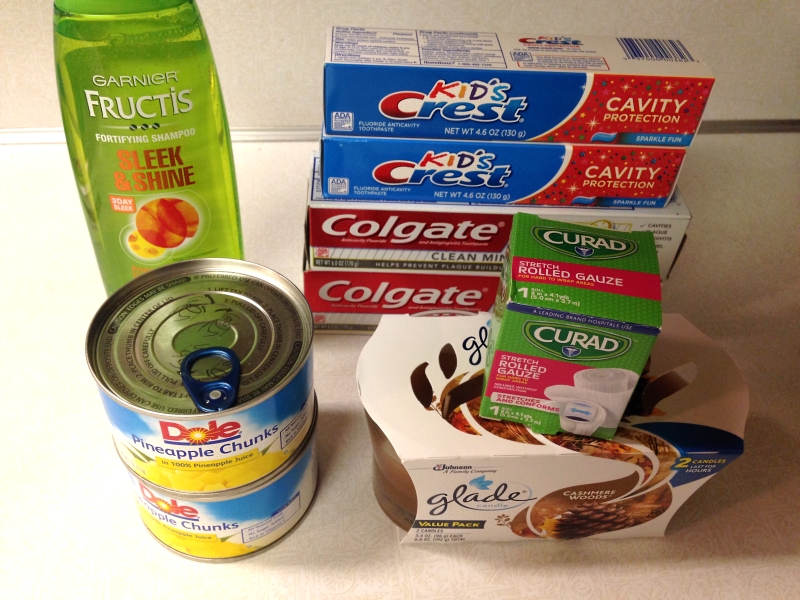
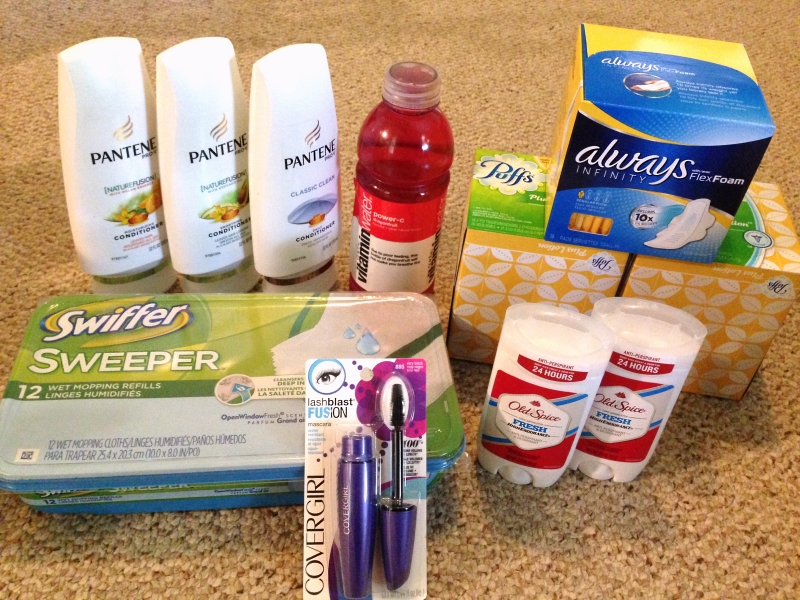
Two weeks ago the Proctor & Gamble coupon insert came out, and all three stores were running $10 off $30 worth of P&G stuff so you could match coupons with the sale. I got $36 worth of stuff for $8 (which is the cost of the mascara + the 20 oz., so I'm counting the rest as freebies!).

Coupon Freebies - Week 4

One problem with pharmacy deals and rebate apps is that you have to spend some money up front to get the money back later. This is rough when you are starting out! I figured out deals at both of the other pharmacies where I could have gotten another $30 worth of stuff for free, but it would have temporarily tied up $10-17 in reward bucks per store. Normally that wouldn't be a big deal, but my business has been super slow lately, so we're really having to watch what we spend.

But the big problem with pharmacies is that each of them have different reward bucks/points programs with different rules to remember, and sometimes more than one program at the same store! I'd avoided pharmacy deals before because I didn't know how they worked, and they really can be confusing! I keep a post-it with each store's guidelines written down so I can check them before I shop. If you go to either of those couponing sites I linked above, you can find info on how each pharmacy works, or I will probably do a post about them soon. If you don't want to bother dealing with the fine print, I'd stick to CVS, which is very straight forward with no weird rules.

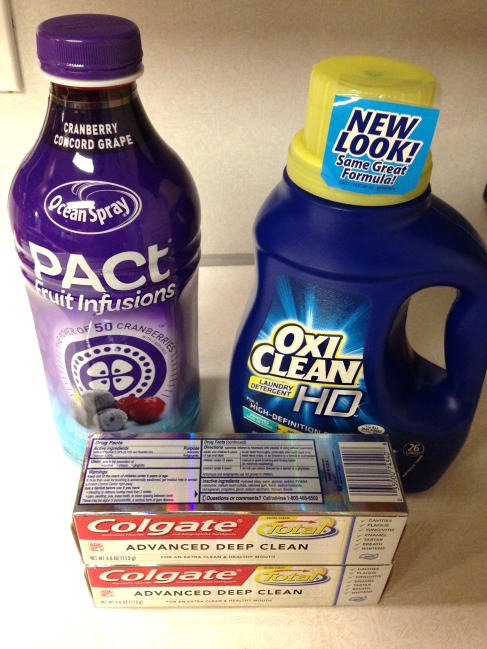
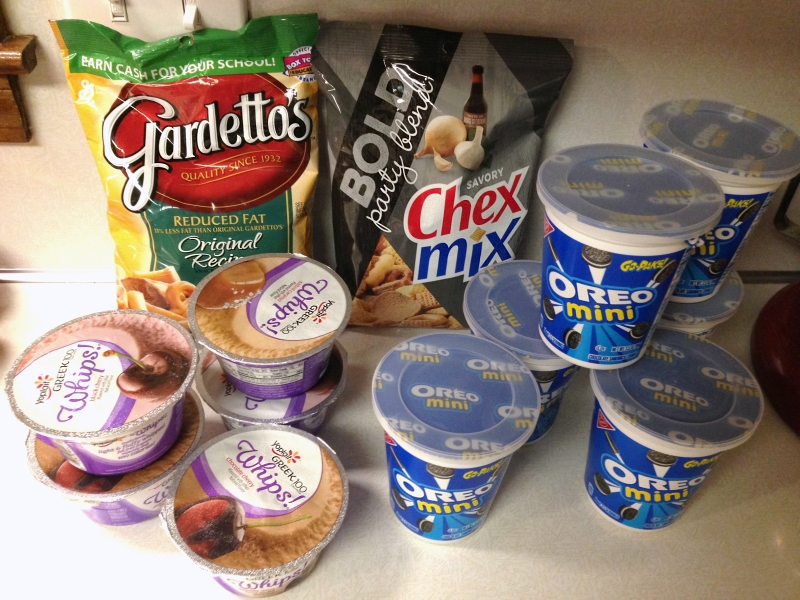
Coupon Freebies - Week 5

Last week we were on vacation, so I didn't have much time to go shopping for deals, but I did manage to snag some nice snacks for the road trip before we left!

Coupon Freebies - Week 5

Extras ~ 

One thing you've probably noticed is that you can get tons of shampoo, body wash, and toothpaste for free. Way more than you could ever use! I've started a 'freebie box' that my friends can pick out goodies from, and I'm hoping to donate extras to a food pantry or shelter. I've also seen some crazy low prices for diapers (like $2 or even $.50 a pack!), but unfortunately we *just* potty trained our youngest. Wish I'd known about these deals 6 years ago!

Thursday, June 16, 2016

Cash Back with Shopping Rebate Apps - Ibotta and more

At the start of the month I was flipping through an old Rachael Ray magazine and saw a mention of a shopping rebate app called Ibotta. Apparently it's been around for years, but this was the first I'd heard about it! I did some research before downloading the app and was quickly convinced to get it. I've had it for about 1 1/2 weeks, already earned nearly $35 (plus more on my husband's account), and have become a little obsessed!


Ibotta - 

How does it work? ~
Choose a store, choose rebates, go shopping. Afterward, scan the item barcode and take a picture of your receipt, and you'll get a credit in your account. Once you reach $20 you can cash out to Paypal or Venmo, or they have gift cards for Amazon, Walmart, Best Buy, etc.

Ibotta works at Walmart, Target, big chain grocery stores, pharmacies, and more. There are a *lot* of rebates (about 200-500 per store), so you definitely won't have trouble finding a deal! Some current examples include $3 off Luvs diapers, $1 off Bounty paper towels, $1 off Banana Boat sunscreen, $2 off Kotex tampons, and so on.

"Any Brand" rebates ~
One thing I was really excited about are the 'any brand' offers that rotate out each week. This week you can get $.50 off *any* gallon of milk, $.50 off a dozen eggs, $.25 off bananas, onions, tomatoes, etc. With 2 kids in the house we are constantly buying milk and bananas, so these can really add up over time! 

$10 bonus for signing up, $5-10 for referring a friend ~
Sign-up, use 1 rebate within the first week, and you get $10! You also get $5 every time a friend joins with your referral link/code, so when you sign-up make sure to find a friend that uses it and share the love (here's my link, or my code is nwhblwe). This month there was an extra $5 bonus for your first friend, so I had my husband sign up and we both made $10 from that.

Stack rebates with coupons & other rebate apps ~ 
You can still use a coupon at the store and then get the rebate after shopping. I'm not usually good with coupons, but this has got me motivated to keep my eye out for some great deals! (Check out coupons.com for tons of printable coupons!) You can also redeem the same receipt with multiple rebate apps, which I'll talk about below.

Just this week I found some overlapping coupons/rebates and was able to get a Zest body wash and a 3 pack of bar soap for free, a different Zest shower gel for free (I actually made $1.75 off that one), and found Glade candle 2-packs for $.88. I'm definitely going to start stocking up for teacher/birthday/shower gifts!

Bonuses & Teamwork ~
Other than the sheer number of rebates, another thing that sets Ibotta apart is the bonuses. There are a ton of extras that you can earn for buying certain combinations, like a $3 bonus for buying 3 items from the health & beauty section, or $.75 bonus for buying a Glade oil warmer and refills in the same trip. These are automatically added to your account so you don't have to 'unlock' them or add them yourself. 

If you find yourself using a lot of rebates, you may be able to get big 'teamwork' bonuses too. Your team consists of your friends on Facebook and friends you referred. If you use enough rebates (between 10-25 this month) and your team earns enough money ($15-30) you can earn a $10+ bonus each month! (The team bonuses are tiered, so 10 rebates and $15 team earnings will earn you $1, then 12 rebates and $20 earnings adds another $2 and so on.) If you want to build up a team, just ask for friends on the Ibotta Team Builder page and you will soon have plenty. I didn't want to add a bunch of strangers on my real Facebook, so I created a new FB page just for Ibotta and linked that to my account. But in the end it's easy to get a team that can earn the needed amount, the real challenge is meeting your own requirements if you want the monthly bonuses.

Search & website ~ 
Another thing that really makes Ibotta shine is the search bar. When you search it will pull up results from rebates, bonuses, and even store names, making it super easy to access anything quickly. Surprisingly *none* of the other rebate apps I tried even had a search option!! Though they do have far fewer rebates to search through (less than 100), it's still very annoying to have to scroll through the list every time. Ibotta does also have a website where you can browse & search through the rebates, though you can only load them on your phone.


Other Rebate Apps?
There are actually a lot out there! I wasn't really planning on getting more rebate apps, but as I looked online to find some good Ibotta deals, I kept seeing girls say they got another $1 off with this app and another with that app. I did a little more research and picked 3 that seemed to be the most popular & most rewarding. Time will tell!

While this one has far fewer rebate offers than Ibotta (about 90 this week), it is the largest of the other apps I tried. And there does seem to be a good amount of overlap with coupons, Ibotta rebates, and a couple of 'any brand' offers, which is what makes it really valuable. Once you reach $20 you can request a check, though I have heard it is slow to arrive! They add new rebates every Thursday, and seem to re-load the old ones, so you may need to select them again. They do also have a website interface, but there is no search bar or categories on either. (At least online I can easily drop to the bottom of the page and Ctrl+F to search the page!) So far in the last few days I've earned $6.75 (with a $3 bonus on the way). 

This app does does not offer quite as many rebates (about 60 this week), and frankly a lot of them are duds. They do have a ton of 'any brand' offers on things like clementines, bacon, deodorant and more (about 10 this week), though they each only give you a $.10 rebate. I believe there is also one free item posted each week, which can even make you some money if you find overlapping deals. Any money you earn is deposited instantly into your Paypal account. There is no website option, and no search bar, but you can at least browse through the rebates by category. This week I got one free item ($3) and about $.40 from 'any brand' rebates.

This app offers the fewest amount of rebates (40 this week), and most of them seem to be cumulative, like a $5 rebate when you spend $25 on Frito-Lays products (not all on one trip). Those bonuses are really only helpful if it is a product your family buys a whole lot of, but offers a nice bonus if you do (we might actually reach the Lays amount, haha). They do also have a weekly 'healthy' offer for 20% off a produce item, like cucumbers or mangoes. And about once a month there is a free item - this month it's a frozen pizza. You can cash out to your Paypal or bank account once you've earned $5. They do also have a website where you can browse and add the rebates to your account, and you can sort the offers by category there (not on the app). With all of the cumulative offers, I haven't earned anything on this app yet, though I'll definitely snag that free pizza that just popped up!


In the end, I'd say Ibotta is definitely worth getting, and you can really rack up some extra money with it if you use it regularly. The other rebate apps are a little hit & miss, though when they overlap with other deals, you can get items for a fraction of the price (or even free!). Let me know if you have a favorite rebate app I didn't mention here, or know if any good deals!

Monday, June 6, 2016

The Painted Couch Project

Painting couches?! I know it sounds a little crazy, but it is possible. Painting our couch showed me that you can get a good result, but unfortunately ours was not a very good candidate for painting (I'll explain why below). The finished couch looks decent in the living room, but if you get up close, it has some flaws. I actually finished this project a long time ago, but was too bummed with the finished job to take pics.

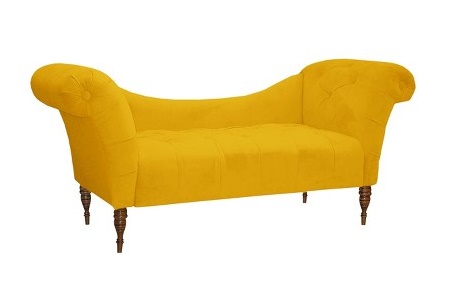
And Target is pretty much to blame for the whole thing! It all started with this lovely settee that we ordered from Target's website ~ 

Target pic - Velvet Canary Settee

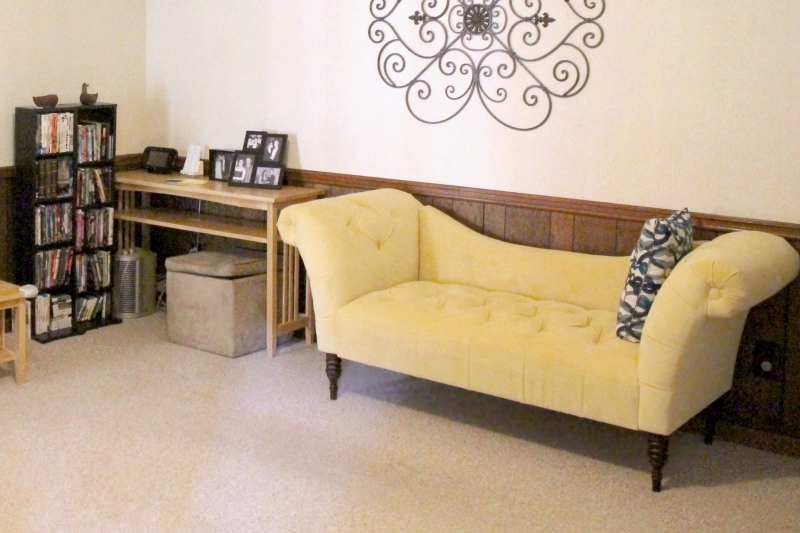
Now, I know color varies a little bit on your computer screen, but that picture was so far off the mark! Instead of a bright, vibrant yellow, we ended up with a pale, pastel color. See below. It's not a terrible color, but definitely not what I had in mind for the room.

Couch, pale yellow, before

I hadn't really found any similar couches to replace it with, and I didn't want to deal with trying to ship such a huge thing back to return it, so I dealt with it. I thought maybe the color would grow on me, but weeks later I was still grumbling every time I walked past it. Finally I started doing a little research on painting furniture, and decided I needed to give it a try. It was a little nerve-wracking to test it out on a brand new couch (that we just paid hundreds for), but my research had me pretty confident about the whole project, especially since we just needed to change the color a little!

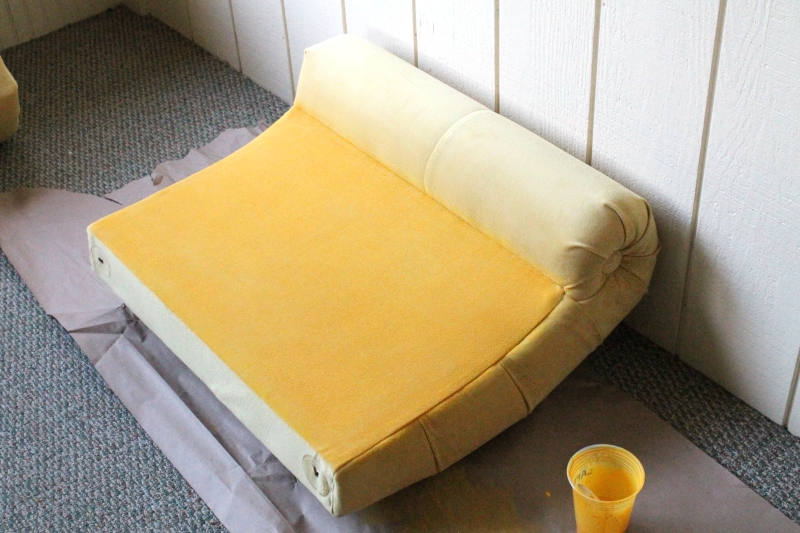
Painting couch, 1

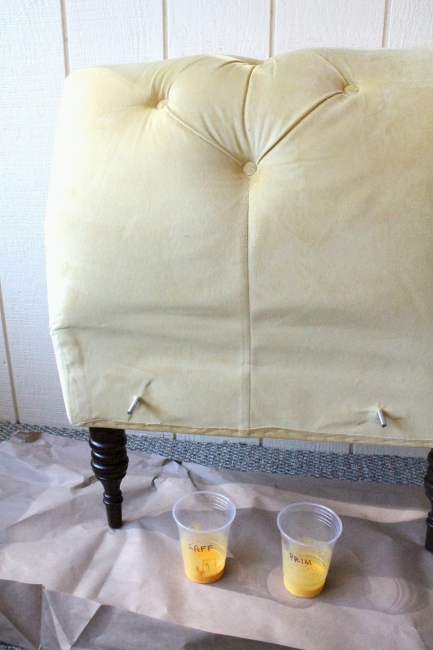
First I perused the craft paints and picked out my favorite two yellows. I took apart the couch, tried them out on a hidden area, and was getting pretty excited. 

Painting couch, 2

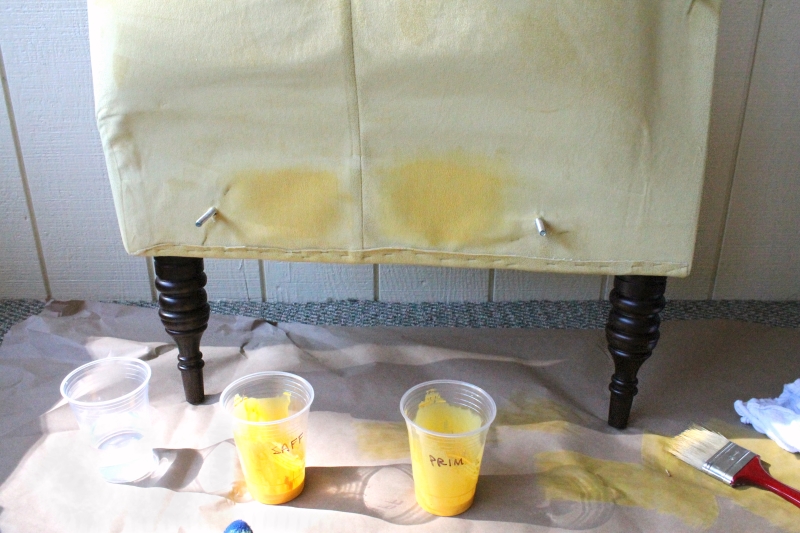
From all of the tutorials I read, for each coat you want to mix 1 part paint, 1 part textile medium, and 1 part water. The textile medium makes the paint a little more flexible, and it will adhere to the fabric a little better. For the first coat, you may want to spray the fabric with water first, or use more water in your mixture. I didn't notice much of a difference at the time, so I skipped that step.

Painting couch, 3

Once the paint dries, you rub everything down with sandpaper to soften it up a bit, then do another coat or two until opaque. Simple enough? Naturally I had a few unexpected problems!

1) Hobby Lobby only stocked about 3-4 bottles of the yellow craft paint at a time, and it didn't take me long to get through those. The store wouldn't re-stock for a week, and sometimes missed a week (maybe I bought it after they'd sent in the order for the week). I checked the other craft stores in town, and didn't have luck with those, so then I started driving to every Hobby Lobby in nearby towns. I was having to hit store after store for weeks, and the project dragged on. I probably should have just asked the employees to order a big batch for me, but I kept thinking I only needed 4 more bottles & I'd be done (I was wrong again and again). In the end I needed about 20 bottles of paint, though I wouldn't have needed quite so much if I hadn't made a mistake (see #4).

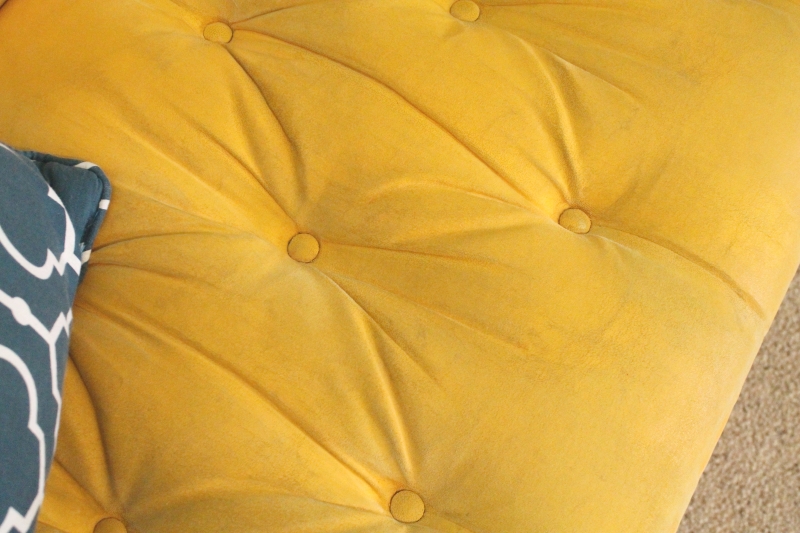
2) Apparently velvet is not a great fabric to paint, with its longer, fuzzy fibers. This might not have even been a problem if the couch was mostly large, flat areas, because the flat back & sides of the couch turned out pretty nice & soft. But everywhere there was a pleat or tuft, I ended up with rough edges that would just not sand down to get soft. :( And with a tufted, velvet couch, I was pretty much doomed from the start!

Painted couch close-up (dingy)

3) Since the tufted seat of the couch still had a lot of rough spots, I pulled out a coarser sanding block to see if that would help. Unfortunately all it did was leave a gray color on the fabric that I couldn't remove, making the seat area look pretty dingy.

4) After I'd done about 2 or 3 coats on the whole couch, and was ready to be finished, I realized that the paint had not gotten down to the bottom of the fibers, and the pale yellow was peeking through in some spots (especially in cracks along the pleats). Remember how I skipped that extra watery coat for the first step? Yeah, that probably would have helped it really sink down there. I ended up having to buy even more paint for another coat and really soaking the thing. 

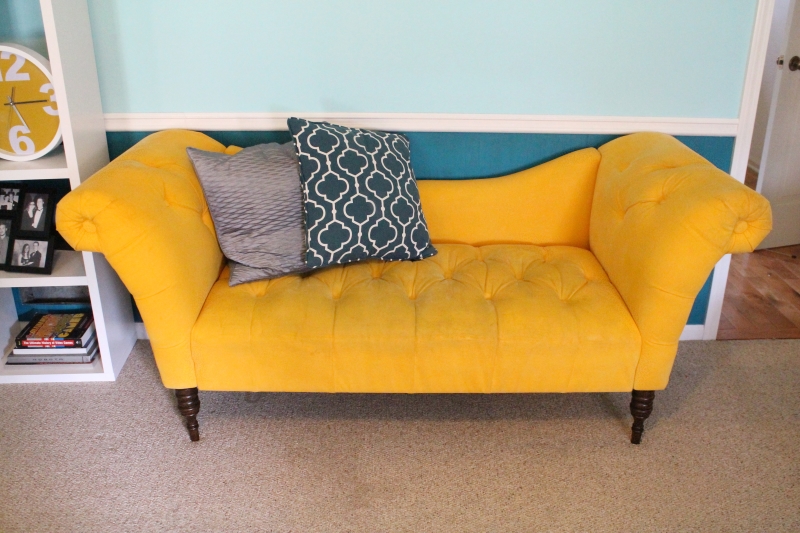
Painted couch

In the end, I love the color, and we do get lots of compliments on the couch. Just don't look at it too close! While the paint job is a little rougher & more uneven than I would like, I suppose I would be even grumpier with the couch if it were still that pale yellow color. But I don't know that I would recommend furniture painting unless it is a very flat, and not a plush fabric!

Friday, May 13, 2016

Easy Drip Pan Cleaning

Drip pans ~ you know those metal plates that sit under your burners to catch all of the spills? Ours get filled with burnt gunk so quickly, and they are a big pain to clean. Not to mention that it always tears my nails up trying to get the scouring pad in the nooks!

Recently my pans were at their worst! We hadn't had company over for a while, which means we hadn't cleaned for a while, and the mostly hidden pans were pretty low on my cleaning priority list. The worse they got, the more I put it off, because I knew how tough they would be to clean. I hate throwing salvageable things away, but at that point I was about ready to just break out a new set and toss them.

Pinterest to the rescue! Most of the links recommended stuffing them in a big Ziplock with a little ammonia and letting it sit for 24 hours. I tried it out with my absolute worst drip pan, and the next day it was a beauty!!

Easily clean drip pans, before & after

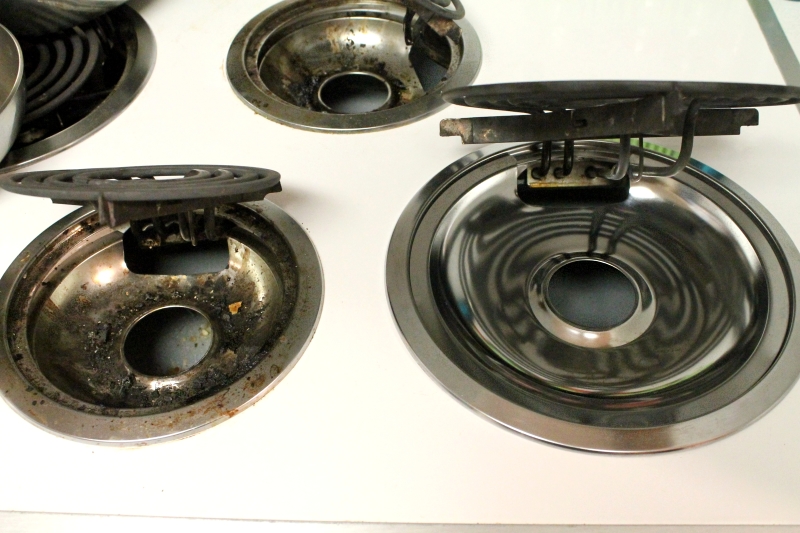
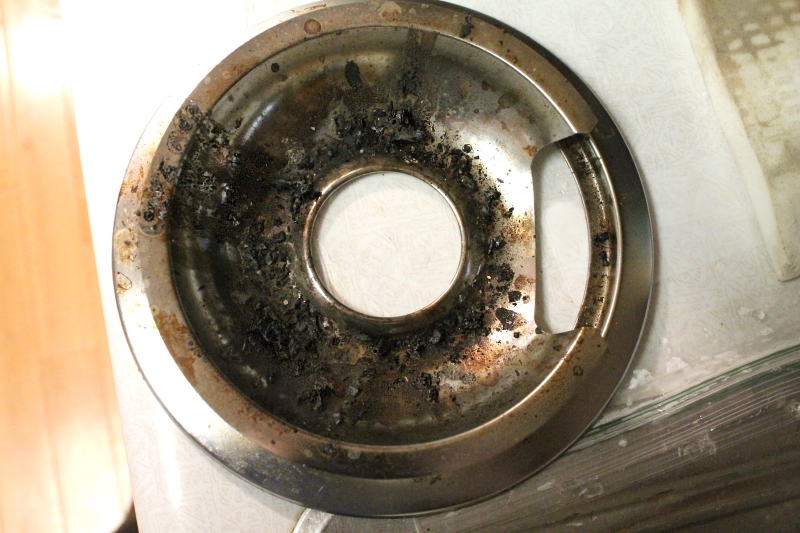
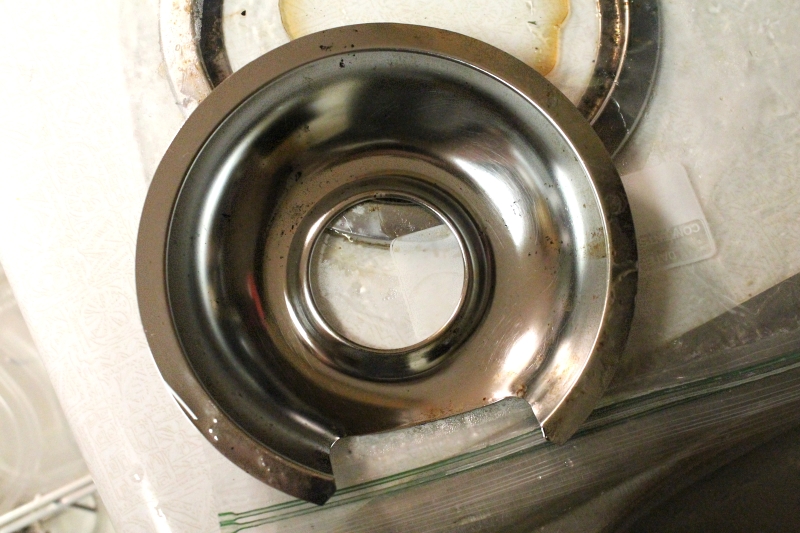
For the next pan, I took some step-by-step shots to show the progress. Here is the pan at the start ~

Easily clean drip pans, before 1

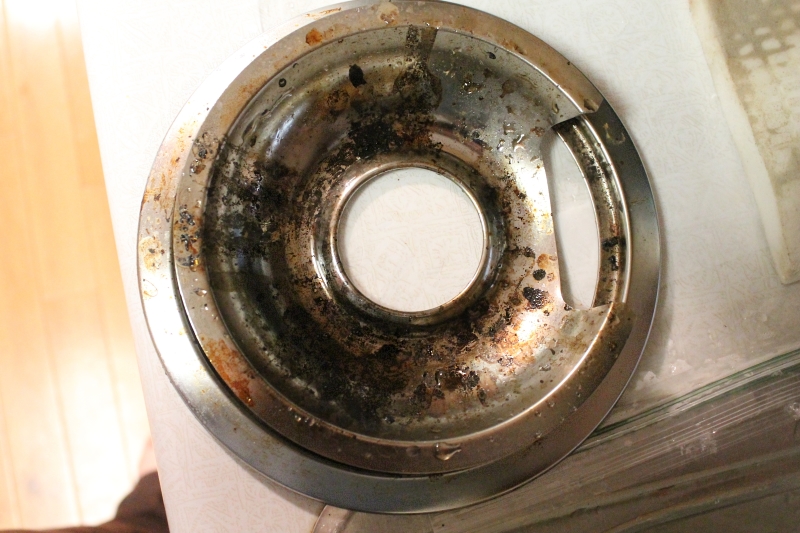
And then I ran it under some water and lightly used a scrub brush just to knock out any of the large, loose bits ~ 

Easily clean drip pans, before 2

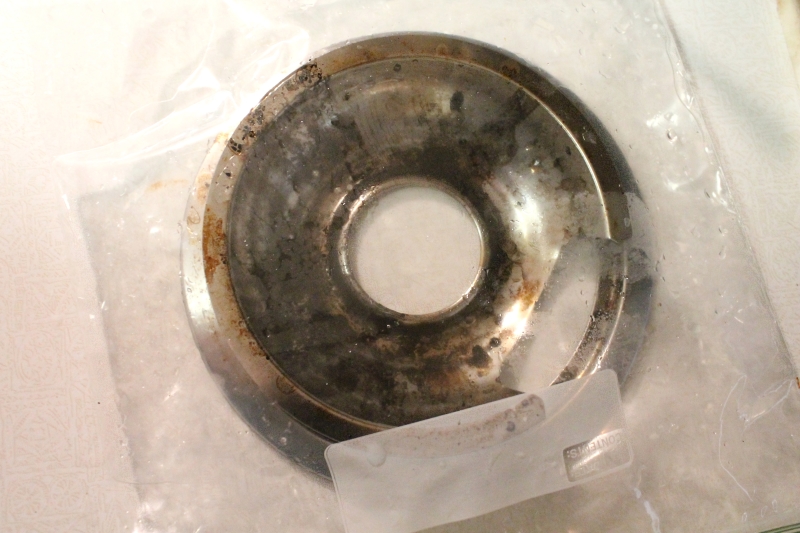
Into the baggie! I put the ring first, the pan on top, and poured a little ammonia into the pan. You can easily fit 2 sets in one bag. Let it sit for about a day ~

Easily clean drip pans, soaking in ammonia

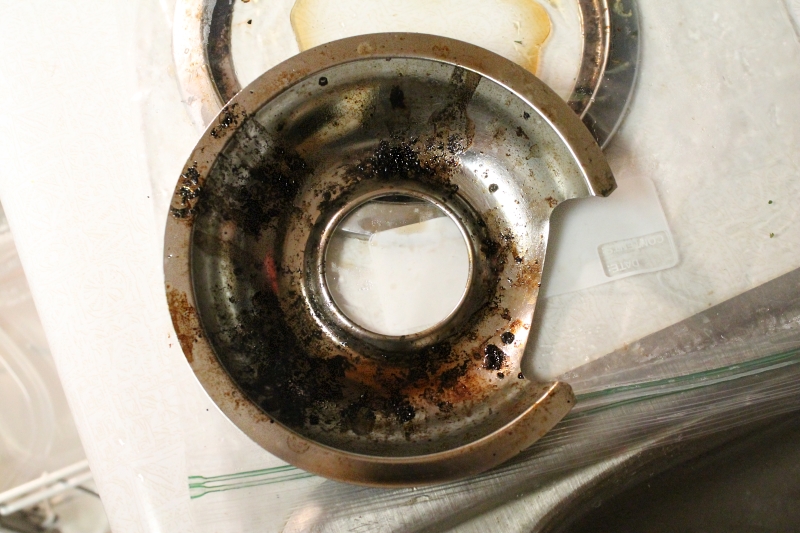
When you pull it out, it will look about the same. But with some light scrubbing from a scouring sponge (like Scotch Brite), the burnt gunk will just fall off!

Easily clean drip pans, after soaking

I usually ended up with some small bits of black still stuck on there...

Easily clean drip pans, after scrubbing

The first time around I had one bad area, so I tried giving it another 24 our soak with ammonia, but that didn't seem to make a difference. I pulled out the metal scouring pad and easily knocked off the last spots. And in a few areas there was some light brown, sticky residue, which I removed with a magic eraser.

Behold the shiny!

Easily clean drip pans, after

I was so happy to find this easy tip! Try it out & pass it on to make someone else's life easier, and maybe save a few burner pans from ending up in the landfill!

Easily clean drip pans, before & after

Tuesday, April 26, 2016

Office Space Makeover - Finished!

Last month I shared the inspiration pics for my office area makeover, as well as the furniture & supplies that I bought to start the project. And last week I posted about the decor & organizers I picked up for the new shelving. Well, I'm happy to say my pretty office space is all finished, and today I'm sharing a few in-progress pics as well as the final results.

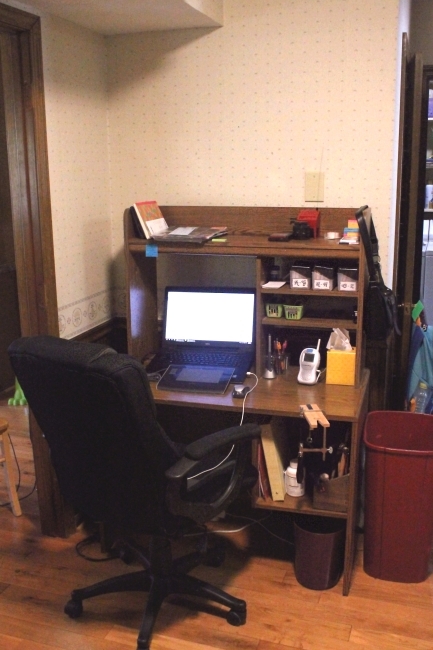
Once again, here is the before shot of my cluttered desk, in front of the old fashioned wallpaper. *shudder* ~ 

Desk, before

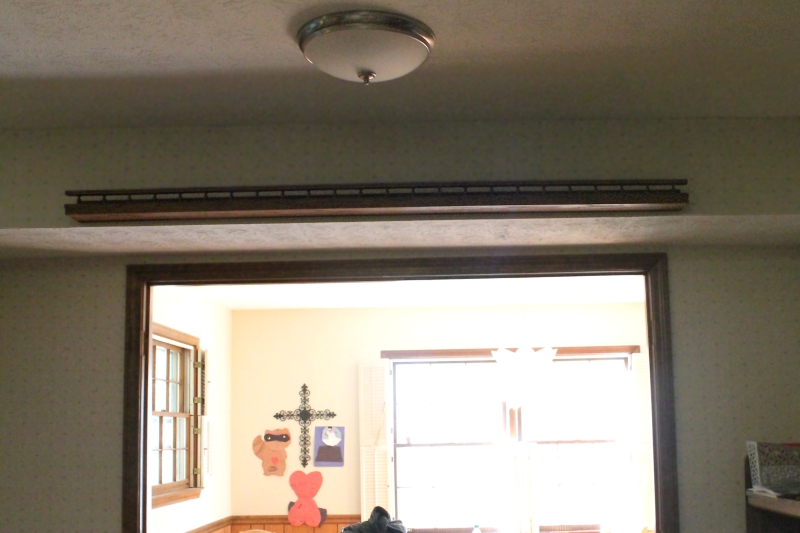
I really wanted to paint the wall before putting up my new shelves, but my husband was hesitant. So naturally I had to rip down the old wallpaper and get things rolling! First though, I had to remove this random long shelf over the dining room entrance. It might have been useful if I could fit serving platters up there, but it's so narrow & short you can only display tiny plates. 

Too narrow plate rail

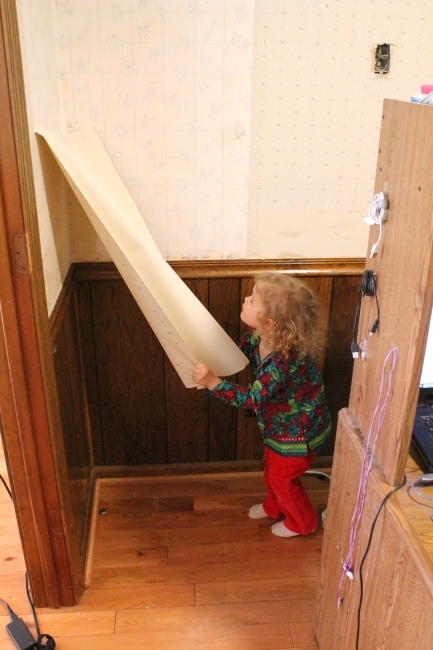
My nearly-3-year-old was very happy to help with the wall paper removal. She loves peeling! ~

Panda peeling wallpaper

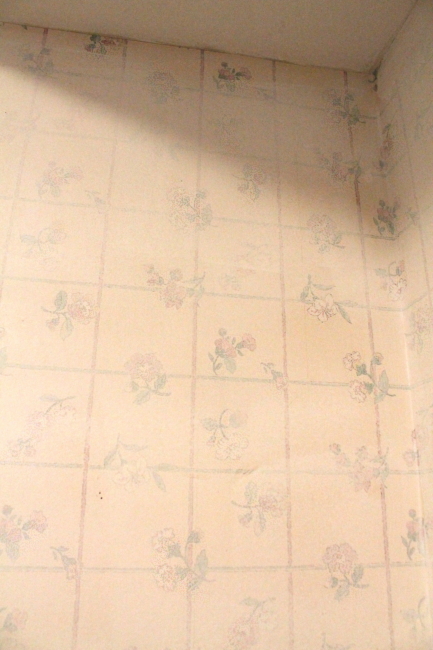
And of course pulling down one layer of wallpaper revealed an even uglier wallpaper underneath!

2nd layer of wallpaper

The 2nd layer of wallpaper was apparently impenetrable. I attempted to scrape some off, but to even remove a tiny bit meant completely marring the wall underneath, so I decided this was a case where we just needed to paint over it. I'm usually not a big fan of painting over wallpaper, but this is such a small area (and most of it is just above doorways), that seams are not going to be a big issue.

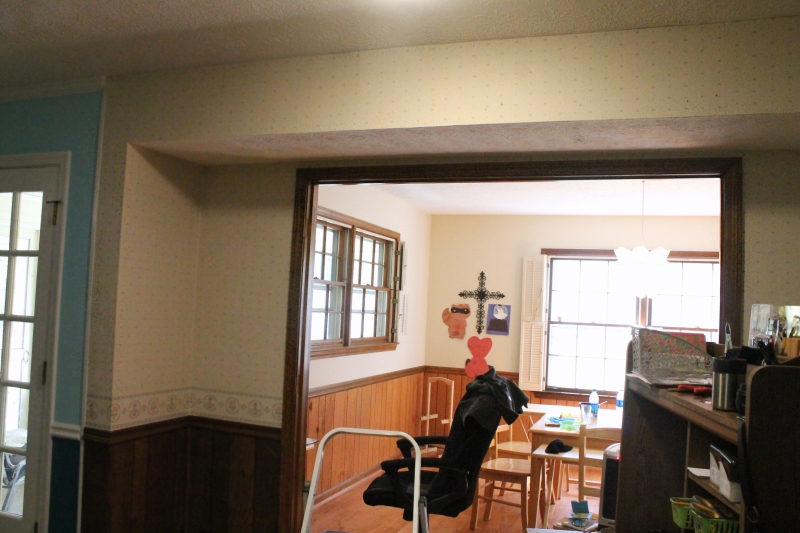
To show you the area I'm working with, my desk sits between the dining room and kitchen (with a nice view of the living room too). I'm painting around the door of our dining room...

Dining room entrance

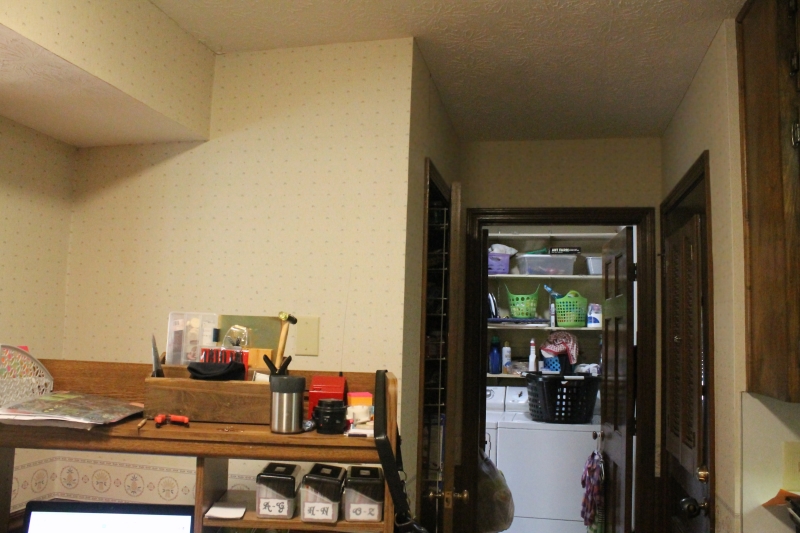
then turn to the right & my desk goes on that left wall, and then you have this little nook with doors going to the pantry, laundry room, and garage.  ~

Desk wall & door nook

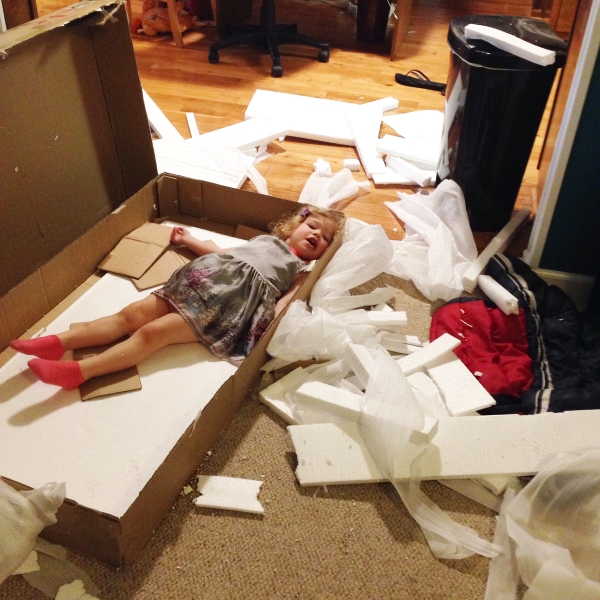
While we working on the walls,  my new desk arrived, and the kids had a great time un-packing the box!

3-16 Desk unpacking

They really wanted to help me assemble it, and we finished everything except the drawers before bed. But that gave me the perfect chance to add a special touch! I fell in love with the picture below and really wanted to add black stripes to the sides of my drawers ~ 


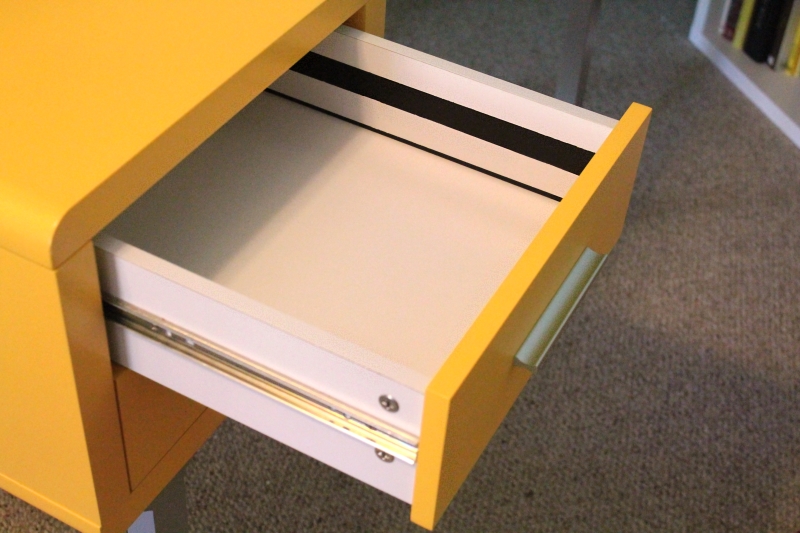
While they were still in pieces, I measured and taped off my stripes, and painted them in with some black craft paint. Unfortunately it turns out the outsides of those drawers look just like the *inside* of my drawers, so I didn't even realize my mistake until I sat down to assemble them the next day. So dumb!! (Also the outsides of my drawers have giant metal tracks on them, which pretty much throws out the stripe idea. Oh well!)

Drawer stripe fail

So, now that our house is covered in styrofoam packing bits, and we have two desks sitting around, let's get back to the walls....

After pulling down the 1st layer of wallpaper I washed the wall to remove the glue residue, puttied & sanded many holes, and then we applied 2 coats of Bullseye 1-2-3 water based primer to make sure the wallpaper pattern was well covered.

For the paint I chose a light gray - "White Metal" by Behr (mixed in the i300 flat base). Which looks nothing like this, of course ~ 


In the end I'm not loving my color choice. It's not terrible, but the gray has a slight purple tint in this room, which isn't great with all of the yellow details, and I wish it was a shade darker to pop more against the white. But it's going to be a long time before we'll have any interest in painting it again! 

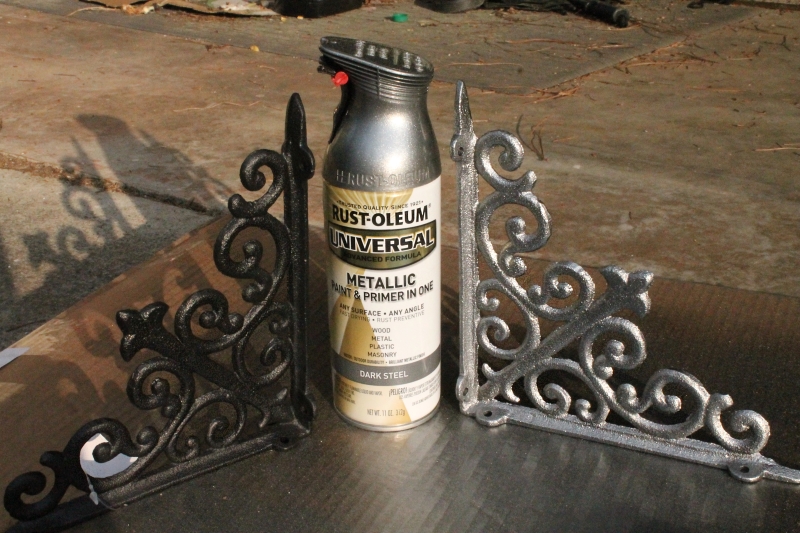
In between coats of paint & touch-ups, I also worked on spray painting some stuff. I had originally planned on painting the brackets yellow, but after a quick photo mock-up, my husband and I definitely agreed that would be too much yellow. Silver looked the best, so I grabbed my trusty Rust-oleum Metallic spray in "Dark Steel". I love this stuff!

Painted brackets

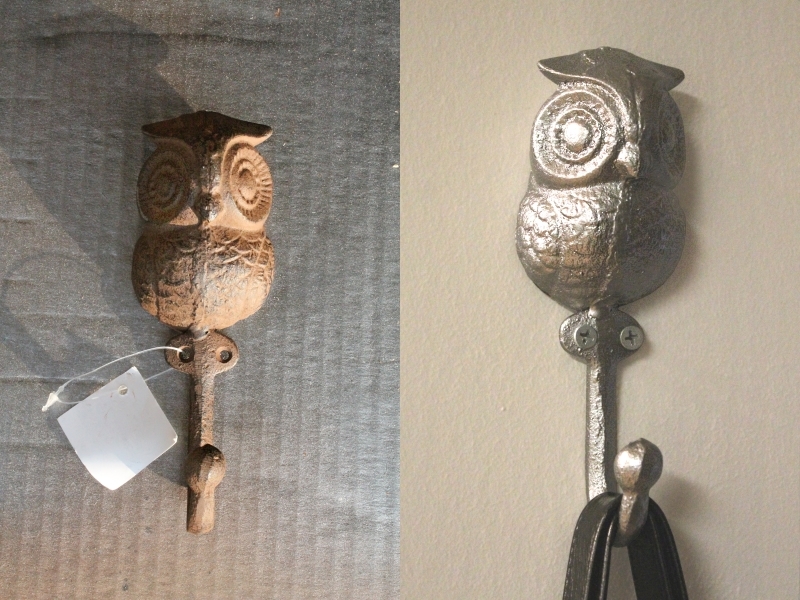
I also picked up an owl hook from Hobby Lobby to hang my purse on, and gave him the silver treatment too ~ 

Painted owl hook

And this is the part of the project where we had to visit Home Depot 5 times in one week, and every time I turned around we were spending another $20. Each bracket has 8 holes in it, so Justin had to buy a pack of screws for the bottom holes (deep) and another for the top holes (not so deep). I had to buy another gallon of the primer and another can of silver spray paint. The studs for our shelves were not where we expected them to be at all because that wall is where they built the expansion on the house, so we had to go back for some dry-wall anchors for one side. One of the brackets was a little warped (make sure to eyeball them!), so I picked up a new one. We needed new, white outlet covers and switches. And the original shelves I had delivered to the store were trashed, so I had to return those & buy a new set. Ugghhh!

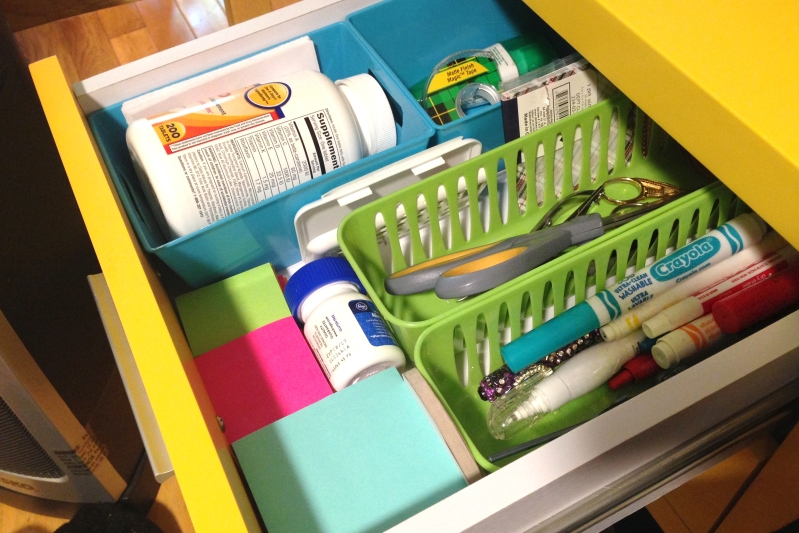
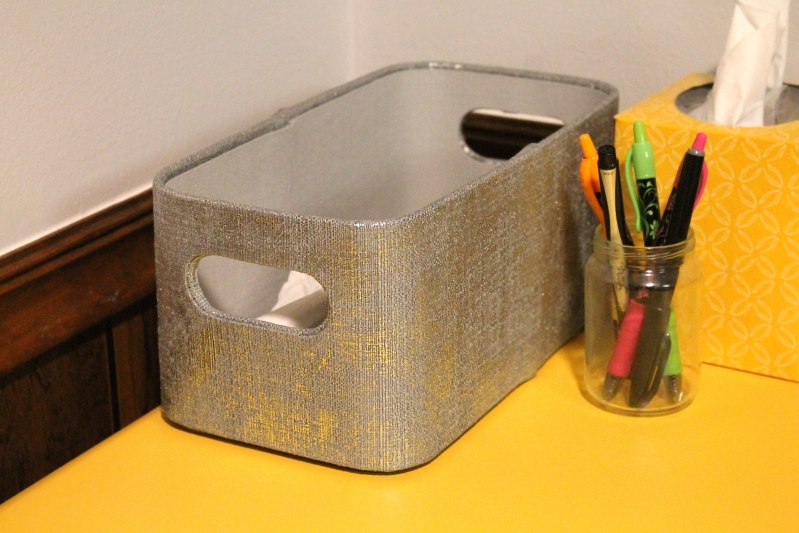
Once the brackets & shelves were *finally* up and the outlets were replaced, I worked on cleaning everything up and getting my desk in place. I arranged my drawers with some small dollar store bins I already had on hand. Not so glamorous, but free ~ 

Desk drawers

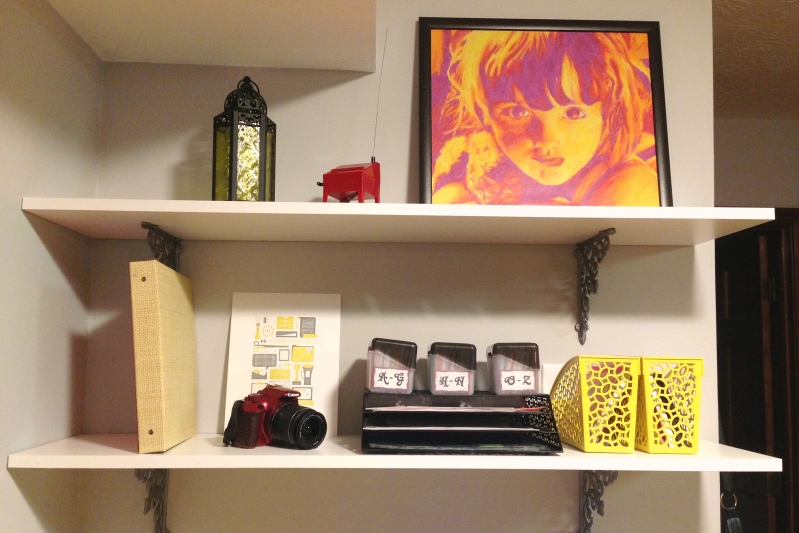
With that stuff stored away, we realized the shelves were really, really empty! Time to begrudgingly throw some more money at it. (Details about the stuff I got for my shelves here.)

office_shelves

Desk, fabric tote

After some more touch-ups and a little caulk, everything was finally finished! 

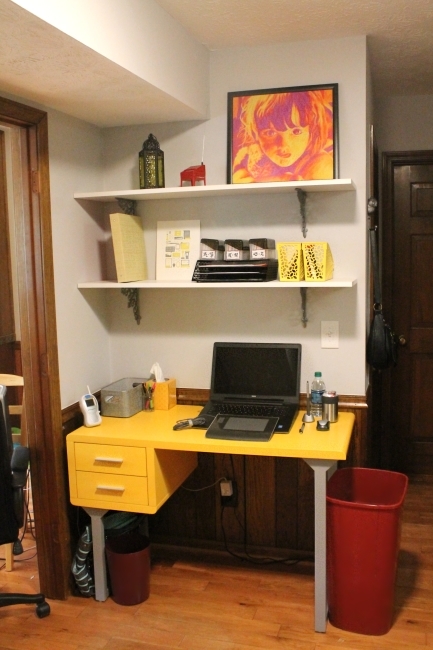
I'm loving my pretty, new office space ~

Office area makeover

It's amazing how out of hand even a small remodling project can get, and we definitely felt like our house was upside down for a few weeks there. I'm so happy to have a desk again, and now I can even do crazy things, like easily unplugging my laptop, or using the light switch without taking something off the shelf, haha. Of course I still have a few small office items I'd like to add to it soonish, but for now I'm enjoying having a very functional and lovely work space for once!

Finishing off this project has also motivated me to get back into the living room and finally do all of the caulking and touch-ups I've been putting off in that room. The living room has been about 95% finished for months now, so I'm hoping to knock out the rest of those jobs soon and get another nice set of 'after' pictures. I want to paint everything!

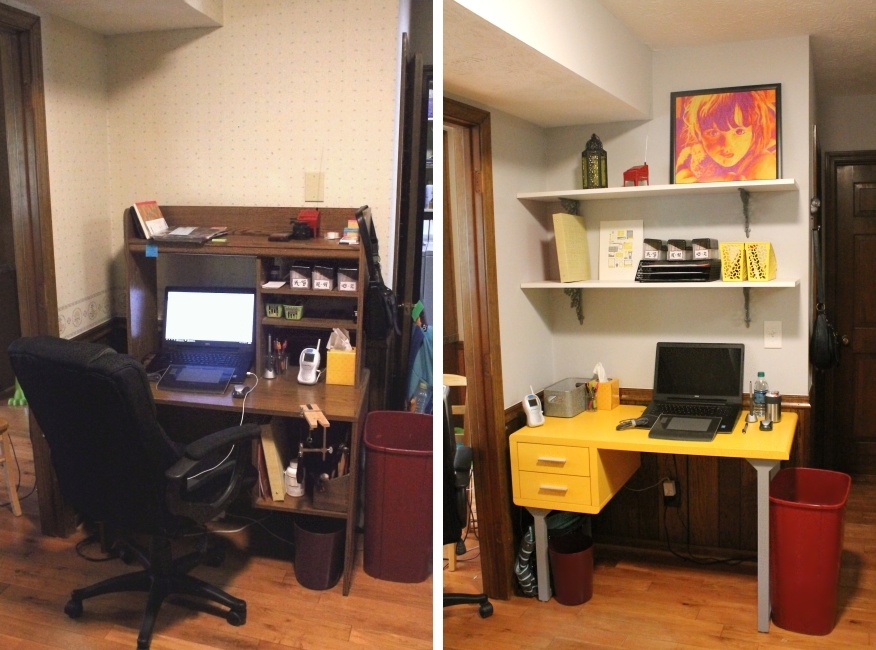
And I'll leave you with a side-by-side before & after pic to enjoy!

Office area makeover - Before & after