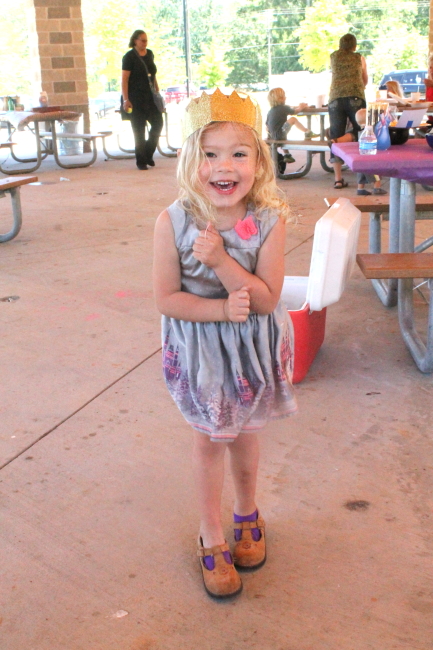
This little girl turned 4 this week, and it was her year for
a party! (We alternate years with her brother) Of course Pandora picked a
pink and purple princess theme. I decided to base the decorations and
food on the Disney princess movies instead of just going fully
'princess' with tiaras and pearls, and ended up having a little too much
fun browsing Pinterest and planning everything out.
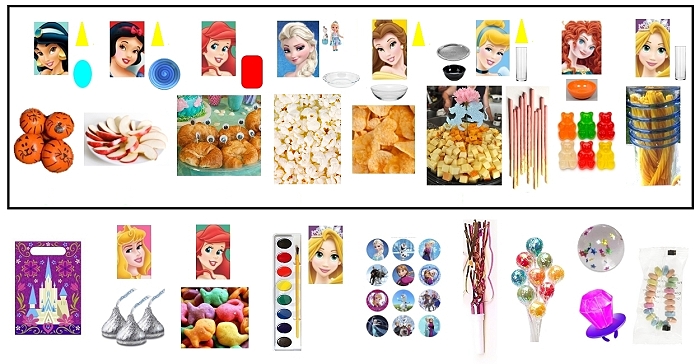
Whole parties have been planned around each princess, so there were a lot of ideas out there. I tried keeping a list of our definites and maybes, but soon I was desperate for something more visual, and I started slapping together an image to sort everything out. The top section shows everything for the table, and the bottom section is for the goodie bags (since some things could be on either). The picture ended up being a great help as we planned, because I could easily see how many sweets, salty foods, and healthy options we had. I even ended up marking which plates and decorations I wanted to use beside each food, since I had to bring it all with me, and it was so easy to reference.
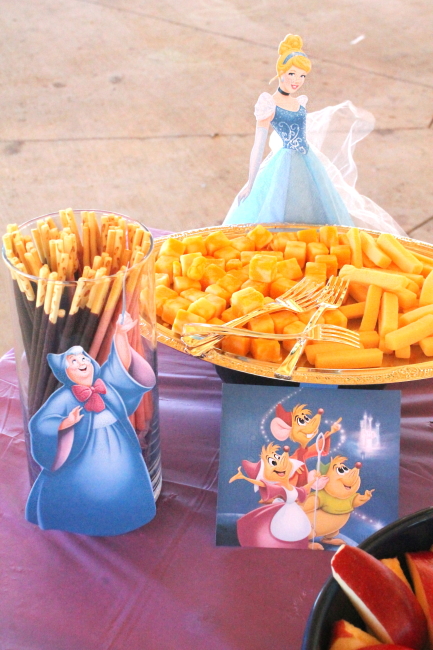
First we'll start with Cinderella, who's Fairy Godmother got some Pokky sticks for magic wands. I saw this idea done with chocolate covered pretzel sticks, which is also cute, but sometimes those things are just too big. When I saw the Pokky I thought the size would be better for snacking, and was also excited I wouldn't have to make anything! Then I bought some cheese cubes for her little mice friends. I found an ornate metal tray at the Dollar Tree, and set it on top of a bowl of ice to help the cheese stay fresh through the party. It didn't get sweaty, just a little dry, so I'd call that a success.
The Fairy Godmother and mice pictures I just printed out and taped to the vase/plate. I made the standing Cinderella (and the other skirted princesses below), and will be posting a tutorial for those soon!
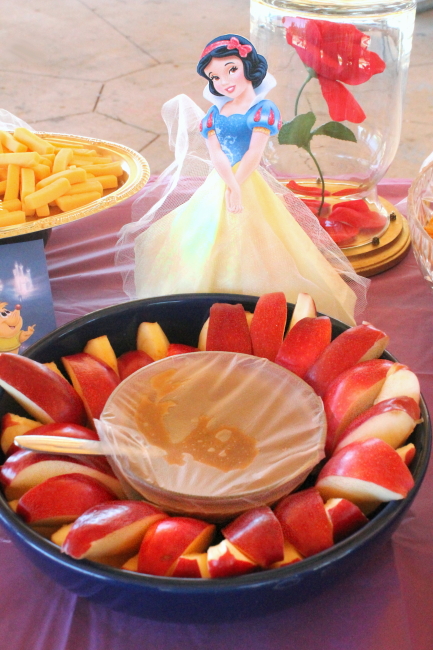
Of course Snow White *had* to have some nice red apple slices, and I made this caramel dip to go with them. I soaked the slices in club soda to keep them from turning brown.
Behind Snow White you can spy Belle's rose, which I'll also share a tutorial for soon ~
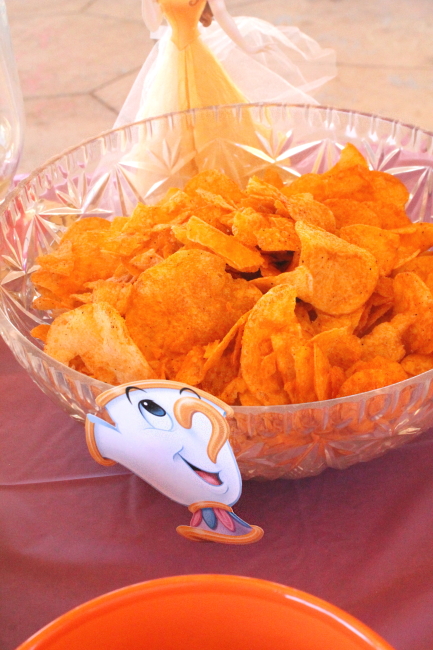
And Belle's food was Chip's chips!
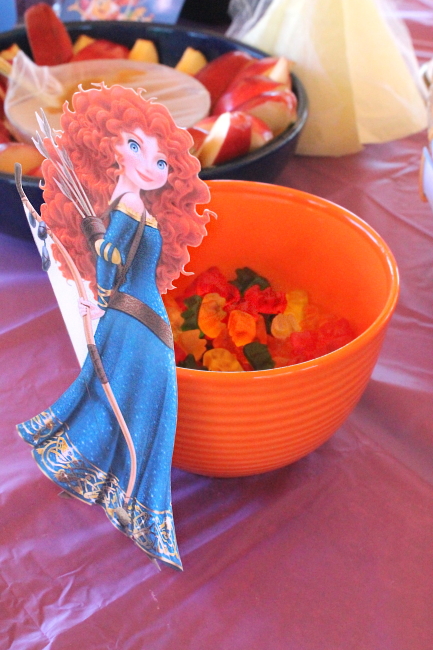
On this side of the table we also had Merida with some gummy bears. I had printed out a picture of the little bears from the movie and forgot to stick them on beside her, oh well ~
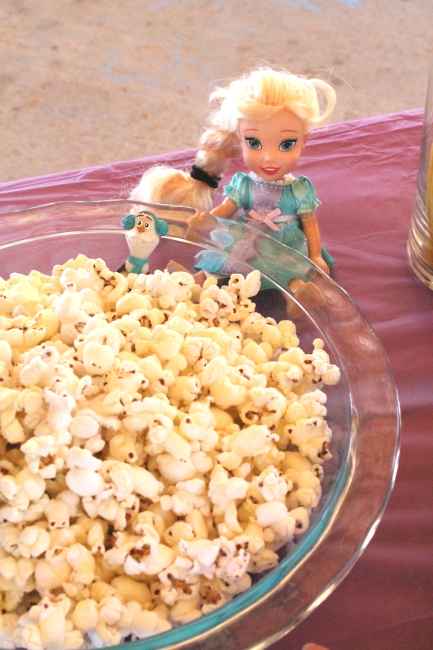
On the other half of the table we had an Elsa and Olaf doll with some white cheddar popcorn for 'snow'. I looked everywhere for white cheese balls to use as snowballs, but could find them no where, so I finally had to settle for something a little less obvious. ~
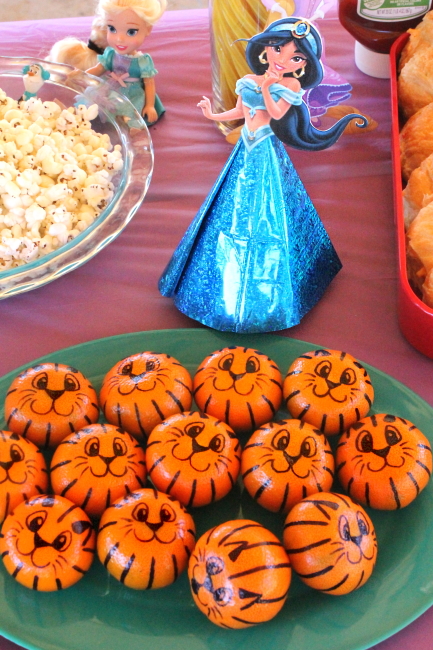
Jasmine was a hard one, since the only food ideas I saw for her were chocolate golden coins as 'treasure'. Finally I remembered the cute tiger oranges a mom had made for cub scouts, and so we have her friend Rajah ~
The oranges are a simple idea, but ended up being a big pain to do. The oil from the orange peel kills Sharpies, and I ended up with one pen after another dying on me. As I struggled with the pens it took forever to do a dozen tigers, and so I gave up and left the rest of them blank. I wouldn't recommend this one!
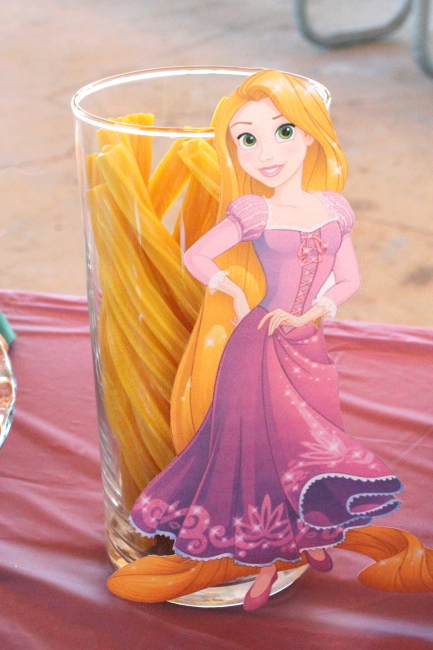
These sour filled Twizzlers look incredible as Rapunzel's hair! Better yet, the package comes with only red and yellow colored Twizzlers, and you can buy them lots of places, so they are an easy addition. (I used 2 packs)
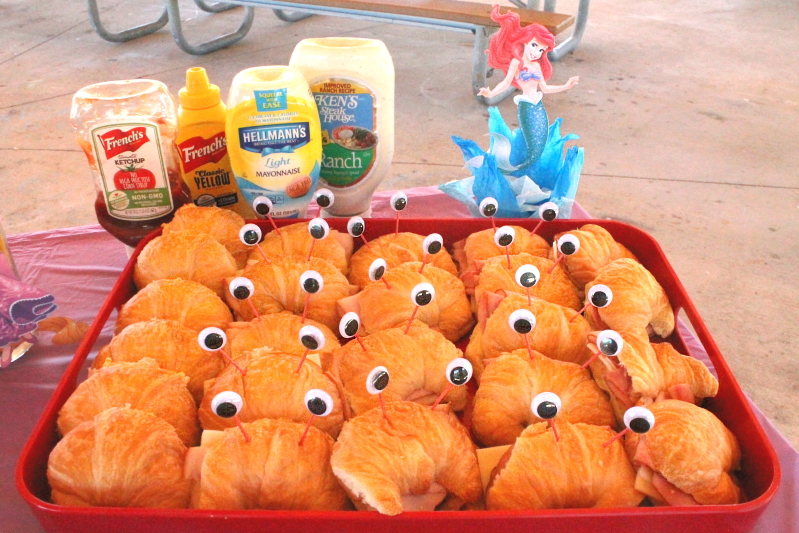
I saw so many awesome ideas for Ariel, it was hard to narrow down! With all of the cheese cubes and apple slices we had tons of kid-friendly food, so we chose these crab shaped sandwiches with the adults in mind. We had pimento cheese, ham & swiss, and turkey & swiss, with a range of condiments on the side. I searched several stores before I found sew-on google eyes, which have a tab sticking out on the back the perfect size for a toothpick. I finally found two sizes at Hobby Lobby, and the search was worth it in the end when I was able to pop them right on the toothpicks and avoided gluing on 30+ eyes.
The Ariel decoration was created a little differently than the skirted princesses, so I'll have a separate tutorial for her.
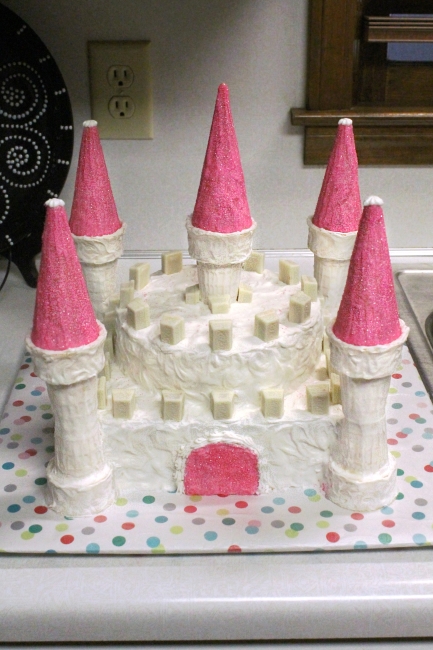
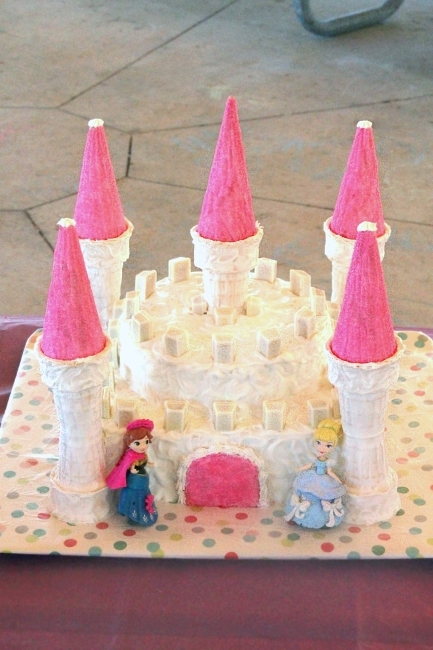
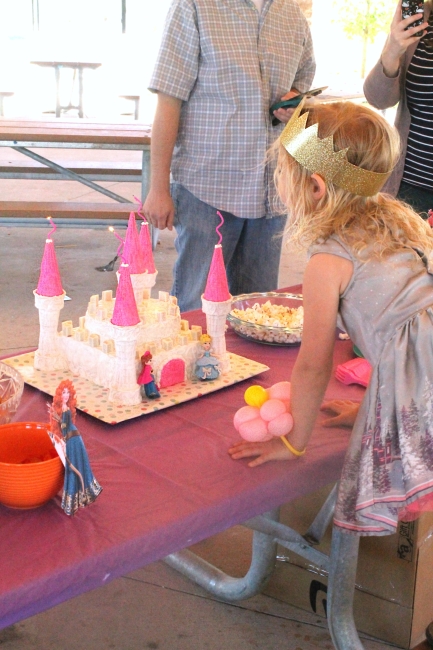
We waited to reveal the best part, an awesome castle cake!
This cake is actually simpler than it looks, as the towers are created with two stacked ice cream cones (cake cones), and then topped with a pointy cone (sugar cone). I covered all of the cones with frosting and rolled the pointed cones in pink sugar. They ended up looking super glittery in person and prettier than I'd expected! For the actual cake part there are two layers of a square cake on the bottom and two smaller circle layers on top (I just used a normal circle pan and then cut them down to size). This is topped with another cake cone and sugar cone in the center.
I debated for a long time what to use for the rectangle shapes around the edges, and had heavily considered using pink wafer cookies or mini marshmallows. In the end I couldn't find cheap wafers, and the marshmallows were too irregularly shaped, so I searched the candy aisle and found some perfect mini white chocolate Kit Kats! For the door I cut a graham cracker into shape and covered it with the pink sugar, piping a little white frosting around the edge. I cut the tips off the corner cones until I had a hole big enough to fit some slender candles, then piped a little icing over the hole. The four towers were perfect for our 4 candles!
I built the cake on a large, sturdy air bake pan we have, which was first covered in wrapping paper and then a layer of Press'n Seal. I cut a cardboard box down to size to transport it, having the box open at the front so I could slide the tray in & out. It traveled well, other than the center tower, which kept toppling over. If I were to do it again, I'd mix up some royal icing to really cement the side towers together, and then take the center tower off when the cake needs to be moved. (Cutting a small hole in the top of the cake might have helped too)
The party went really well, other than having to battle the wind to set everything up. The wind was ripping things from my hands, and actually blew gifts off the present table!! I was able to get everything well secured, and it mostly calmed down for the party. Everything went really well, and I think our little one definitely felt like a special princess for her birthday.


No comments:
Post a Comment