
Sushi rice is not just for making sushi! Another great way to use it is making rice balls (onigiri), either plain or with yummy fillings. I recently tried stuffing them with fillings a few times and was surprised how easily they come together, and my family *loved* them. (Well, ignore the 2 year old. She won't eat anything.)
First you'll need to make a batch of sushi rice ~ Bring 3/4 cups sushi rice and 1 cup water to a boil, then reduce the heat to low and cover for 20 minutes. Remove from heat and let sit covered another 10 minutes. This will make 2 cups of cooked rice, enough for about 7-8 balls. Meanwhile you can prepare your fillings.
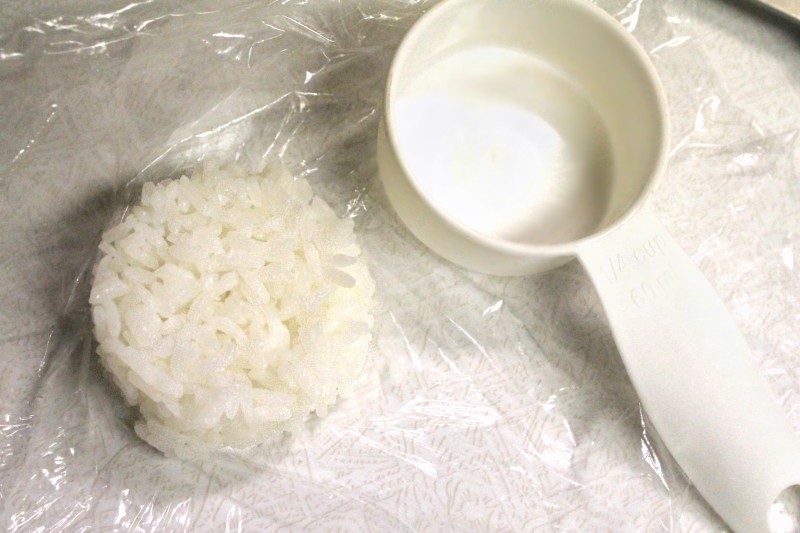
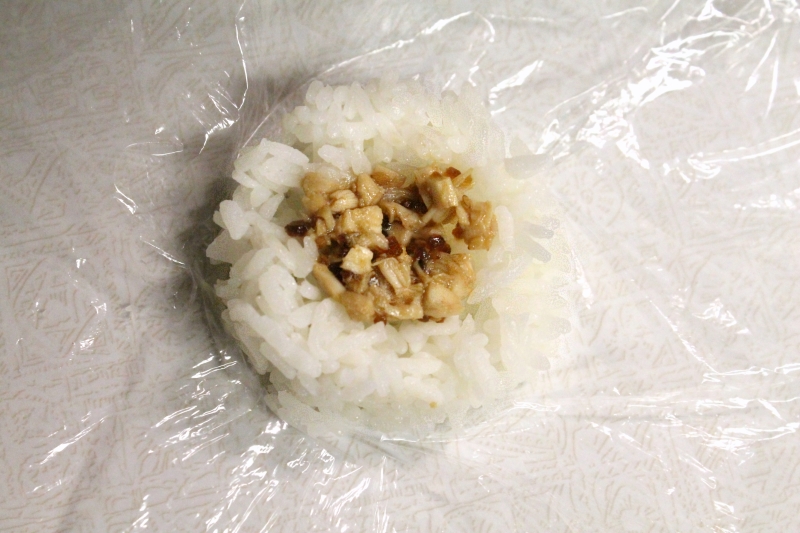
When that is ready, lay out a piece of plastic wrap and measure 1/4 cup of rice, packed lightly. Dump it out on the wrap and press down in the center to indent. Fill the indention with 1 tsp. of filling (a rounded tsp. is fine!). You can toss the filling with sauce, or if you'd like to add it separately, spoon in about 1/4 tsp. of sauce. (Or you can skip the fillings entirely and just sprinkle the rice with a little salt.)
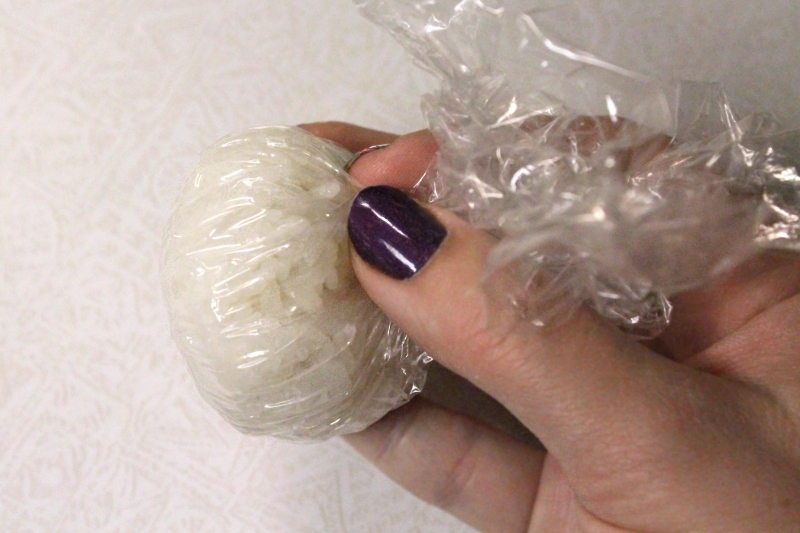
Cup the rice in your hand, push the filling down a little, and then close your fingers around it as if you were holding a ball. This nicely wraps the rice around the sides and over the top of the filling!
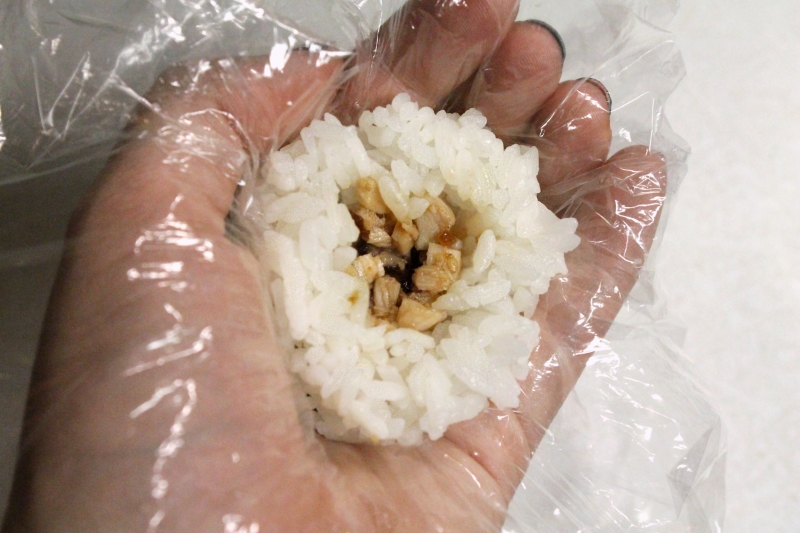
Gather the plastic wrap around the ball tightly, and use one hand to squeeze it into a ball shape while holding the top closed with the other hand. As the ball is packed tighter you'll probably need to let air out and make the top tighter.
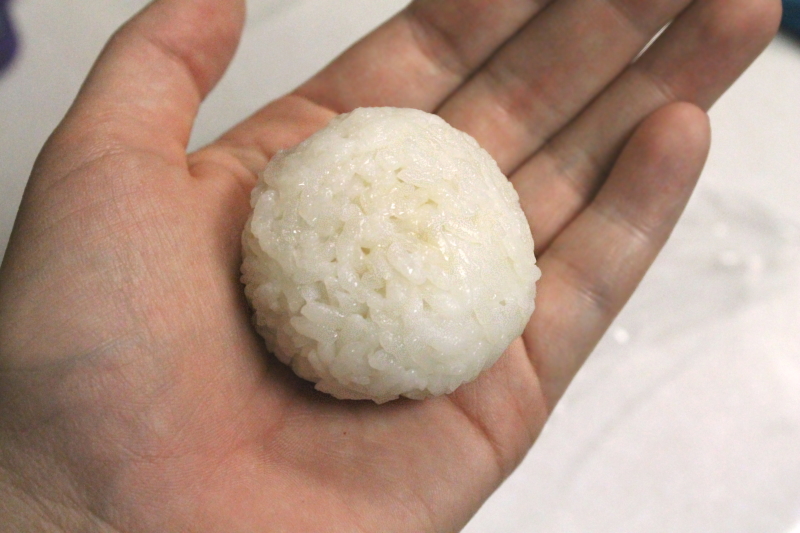
When you feel like you've got a nice, tight ball, fold the wrap back and admire your creation! The spot where you gathered the wrap together will probably be uneven, so press it down smooth with the wrap or a wet finger. I usually consider this the bottom of the ball and flip it over to put on a plate. This may sound complicated, but once you get the hang of it, each ball only takes about 2 minutes.
Now, what can you fill them with? Any small amount of finely chopped meat and/or veggies work well, and it's a great way to use up leftovers! Here is a list of Japan's favorite fillings, but don't be afraid to raid your fridge and get creative. The rice mellows the flavor a lot, so strong flavors work the best.
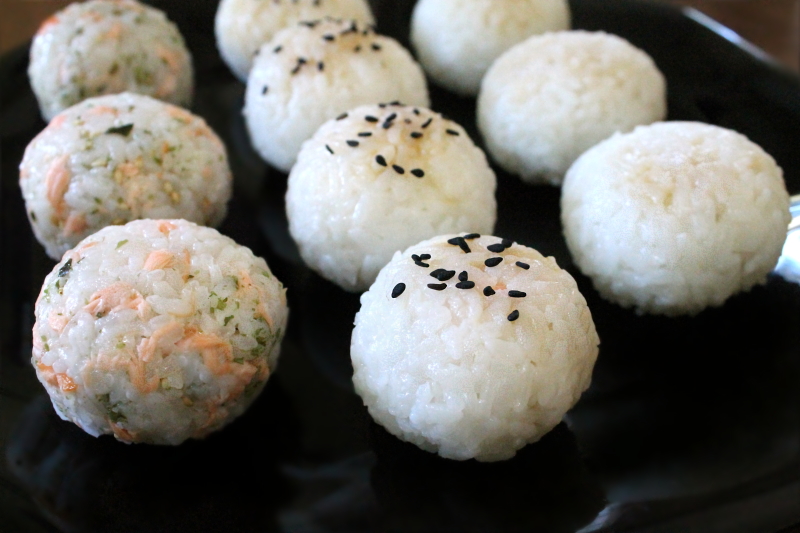
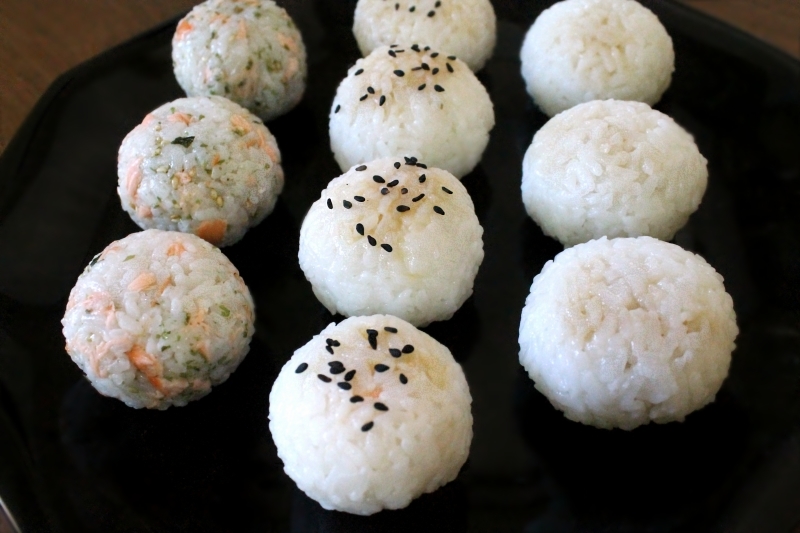
The other night we ended up with tons of leftover salmon. That never happens! I knew it would be a great time to make rice balls.
Right side - First I made some teriyaki chicken balls that my son had enjoyed before. I finely chopped/minced some cooked chicken and tossed it with a little store bought teriyaki sauce (Soy Vay brand).
Middle - Next I mixed up a sweet & savory miso sauce for the salmon. I used 2 Tbsp. miso (awase, a mix of red & white), 2 Tbsp. mirin, 1 Tbsp. sugar, & 1/2 Tbsp. sesame oil. I didn't toss the salmon with the sauce since I wanted to use it two ways, so I just spooned in a little of each. I sprinkled these with black sesame seeds to keep them separate from the first balls.
Left - You can also mix the rice with the ingredients instead of using it as a filling, and it gives the rice lovely specks of color. For the last balls I used some more of the salmon and sprinkled in a little furikake for seasoning.
You can eat the balls right away, or they work well in a lunchbox since you can eat them hot or cold. After forming the ball you can wrap them right in the plastic wrap to store them. They are still tasty the next day, but rice dries out in the fridge after a few days. If you'd like to keep them longer than that, stick them in the freezer and thaw/re-heat before eating. The rice will be nice and fresh!
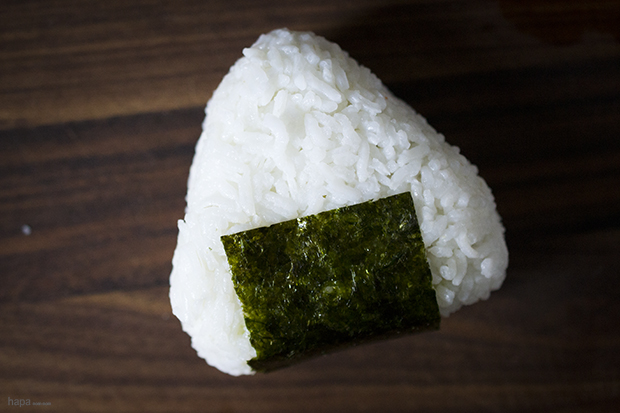
By the way, traditionally the Japanese use a triangle shape instead of a ball. You can make a triangle by following the above directions, but instead of packing it into a ball shape, flatten it out a little and press it into a triangle with your hands.
1 comment:
I love the idea of using leftover salmon to make rice balls.
Post a Comment