Tuesday, February 23, 2016

Contemplating Nerdy Necklaces


Last year I got *really* into necklaces. I bought a ton (just super cheap stuff), and along the way I came across this Harry Potter Deathly Hallows necklace ~


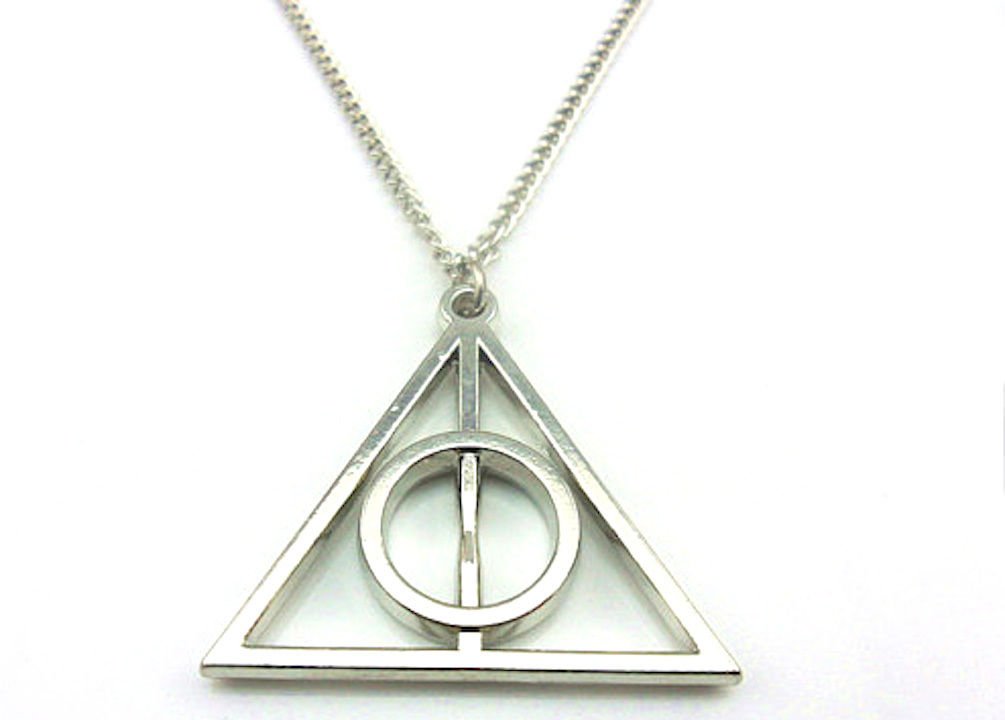
The eBay seller didn't even know what it was, and just had it labeled as a geometric triangle design. Scrolling through pictures, I didn't notice it at first, but then had a "Hey, wait a minute..." moment. I really loved the idea that fans could recognize the reference, but it also looked like a nice, normal design to everyone else.

 
Hunger Games - Mockingjay

I started searching for more, thinking of my favorite books, movies, video games, and board games. And while I found the few pictured on this post, I was disappointed by most of the selection. A search for Mario turned up brightly colored cartoon designs. A search for Tetris turned up junk made with perler beads. And for a lot of searches turned up nothing.

One night I was trying to fall asleep, and my mind started racing with nerdy necklace designs. It got so bad that I had to get up and draw them out so I could go to sleep. And while I was excited by the rush of ideas, I didn't have any real interest in figuring out how to make them out of metal. Maybe one day in the far future!

 
Harry Potter - Time Turner

But the custom ambigram business has been slowly getting worse & worse. Last year I made about half of what I made a few years ago. The only good months I had were the 2 months when the ambigram generator was broken and more business flocked my way. December and January were miserably low, and I only brought in about 1/4th of what used to be a 'normal' month. Something needed to change. It was becoming more obvious that I was going to have to find something new that I could make & sell in addition to the ambigrams. And with a little one at home with me for another 2 years, I *dreaded* the idea. I already have hardly any work time as it is! 

My mind kept going back to those necklace ideas, but out of stressful obligation. There was no enthusiastic, creative energy behind it. When a whole week came up where I had no orders due, I begrudgingly decided to spend the time researching and watching tutorial videos. And as I researched, I started getting interested, and even excited!
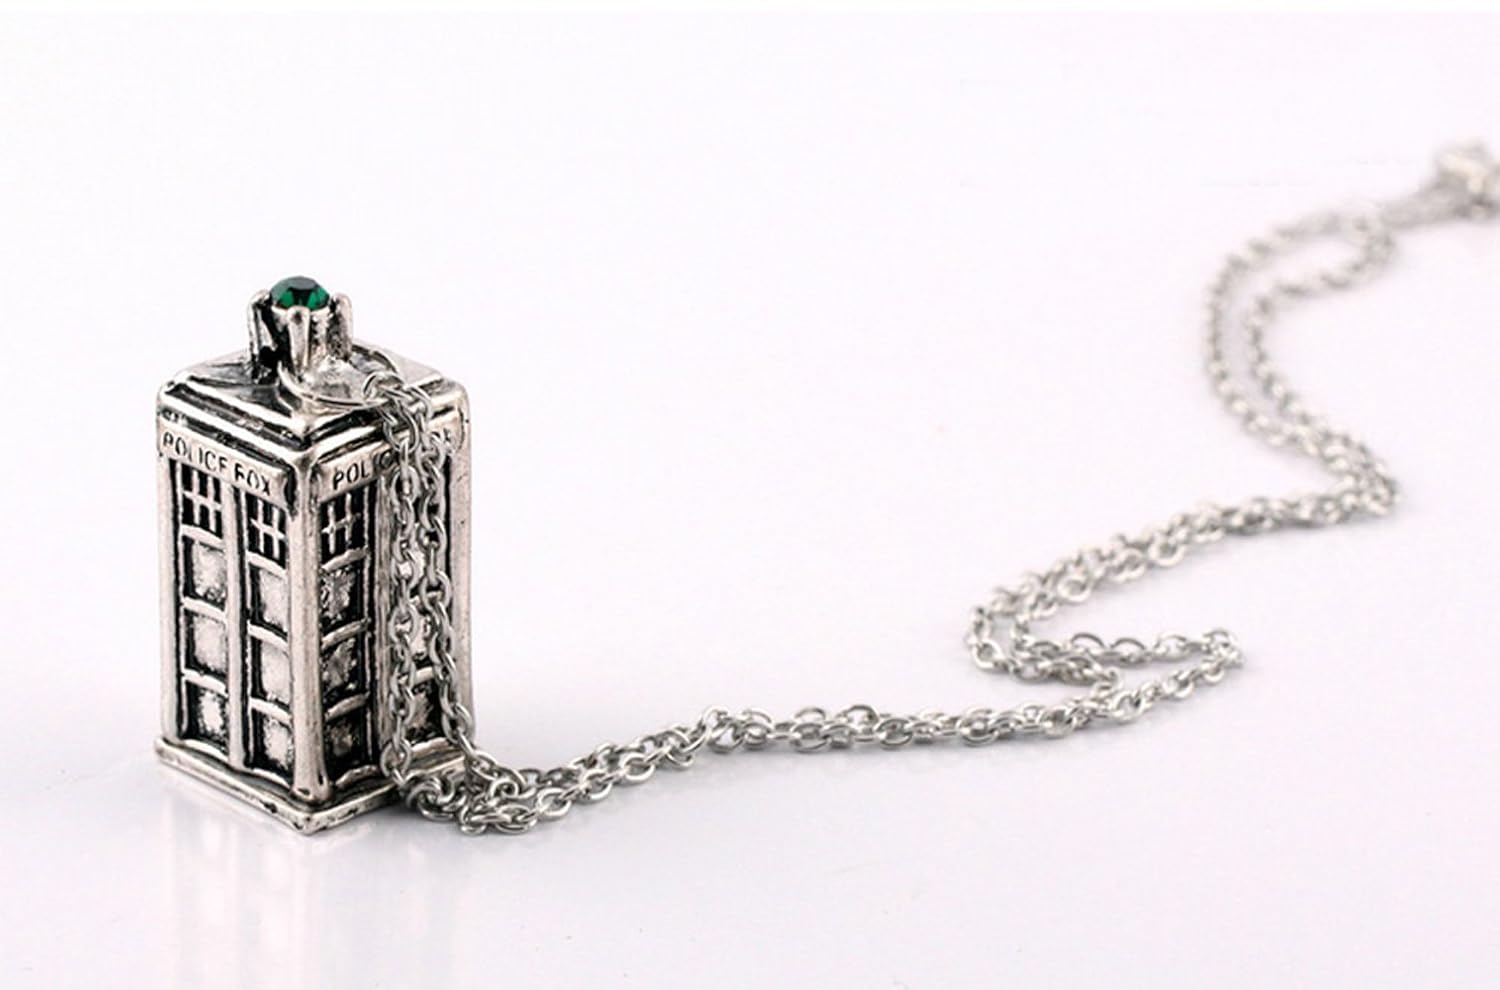
Dr. Who - Tardis

The next big hurdle was going to be buying well over $100 worth of supplies though. We had no money to spare, and my only hope was the mention of some late Christmas money that might be heading my way (though that wouldn't cover much of it). I obsessively read and researched in a frenzy, racing to finalize a supply list before the check arrived so I'd know what I needed to order from each store.

Every step turned into an overwhelming list of questions - there weren't just sheets of silver, there was sterling silver, silver plated, silver filled, and so on. Or gold, bronze, brass, aluminum, copper, titanium, etc. Then I had to figure out what gauge/thickness I needed (18, 20, 22, 24...), what the difference between dead soft and half hard and hard meant, and who had the best prices. Every tool I needed was the same. While I knew I needed a hammer, I had no idea which of the 15 completely different jewelry hammers I needed. Smoothing and polishing the metal was the worst, since there are a lot of different techniques to choose between, each with their own supplies. Did I need sandpaper, files, polishing componds, or silicone polishers? Could I do it by hand, or did I need a big machine, or was the Dremel OK?

 
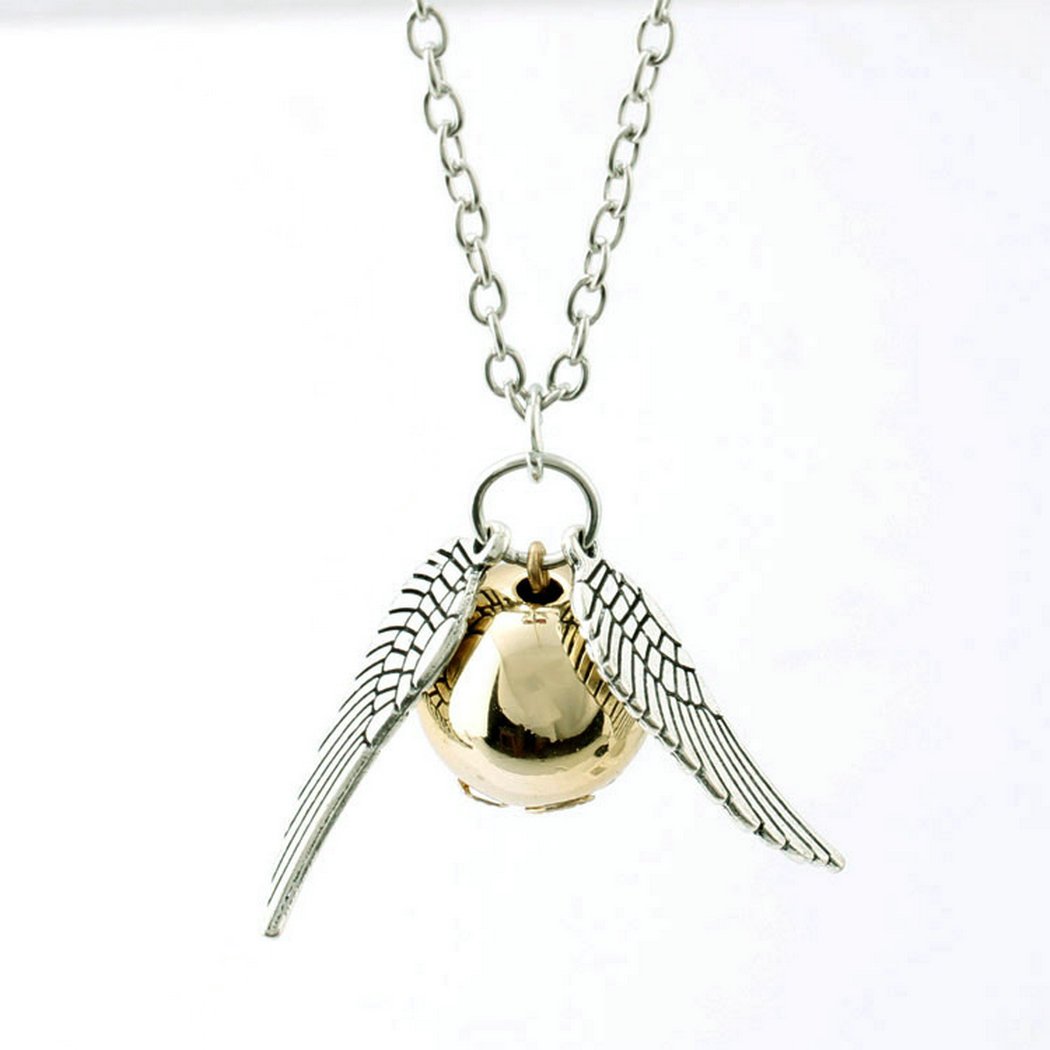
Harry Potter - Golden Snitch

1 week of no orders turned into 2+ weeks of no orders, the longest we've ever gone without one, but I was thankful for the time because I still had so much more to figure out. I finally hacked away until I had the final shopping list and there was nothing left to do but wait..... and then I got 4 payments! Any other week that might have gone straight to bills and food, but Justin was about to be paid for the month and we'd already bought our groceries. To get everything from my list, I needed to order from a few different shops, but I was immediately able to put in the biggest order ($75), which was going to be the toughest to afford. Over the next few weeks I was able to put in smaller orders here and there, and in less than a month I was able to buy all $200 of supplies from my list!!

The timing of everything has been really incredible. If orders hadn't gotten so bad, I would have never sat down to do the research. The two weeks off was just enough time to research and compile my supply list, and then I suddenly had more than enough payments to fund everything! I've already had a chance to start playing a little with the metal, but the work was slow as I was still waiting on a few tools to arrive in the mail. (And naturally, *now* I have a steady stream of ambigram orders to work on!)

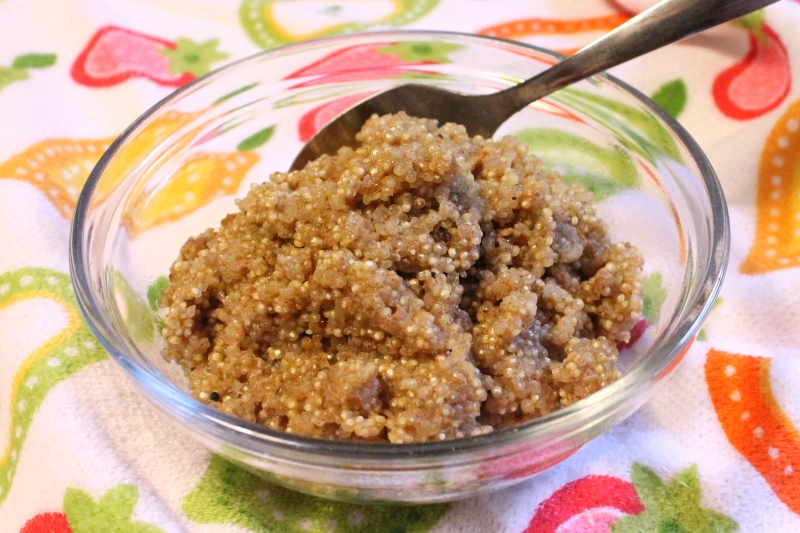
My first work-in-progress!

Who knows how well the necklaces will actually sell, but it's been an interesting, wild & crazy start. And if nothing else, at least I can wear all of those awesome designs I dreamed of!

Friday, February 19, 2016

Book Review - Creative Lettering and Beyond


I was very curious to try out some modern calligraphy after seeing some of Sara's beautiful posts on Instagram.I used some birthday money (a few months back) to order the Pentel Fude Touch Sign pen that she mentions, and I love that thing! I use it everyday now and you can see my to-do lists have gotten ridiculously ornate. I wanted to get a book too, and looked at one she recommended, but ended up ordering Creative Lettering and Beyond .

Creative Lettering and Beyond (review)

In person the book is much prettier than the Amazon picture. It is printed with the look of  handmade-paper and has some lovely feather illustrations that are carried throughout the book. It was much taller than I'd imagined (though I guess that could be a good or bad thing), and the weight of the paper and overall printing make the book feel well made.

CLaB review - feather deco

The book is broken into four sections, each authored by a different artist. First you have "Modern Calligraphy", then "Illustrated Lettering", "Chalk Lettering", and "Lettering Crafts". I think this book would be best suited for someone who is interested in trying out some kind of decorative lettering, but is not sure which type they might like (though with that goal in mind, I'd love to see some fonts that you make with an Italic nib mixed in, like Old English and Celtic). If I had realized the book was broken up like this from the beginning I might not have bought it.

Obviously the section I was most interested in was the modern calligraphy. I have done calligraphy in the past, but never tried brush lettering, and was eager to see some tips on creating the irregular text that's so popular lately. Unfortunately the section just covered the basics ~ supplies, pressing hard as you go down & light on the way up, and lots of stroke practice pages that I would never use. The lettering was not really the style I was looking for (just normal Script, very regular), and once I got to the section on flourishes, I realized I really did not like this artists style. The flourishes are all over the place & don't really feel like they flow naturally.

CLaB review - flourishes

Here is another example where she showed how you can flourish the same letter many different ways. I don't particularly like any of them ~ 

CLaB review - S samples

The best section of the book was the "Illustrated Lettering". She showed how to mimic the look of brush lettering by drawing in the thick lines, suggestions for some fun layouts, taking a photo of your work to convert it to a digital format, and lots of projects (like lettering on an old window or a plate). This section really is loaded with projects, while oddly enough the last section of the book ("Lettering Crafts") only has three? My only complaint with this artist is that she shows many types of lettering, but doesn't really give any guidelines for how to create the styles, the rules of the fonts, or sample alphabets. She gives lots of ideas, but you are expected to provide all of the decorative lettering. I would have loved to see this section expanded into a whole book, with guides for creating different alphabets at the start, and then it would be a good choice for beginning and advanced typographers.

Likewise, the "Chalk Lettering" section features many samples of the artist's work and some nice in-progress shots that show how the artist goes from the rough layout sketch to adding more & more details. That is about all it shows though, and you don't get any tips on how to actually create different letter styles.

While the beginning section is very basic, assuming you know nothing about brush lettering or calligraphy, the next two sections are almost too advanced, assuming the reader knows to to create a large variety of fonts already. While the book looks nice, is well made, and has some fun ideas mixed in, it is hard to figure out what audience they were aiming for. It felt more like a glimpse at several different types of lettering without a lot of information, and I would recommend it as a library-check-out rather than a reference book you're going to want to keep on your shelf.

Thursday, February 11, 2016

30 Days to Splits Challenge


I always do Pilates with Cassie Ho for the strength part of my workouts. Last month, while pulling up a new workout, I came across a video of hers called 30 Days to Splits. I've always been pretty flexible, but not able to do a split, so I knew I wanted to try this right away. Honestly, the video does not tell you much, all you really need is the graphic below (found here)


On both the video and site she tells you that #1-5 are your foundation stretches, which you'll be doing every day. For the first five days you'll only do those, and after that you will also do the stretch number that corresponds with the day you are on. So on day 6 you'd do 1-5 + #6, and on day 30 you would do 1-5 and #30. For each stretch you need to do 1 minute per side, and it will take about 10 minutes a day.

Well, I just finished up my 30 days and am here to report back!


The Good ~
The foundation stretches really are the key here. The first five days were a little boring, since you aren't adding in anything new, but after a week I noticed that I was definitely able to stretch further than I had before! For example, on #2 I started off touching the floor with my finger tips, and by the end of the month I had my palms flat on the floor. (I wasn't a huge fan of #4, just because my knee was so high up, I wasn't sure where to put my knee or my arms.)

The Bad ~
I guess I'm used to quick stretches, and went into this thinking stretching feels 'good'. But when you hold a stretch for a long time, it quickly goes from refreshing to uncomfortable and even slightly painful. One minute sounds short, but when you are holding a slightly painful position, it feels like a really long time! On the first day I realized this was not going to be relaxing and fun.

I also did not like most of the additional stretches (6-30). Some were good, but there are so many I can't remember which ones were. Some I would avoid all together ~ #16 & 17 hurt my shoulders, and #24 actually left bruises on my knees! (even with carpet & extra padding) While the extra stretches help you keep track of which day you are on and add a little excitement, if I were to do this again I would just pick a month, do the first 5 stretches, and then hold a split as low as I can (for 1 min.) each day

The Results ~ 
I started out already being able to go pretty low, about 6" away from a split. After the month, I am definitely more flexible on those foundational stretches, but still about 4" away from the split. :( The last week or so I started adding a split as a 6th stretch (holding it as low as I could for 1 min.), and that seemed to really improve things. Wish I'd been doing that all along! 


In the end, I feel like I definitely learned a lot about stretching and was impressed with how much you can improve your flexibility by holding stretches each day. I have mixed feelings about this particular challenge because while the foundational stretches were great and did help, I think the rest should probably be ditched and replaced with a split stretch. If it couldn't get me from 6" away to a full split, it's probably not going to work for most people! While I definitely took day 31 off, I saw so much improvement that I will continue to do these stretches most days until I reach the elusive split. 

Friday, February 5, 2016

Recipe Trials

It's time again to share some pictures of recipes we've tried over the last few months!

Cheesy Chicken Broccoli Casserole, 1

First up, we tried the Cheesy Broccoli Chicken Casserole from Our Best Bites. This one was OK, but the broccoli was a little too crunchy, and overall it just wasn't very memorable. Not worth trying to tweak & make again.

Cheesy Chicken Broccoli Casserole, 2

Also from Our Best Bites, we made this Marshmallow Caramel Popcorn for dessert one night. Unlike the recipe pic, mine turned into a big, stringy mess. It was pretty tasty, but not worth making again. 

Caramel Marshmallow Popcorn

I might have mentioned it before, but Our Best Bites has recipes from two different girls, and both of these were from Kate. I've had quite a few misses with Kate, but Sarah is what makes it one of my favorite recipe blogs, and everything I've tried from her has been top-notch!


Here's one from way back in October. This year I was so busy painting the living room I didn't have time for much Halloween stuff, but the one themed recipe I did make was these little ghost sandwiches. You make a ham sandwich, lay a circle of cheese on top, and melt it to drape down the sides. Then you add some olives for the face. They were super tasty, but things didn't go so well! 

Ghost sandwiches, 1

First, the cheese didn't melt down very far, so I had to really pull it to get it just to cover the meat. You can see some where it didn't cover at all. Second, the olives were not easy to attach, and the sandwiches were so short they didn't really look like ghosts. On the second half (below) I used a punch with nori seaweed and the face stuck on by itself. They were easier, and the faces were cute, but once again they didn't really look like ghosts.

Ghost sandwiches, 2


This Cinnamon Quinoa Pudding is one of those recipes that stuck in my brain & I had to make it as soon as possible. I've been wanting to try quinoa for a while on it's own (I had only tried it in a grain blend before), and I *love* cinnamon and brown sugar flavors. I didn't want to use the syrup, but it looked like the quinoa was coated in something tasty.

Cinnamon Quinoa Pudding

After cooking it, I realized that the grains of quinoa become a little translucent on the outside with a brighter white center. So that wasn't a yummy coating I was seeing on the pictures, it was just the difference in the color of the grain. The results were meh ~ kind of like a thick, cinnamony oatmeal with a grainy texture mixed in. At least now I have a big bag of quinoa on hand for future recipes!


So far we've had a lot of failures, so let me share one recipe that turned out great! These Chinese BBQ Pork Steam Buns were incredible! I had a lot of shredded pork in the freezer, so I mixed it with bbq, hoisin, and oyster sauce. Then I followed this Food Network recipe for the dough and steaming. Instead of using half all-purpose and half cake flour though, I looked up directions on how to make your own cake flour and just mixed 6 Tbsp. cornstarch into 3 cups of normal flour. They weren't the prettiest, but they tasted just like ones from the store. Recipes where you mix dough and have to let it rise always intimidate me a little since they take some extra planning, but I need to make these again soon! 

BBQ Steam Buns


This Vietnamese Lemongrass Chicken looked nothing like the recipe picture, but was very yummy. The difference in color is probably because I suck at caramelizing things ~ my sauce seized up like hard candy, so I added in some water to melt it back down. The only other problem was chopping the lemongrass. It would not mince in our chopper, so I had to finish mincing it with some kitchen scissors. Not easy! I was thinking next time it would be better just to use some ground lemongrass, but the minced pieces added a really nice texture to the dish. If I can find an easier way to chop that, it would definitely be worth making again. 

Lemongrass Chiken

On the left side of that picture you can see a Coconut Cabbage recipe I made up that I've cooked several times but keep forgetting to write about. Whenever I mention it to my husband, he forgets we've had it before and questions the combination of coconut + cabbage, then is always surprised by how much he likes it.  (There are also some caramelized onions and other flavors going on in there. It's good!)

 
I'll end with an Indian dish, Pakistani Beef Curry. This one was a little out of my comfort zone, but it turned out really good. The cinnamon and ginger were such a nice addition to the curry flavor that we wanted it stronger, and both agreed to bump up all the spices next time. It's quite liquidy in the picture, so next time I might try to reduce that, or just serve it in a bowl over rice. Her ingredient list not super exact (3 potatoes, 2-3 cups of peas, etc.), so you'll want to write down what ratios you used to recreate it later.

Pakistani Kima

Obviously I need to do these posts more often, because that is less than half of the pictures I have filed away! I really like trying new recipes, heh heh.