Thursday, January 28, 2016

Searching for the Perfect Purple Hair - A Review of 4 Dyes


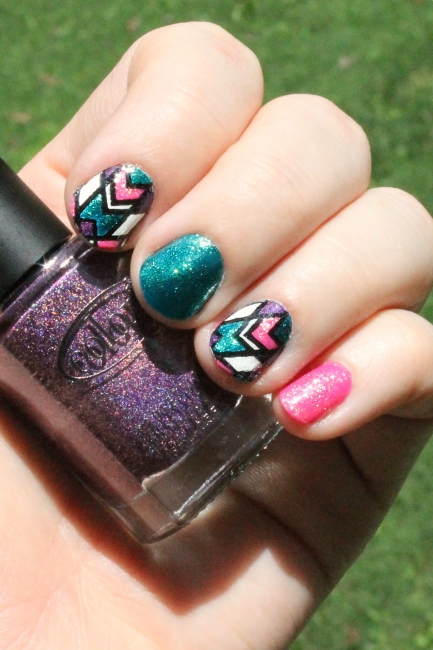
For the past 6 months, I've been on the search for a pretty shade of purple hair dye. I wanted something that would tint my medium brown hair to a noticeably purple color similar to this ~ not too subtle, but not in-your-face neon either. I've tested out a few options and wanted to write a brief review about each one before I forget the details!

To choose my dyes, I basically looked around Amazon for the top rated purples. Then I would do an image search to try & see the dye on people's hair. Unfortunately it's pretty hard to tell what the actual color is going to look like because 1) Purple can be a tricky color to capture right in a photo, and I'm sure most people are not editing their photos for color accuracy. 2) Some people lighten their hair first, some don't, so you get a wide range of possible shades, and 3) A lot of the photos that show up in a search do not actually use the dye you searched for. Often the correct dye was listed elsewhere on the webpage, and sometimes Google's used up the 'best results' and is now just showing 'purple hair' from anywhere. It can help you weed out a few that are far off base, but in the end, you pretty much just have to choose one and hope for the best.


Adore Semi-Permanent Hair Color, Rich Fuchsia

Back in July I bought this dye for about $6 off of eBay. This was my first time using a dye that didn't come in a boxed kit (other than putting some Manic Panic streaks in my hair in college once, which I can barely remember!), and it was a very different dye. It is not as chemical-ly ~ you can leave it in your hair for 2 hours if you want to ~ and it actually had a nice scent! You don't have to mix it with a developer, so you can use some of the bottle now and save the rest for later (great for streaks). I probably used half the bottle on my short hair.

Unfortunately, everything else about this dye was pretty terrible. I was hoping the purply fuchsia + brown hair would make a nice reddish purple color, but it was really more of a pink-red. But the big problem was that it stained worse during application than any dye I have ever used! (Both the bathroom and my skin) Normally with a boxed dye I can wipe up a drip with a wet finger or toilet paper and it leaves no mark if I catch it right away. This stuff was thin & drippy, and left a bright stain as soon as it touched any surface! Thank goodness I discovered it was easy to remove with nail polish remover. Though it did leave my shower quite pink & I was not able to remove that with the nail polish remover or my normal shower cleaner (haven't tried anything harsh yet). I'll be avoiding this brand from now on!

Adore "Rich Fuchsia" Hair Dye


In October I decided to try a boxed kit in a deep, reddish purple shade. The result looked like every other reddish brown dye, with a very slight purplish tint. It was so boring I barely have a picture of it. Here you can see the reddish-brown color on my bangs and a few hints of purple where the light is hitting it. Blah.

Vidal Sassoon "Mayfair Burgundy" Hair Dye, 1

This dye actually left color on my towel after the first few washes, which I've never had happen with a dye before (even the super-stainy one above). Luckily I threw them in the wash right away when I noticed & it came out fine.

It faded quickly, but on the plus side I ended up with a nice orange-red color that I liked! 

Vidal Sassoon "Mayfair Burgundy" Hair Dye, 2


Two months later, I decided to use some birthday money and try for purple again! I picked up another purple London Luxe (I think they have even more) and hoped this one would be closer to my dream color. 

Let's just say I *hated* this one! Indoors it pretty much looked like a black-blue, and I was not liking the black against my skin color at all.

Vidal Sassoon "London Lilac" Hair Dye, 1

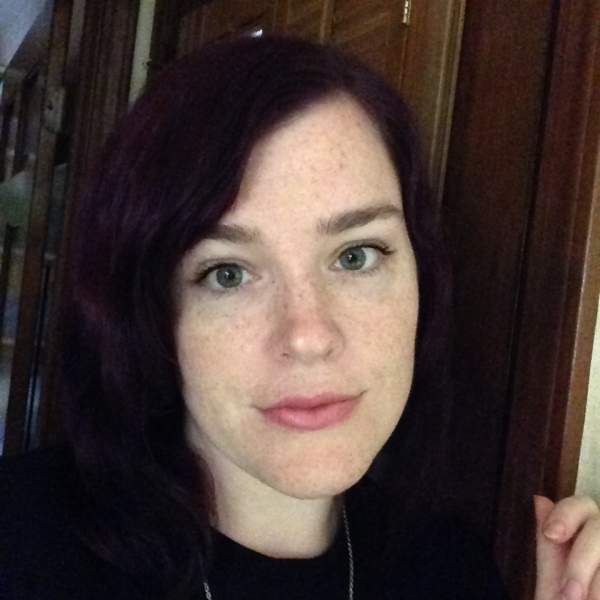
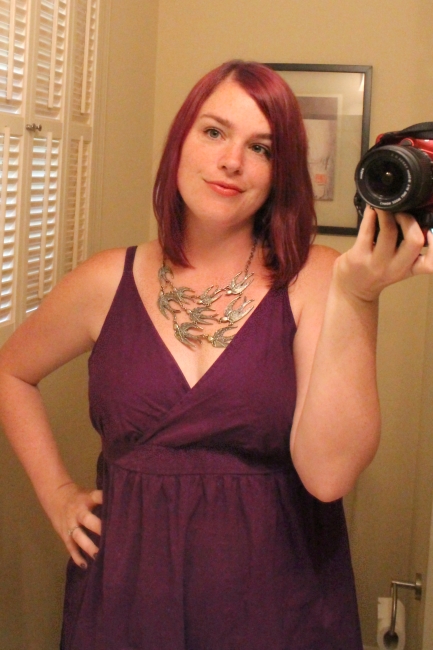
The purple was in the highlights, so under bright light it would glow a bit purplish. After a week or two the black had faded and the purple was able to show through more. I'm sure the purple probably showed up outside some (my husband assures me it did), but I rarely caught a glimpse of it. With bright sunlight I was able to capture this nice, purplish pic, but it definitely did not look this good most of the time! 

Vidal Sassoon "London Lilac" Hair Dye, 2

After another week or two, the color had mostly faded out so that I was back to my medium brown color with a hint of a purple glow under bright light. There was one pretty good week, but I would never use this one again just to avoid the original blackish color. (Oh, and I made sure to use dark towels this time, so I'm not sure if this shade bled like the other box or not.)


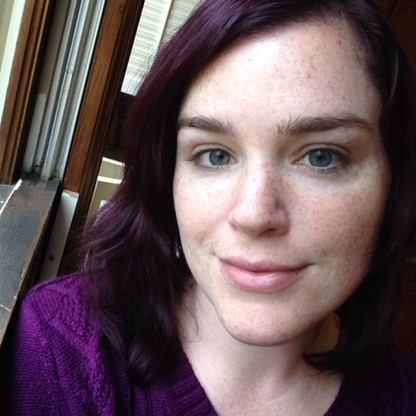
This dye also did not need a developer & didn't have the chemical funk you get from boxed kits. It came in a large bottle, but went on super thick, and I started wondering if my short hair was going to use the whole thing! I ended up only using about half, which is good since this one was a little pricier at $12 (the others were about $6-7). Next time I might mix in a little conditioner to make it thinner & easier to apply, but I will say that the dye went on with less mess than normal, so maybe thick is a good thing?

Joico "Amethyst Purple" Hair Dye

This has definitely been my favorite dye so far! The color is lovely, and this is the first time I was able to see the purple regularly & felt like I finally had *purple* hair. Unfortunately after 2 weeks the color is fading already, and I'm nearly back to brown with a purple glow. I've had pink suds every time I shampoo (way more than most dyes), so it's washing out quick. In a few weeks I'll happily use the other half of the bottle and enjoy another 2 nice, purply weeks, but after that I'll be on the hunt for something new. I've still got a few ideas tucked away on my Amazon Wish List!

Any other purple girls out there?

Thursday, January 21, 2016

Hot Crab Dip

I was looking through my old recipes & came across this tasty crab dip we'd forgotten all about. Naturally I had to make it right away! This warm, cheesy dip is perfect for a party or a cold winter night.

Hot Crab Dip

Hot Crab Dip  

2 can (12 oz.) crab (or 1 cup fresh, chopped & shredded)
½ Tbsp. lemon juice
8 oz. cream cheese (regular or reduced fat)
¼ cup mayonnaise (light is fine, not Miracle Whip)
½ cup shredded Parmesan cheese
1 Tbsp. minced garlic (6 cloves)
¼ cup chopped green onions
⅛ tsp. cayenne pepper
¼ cup shredded sharp cheddar cheese


1) Preheat oven to 350 F.

2) Combine the crab and lemon juice in a large bowl, then stir in the remaining ingredients. Mix well and spread in a medium casserole dish (the picture shows a half batch in a small dish).

3) Bake for 20-25 minutes or until the top is golden brown and bubbly. Serve with crositinis, bagel chips, or crackers.

Friday, January 15, 2016

Weight Loss 1 Year Update


Tomorrow is officially the 1 year mark from when my husband and I started doing the 5:2 diet ! I am so happy with the progress we've made over the last year! 

After one year I am down 36 pounds! I was even down to 39 before Christmas & New Years hit, with weeks of yummy foods & lots of traveling. Minor setback! I've also lost 6 inches off my waist, 5 inches off my hips, and dropped 4 pant sizes. (My husband reached his 20 lb. goal months ago, without doing any exercise. He still eats the 5:2 dinners with me, and does full diet days when the scale starts climbing again.)

Here is a 1 year comparison picture for you... which sadly looks almost identical to my 4 month picture, even though I've lost another 15 lbs. or so since then, haha.

Weight loss, 1 year (36 lb.)

To quickly sum things up...
Diet ~
Throughout the year I have been doing the 5:2 diet, which involves dieting 2 days a week and only eating 600 calories those days. I have created a lot of 100 and 200 calorie meals, which I've been sharing here (with links on my recipe page). After 8 months I bumped my calorie amount up to 700 just to give myself a little more freedom on those days & keep from getting burnt out.

Exercise ~
I've also been exercising every week day, doing a combination of cardio and strength. I find my workouts on YouTube, and early on I discovered Zumba, which is a fun dance based workout (though I like it more than most dance workouts!). I got totally hooked and was happily doing 20-30 minutes a day along with a 10 minute strength workout (Pilates with Cassie Ho). Around 6 months I was laid up with Strep and had a hard time getting back into the workout routine. I eased back in doing 10 minutes of Zumba & 10 of strength, and have been doing that ever since (and wondering how I had the time & motivation to do so much before!)

It's not surprising to hear that I lost most of my weight (29 lb.) during the first 6 months, and it's been a very slow decline since then. Part of that is from cutting the exercise in half, but I also know it is just going to be harder to lose weight the closer you are to your goal. I don't get to see quite as large rewards now, but I am pretty happy with my figure currently and motivated to keep working as long as the numbers are still going down.
Weight loss, 1 year, front (36 lb.)

A couple of recent changes...

On my 2 diet days, instead of the Zumba + Pilates combination, I've started doing a circuit workout to keep things interesting. I started with a circuit I found on Pinterest, but added in some other exercises since it was mostly focused on abs. I also threw in 500 jumping jacks, ha ha! I have this exercise written out as a checklist and just work on it throughout the day, doing a few here & there. Sometimes I knock it out in the morning, other times I'm finishing it up before bed. 

One day I should put together a nice graphic for this, but for now, my circuit workout is ~ 

1) 5 burpess   2) 30 second side plank (both sides)   3) 50 jumping jacks   4) 15 squats   5) 50 jumping jacks   6) 45 sec. plank   7) 50 jumping jacks   8) 15 side leg lifts   9) 50 jumping jacks   10) 20 Mnt. climbers   11) 50 jumping jacks   12) 15 push ups   13) 50 jumping jacks   14) 10 tricep chair dips   15) 50 jumping jacks   16) 30 Russian twists   17) 50 jumping jacks   18) 15 plie squats   19) 50 jumping jacks   20) 25 oblique cruches (each side)   21) 50 jumping jacks   22) 20 bicycles

Do it one time through. If you're not sure what any of those are, search for the name on YouTube and you'll find some examples. And if any of the reps are too high, just start with half and come back to finish the other half later. At the end I am definitely doing sets of 25 jumping jacks!


And on the diet side, about 2 or 3 times when things were too stagnant & I needed a boost, I did a 'light' week. I basically tried to eat more similar to my diet days before dinner for one week (Just the 5 weekdays. I'm not dieting on weekends!). I would either skip breakfast or have something 100 calories, then I would have my 100 calorie soup or salad for lunch and a few light snacks leading up into dinner. Since it wasn't official a diet day, I was a little more free with my snacking, but tried to keep it under 500 before dinner. That way, even with a big dinner and possibly a snack afterward, it was still a pretty low calorie day. Those weeks I was usually able to loose 2 lbs.

Currently I'm having a hard time coming down from the holiday eating and am still stuffing my face way more than I should! (I work at home, like 1 foot away from the pantry. It is not pretty!) I'd planned on doing a light week to make up for the holiday & could not motivate myself to the last two weeks at all. Maybe next week!

Wednesday, January 6, 2016

Geometric Nail Stamping Decals


When Born Pretty Store lists new nail stamping plates, they put them at a steep discount for a day or two. I've learned to snatch up any I really want, because it might be a long time before you see them any where near that cheap again! I had to watch for months for this plate to go as low as $3 (50% off), so I jumped at the chance to buy this one for $2 when it was still new. 

And then the poor plates sat around for a few months until I finally found some motivation to do nail art again! (And then the photos and blog post sat around for a few more months until I found them again and made the final touches. Yikes!)

I grabbed the 2nd plate & decided to try somethings new - a full nail decal with lots of colors. First I stamped onto a freezer bag (would not recommend) with Konad Special Black polish, then used some dotting tools to fill in each space with color. This will become the back of the design, so you don't have to worry about coloring *on* the lines, just try not to go *over* the lines into the next spot. I was planning on putting decals on 4 nails, so I made a 5th decal just in case. Good thing I did!

Making full nail decal

That picture also shows the most accurate colors. I used Milani "White on the Spot", Color Club "Wild at Heart" (purple), ORLY "Halley's Comet (teal), and for the pink I laid down some Sinful Colors "Pinky Glitter" for sparkle (remember, we're working in reverse!) & then used Jessica "Smitten Kitten" (pink). 

I covered the whole thing with a coat or two of fast drying top coat & waited quite a while to remove the finished decals. But not long enough.... the decals were very hard to remove, and some areas smeared or ripped off & stayed stuck to the freezer bag! A few hours later I tried again and the decals didn't rip anymore, but they still weren't super easy to remove. In the past I've used the backing paper from stickers and the polish popped right off that, so I'll definitely try using that next time around.

Making full nail decal

After I removed the decals, I noticed that when I held them up to the light, I could see a few spots where the colors needed a 2nd coat, or hadn't reached all the way to the corners of a section. I did a few touchups & got read to apply them to my nails. I laid down some clear coat polish, pressed down the decal, and cut away some of the excess. Then I used some nail polish remover to get rid of the rest. 

Even though I tried to be super careful, the edges of the decals still needed touchups, so I filled in any missing lines & color. And just like stamping, it was very hard to align the designs straight down my nails, so I put them on at random angles so I wouldn't have to worry about that. 

Geometric Stamped Nail Decals

So, in some ways the decals make nail art easier because you can work on them leisurely, and without wet nails. You can also add in much more color detail than normal, and don't have to worry about recreating that detail with your non-dominate hand. But this time around the decals did give me a lot of trouble, and I spent a lot of time on touchups on & off the nail. On top of that, the finished decals ended up being so thick that they kept popping off my nails, so all of that hard work could be lost at any moment (and was, after a couple of days). I'm hoping that my next attempt will go smoother if I ditch the freezer bags & use what I've learned along the way. Of course, as infrequently as I paint my nails these days, it's going to be a while!

Monday, January 4, 2016

My New Christmas KitchenAid!


This year for Christmas my husband went 3+ times over budget to buy me a beautiful new KitchenAid mixer! He was very sneaky about it, telling me the giant, heavy box was tools for his brother. He also wrapped up some snacks & cheap things for me so I had a few gifts under the tree. It wasn't until his brother was opening gifts that she said, "Oh, wait, I just realized I got the tags switched on these two." (he'd already clued his brother in on it) and of course I was completely shocked about the whole thing. (He'd worried if he had my name on the giant box I would figure it out, but I don't think I would have ever guessed that!)

My new KitchenAid!

So pretty!

Previously I had a small, red stand mixer that was about $60 and sometimes it was a bit of a fight to use it. It liked to walk across the counter, dough would travel up the beaters into the machine, and I had to constantly scrape the sides while it ran. I still used it a few times a year though, and so I'm hoping to use the new one even more!

Alton's Soft Pretzels

I used it for the first time last week to whip up a batch of Alton Brown's soft pretzels. These turned out a little prettier & smoother last time ~ maybe it was because I used flour on my work surface this time instead of oil? (the recipe said oil) Either way they were *so* good. My son quickly asked how many there were, because he wanted more than one, and we gobbled them up quick!

Saturday, January 2, 2016

(Martha's) Ginger Sugared Pecans - Our Christmas Favorite!

There is only one recipe that I *have* to make every Christmas. Martha Stewart's Ginger Scented Pecans. These pecans are sweet and salty with a kick of ginger that is highly addictive. I've been making them for at least 10 years now, and they are always a huge hit. I've even had people chase me down to rave about them.

I've shared Martha's link on here before, but this year I wanted to re-write the recipe a bit. Her recipe calls for 5 cups of pecans, while a standard 12 oz. bag only has about 3 cups. I always end up re-calculating the other ingredients for a smaller batch, and thought it was about time to just write it down officially! And naturally there are a few minor tweaks, including the name.

Ginger Sugared Pecans - Our Christmas Favorite!


(Martha's) Ginger Sugared Pecans 

12 oz. bag pecan halves (3 cups)

1/4 cup sugar
1 tsp. salt
1/2 tsp. ground ginger

1 1/2 Tbsp. honey
1 1/2 Tbsp. water
1 1/2 tsp. vegetable oil (or canola, etc.)

1) Preheat your oven to  325 F. Spread the pecans in a single layer on a rimmed baking sheet and toast for 10-15 minutes, until fragrant.

2) Meanwhile, combine the sugar, salt, and ground ginger in a large bowl. Measure the honey and oil out in a large skillet.

3) When the pecans are done toasting, bring the skillet to a boil over high heat, then reduce to medium. Add the pecans, stirring to coat well, and cook 3-5 minutes until liquid has evaporated. Pour the pecans into the large bowl with the sugar mixture and toss well to coat.

Supposedly these will keep for about a week in a tupperware, but you'll be lucky if they last the day!