Saturday, November 28, 2015

Pumpkin Rolls

Our family does holidays pot-luck style, and this year an email went around for everyone to tell what they wanted to bring. Turkey, stuffing, potatoes, green beans, multiple desserts... everything filled up quickly, and as I looked over the list I realized the only thing missing was bread. Well, if I'm going to bring bread, I'm at least going to make something pretty!

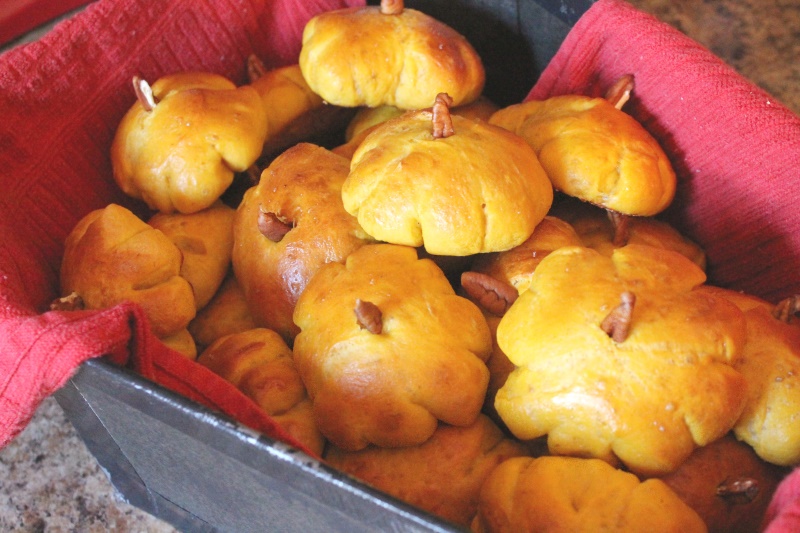
Last year for Halloween I made these pumpkin shaped dinner rolls from Beyond Kimchee. The rolls have a little bit of pumpkin mixed in for color, and are a little sweet. I remember they were tasty, but they definitely did not come out as cute or recognizable as I'd hoped. (these are the nicest ones on top) ~

Pumkin rolls

I decided to make pumpkins again, but debated if I should shape them the same way. I searched for pictures of pumpkin rolls, and the best ones I saw wrapped the dough with kitchen string. I also saw a tempting technique of wrapping & knotting a coil of dough to make the shape. But in the end I decided that I hadn't cut the slits deep enough last time, and wanted to try cutting them again.

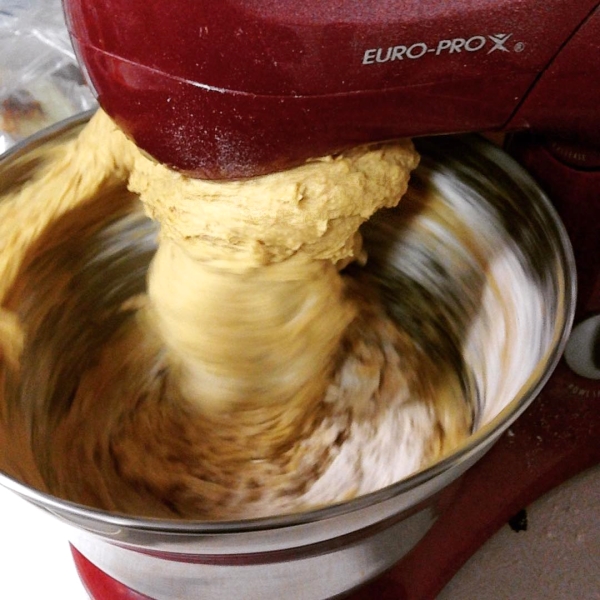
The first step is mixing the dough and then letting it rise an hour. I actually had a little trouble with this because the dough started traveling up the beaters and wouldn't stay down. I've had it happen once or twice before, and it even gets past the beaters up inside the mixer! (A Google search says the speed might not have been high enough, or maybe it was the wrong attachment, or maybe no one knows why.) At this point it was mostly mixed anyway, so I just did a little hand kneading.

Dough traveling up beaters

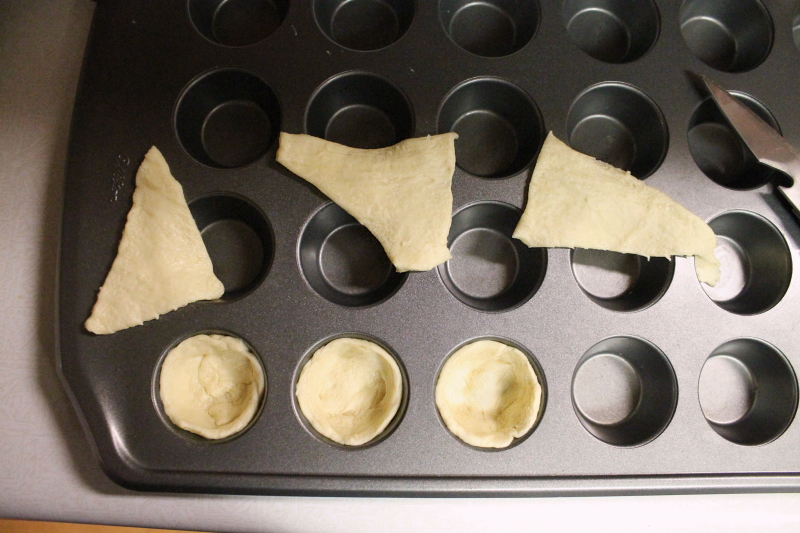
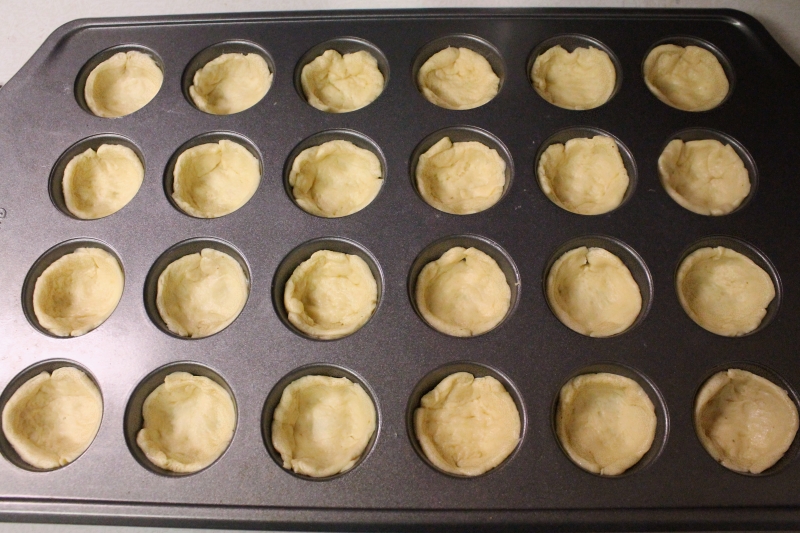
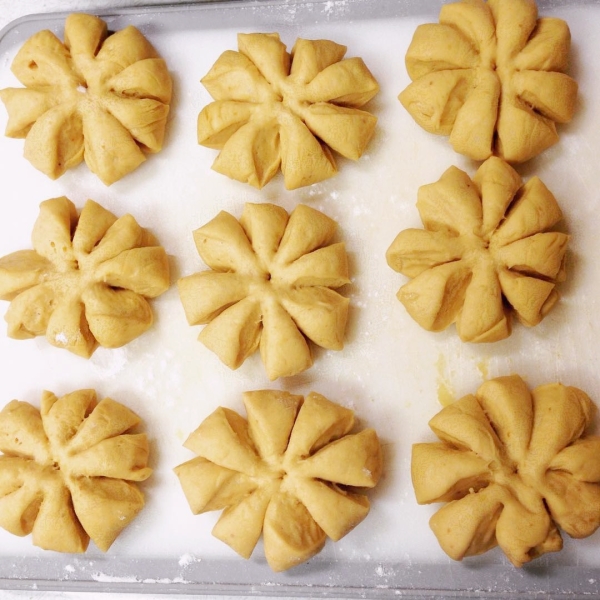
Next you divide the dough in half, then cut each half into 16 pieces (the recipe said 15, but 16 makes more sense to me!). Roll each piece into a ball, flatten a little, then use a knife or kitchen scissors to cut 8 deep slits around the sides (almost to the center) and let rise another 45 minutes.

Pumpkin rolls, before

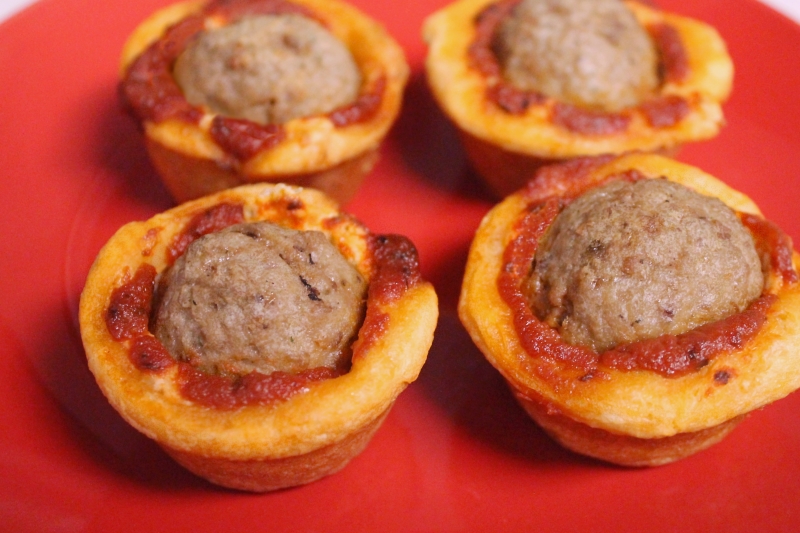
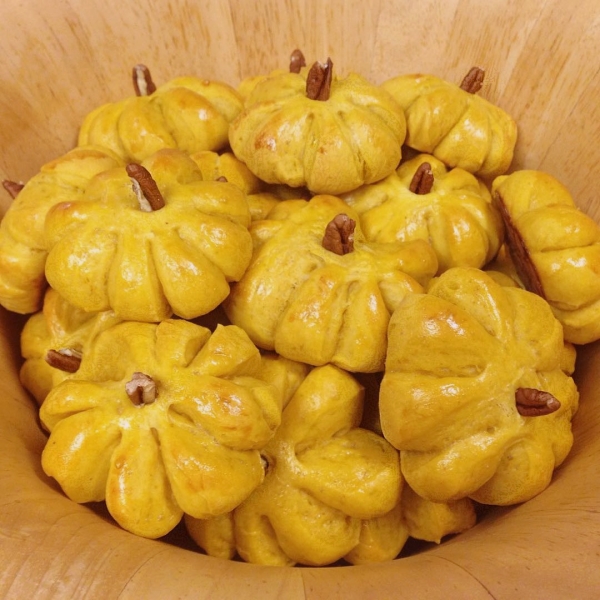
And then it's time to bake them, then add a pecan half for a stem at the end. My rolls turned out so much better this year with the deeper cuts!

Pumpkin rolls

After the first pan, I learned that I needed to reshape the rolls a little before baking. If one 'petal' was sticking out further than the others, or if the whole thing was shaped more like an oval, that should be pushed in a little to make a nice circular shape. Surprisingly, they don't magically turn into circles as they bake, haha.

I also found the recipe a little hard to follow. There is a step-by-step with pictures first, then a written recipe at the bottom. But some details are only in the top section and some only in the bottom, so you constantly have to scroll back & forth (past all of the pictures). If I make these again I'll definitely take a few progress shots and write up my own version. Otherwise the recipe is great!

Tuesday, November 17, 2015

Cooking With Tamarind Paste

Pad Thai is my favorite Thai dish, and I can make a mean plate of it at home using pre-made Pad Thai sauce. A few times I've tried to make my own sauce, usually following an Americanized recipe with no tamarind paste, but the results were never quite as good. Recently I was working on a low-calorie version and decided it was time to figure out how to use tamarind after all!

Tamarind Block

You will usually find tamarind paste in a big block like this. The tamarind pods are all ground up, so even if it is labeled as "seedless", expect it to be full of tough fibers and the occasional seed.

To use it, break off about 2 times what you need for your recipe and cover it with hot water (I microwave it for 30 seconds) to soften. If the block is very hard, let it sit 15 minutes, or just a few minutes if it already seems pretty soft. 

Tamarind softened, not strained

Now you will need a strainer and something to scrape it with (I use a table knife). Put a small piece of tamarind (1 tsp?) on the strainer and press and scrape the tamarind back and forth. Turn the strainer over and you will see nice, soft paste has pushed through. Scrape the smooth paste off the back of the strainer and you can put it right in your measuring spoon. Once you feel like you've scraped all you can, dump out the hard fibers and get another chunk.

Smooth, strained tamarind paste

This process does take a little while, but by using tamarind I was able to make my best Pad Thai sauce by far. It is definitely worth the extra steps! You can store the leftover block wrapped with plastic wrap or a Ziplock bag in your pantry for a year or two, so it's easy to keep on hand.

Note ~ Sometimes you can find pre-strained paste in a jar, though I've heard it can often be watered down & not as tasty. I wasn't able to find any at my international market, so I haven't tried it myself. Jars of paste and tamarind juice should be stored in the fridge and don't keep as long.

Now I'm eager to find some more recipes using this tasty ingredient. Have you cooked with tamarind before?

Thursday, November 12, 2015

Meatball Sub Cups

Last time I shared my first failed attempt at these yummy Meatball Sub Cups. The second try went much better, though I tried garnishing  with cheese only and it rolled right off the frozen meatballs (gotta have the sauce!). By the third batch I'd worked out the kinks, and everyone agreed these are delicious!

Meatball Sub Cups (garnished)

Meatball Sub Cups

1 can crescent roll dough
4 oz. cream cheese, 1/3 less fat (Neufchatel cheese)
1 tsp. Italian seasoning
1/2 cup shredded mozzarella cheese
24 frozen meatballs (no need to thaw)
1/4 cup spaghetti sauce
More Italian seasoning, mozzarella, and sauce for garnish


1) Preheat oven to 375 F. Butter a mini muffin tin (or use cooking spray) & set aside.

2) Break the crescent roll dough up in to triangles, then cut/snip each triangle into thirds. (Just estimate! You can always snip off a little bit if one is larger and add to a smaller piece.)

Meatball Sub Cups, 1

Press the dough into the bottom and up the sides of each muffin cup.

Meatball Sub Cups, 2

3) Microwave the cream cheese for 1 minute to soften. Stir in the Italian seasoning and mozzarella. Fill each cup with 1 tsp. of the mixture (You will have a little leftover. I like to divide it between any cups that seem lower.)

Meatball Sub Cups, 3

4) Top the cheese mixture with 1/2 tsp. of spaghetti sauce and press a meatball down into each cup.

5) If you want to skip the garnish, the finished meatballs will look like these ~

Meatball Sub Cups (ungarnished)

Or you can top each with a small dab of sauce, a couple strands of shredded cheese, and a dash of Italian seasoning ~

Meatball Sub Cups (garnished)

Bake 15-18 minutes, until golden brown. Remove the cups from the tin while warm (they tend to stick when cool).

Tip ~ You can freeze the other half of the cream cheese

Monday, November 9, 2015

Meatball Sub Cups - Fail

Do you ever have those times when you're trying a new recipe, and your gut is telling you something's not right? I'm not usually one to follow a recipe to-the-letter, but a few months ago I made these Meatball Sub Cupcakes and decided to trust the directions, in spite of a few nagging doubts.

First, the recipe said to use regular sized muffin tins. The pictures show the bread hugging the sides of the meatball, and I was guessing the dough wasn't going to rise *that* much....

Meatball cups, fail!

Then it said to pour 2 Tablespoons of sauce over the top of each. That might not sound like a lot, but it was enough to drown these little cups. (Once again, in the recipe picture it looks like a dainty dab of sauce, maybe 1/4 tsp.)

Meatball cups, fail!

Nailed it! You really should take a look at the pretty recipe pictures to see what they were supposed to look like, haha.

I've made these cups a few times since then, switching to mini muffin tins and tweaking the recipe as I would normally do. Next time I'll post my new updated recipe, but first I wanted to share these disastrous pictures for us to giggle over.

Thursday, November 5, 2015

Halloween Costumes, 2015

For Halloween this year my 2-year-old wanted to dress as Daniel Tiger (from PBS) and my 5-year-old wanted to dress like a pickle!

Trick or Treating '15, 4

I worked on Pandora's costume first. She chose her costume early, so I was able to pick up a matching red jacket at a consignment sale & removed a logo from its chest. Then I found these cute tiger ears and tail cheap on Amazon (the picture is totally wrong), and after giving up trying to find orange pants in a store, I bought a pair on eBay.

Unfortunately the brownish ears/tail and the bright sherbert orange pants totally clashed!

Costume leggings, before

I had an old pack of brown fabric dye and used a tiny bit to turn the pants into more of a rusty orange. The color change isn't very accurate here, but you get the idea! Then I cut some rounded stripes out of dark brown felt & glued them on with white school glue so we can remove them and use them as normal pants after Halloween.

Costume leggings, after

Next up was the shoes! I always keep my kinds in velcro shoes, so I didn't really want to spend a lot on lace-up costume shoes she'd only wear for a few hours. Then I remembered this pair of red shoes a parent from Orson's school handed down to us... she kept forgetting to bring them, and by the time she did, the dog had chewed up one! I wasn't really sure why she bothered after that, but we'd been using them for dirty outdoor play. In the end they ended up being the perfect base for Daniel Tiger sneakers!

Daniel Tiger shoes, 1

First I cut some tongues to size out of red felt & hot glued them on (and chopped off the 'Toms' tag) ~

Daniel Tiger shoes, 2

Then I covered the fronts in white felt. I glued the line across the top first, then folded it down and trimmed & glued it along the bottom edge ~

Daniel Tiger shoes, 3

Daniel's laces are lines rather than X's, so that made things easy. I bought a cheap pair of shoe laces and tied them in bows at the end. Then I chopped them off wider than the tongue, folded the ends under, and glued them down ~

Daniel Tiger shoes, 4

Next I needed to do a little painting. See how grungy the bottom edge looks against the white toes?

Daniel Tiger shoes, 5

I used some craft paint to paint over the bottom edge, then watered down some red paint & went over any of the exposed shoe to brighten the red a little too. The white toes ended up getting a little pilly after the first wear, so I ended up painting over the white felt too, for a little protection. I swear I took a photo of the finished shoes, but never found one, so you'll have to admire them from afar ~

Dancy party, costume     Daniel Tiger


Now Orson's costume gave us some problems! First he said he wanted to be a monster or a pickle, then he decided on a "monster pickle"! Once again I could find no green pants in a store, so I finally found a matching sweat shirt and sweat pants online. Then we took him to the costume shop to find a monster mask, and he really wanted a Hulk mask, which was the perfect green monster in his mind. We said we couldn't buy that one or else everyone would think he was the Hulk though, and after that he was pretty sulky about the whole thing and said he just wanted to be a pickle.

Meanwhile I had already ordered a sweat suit which, even with a few green dots, was going to look nothing like a pickle! I was feeling like a pretty rotten mom until I found this giant inflatable pickle, which I thought would help things a little ~


And then, right before heading to the craft store for some green felt, I had a great idea for a pickle hat. My sewing machine has been out of commission for a few years, but I knew I could hot glue this one! For the hat I just measured how big I wanted the opening for the face, and how far above and below I wanted it to fall, as well as the width. I drew it out on some fleece with a Sharpie, cut it out and the fit was just right! Orson insisted there needed to be a stem, which was a good call. I stuffed the top of the hat with two plastic grocery bags, then I cut out two sizes of circles from some bright green felt and used school glue again to attach them all over.

Here he is with the inflatable pickle, which we ended up ditching after a few houses, of course. With the hat we really didn't need him though! ~

Trick or Treating '15, 3

Both kids loved their costumes, and I was pretty pleased they picked something other than the normal Elsa and superhero. (Pandora loves Elsa, but I saw a *lot* of them this year!) And of course they had a great time Trick or Treat-ing!

Trick or Treating '15, 1