Thursday, October 31, 2013

Happy Halloween!

I hope everyone is having a Happy Halloween! Any plans tonight? We did most of our celebrating on Saturday with a Fall Festival (kids in costume) & our party. Tonight we plan on doing a little trick-or-treating & handing out candy at home, but that is it!

This year Orson helped daddy empty out a pumpkin and then drew on a face for daddy to cut while I worked on a 2nd pumpkin. One of my new favorite blogs, Epbot, mentioned using dry erase markers to draw on the pumpkins & they worked great! (I've used Sharpies in the past, but they don't wipe off easily)

2013 Pumpkins, Day

I copied my template from this image, just free-handing it on the pumpkin. Drawing & cutting didn't take too long & I think it turned out great!

2013 Pumpkins, Night

We carved them on Monday & they seem to be holding up pretty well, just starting to sink a little. I think they'll make it through the night! ;)


Wednesday, October 30, 2013

Pumpkin Round-up

Here are some of the pumpkins I decorated in years past! I rooted around in my folders & even found two that were never posted online before.

I always seem to struggle for some sort of inspiration & then finally just do *something* out of obligation. All of them (except for the last one) were done from my own designs. I wish I found the process more enjoyable! Some are carved, some are painted, and a lot were done in the years before nice cameras.


Butterfly pumpkin - 2004
2004 - Butterfly

2005 Lantern Pumpkin, 12005 Lantern Pumpkin, 2
2005 Lantern Pumpkin, 32005 Lantern Pumpkin, 4
2005 - 'Lantern' pumpkin, carved on four sides

Drooping Ambigram Pumpkin - 2006
2006 - "Harvey" Ambigram (the picture was taken a little too late, it's so droopy!)

"Happy Halloween" Pumpkin
2007 - "Happy Halloween" design from my own template

Painted Pumpkin
2008 - A tiny pumpkin with a black painted design

Carved Orange
2008 - An orange I carved like a pumpkin!

Pumpkin design detail
2008 - A pattern I drew for our rock themed party. A friend carved it here

My Pumpkin - 09
2009 - Painted & carved geometric design

2012 Pumpkin, Caved in, 1

2012 Pumpkin, Caved in, 2
2012 - For some reason this pumpkin caved in the next day, so I couldn't get a good picture. I covered the front with a black cat, snake, witch, hat, & all sorts of Halloween icons.


And this year I just pulled up a pre-made template and have an awesome pumpkin sitting out on the back porch, which I'll hopefully get to share with you later today. Have you carved yours yet?

Tuesday, October 29, 2013

Witch Broom Tutorial

I know I just posted the Piped Brain Dip Tutorial earlier today, but I wanted to make sure to get these up ASAP so people have time to make them before Halloween!

I'd seen adorable witch brooms like these around Pinterest a few times & could not resist. Some were made with cheese slices fringed along the bottom and then rolled around the pretzel stick, but the string cheese version sounded much easier. A little too easy ~ I seemed to hit a snag at each step & had to come up with several tricks I'll share here.


1) The directions said to cut the cheese sticks in half, but that seemed way too long! You could probably do thirds, but I chose to cut mine in fourths.

Witch Broom Tutorial, 1


2) Pushing the pretzel stick in one end cracked the cheese sticks every time. So I grabbed a drinking straw and pushed it down about 1/2 inch in the center of one end and twisted it to remove a chunk (save this piece). The perfect size for a pretzel stick!

Witch Broom Tutorial, 2

Sometimes the chunk came out easily, sometimes I had to insert it & twist some more. If it really wouldn't come out I just pushed the straw all the way through to the bottom.


3) On the opposite end you cut slits all around, cutting about halfway up the cheese. I cut the bottom of the cheese in half, rotated it a quarter turn and cut it in half again. Then I sliced each of those fourths 2-3 times (don't worry too much about spacing).

Witch Broom Tutorial, 3

The sample brooms from the link looked nice and flared, but mine just looked like a cheese stick with faint lines! I could have spread them out & carefully posed them for a picture, but I wanted them to flare naturally a bit. So I took that chunk we removed from the other end and shoved it in the center of the 'bristles', pushing up until they spread. (If you had to go all the way through the cheese with the straw, just fold the piece in half & push them both in)


4) Now just insert the pretzel and knot a piece of green onion above the slits! My green onions were very wide so I cut one into very thin strips. Just be sure to cut it much longer than needed, because they are fiddly to tie & break easily. They did not seem too secure, but I didn't have any come apart later (chilling in the fridge probably helped).

Witch Broom Tutorial, 4

I put mine in a tupperware in the fridge, and when I pulled them out the next day the pretzel sticks were soft and bendy! Of course they could easily be replaced, but if you are going to store them I'd wait & add them before serving. Now you are ready to make an army of little brooms!

Witch Brooms

Piped Brain Dip Tutorial

Most of the "brain" recipes I see around Halloween use a mold to create the shape, so I was excited to see a piped brain dip here. I didn't really like the shape of that one though, or the visible shreds of cheese in the recipe, so I decided to make things up as I went along.

To make the dip I used a chicken & cream cheese recipe we'd made before but subbed the chicken with ham for a nice touch of pink. Microwave an 8 oz. block of cream cheese for 30 seconds so it is soft enough to stir up. Mince an 8 oz. pack of ham lunchmeat in a chopper/food processor and stir into the cheese along with a packet of dry Hidden Valley ranch mix. This was a little thick, so next time I would add in a little sour cream or skim milk. You can also add in a few drops of red food coloring if you like yours brains bright pink, but I liked the color as-is!

Now we are going to fill a small zip-lock bag with the dip. For an easy, no-mess technique ~ push the bottom of the bag into a small glass (or mug), flipping the top of the bag inside out around the outside of the glass. I wish I had taken a picture of this! Spoon the dip in until the glass is full, then remove the bag & it will stand open on its own on the counter if you need to spoon in a little more. Squeeze out the air, close your bag, and grab a plate or platter.

First I squished the dip into an oval shape & laid it on my platter to get an idea of how large the brain needed to be ~

Brain Dip Step-by-step, 1

I stored my bag in the fridge for a while so I needed to microwave it about 10 seconds or so to take of the chill & loosen it up (repeat as needed). Now cut off one of the bottom corners of the bag and pipe an oval slightly smaller than the base needs to be. Fill in the center ~ no need to be neat, this just helps us create a domed shape.

Brain Dip Step-by-step, 2

For each layer we are going to create a curving zig-zag around the left and right side, stopping at the top & bottom center, and then fill in the space in between. This layer will be larger than the first, the full size of the brain base.

Brain Dip Step-by-step, 3

Add another layer the same way & same size.

Brain Dip Step-by-step, 4

And for the fourth layer I zig-zagged a little further in (closer to the center) and topped that with two rows of zags along the center. Leaving a seam along the center gives it that nice 'double hemisphere' look! If you leave too big of a gap you can gently press it together with your fingers.

Brain Dip Step-by-step, 5

Now we could stop there, but I still had about 1/3 of my dip left ~ whoops! I added in some more rows along the top and filled in some on the sides with small blobs (mimicking the look of the zig-zags curving in & out).

Brain Dip

I added some rows of FlipSides pretzel-crackers along the outside of the platter, which was honestly more tedious than piping the brain itself! I would recommend piping on a smaller plate and tossing these in a bowl on the side. Mini pretzel twists taste great too.

Brain Dip, 2

Now grab a pretzel and feast on brains zombie-style!


Monday, October 28, 2013

Fearsome Foods

I might have gone a little overboard with Halloween foods this year! Thank you Pinterest for rounding up lots of great ideas. ;)

Unfortunately there is a lot going on the weekend before Halloween & our get-together ended up being a little small. The people that could come had something scheduled before or after, and so did we! (Fall Festival beforehand & Justin had to chaperone Homecoming that night) Thankfully we were able to get the food & kid's costumes ready in time without too much stress & skipped dressing up ourselves this year.


On to the eye candy! Or "Bloody Eyeballs" in this case. It's always hard to come up with a themed meat dish without resorting back to the classic mummy dogs, so I was thrilled to come across these eyeball meatballs.

Bloody Eyeballs

I altered the recipe a little & doubled it, using 2 lbs. ground turkey, 1/2 cup Panko breadcrumbs, 1/2 cup Parmesan cheese, 2 Tbsp. minced garlic, 2 eggs, 1/2 tsp. salt, & 1/2 tsp. pepper. I lined the bottoms of two casserole dishes with (store bought) spaghetti sauce, about 3-4 cups, and placed the meatballs on top. (The picture shows the smaller batch, uncooked. We made way too much!) Ground chicken or turkey will give you nice, whitish eyeballs.

Now, I didn't want to use slices of olive & have white centers. I bought whole black olives, cut them in half, & cut a slice from each half. Then I cut down the leftover ends until I had a black piece small enough to fit inside the hole. It was a little extra work, but worth it! I think a large milkshake straw might be the perfect size to quickly punch these out, but I didn't have one on hand. Slap the iris on your meatballs and bake for 20 minutes at 350 F.


Next we have the Brain Dip, which I will post a step-by-step for tomorrow! (Tutorial added here)

Brain Dip


The same goes for these cute little Witch Brooms (Tutorial added here) ~

Witch Brooms


Justin made some homemade salsa, so I grabbed a pack of tortillas and cut out a tree and some gravestones to make a little cemetery scene. First I brushed the tree with some ground cinnamon mixed with water then I baked these at 350 F, just checking on them every few minutes (and flipping them over once) until they were firm & a little browned. I also used the cinnamon paste to paint the tombstones with the last names of our guests, but Justin thought that might cross the line so I wiped it off. Of course of guests liked the idea!

Salsa Graveyard

I carefully put the pieces back in the tortilla bag, thinking there was enough wiggle room in there to keep them safe, but I came back to broken tombstones and tree. The moisture from the other tortillas probably didn't help, and someone could have easily moved the bag, not realizing there were fragile pieces inside! I glued the tree back together long enough to get a picture, snapped off another branch just setting it in the salsa, and then it went into the trash.


And I couldn't resist making these cute & easy vampire donuts, which I'm dubbing "Krispy Skreams". One of the girls from my favorite food blog, Our Best Bites, said she tried to make these and the fangs opened back up & ripped her donuts apart! Our fangs did not seem very strong, so it might vary by brand, but I pinched the creases closed with my fingers a bit just in case and we had no problems. Add some chocolate kisses for the eyes and you are set!

Krispy Skreams


Are you doing any spooky cooking this year? Whenever I mention making a silly food now my 3 year-old says "maybe for Halloween", so I may have to make some more on Halloween day. I might not get another chance anytime soon!

Wednesday, October 23, 2013

Magic Corn Trick

I saw this “magic corn trick” a few times around Pinterest and had to give it a try. Apparently you cut the bottom of the corn off, then cook it in the microwave with a wet paper towel. After cooling for 2 minutes you can just squeeze the corn out of the husk without all of those pesky silk threads!

Magic Corn Trick?, 1

And just like magic… oh, wait.

Magic Corn Trick?, 2

Yeah, so that didn’t work at all! We did have a few that came out rather clean with a few threads still left to pick off, but I can get them that clean just by pulling the husks off normally (and cutting the bottoms off was really hard to do). Cooking them in the microwave did seem to work well, but don’t expect them to slide out with ‘no strings attached’.

Monday, October 21, 2013

Face Punches! (not as painful as it sounds)

A while back we ate dinner at IHOP and Orson got super excited about their chocolate pancake with a face made out of whipped cream, chocolate chips, and cherries. Not something we’d let him order every time, but sometimes you’ve got to give in when they are that enthusiastic! It took him about three days to eat the whole thing, and the whole time he happily chatted away about his ‘candy face’ pancake.

Seeing him that excited about food with a face reminded me of these cute face punches that I put on his Amazon wish list a while back. You can use them on sheets of nori (the seaweed used for sushi) to quickly add a black face on lots of foods. And with three faces you can mix & match a little bit, like turning the eyes from the middle punch sideways to create a wink.

Nore Face Punches

I let the punches sit around for a week or two before I finally pulled them out & used them. Pandora likes to wake up right at Orson’s lunch time, so trying to get everyone’s food & milk ready at the same time can be a little crazy. I felt a little ridiculous for putting it off ~ they only take a minute to use! So one day I cut a hot dog in half, made some slits for legs to turn them into octopus, and punched out a couple of faces while it was in the microwave. A super cute lunch in no time!

Hot Dog Octopus

Unfortunately toddlers are a finicky bunch. As I was assembling them Orson started screaming that he didn’t want them to have faces. Panda joined in on the wailing, ready for her bottle. I snapped a few photos & told Orson he could take the faces off if he didn’t want them, and he started complaining that he didn’t want them to be octopus & I should put them back to ‘normal’. He finally agreed to eat them only after all of the legs were ripped off and dubbed ‘tiny hot dogs’. By the end of it I was grumbling the equivalent of, “This is why we can’t have nice things!” Oh well. I know he’ll appreciate it one day!

Shortly after this I discovered the blog Just One Cookbook, which is filled with tons of yummy Japanese recipes and some really good posts about bento box lunches. Hers are not the over-the-top kind where you spend hours cutting licensed cartoon characters out of food stuff (Google “Bento art” to see what I mean), but simple lunches that made bento seem possible. Of course I would add a few cute touches here & there! Since then I have spent a lot of time browsing bento supplies on Amazon, eBay, and my new favorite ~ BentoUSA ~ and tacked several items on my Christmas list. With Orson starting Pre-K next year I figured a little practice wouldn’t hurt! (though there my be some whining involved)

Saturday, October 19, 2013

Ginger Chicken with Peanuts

I *love* Chinese food. When I was growing up and my family asked where we should eat out, they often added, "and don't say Chinese food!" because they knew it would always be my answer. I've tried making Asian foods again and again, and while I've got a pretty good recipe for Hot & Sour Soup, we haven't had much luck with the meals. After a few experiments I recently came up with a recipe that we really loved.

Ginger Chicken with Peanuts

Honestly the sauce doesn't immediately make me think 'Chinese take-out', and I think that is because of the strong ginger flavor, but it is so good that I don't want to mess with it! Everything in this recipe is cut pretty small so that you get a nice mix of flavors and textures in each bite.

Recipe here!


Wednesday, October 16, 2013

Halloween Treat Round-up

I love making spooky themed recipes for Halloween! Figuring out *what* to make can be tough though, so I thought I would round-up pictures of our foods from years past for inspiration. Some of these don't have recipes, since they were made by friends or family (or just made up), but I'll describe what I can.

Sand Witches

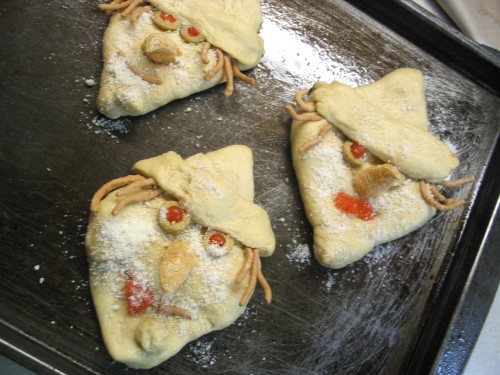
Sand Witches ~ A diamond of dough (wrapped around a cheese slice) with a strip of dough across to form the brim of the hat. Chow mein hair, olives for eyes, bugle noses, sprinkled with parmesan cheese for 'sand'.


Witch's hats

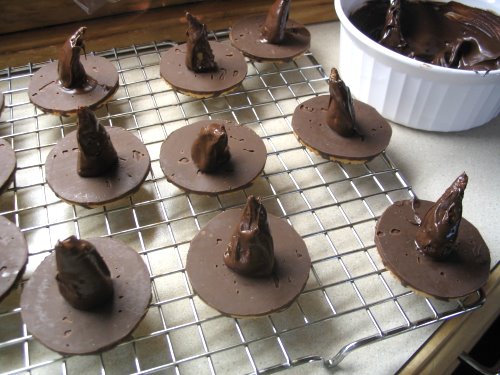
Witch Hat Cookies ~ You can use those Bugles again, this time dipped in chocolate and laid atop a (upside down) Fudgestripe cookie to create a witch's hat! (Or use them as 'sorting hats' for a HP party)


Mashed Boo-tatoes

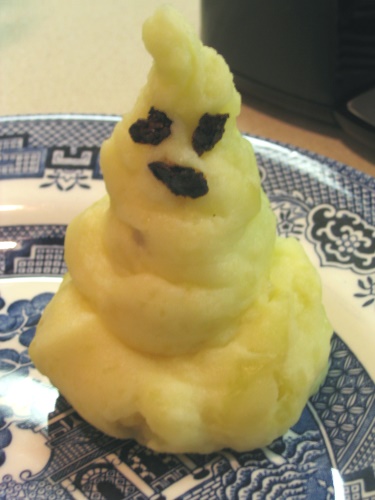
Mashed Boo-tatoes ~ Spoon or pipe the potatoes onto a plate and add eyes & a mouth with sun dried tomatoes (or another black food)


Hot Dog Mummies

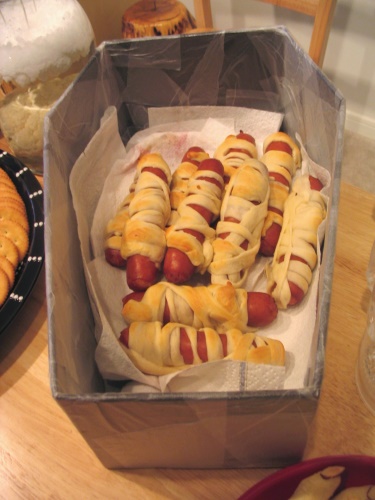
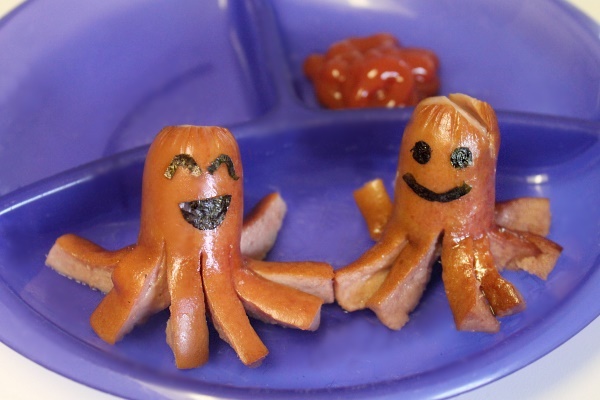
Mummy Hot Dogs ~ A classic! Wrap hot dogs or brats with strips of dough (we usually use crescent rolls) then bake until golden brown. You can leave them blind or add some eyes with ketchup, seeds, etc.

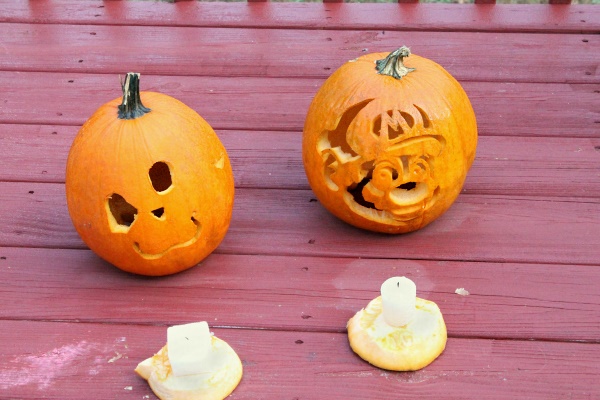
I created a coffin out of cardboard, tape, and black spray paint, then wrapped it in Press & Seal to make it safe for food. We use it every year!


Witch's Fingers

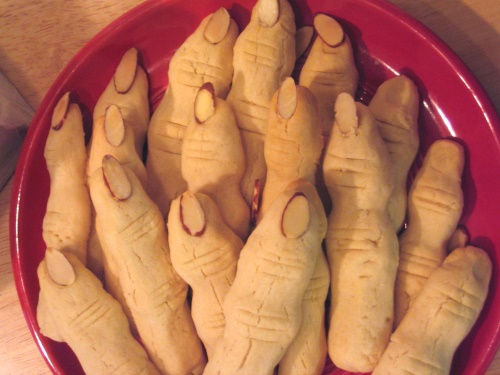
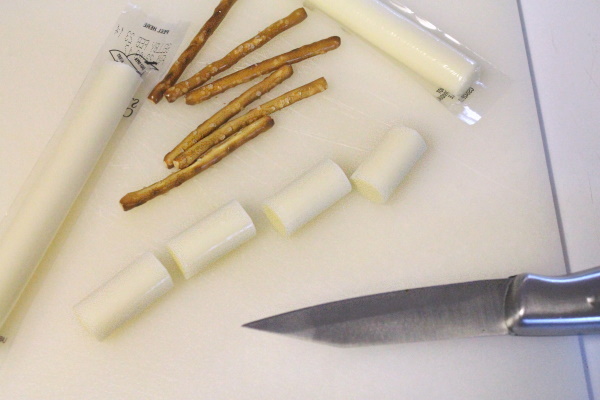
Severed Fingers ~ Roll out a snake of dough, add a slivered almond for a nail and cut some slits to make knuckles. This version used cookie dough and puffed out a little too much, so I'd recommend some kind of cookie or bread dough that doesn't spread much. This year I saw some dusted around the knuckles with cinnamon for some nice grime.

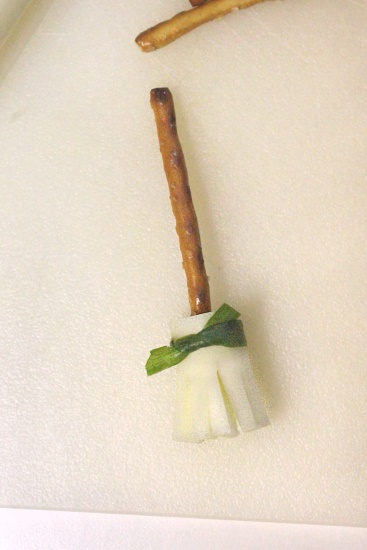
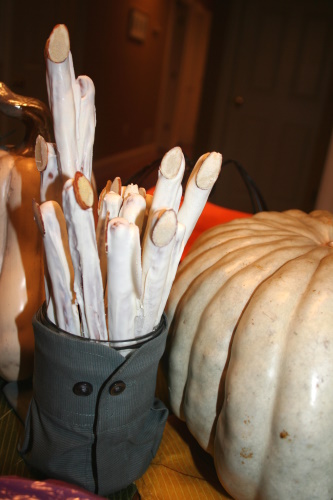
Chocolate dipped pretzels work too!

White Chocolate & Pretzel Fingers


Spooky Croutons

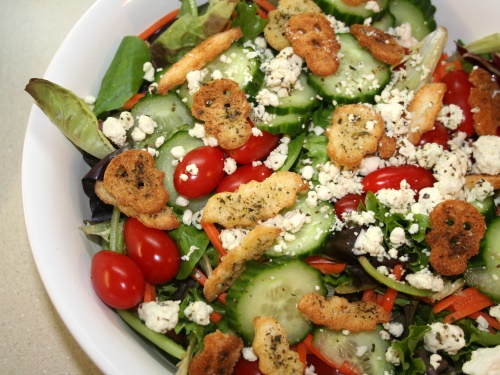
Crouton Creatures ~ Cut spooky shapes out of bread slices, brush them with oil and herbs, and toast them up in the oven to create some awesome croutons.


Veggie Tray Skeleton

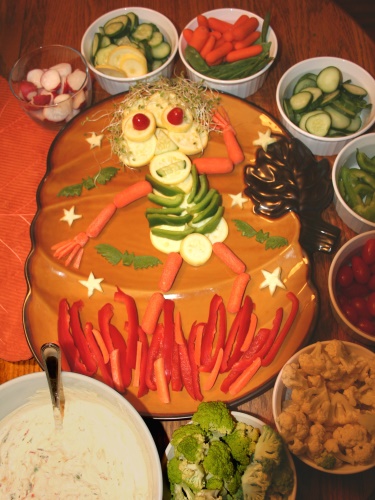
Vile Veggies ~ Arrange a veggie tray to create a skeleton or other beasts. Snap peas make adorable bats!


Candy Corn Cheese Pizza

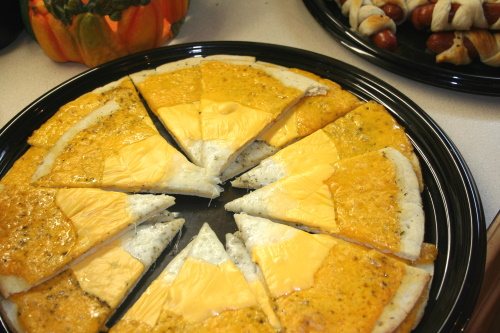
Candy Corn Tortillas ~ Sprinkle tortillas or pizza dough with a ring of three different cheeses, bake, and slice into wedges to look like candy corn.


Tomato Soup with eyes

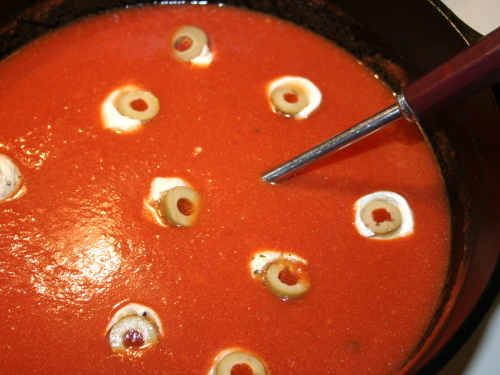
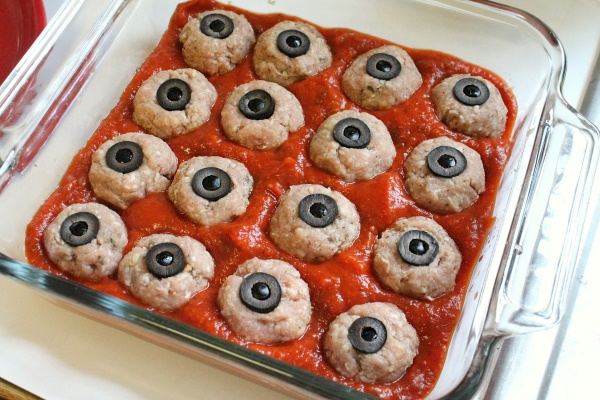
Bloody Eyeball Soup ~ Tomato Soup topped with eyeballs created from mozzarella rounds and olives. Add the eyeballs right before serving so they don't have a chance to sink or melt.


Candince's Graveyard Brownies

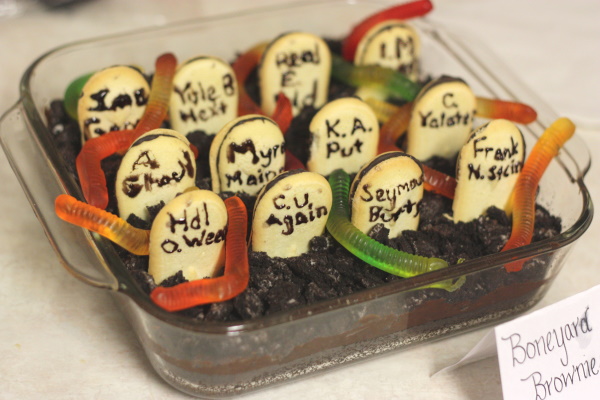
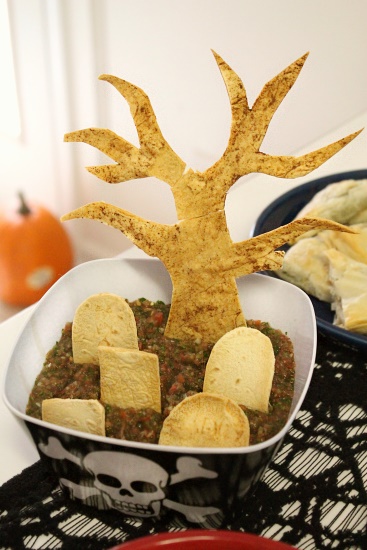
Boneyard Brownies ~ Create the dirt with crumbled brownies (or crushed oreos) and top with Milano cookie tombstones and slithering gummy worms. My friend had lots of fun coming up with the names, piped on with black gel.


Hand-burgers, 1

Hand-burgers ~ Press meat into a hand shaped cookie cutter before grilling these up. They look awesome a little charred and dripping with ketchup.


Bone Breadsticks, 2

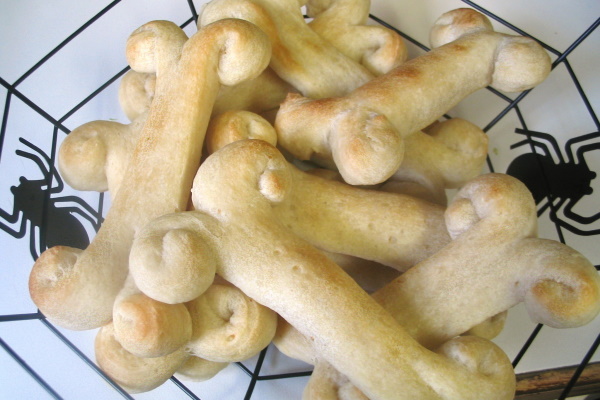
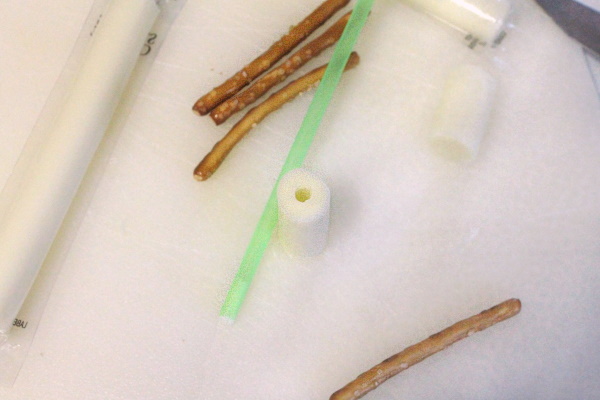
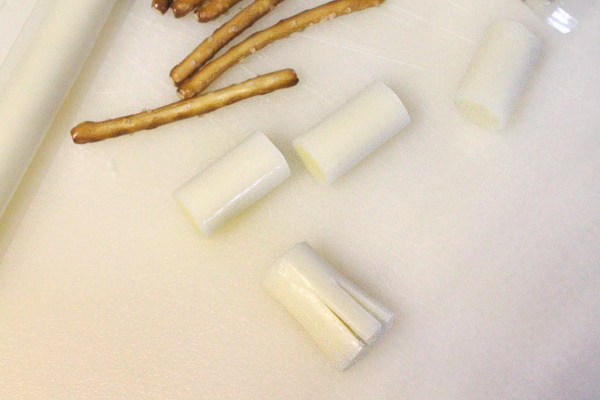
Breadstick Bones ~ A tube of breadstick dough makes these extra easy, or you can roll out your own. Simply snip each end of the dough and curl the sides outward to create beautiful bones.


Candy Corn Cups, take 2

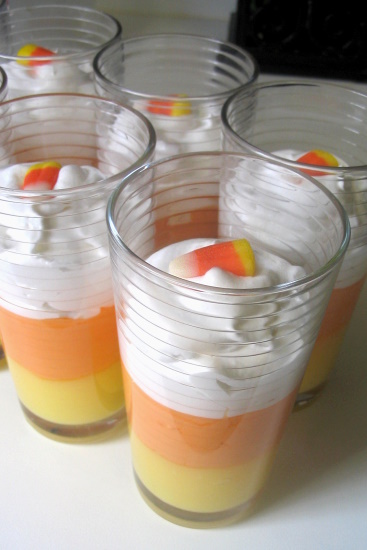
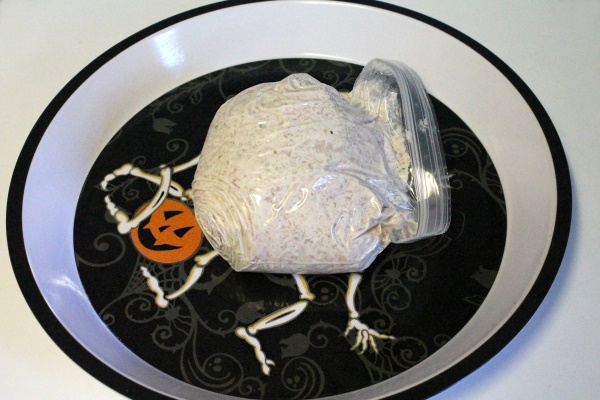
Candy Corn Cups ~ I tried two different recipes for these and we didn't like either, but I do love the look of these! You can take any fluffy white dessert and divide it up, coloring 1/3 yellow and 1/3 orange, and then layer them into cups. My guests had hoped each layer would taste different though, so another year I tried this version which used vanilla pudding for the bottom layer and whipped cream for the top, which worked well. The middle layer used melted candy corn for the orange coloring, but it was much too sweet, so you'll have to get creative for the center layer.


Intestine Topping - cooked

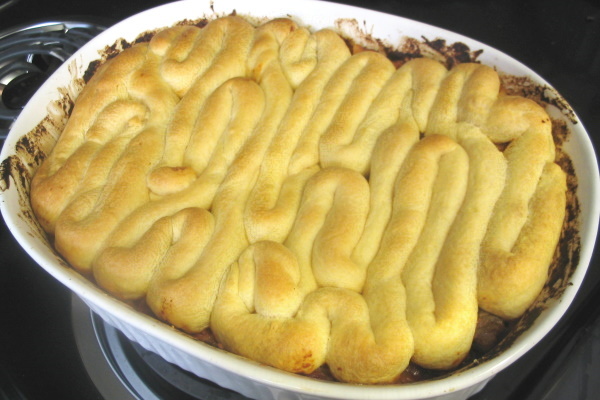
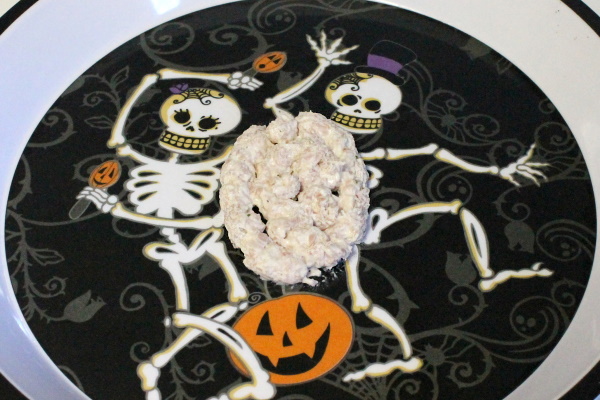
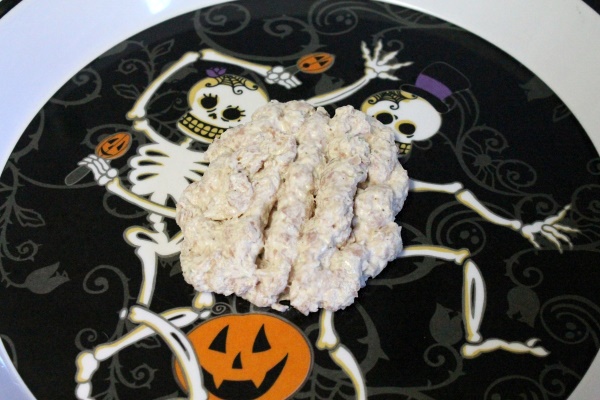
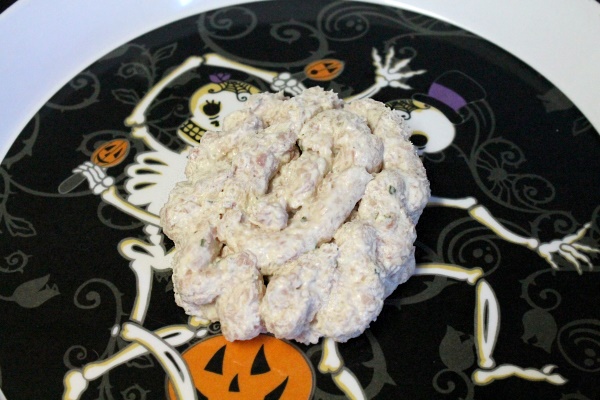
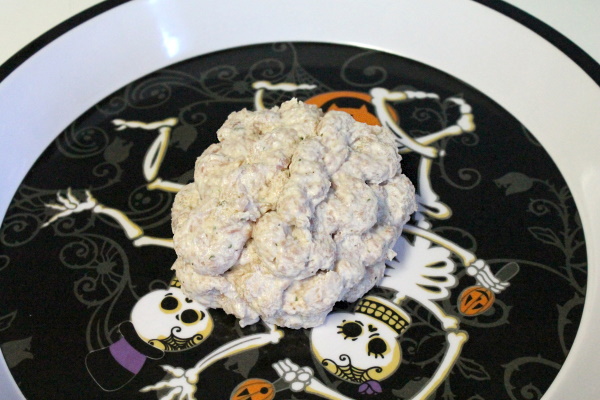
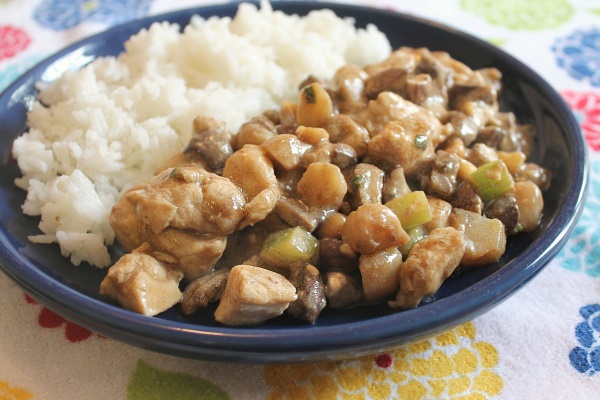
Ghoul-ash with Intestines ~ Top any casserole with these winding coils of dough to create some gruesome intestines (once again, we used crescent rolls). Ours was filled with nice red Goulash, and was promptly re-named with an added H for fun.


Now what in the world and I going to make this year?