Thursday, December 19, 2013

Christmas Crafting (with Kids)

The last two weeks I've been trying to fit in lots of Christmas crafting with Orson. We made this candycane and wreath by stringing Fruit Loops on pipecleaners, which turned out pretty cute! But before I could get a picture of them, Panda rolled over to the tree and stole the wreath, ripping it apart. I was going to fix it, but then Orson ripped apart the candy cane and asked if he could eat the cereal so I gave him the wreath too. Oh well!

We are in the process of making about 7 presents for grandma's and aunts, but those need to stay secret for now! I wanted to make something for a couple of our friends too, so I put together some cards for him to color. I had planned on cutting out some random things from his Christmas coloring book, but then I noticed the Star Wars coloring book and decided to do a mash-up. I had a little too much fun with these!

Here are the cards before he colored them. It kind of looks like the clones are sneaking up on the elves, but I was go for more of a 'slave driver' thing ~

Star Wars Xmas Cards, uncolored

And here they are colored ~

Star Wars Xmas Cards, colored

Good use of the reds and greens! Orson's not much into coloring lately so I was happy he did this much.

And I just realized there is one more friend that really needs a card, so I better pull my scissors back out!

Wednesday, December 11, 2013

Meatball Pie

I have a feeling you aren't going to see much of me around here this month! I normally like to start Christmas shopping a few months early, but this year we had to wait until December for a bonus, and so we've been cramming everything in since then. 2 more weeks... I think we can do it!

I pulled out some old photos of a "Meatball Pie" that I never shared because the recipe still needs some work and I'll be cooking it very differently next time. Years ago I bookmarked a simpler 'spaghetti pie' that used noodles, egg, and cheese, and then was cut into wedges to serve. When I saw this version topped with caramelized onions, ricotta, tomato sauce, and frozen meatballs (and other yumminess), I had to try it right away!

Meatball Pie, 1

The first time I followed the recipe pretty closely, but there was too much pasta (which was also really dry), and a lot of unnecessary steps that made things overly complex. So this time I simplified things a bit and added a little sauce to the pasta, but as you can see below it did not hold it's shape very well!

Meatball Pie, 2

Next time around I'm thinking of just baking the crust in the oven and heating up everything else on the stove to pour over the 'pie' wedges. Hopefully it will be easier to serve up this way, and it will lower the cooking time dramatically! We do have another spaghetti casserole that we love (cream cheese and french fried onions), but both of these are definitely worth keeping around.

Thursday, December 5, 2013

Hectic Holidays

December has arrived and I feel like my to-do list is a mile long & constantly growing! I don't know how anyone has time for one of those daily activity advent calendars ~ maybe when the kids are older? Orders have been dead the last few months & of course they suddenly decided to pick up now, but I'm not going to complain about that one!

We managed to get out of cooking for Thanksgiving this year and it was great! While I do love cooking for people, I am not a fan of traveling around to multiple houses and trying to transport food to each. Do you bring something lukewarm, try to heat it there, or bring a cold desert (even though you usually leave before desert is served)? No good options. This year the first family ate at Cracker Barrel (which is as crazy on Thanksgiving day as you'd assume), so we just tacked a couple of pies for the 2nd family on our bill and called it a day!

Chocolate Peanut Butter Oatmeal Cookies - "33"

This year Justin's birthday actually fell on Thanksgiving and mine was a few days earlier. We had to go very low-key this year and pretty much just went out to eat, but I did get up a little early on his bday and made some of his favorite No Bake Chocolate, Peanut Butter, & Oatmeal Cookies. I spooned them out into a large "33", and when it cooled down a little bit it was easy to smooth and reshape as needed with my fingers. There was a little bit leftover so I just rolled that into balls, then I started cooking some yummy breakfast sandwiches. He was quite pleased!

Tuesday, November 19, 2013

Ajitsuke Tamago! (aka Japanese Marinated Eggs)

This recipe has been in the works for a long time!! 4 years ago I was drooling over pictures of Japanese ramen and reading about all the different flavor variations and toppings. Nearly every bowl was adorned with a half-boiled egg (hanjuku tamago), which is usually marinated in soy sauce, mirin, and sake to become a ajitsuke tamago (‘flavored egg’). I’ve never been a big fan of hard boiled eggs, disliking the chalky texture of the yolks, but these lightly set eggs were a far cry with their orange, glistening, custard center. I figured I’d learn how to make these tasty looking eggs first and worry about mastering ramen later.

Ajitsuke Tamago, medium

‘Hanjuku tamago’ is usually translated as ‘soft-boiled egg’, but I wanted a yolk that was set and not runny, so I like to call mine ‘medium-boiled’. Well, I soon discovered that while it is easy to hard boil an egg, getting the perfect medium-boiled center required lots of eggs-perimentation!

A *big* part of the problem is that there are just so many ways to do it! Do you use a new egg or an old egg? Straight out of the fridge or room temperature? Pierce the bottom, break it, or leave it intact? Should you add vinegar or salt to the water? Start the eggs in cold water, boiling water, drop the temperature, or remove them from the heat all together? The timing will determine whether the egg is soft, medium, or hard set, but first you’ve got to decide which cooking technique to use.

Ajitsuke Tamago, tests

I tried a few. I think I first began by letting my eggs warm up on the counter a bit first and then started them in cold water, bringing them to a boil and then reducing the heat and setting the timer. I experimented with times for a while, but it was too hard to catch the beginning of the boil, and I realized that I needed to start from scratch with a technique that offered a lot more consistency. At this point, however, I was pregnant with Orson and figured I probably should avoid eating the undercooked mistakes, and it wasn’t long before my nauseous tummy wanted to ignore the topic of eggs all together!

Fast forward 4 years and 2 kids later, when I came across this wonderful post about ajitsuke tamago. She shared my frustration about the varied cooking techniques ("Use no more than a centimetre's depth of water. No, make sure there's at least a gallon in the pot. Salt, don't salt. Add vinegar, but why, for acidulating is an old wives tale..."), had a few new tips, and inspired me to tackle the recipe again. I chose an easy method that offered the most consistency and then only had to do a few timed tests before I had my perfectly cooked egg! I hope you enjoy this recipe and give it a try yourself.


1) Fill a small pot with enough hot water to cover four eggs and bring to a boil over high heat.

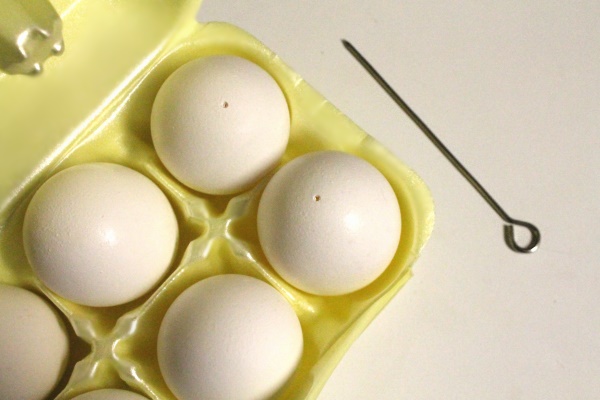
2) Meanwhile, take four large eggs from the fridge and pierce the bottoms (optional) to help keep the eggs from cracking and to get rid of the indention from the air pocket. I use the metal skewers used for trussing a turkey, but a push pin works well too. Puncturing the shell is a little scary but I haven't had one break while piercing it yet!

Ajitsuke Tamago, 1

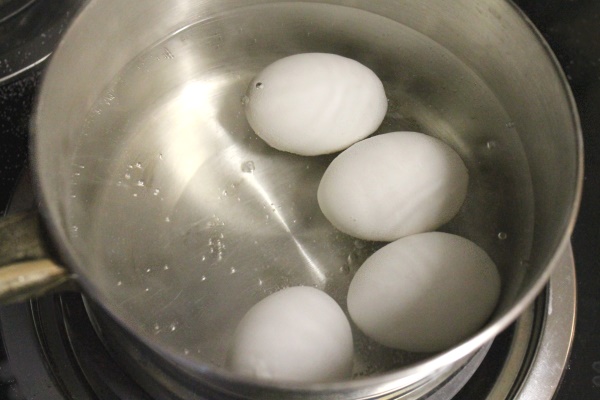
3) When the water begins to boil, quickly add the eggs, reduce the heat to medium, and set your timer for 8 minutes. (I like to gently lower the eggs into the water two at a time on a large spoon)

Ajitsuke Tamago, 2

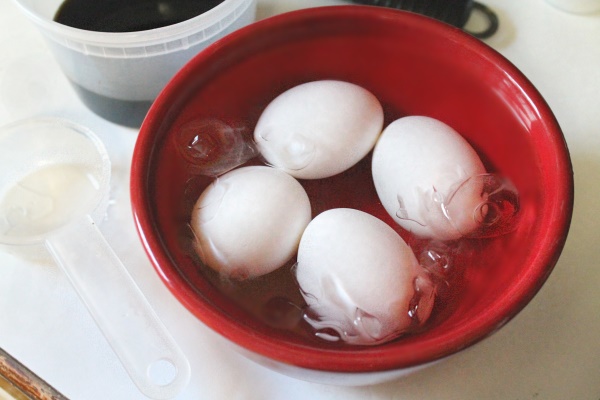
4) While you wait, fill a small bowl with ice and add cold water when the eggs are nearly finished. When the timer goes off, place the eggs in the ice water to prevent further cooking and to make them easier to handle and peel.

Ajitsuke Tamago, 3

Now, I had a lot of trouble getting the finished eggs to peel nicely. I tried new eggs, old eggs, and different techniques, but it made no difference! Some turned out fine while others ended up with chunks missing. Another blog solved this problem with a tip from Julia Child  (I can’t seem to find the post)...

5) Leave your water boiling as you chill the eggs in the ice water for 2 minutes (this shrinks the eggs away from the shell). Lower 2 eggs at a time into the water and boil for 10 seconds, then remove to the ice water again and chill for 5 minutes (this expands the shell). I added this extra step last time and had the most perfect & easily peeled eggs ever! (If you want to skip this step just chill your eggs for at least 5 minutes.)

Ajitsuke Tamago, 5

6) While they are chilling, prepare your marinade. In a small bowl (or tupperware or ziplock) mix 1/4 cup water, 1/4 cup soy sauce (La Choy), 2 Tbsp. mirin, 2 Tbsp. sugar, and between 1/2 - 2 Tbsp. sake. (Traditional recipes call for 4 Tbsp. sake, but we thought the eggs tasted much too boozy that way. I tried lowering the amount or leaving it out all together, but thought 1/2 Tbsp. was just the right hint of flavor for a lightweight like me!)

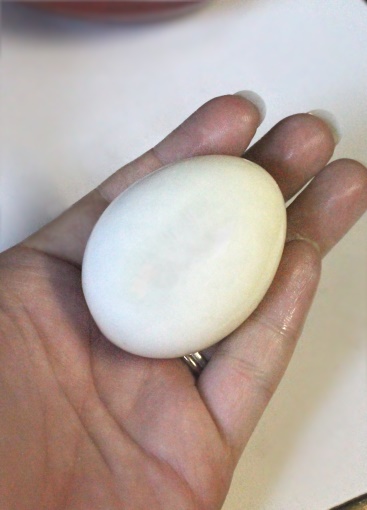
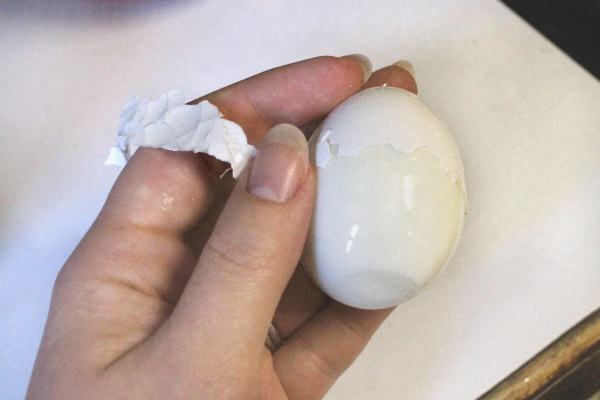
7) Peeling your eggs will hopefully be a cinch after #5! Tap your egg lightly on the counter, turning to crack the shell all over, and then start peeling from the bottom. I like remove a small strip, circling around like an apple peeler, but you do what feels right! Rinse the eggs off to remove any stray shell.

Ajitsuke Tamago, 4

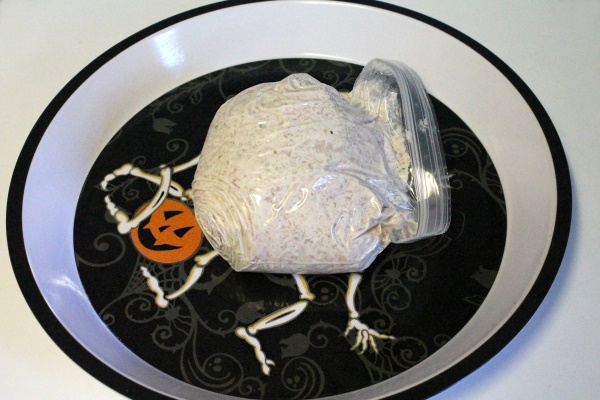
8) Plop the 4 peeled eggs in the marinade (mix more if needed). In this container my eggs are quite snug, but see how the tops are peeking out?

Ajitsuke Tamago, 6

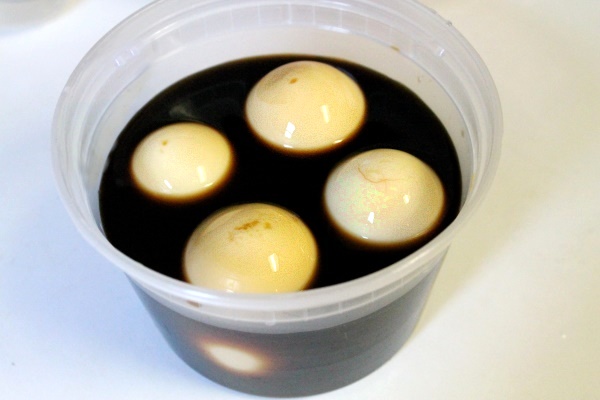
The linked recipe above gives us a nice tip here ~ Grab a paper towel (or cheesecloth, muslin, coffee filter, etc.) fold it into fourths and then cut it down to fit into the top of the bowl. The cloth will soak up the marinade and drape over the tops of the eggs so they are in contact with the liquid too. Genius!

Ajitsuke Tamago, 7

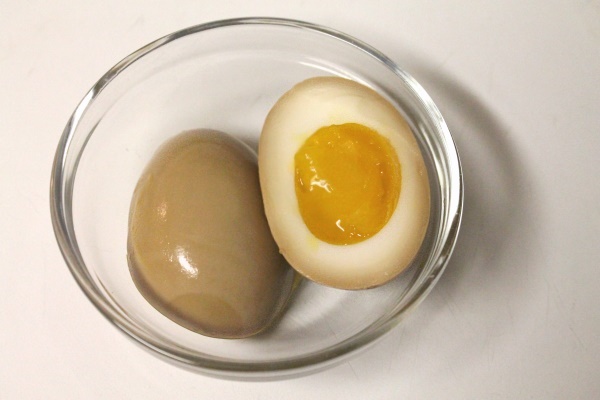
The longer you leave the eggs in the marinade, the darker & more flavorful they become. Some people prefer a lighter egg, marinaded for only a few hours, but I like to leave mine overnight (see the egg at the top of the post). At some point I will spin them a quarter turn so the marinade can reach the spots where they were pressed up against the sides of the bowl or each other (otherwise you will end up with some white spots).

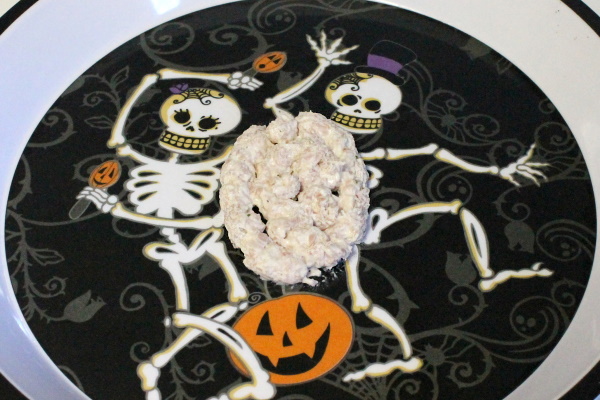
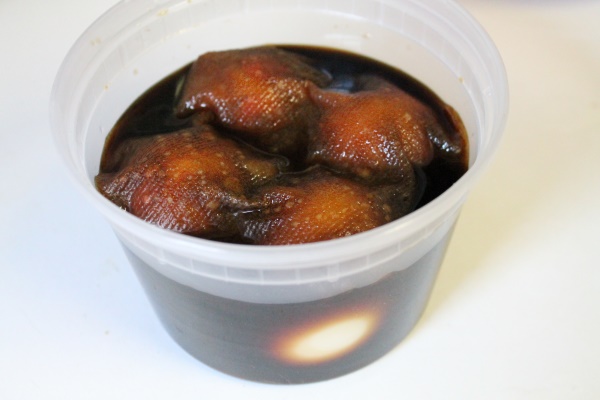
And good news! You can re-use the marinade for future eggs, just keep it in the fridge. I use mine for multiple batches until the flavor starts getting a little weak. Here is a super dark egg that marinaded in a fresh batch for two days ~

Ajitsuke Tamago, dark

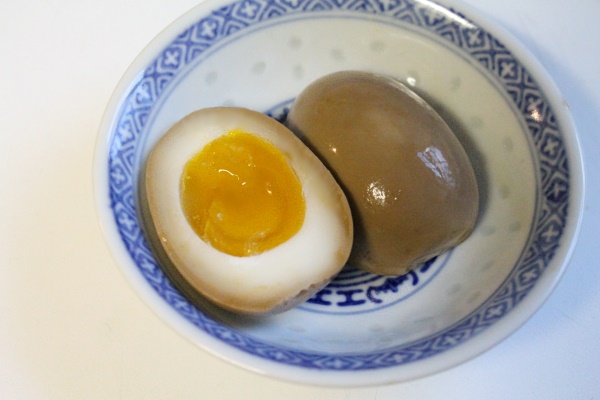
To serve, remove your eggs from the marinade and microwave for 30 seconds to take off the chill (be careful not to let them touch or they will stick together badly). Slice in half and serve atop a steaming bowl of ramen, or gobble them up on their own. I’ve enjoyed them for a quick breakfast many times.

Ajitsuke Tamago, ramen

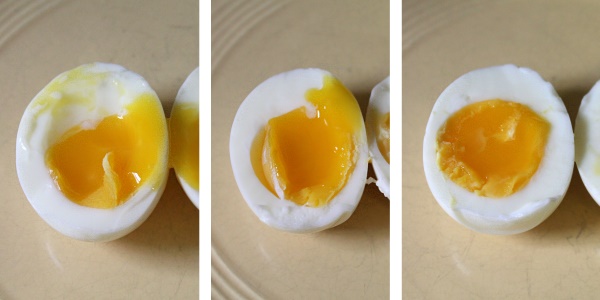
Troubleshooting ~ If your egg yolks are too runny or too hard, you may need to experiment with the time a little bit. Many factors like using a larger number (or different size) of eggs may change it slightly.

To quickly figure out what timing produces your perfect egg, fill up four small bowls with ice water and line them up on your counter. Remove each egg at a different time interval and place one egg in each bowl. You may want to remove one at 7 minutes, 7 ½, 8, and 8 ½ minutes, for example. Chill for 5 minutes, peel, and cut them in half to compare the yolks. This one test can save you a lot of future trials and frustration!


Are you inspired to try an ajistuke tamago? All my tips may make it sound overly complicated, but if you try it you will see you are mainly just boiling water and setting a few timers. The eggs take about 20 minutes, with a lot of downtime for reading blogs or Googling pics of ramen!

Thursday, November 14, 2013

Sweet (not spicy) Drumsticks

I'm always on the lookout for good chicken wing/drumstick recipes with a thick, sticky, sweet sauce. These Sweet & Spicy Drumsticks looked like a good candidate, and using pineapple juice in the sauce sounded yummy.

As I popped them in the oven I was grumbling about how they looked nothing like the recipe, but I subbed the Sriracha with some red pepper flakes, so I'll forgive it for not having the same red coloring. Simmering for 30 minutes did little to thicken the sauce ~ I think it needs cornstarch mixed in there in addition to coating the chicken (& then just heat it for a few minutes). It did thicken a bit in the oven, but was still thinner than I'd hoped for.

But they did taste delicious!

Sweet (not spicy) Drumsticks

We ended up with a lot of extra sauce, and while it wasn't strong enough on the chicken it was insanely good over rice. After this we actually bought some Sriracha and I used the leftover pineapple juice to whip up another 1/2 batch of sauce just to use on more rice. Unfortunately the sauce was so painfully spicy I had to toss it out, and I even used the lower amount from the recipe!

So yes, we will probably be making this one again, but hopefully with thicker sauce and possibly a *tiny* squirt of the Sriracha. Using wings instead of drumsticks might also help with a higher sauce-to-meat ratio, and I'll definitely be serving it with a side of rice to spoon extra sauce over!

Tuesday, November 12, 2013

Japanese Recipe: Chikuzenni

Recently I was fascinated by a few blog posts about the food that is traditionally prepared for Japanese New Year (it's a shame I can't remember the blog!), so when I saw this recipe for Chikuzenni I bookmarked it right away. Soon after we made a much needed trip to the Asian market to replenish a few ingredients, and this was the perfect recipe for trying out some exotic new veggies too.

In the post she shows lots of fancy cuts to make the food pretty for the holiday, but you can also just chop everything up for a normal dinner. I had fun cutting up the veggies though & ended up doing almost all of the special cuts. It does take some extra time, but I was kind of just playing with the ingredients throughout the day, doing a little here & there, so it came together quickly at dinner time.

Chikuzenni

This recipe uses chicken, shitake mushrooms, lotus root, bamboo shoots, taro, burdock root, carrot, konnyaku, and snow peas. Click on the picture to see where everything is in the bowl! (There are also some good pics on the recipe link)

We have cooked with burdock root and konnyaku in the past & were not super impressed then, but I enjoyed both this time. Burdock root is similar to bamboo shoots, but a little tougher. We always end up with extra since they sell this in packs of three at our store, but this time I did some research & found that it freezes well. Konnyaku has a very rubbery texture that reminds me of squid/octopus, and like the burdock root it mostly takes its flavor from the broth. This time I learned that it is much better when you slice it thin!

The taro and lotus root were new to us. The taro was like a potato but starchier, but I wasn't a fan of the texture. The lotus root was very crunchy and had a nutty flavor. We all liked that one (even the toddler), though we had so much of it that I got a bit tired of it.

The broth was delicious and we did enjoy the meal, but this recipe made a *lot* of food. After 2 dinners I still had a ton left over for lunches, so it would be best to make this one for a bigger crowd.

Thursday, November 7, 2013

Japanese Books Pic

So I have a little bit of a Flickr mystery on my hands. Apparently this picture of my Japanese books from 3 years ago has gotten very popular for some reason!

Japanese books

I noticed it showing up very high on my stats for a while, but figured someone linked to it or posted it in a forum. Flickr stats are usually not that great at showing where your traffic is coming from, but I finally clicked on the picture & saw people were coming from Flickr searches for things like “books” or “Japanese”. I gave it a try myself.

If you search for “Japanese”, mine is the 4th picture! It’s #1 if you search for “Japanese books”, and even #34 for just “books”. What in the world? Of course now that it shows up that high in the searches it is going to get a lot of clicks, but I have no idea how it got so popular in the first place. I mean, nothing says “Japanese” like a few books on a shelf in an American kitchen.

Thursday, October 31, 2013

Happy Halloween!

I hope everyone is having a Happy Halloween! Any plans tonight? We did most of our celebrating on Saturday with a Fall Festival (kids in costume) & our party. Tonight we plan on doing a little trick-or-treating & handing out candy at home, but that is it!

This year Orson helped daddy empty out a pumpkin and then drew on a face for daddy to cut while I worked on a 2nd pumpkin. One of my new favorite blogs, Epbot, mentioned using dry erase markers to draw on the pumpkins & they worked great! (I've used Sharpies in the past, but they don't wipe off easily)

2013 Pumpkins, Day

I copied my template from this image, just free-handing it on the pumpkin. Drawing & cutting didn't take too long & I think it turned out great!

2013 Pumpkins, Night

We carved them on Monday & they seem to be holding up pretty well, just starting to sink a little. I think they'll make it through the night! ;)


Wednesday, October 30, 2013

Pumpkin Round-up

Here are some of the pumpkins I decorated in years past! I rooted around in my folders & even found two that were never posted online before.

I always seem to struggle for some sort of inspiration & then finally just do *something* out of obligation. All of them (except for the last one) were done from my own designs. I wish I found the process more enjoyable! Some are carved, some are painted, and a lot were done in the years before nice cameras.


Butterfly pumpkin - 2004
2004 - Butterfly

2005 Lantern Pumpkin, 12005 Lantern Pumpkin, 2
2005 Lantern Pumpkin, 32005 Lantern Pumpkin, 4
2005 - 'Lantern' pumpkin, carved on four sides

Drooping Ambigram Pumpkin - 2006
2006 - "Harvey" Ambigram (the picture was taken a little too late, it's so droopy!)

"Happy Halloween" Pumpkin
2007 - "Happy Halloween" design from my own template

Painted Pumpkin
2008 - A tiny pumpkin with a black painted design

Carved Orange
2008 - An orange I carved like a pumpkin!

Pumpkin design detail
2008 - A pattern I drew for our rock themed party. A friend carved it here

My Pumpkin - 09
2009 - Painted & carved geometric design

2012 Pumpkin, Caved in, 1

2012 Pumpkin, Caved in, 2
2012 - For some reason this pumpkin caved in the next day, so I couldn't get a good picture. I covered the front with a black cat, snake, witch, hat, & all sorts of Halloween icons.


And this year I just pulled up a pre-made template and have an awesome pumpkin sitting out on the back porch, which I'll hopefully get to share with you later today. Have you carved yours yet?

Tuesday, October 29, 2013

Witch Broom Tutorial

I know I just posted the Piped Brain Dip Tutorial earlier today, but I wanted to make sure to get these up ASAP so people have time to make them before Halloween!

I'd seen adorable witch brooms like these around Pinterest a few times & could not resist. Some were made with cheese slices fringed along the bottom and then rolled around the pretzel stick, but the string cheese version sounded much easier. A little too easy ~ I seemed to hit a snag at each step & had to come up with several tricks I'll share here.


1) The directions said to cut the cheese sticks in half, but that seemed way too long! You could probably do thirds, but I chose to cut mine in fourths.

Witch Broom Tutorial, 1


2) Pushing the pretzel stick in one end cracked the cheese sticks every time. So I grabbed a drinking straw and pushed it down about 1/2 inch in the center of one end and twisted it to remove a chunk (save this piece). The perfect size for a pretzel stick!

Witch Broom Tutorial, 2

Sometimes the chunk came out easily, sometimes I had to insert it & twist some more. If it really wouldn't come out I just pushed the straw all the way through to the bottom.


3) On the opposite end you cut slits all around, cutting about halfway up the cheese. I cut the bottom of the cheese in half, rotated it a quarter turn and cut it in half again. Then I sliced each of those fourths 2-3 times (don't worry too much about spacing).

Witch Broom Tutorial, 3

The sample brooms from the link looked nice and flared, but mine just looked like a cheese stick with faint lines! I could have spread them out & carefully posed them for a picture, but I wanted them to flare naturally a bit. So I took that chunk we removed from the other end and shoved it in the center of the 'bristles', pushing up until they spread. (If you had to go all the way through the cheese with the straw, just fold the piece in half & push them both in)


4) Now just insert the pretzel and knot a piece of green onion above the slits! My green onions were very wide so I cut one into very thin strips. Just be sure to cut it much longer than needed, because they are fiddly to tie & break easily. They did not seem too secure, but I didn't have any come apart later (chilling in the fridge probably helped).

Witch Broom Tutorial, 4

I put mine in a tupperware in the fridge, and when I pulled them out the next day the pretzel sticks were soft and bendy! Of course they could easily be replaced, but if you are going to store them I'd wait & add them before serving. Now you are ready to make an army of little brooms!

Witch Brooms

Piped Brain Dip Tutorial

Most of the "brain" recipes I see around Halloween use a mold to create the shape, so I was excited to see a piped brain dip here. I didn't really like the shape of that one though, or the visible shreds of cheese in the recipe, so I decided to make things up as I went along.

To make the dip I used a chicken & cream cheese recipe we'd made before but subbed the chicken with ham for a nice touch of pink. Microwave an 8 oz. block of cream cheese for 30 seconds so it is soft enough to stir up. Mince an 8 oz. pack of ham lunchmeat in a chopper/food processor and stir into the cheese along with a packet of dry Hidden Valley ranch mix. This was a little thick, so next time I would add in a little sour cream or skim milk. You can also add in a few drops of red food coloring if you like yours brains bright pink, but I liked the color as-is!

Now we are going to fill a small zip-lock bag with the dip. For an easy, no-mess technique ~ push the bottom of the bag into a small glass (or mug), flipping the top of the bag inside out around the outside of the glass. I wish I had taken a picture of this! Spoon the dip in until the glass is full, then remove the bag & it will stand open on its own on the counter if you need to spoon in a little more. Squeeze out the air, close your bag, and grab a plate or platter.

First I squished the dip into an oval shape & laid it on my platter to get an idea of how large the brain needed to be ~

Brain Dip Step-by-step, 1

I stored my bag in the fridge for a while so I needed to microwave it about 10 seconds or so to take of the chill & loosen it up (repeat as needed). Now cut off one of the bottom corners of the bag and pipe an oval slightly smaller than the base needs to be. Fill in the center ~ no need to be neat, this just helps us create a domed shape.

Brain Dip Step-by-step, 2

For each layer we are going to create a curving zig-zag around the left and right side, stopping at the top & bottom center, and then fill in the space in between. This layer will be larger than the first, the full size of the brain base.

Brain Dip Step-by-step, 3

Add another layer the same way & same size.

Brain Dip Step-by-step, 4

And for the fourth layer I zig-zagged a little further in (closer to the center) and topped that with two rows of zags along the center. Leaving a seam along the center gives it that nice 'double hemisphere' look! If you leave too big of a gap you can gently press it together with your fingers.

Brain Dip Step-by-step, 5

Now we could stop there, but I still had about 1/3 of my dip left ~ whoops! I added in some more rows along the top and filled in some on the sides with small blobs (mimicking the look of the zig-zags curving in & out).

Brain Dip

I added some rows of FlipSides pretzel-crackers along the outside of the platter, which was honestly more tedious than piping the brain itself! I would recommend piping on a smaller plate and tossing these in a bowl on the side. Mini pretzel twists taste great too.

Brain Dip, 2

Now grab a pretzel and feast on brains zombie-style!


Monday, October 28, 2013

Fearsome Foods

I might have gone a little overboard with Halloween foods this year! Thank you Pinterest for rounding up lots of great ideas. ;)

Unfortunately there is a lot going on the weekend before Halloween & our get-together ended up being a little small. The people that could come had something scheduled before or after, and so did we! (Fall Festival beforehand & Justin had to chaperone Homecoming that night) Thankfully we were able to get the food & kid's costumes ready in time without too much stress & skipped dressing up ourselves this year.


On to the eye candy! Or "Bloody Eyeballs" in this case. It's always hard to come up with a themed meat dish without resorting back to the classic mummy dogs, so I was thrilled to come across these eyeball meatballs.

Bloody Eyeballs

I altered the recipe a little & doubled it, using 2 lbs. ground turkey, 1/2 cup Panko breadcrumbs, 1/2 cup Parmesan cheese, 2 Tbsp. minced garlic, 2 eggs, 1/2 tsp. salt, & 1/2 tsp. pepper. I lined the bottoms of two casserole dishes with (store bought) spaghetti sauce, about 3-4 cups, and placed the meatballs on top. (The picture shows the smaller batch, uncooked. We made way too much!) Ground chicken or turkey will give you nice, whitish eyeballs.

Now, I didn't want to use slices of olive & have white centers. I bought whole black olives, cut them in half, & cut a slice from each half. Then I cut down the leftover ends until I had a black piece small enough to fit inside the hole. It was a little extra work, but worth it! I think a large milkshake straw might be the perfect size to quickly punch these out, but I didn't have one on hand. Slap the iris on your meatballs and bake for 20 minutes at 350 F.


Next we have the Brain Dip, which I will post a step-by-step for tomorrow! (Tutorial added here)

Brain Dip


The same goes for these cute little Witch Brooms (Tutorial added here) ~

Witch Brooms


Justin made some homemade salsa, so I grabbed a pack of tortillas and cut out a tree and some gravestones to make a little cemetery scene. First I brushed the tree with some ground cinnamon mixed with water then I baked these at 350 F, just checking on them every few minutes (and flipping them over once) until they were firm & a little browned. I also used the cinnamon paste to paint the tombstones with the last names of our guests, but Justin thought that might cross the line so I wiped it off. Of course of guests liked the idea!

Salsa Graveyard

I carefully put the pieces back in the tortilla bag, thinking there was enough wiggle room in there to keep them safe, but I came back to broken tombstones and tree. The moisture from the other tortillas probably didn't help, and someone could have easily moved the bag, not realizing there were fragile pieces inside! I glued the tree back together long enough to get a picture, snapped off another branch just setting it in the salsa, and then it went into the trash.


And I couldn't resist making these cute & easy vampire donuts, which I'm dubbing "Krispy Skreams". One of the girls from my favorite food blog, Our Best Bites, said she tried to make these and the fangs opened back up & ripped her donuts apart! Our fangs did not seem very strong, so it might vary by brand, but I pinched the creases closed with my fingers a bit just in case and we had no problems. Add some chocolate kisses for the eyes and you are set!

Krispy Skreams


Are you doing any spooky cooking this year? Whenever I mention making a silly food now my 3 year-old says "maybe for Halloween", so I may have to make some more on Halloween day. I might not get another chance anytime soon!