Saturday, April 21, 2012

More Nails

Here are the two nail photos I skipped over the for the Easter pics ~

First I used a silver base, Wet n Wild Fast Dry in "Silvivor". You may remember me posting about buying a few WNW colors before - well I hated the other two so much I sold them off on eBay. I didn't end up liking the colors very much and the brushes are *terrible*. "Silvivor" is a nice shimmery polish though, and I didn't have as much trouble with the brush on this one.

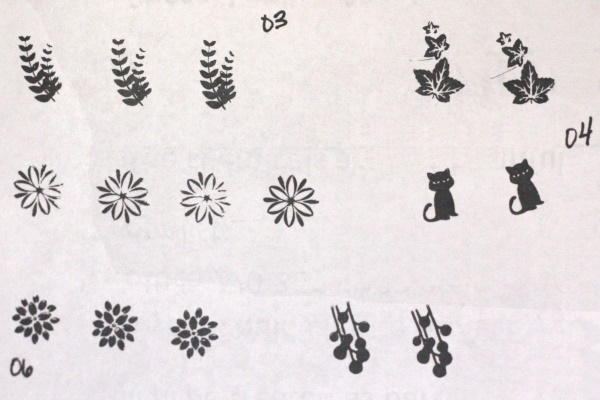
I had read that my new China Glaze "Ruby Pumps" was good for stamping, so I thought I would try doing a nice flower & leaf design in two colors. ORLY's "Halley's Comet" was the closest thing I had to a green at the time, so I used that with the fern leaves from Bundle Monster plate BM03 and "Ruby Pumps" with plate BM06. Both stamped very light & slightly translucent with the red showing more as a red-violet than the bright red in the bottle.

Flowers & Leaves on Silver (Bundle Monster)

I thought the color combination was pretty terrible. I eventually added a coat of Pure Ice "Cheatin" over the top of it, and the purple & blue glitter mix did bring the colors together a little better but made the stamping hard to see.


Next I wanted to try the "Ruby Pumps" for real. The first coat does show up red-violet like the stamps, but after that the glitter covers enough to give it the deep red shade. It's a really lovely polish! I stamped with my trusty Pure Ice "Silver Mercedes" and plate BM04. This was one of my favorite combinations yet!

Silver Swooshes on Red (Bundle Monster)

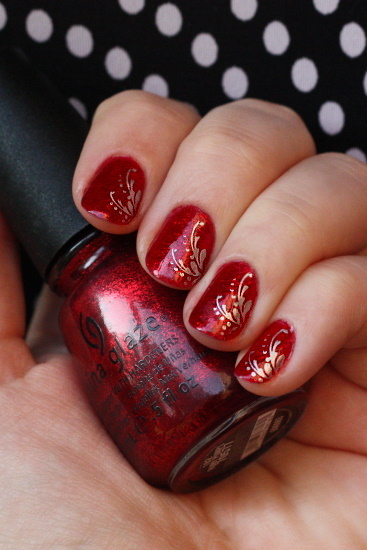
But a pretty bad picture! I'm still figuring out how to get the best pictures of my nails, but I think I'm a bit limited by the fact that I only have a portrait lens. While it makes most things look wonderful, it can not focus very close up, so I have to hold my hand about as far away as possible. Not a very natural pose! Then you've got to try to tilt the nails to just the right angle to get rid of the glare... and I often don't check the pics until after I've taken off the polish, so I can't re-take a new set. As with photographing *anything*, it's a learning process!

Tuesday, April 17, 2012

Easter Nails

I'm skipping over a few other nail pictures for now to show you what I did for Easter. I would have liked to use some kind of bunny but had nothing that fit the Easter theme other than one small cross, so I decided to just go with something pastel with Spring colors.

I used a pale mint green Bon Bons polish for the base (do they even sell Bon Bons anymore?) and that tiny bottle was a pain in the butt to use. Never again! I found some cute daisies on the Bundle Monster BM12 plate and stamped those in white.

Easter Nails, take 1

I think the flowers might have looked better running up the side of the nail a little bit, because having the small flowers in the center did not look great. I added some yellow dots to the center of flowers & a few around the small flowers to try to balance things a little better, but the whole thing just got a little too busy for my taste. I wanted something really pretty to show off!

I had only stamped the left hand when I started disliking the design, so I just left it that way for a while to decide if I wanted to do the other hand or not. After a couple of days I was still not loving it & luckily was able to wipe off the designs without removing much of the base color (I did not want to try to paint the whole hand again with that tiny bottle!).

For the second attempt I used my Konad M51 plate, running the non-spotted edge diagonally across my nail. It turned out really pretty & delicate*.

Easter Nails, take 2

*Maybe too delicate. My mom said she could see dots but couldn't tell they were flowers. She probably also needs to put her glasses on.

Friday, April 13, 2012

Bunny Shaped "Crescent" Rolls

I wanted to make something fun for Easter so I finally pulled out the Garden Bunnies recipe that's been sitting in my recipe binder for years and years. (It originally had a picture of the rolls, not sure why it's missing from the site)

Reading over the recipe, I wasn't really sure how 6 cups of flour & 2+ cups of milk and more were going to turn into "8 small bunnies". I certainly did not want to try to double that hunk of dough. The directions for forming the bunnies were a little confusing, having you form a circle & cut it into wedges just for the sake of evenly diving the dough, but it basically ended up being that you needed 1/3 for the head, 2/3 for the body, minus a hunk for the tail...

So I decided to ditch the recipe & see if we could get away with shaping some crescent roll dough. They ended up being cute and easy to make!

Bunny Rolls, 1

First you need to separate the dough along the perforations to create 8 triangles. Following the picture, cut about 1/3 off the top for the head and chunk for the tail (about 1/3 of the way across the bottom).

Bunny Rolls, 2

Roll the tail into a ball with a pinch at one end. For the body I rolled in from each side to the center and then folded the top & bottom over to also meet in the center (that part is not pictured). Place the body seam down on a cookie sheet and push in the four corners a little bit to round them. Tuck the pinch of the tail underneath one end.

Bunny Rolls, 3

For the head, snip about 2/3 down from the narrow point of the triangle with some kitchen scissors. Fold the bottom two corners in to meet at the center. Push in the three corners a little to round the face.

Bunny Rolls, 4

Lay the head over the body (with the nose touching the tray and the ears running down the back). Give the ears one twist outward, so the cut edge is now pointing up. Bake according to the directions on the tube.

Bunny Rolls, 5

Once you've folded one bunny they go together pretty quickly. I was able to form two tubes worth of rolls (16) in about 10 minutes, but I was rushing!

Bunny Rolls, 6

I think these are going to be a new Easter tradition and will try to remember to pull this post up again for you next year. Maybe even re-do it with some better pictures of shaping the bunnies if I'm really on a 'roll'!

Tuesday, April 10, 2012

Bundle Monster 21pc.

I ordered the Bundle Monster set of 21 nail stamping plates & am pretty pleased with them. You'll definitely run across a few problems with the quality, but for $18 I can deal with a few duds.
Bundle Monster stamping plate, BM21 Bundle Monster stamping plate, BM11
Before ordering I had decided to sell any plates I didn't want on eBay, and as soon as I opened the package I could see that I would have more plates to sell than expected. I knew that the 'new' BM set had larger full nail designs (because of complaints), but wasn't sure which set was 'old' or 'new'. The 21pc. set is the old set, and the full designs are *tiny*. Most also do not match up from side to side so there is no hope of repeating the pattern to stamp your nail twice. Useless! (It looks like they re-made the first set & fixed a few other complaints. Mine came with the paper backing and 'cleaner' images)

Bundle Monster stamping plate, BM01 Bundle Monster stamping plate, BM12

I also had some bad luck with my initial design choices & was getting angry. First I tried the bottom center flourish on BM01 and could barely get any of the lines to show up. I gave up & switched to the top center design on BM12 & still ended up with spotty results. So I grabbed some Konad black polish & started doing some samples on paper.

BM01 & MB12 samples

On the left side are designs from BM01 and BM12 on the right. You can see that none of the designs I tried from BM01 were coming out, so it looks like that plate was printed too shallow. (That doesn't mean all BM01 plates are messed up, but mine is) The results from BM12 were better, but you still miss a few details. This can even happen with the best plates, so sometimes I have to suppress perfectionism and tell myself it's just a nice antiqued look.

Bundle Monster stamping plate, BM03 Bundle Monster stamping plate, BM04

BM03 & MB04 samples

I was thinking of layering some leaves & flowers so I tried some from BM03 and one from BM06. Not terrible. It's sad that you loose the stem on the 2nd leaf, but who's going to notice other than me? I also liked the leaves from BM04, but my plate actually has a scratch running right up the design and the print does pick it up (that is the only scratch on any of the plates). I tried the kitty from that plate to console myself and another from BM06 at the bottom.

Bundle Monster stamping plate, BM21 BM21 samples

And here is the only full nail plate that I kept, BM21. These three designs seemed like they could be repeated pretty easily, though I really hate trying to line up the 2nd stamp for a complex design. You'll also notice on the center design, there is another mistake on the plate - a gap along the bottom row. This is noticeable on the plate even, but I think it could easily be ignored or filled in with a small brush.

So, does the low price make up for the misprints?

I ended up tossing the BM01 plate, keeping 9 plates, and selling the other 11 on eBay. So far I've sold all but two, and am still waiting on payment for another two, but I've already more than paid for the set. It is a lot of work though - if you are not already familiar with selling on eBay & willing to make lots of trips to the post office I would not recommend it! (My husband would argue that it is not worth the work but I'd like to do it again with the next set)