Monday, April 29, 2013

GTD: More baby prep

I've been taking things easy but still working on some last minute baby stuff. Last week I (with some help from Justin) ...

♦ Sewed & hung the new black-out panel for Orson's room. I guess it was a little too successful ~ Orson started asking for a nightlight!

♦ Went on the hospital tour.

♦ Moved Orson's car seat to the right side of the car to give him a little time to adjust before we set up the baby's car seat base in hold old spot.

♦ Set up the playpen bassinet in our bedroom.

♦ Moved the desk from the nursery & scooted over the crib. We've still got some arranging to do in there, but she'll probably be sleeping in our room for a while.

♦ Picked up the custom framed photos we ordered from Hobby Lobby a few weeks ago. The frames were all 50% off this week, so I made sure to ask about the sale and we got a huge discount!!

We also bought a plate holder there for a large serving platter. Might as well use it for decoration rather than having it shoved awkwardly in a cabinet! (It now sits atop the red cabinet)

♦ My lovely aunt & cousin threw me & Pandora a baby shower! It was so nice to see everyone, eat some yummy foods, and we got spoiled with presents. The ladies helped me knock out some of the much-needed items from our registry, and my cousin loaded me up with 7 giant bags of girl's clothing! I'll need to start sorting through them this week, but for now I'm having them checked out by our quality inspector ~

Sadie's Donations

♦ And we had one last big splurge before I stop working ~ an iPad 2! It should be arriving in a few days & we are still in shock, we've wanted one a long time.

We were not able to fix the battery in our current laptop, and with the broken power cord that means it's only really usable if you don't move it at all. (Next year we'll probably replace my desktop with a nice laptop, but for now we needed something a little more portable.) There is also a hand-held baby tracker I've been wishing for since Orson was born, but at this point I figured that $50 would be better spent on a tablet & a cheap app. With Pandora threatening to come early we didn't think it was going to be possible (I'd lose a few weeks of payments), so we are extra excited about our early Mother & Father's Day gift!

Anyone have recommendations for a case?


Sunday, April 28, 2013

Sausage, Lentil, & Kale Stew, Chicken Taquitos, and More

Last week we were worried that the baby might need to be induced early, so we stuck with some easy dinners! We made...

Sausage, Lentil, & Kale Stew

Sausage, Lentil, & Kale Stew (2 dinners, pictured above) - We also doubled this one for 2 more freezer meals! To freeze it we started off by doubling everything, then removed half of it into a freezer bag before the water was added. I poured the rest of the ingredients in the bag and we'll just need to simmer it for 30 minutes when we are ready to make it.

Chicken Taquitos with Queso Fresco (doubled for 2 dinners) - This one was a little more work, but worth it to use up the rest of that Queso Fresco! For this I followed our normal Chicken Taquito recipes but subbed both of the cheese with 6 oz. of the Queso. Not quite as taste as normal, but still very good!

► Frozen Breakfast Scrambler (the type with sausage & potatoes, just add egg)


And I also made a simple Asian salad for lunches. Equal parts shredded savoy cabbage and shredded, cooked chicken ~ then I sprinkled on sesame seeds, Chow Mein noodles, and tossed everything with some of my Savory Miso Dressing. Tonight I made the same thing minus the Chow Mein noodles & mixed it with leftover ranch dressing for a light dinner. Yummy!

Monday, April 22, 2013

GTD: Fabric lined shelves, Light blocking curtain panel, Baby plans & more

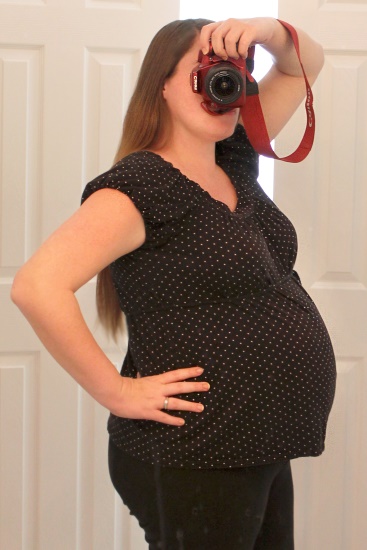
Well, I was able to stay pretty productive last week, but now the baby is thwarting me! My feet & hands started swelling like crazy & my blood pressure shot up ~ the doctor said any higher and we might have to induce early, so now I've got to sit around & do nothing as much as possible. That sounds like fun, but it is not easy to do when you are 1) taking care of a toddler & 2) worried the baby might be here weeks early & there is so much to do! (Don't worry, my blood pressure was lower at my appointment today, but I'll still take it easy.)

Last week I...

♦ Lined a shelf with fabric panels! I'd wanted to do this every since I pinned this (apparently '39 weeks ago', haha). I did not really go back & read the post to follow any directions since it's so simple. Why did it take me so long again?

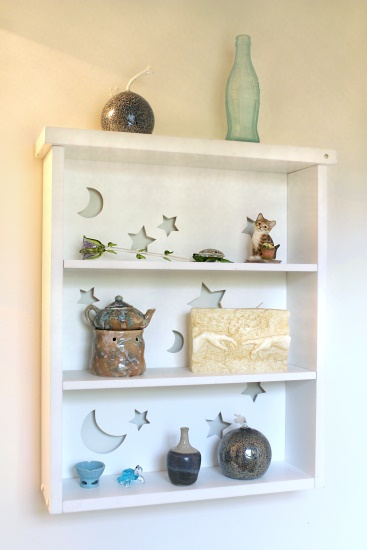
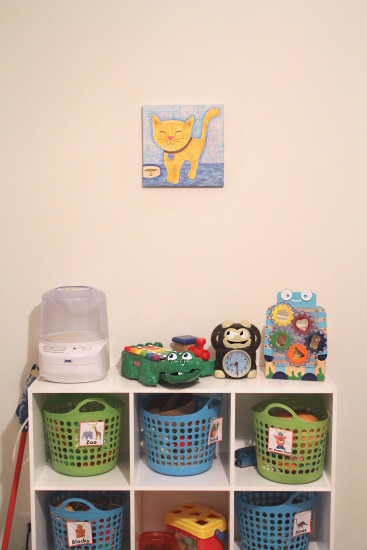
Here is the shelf I wanted to cover, in our guestroom bath. The cut-outs would be cute in a kids/teens room, but seem too young otherwise. They also distract a lot from the items on the shelf (which are not that amazing, but we just used anything the right size & color we had on hand) ~

Fabric Lined Shelf, 1

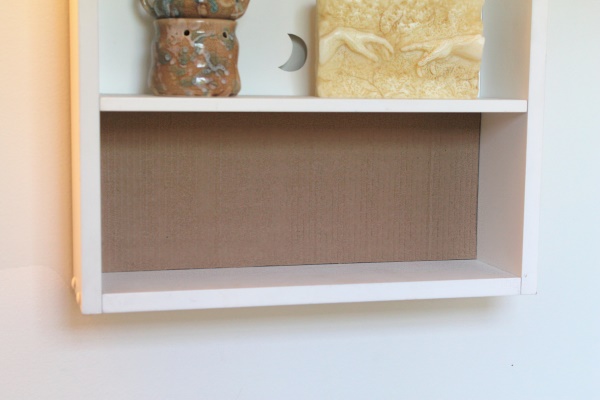
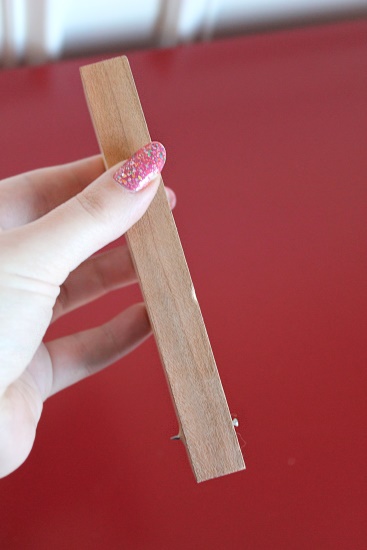
Then I measured the back of each shelf and cut cardboard to size. Luckily they were all the exact same height! For these you do not want to cut them too snug because the fabric will also add some thickness around the edges.

Fabric Lined Shelf, 2

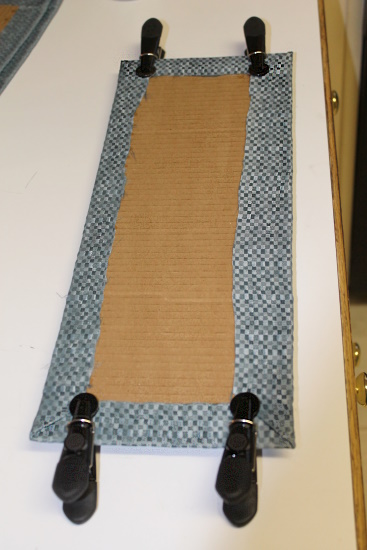
I covered each cardboard piece with fabric scraps that I had been saving from when I hemmed the curtains for the same room. (We could not find any the right height so I just had to shorten them a little) Unfortunately I had to seam rip the hem out first & steam them a bit, but it was not too bad. I glued along the back only, folding in the corners and letting them dry with some cheap clips.

Fabric Lined Shelf, 3

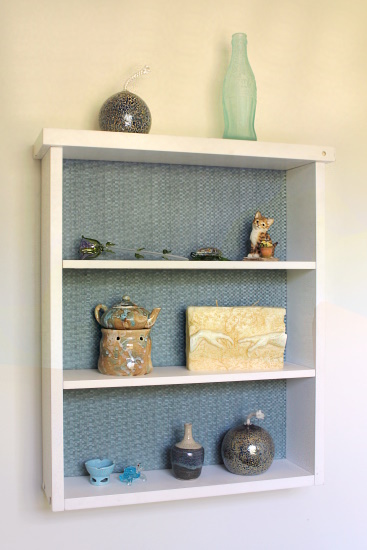
And here is the finished shelf! Aside from the knick-knacks it's looking pretty good, haha.

Fabric Lined Shelf, 4

♦ Measured the shelves of the new white cabinet (master bath) to buy some totes/bins for organization. I also put away the rest of the stuff we had sitting around in moving boxes ~ there is so much more room in there now!

♦ Used Goo Gone on our old coffee table, which has become our new TV stand. The front two corners used to have safety pads to protect our little guy (who previously busted his head on them and had to get stitches!), but they've since fallen off and left dirty residue from the tape. It won't be too long before we'll have to get some new tape and stick them on for the new baby, but at least now I know how easy it is to clean off afterward!

♦ Started working on a new black-out panel for Orson's window. The liner we bought was not blocking out enough light since it is on a curtain rod & away from the window, so after many elaborate plans on how to block the sides better (velcro, magnets, foam noodles even!) I decided to just sew a fabric panel to fit on the inside of the window frame, up against the window. I measured his window & the nursery window and checked my stash of corduroy fabric downstairs. I had some just large enough to cover both! I cut the fabric to size and will sew them this week.

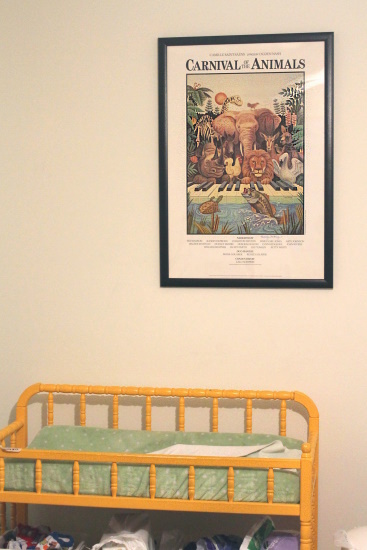
♦ The day Orson's new dresser was arriving I moved the changing table (and the shelf & trashcan we keep beside it) into the nursery. Poor Orson was very upset, trying to carry the trashcan back to his room & arguing with me that I needed to put everything back, but he finally calmed down. He was very excited to 'help' daddy put the dresser together that night and had fun filling it up & arranging toys on the top.

♦ Moved the main camera for Orson's room, hanging it up high on the other side of the room. We have a 2nd camera in there temporarily that will be for the baby's room later. I also adjusted that one a little so now we can almost see his whole room ~ I'll be sad to give that one up!

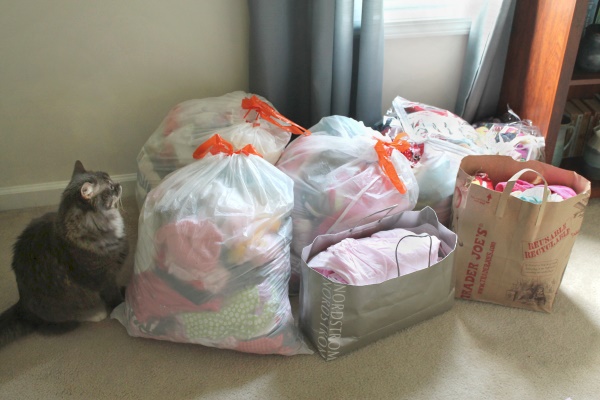
♦ Rounded up all of Orson's too-small clothes since he's officially up a size now. Haven't had a chance to sort them yet, but at least they are all in once place!

♦ Signed up again for the hospital tour. (We were supposed to go last weekend but I was feeling too sick from the insane pollen levels)

♦ Started sorting away my craft supplies in the basement into our new big shelves! I worked down there two different days, about 45 minutes each time, and made some real progress. (Unfortunately I've got to leave it alone now until after the baby arrives.)

♦ Started doing some major planning when we found out the baby might arrive so early ~ making lists for our hospital bag, contacting people who might be able to watch Orson during the delivery, etc.

♦ Got the newborn/infant boxes out of the nursery closet & arranged the blankets, hats, etc. on the changing table shelving. I was waiting to do this until after the shower, but wanted to have some stuff accessible so we can pack a hospital bag now, just in case!

Sunday, April 21, 2013

Polenta with Chorizo & Queso Fresco, Chicken Parmesan Bake

Polenta & Chorizo with Queso Fresco

Polenta with Chorizo & Queso Fresco (doubled for 2+ dinners, pictured above) - I found this new recipe searching for some way to use up some of the Queso Fresco we accidentally bought last week! We used regular grits, about half of the tomatoes called for, and meant to add in a little fresh chopped spinach but we totally forgot when making it! It made a lot of food & definitely did not need to be doubled. The Queso Fresco was interesting ~ I read it was similar to feta, but it had more of a waxy texture & not as strong of a flavor.

Justin *loved* this recipe, but I was not impressed. I am not much of a Mexican fan though (and hate cilantro), so you can’t really take my opinion. To serve it you lay down the polenta & corn mixture, top with the chorizo & tomatoes, and sprinkle the queso & cilantro over the top. Justin raved about how each layer was so flavorful on it’s own, and they created a complex mix together. (Poor guy ~ I doubt we’ll make it again!)


Chicken Parmesan Bake with Pan-fried Asparagus (2 dinners) - I’d been craving this one for weeks, but we kept having one recipe that was too similar (chicken topped with bread cubes or something with tomato sauce & cheese) so I put it off. I wanted to make this one as a freezer meal, but didn't want to buy that much chicken. Oh well ~ it was delicious!

Monday, April 15, 2013

GTD: Super Productive Spring Break!

Ahh. Spring Break is over, but we had a nice one! Relaxing, fun, and productive ~ and it didn’t even rush by! We started out with a quick anniversary trip to Chattanooga, Tn, ended with a bad allergy attack and a get-together with college friends, and managed to knock off the majority of our to-do list in between. We got so much done, I’m just going to list things by room. This week we tackled the...

♦ Basement - Vacuumed (dead bugs), put down more bug spray, & assembled 2 cabinets for my craft supplies. The cabinets were a little smaller than I had pictured, so we’ll definitely need a 3rd! (but wait for them to go on sale again)

♦ Living room - Hung our awesome new metal wall art over the fireplace, cleared the poinsettia & V-day cards off the mantle & them replaced with some ‘neutral’ decorations (which will probably be up there a long time!)

Mantle with new wall art

♦ Kitchen - Bought some black bins for the red cabinet, ordered fabric to spruce them up a bit, hung our trivets on the wall ~ might as well use them for decorations too!

Trivets on Wall

♦ Our room - Put together the white cabinet for our bathroom & filled it up! Need to get some totes for this before I can really organize it.

♦ Orson’s room - Framed a poster, hung 4 things on the wall, bought a light-blocking curtain liner & double curtain rod, stitched together the liner (didn’t realize it was 2 narrow panels) & lengthened it, hung all the curtains, bought & put in a hanging rod for his closet (like this) so he can reach his clothes, & bought him a dresser! Hopefully he won’t mind this replacing the changing table.

Animal Poster

Above you can see the framed poster ~ the artwork was created by my talented aunt! The kitty below is too tiny for the wall, but I was so pleased to find something with a cat that was not girl themed. We'll add to it later.

Tiny Kitty Canvas

♦ Nursery - Moved the file cabinets to the basement & put together the crib!

♦ Everything else - Hung wall art in a bathroom and the hallway, put aside cash to pay for the photos being framed, cancelled the satellite TV (did you know you can legally get broadcast channels free through a cable connection?), re-listed 6 items on eBay and listed 7 new things, took in the mower for repair (so did everyone else - a 2 week wait!), bought a weed-whacker, bought & returned another laptop battery (neither one worked, this thing is dead!), bought a breast pump, tried 6 new recipes & put aside another 2 freezer meals.

Whew! I’m impressed. I definitely did not think we’d mark so much off our list in such a short time. Big thanks to Justin! I've even managed to keep up the momentum today.

Sunday, April 14, 2013

Recent Recipes: Miso Salmon, Garlic Scallion Noodles, Dipping Sauces & More!

Wow, somehow last week I managed to try 6 new recipes without realizing it! They were mostly sauces, and some were added later in the week, so I didn’t notice just how many there were.

Miso Salmon, Garlic Scallion Noodles, & Asparagus

► Miso Glazed Salmon with Garlic Scallion Noodles and Pan-fried Asparagus - This was a winner all around! I used the glaze from this recipe but we ended up having to buy frozen salmon, so I just followed the cooking directions on the package for that. The sauce was just what I was looking for - Japanese dengaku style. I slathered it on often so there was a nice thick coating.

The noodles were surprisingly good! I was a little hesitant after the Ginger Scallion Noodles disaster, but these were delicious. (I did cut 1 Tbsp. of butter, no fish sauce, and my noodles were wheat based rather than egg.) I even ended up making another batch later in the week for lunches since we’d only used half of the noodles, and now I agree with the poster that I could probably eat this entire batch in one sitting. It’s just so easy to go back for another bowl!


► Chinese Roast Chicken with Coriander Rice & Roasted Green Beans (2 dinners) - I had hoped to take a photo of this meal so I could type up an official recipe for it, but we ended up having to change some things this time around so it was a little off. Oh well, maybe next time! It is based on this recipe, but multiplied enough to make 10 drumsticks.

Drumsticks were on sale, so we also doubled it for 2 more freezer meals! I just poured the marinade in a bag with the chicken & we will make the rice the day we bake that. Today I picked up some more green beans & will go ahead and trim those to freeze & hope they will roast well.


► Grilled Kabobs with 2 dipping sauces - Grilling season is finally here! For the kabobs we used steak, sliced onions, mushrooms, broccoli, and bell peppers. I also whipped up 2 new sauces to try out.

Coconut Dipping Sauce - We normally use low-fat coconut milk in recipes, but for this one I think it was a big mistake. The sauce was *super* thin! I used 1/2 the ginger called for (I hate grating it) and that was plenty. The sauce was too tart from the vinegar so I added in another Tbsp. of peanut butter and 1 Tbsp. honey. At that point the flavor was pretty good, but still too runny from the low-fat coconut milk. (I don’t think we’ll bother trying it again with full fat milk though! I’m sure I can find a better one.)

Restaurant Style Ranch Dressing from Our Best Bites - Once again - good, but I don’t think I’ll be making it again. This was better than bottled ranch, but not really the flavor I expect from a restaurant’s ranch dressing. I think a few few spices could change that, but I don’t know what’s missing, so I’ll just try another recipe next time.


► And for a get-together we decided to make nachos! We cooked some ground beef & put out chips, canned nacho cheese dip, salsa, chopped tomatoes, onions, lettuce, black beans, refried beans, and some other stuff I’m probably forgetting. I also used this as an excuse to try out two melty cheese dips I’d been eyeing...

Nacho Cheese Sauce - I was not too impressed with the flavor of this one, and thought it thickened a little too quickly. I actually preferred the canned cheese to this (and wasn’t in love with it either).

Queso Blanco - Whoops! I totally botched this one by grabbing the wrong cheese. We could not find White American Cheese in the dairy section (and totally forgot about the deli), so I headed back to the refrigerated section in the international aisle to grab some melty Mexican cheese instead. I did not realize that most of the cheese there was actually ‘crumbling’ cheese until I was making the dip. I tried to use it anyway, but apparently this cheese does *not* melt, and we ended up with this ~

Crumbling Cheese mix-up

I am not anxious to waste the $6 we spent on this cheese though, so you'll be seeing some recipes with “Queso Fresco” (crumbling cheese) over the next two weeks!!

Tuesday, April 9, 2013

8 months!

Today I am 8 months pregnant! About 1 month and 1 week to go. (And Justin's hoping for 2-3 days late ~ we'll see!)

8 Months (Panda)

Here is my 8m picture from last time. The old one was taken a week or two later than this, yet I think I look further along this time!

Sunday, April 7, 2013

GTD: DIY Air Wicks, Chicken Cobbler Casserole, and Shopping

We'll be out of town on Monday so I wanted to go ahead and post my "Getting Things Done" list today. Prepare for an impressive list next week because we've just started Spring Break!

► Last week we ended up with a lot of leftovers somehow, so we only needed to cook one double dinner ~ Chicken Cobbler Casserole (with some tweaks). I went ahead and doubled that to make 2 more freezer meals. The plan was to prepare the filling but buy new bread when we were ready to cook the frozen version, but Justin picked up twice the bread we needed. I went ahead and cubed it to freeze (with the seasoning but without the butter), which will make it a cinch to prepare in the future.

DIY Air Wick 2.1

► I once again attempted a DIY Air Wick re-fill, & things went so much smoother this time! I learned before not to pull out the wick, just snap the plastic ring off the top of the bottle. Last time I also shook the oil out through the small hole (see below) and it got everywhere. My hand stunk for days, and I could even taste it on my fingers! This time I grabbed one of the syringes from our many bottles of children's medicine and it worked perfectly. I'm sure that's what they intended you to do! Being able to measure everything so easily will definitely come in handy later too if I want to mix scents.

DIY Air Wick 2.2

I filled up each bottle with 10mL of the oil (see above) and topped it off with about 15mL of water. I think these warming oils are too weak to dilute though, since I've got the Air Wicks cranked up high and I can't smell them at all. :( I'll give these oils one more try un-diluted, then start looking for a replacement.

► Went through my many coupons and dumped the expired ones. (I'm terrible with coupons!)

► Started skimming through our trusted Baby 411 book for a refresher on newborns. I'm feeling a little rusty after nearly 3 years! (And still feel a little clueless on signs of labor & breastfeeding, since we didn't really get to experience those last time)

► Framing! I took 4 things in to be framed this week but ended up only getting 2 family photos done for now (various reasons). Unfortunately both mats I chose need to be ordered, so it will be weeks before those are ready & we can pay for them. (I think I'll set the cash aside to cover it so I don't keep reminding myself it's coming up!)

► Clothes & craft supply shopping for Orson and some more work on his room. One of the things I took to be framed was a poster for his room. I just wanted something cheap, but it was such an unusual size nothing really fit, and the poster frames couldn't fit a mat. I ended up just buying a frame online when we got home which will hopefully arrive mid-week so we can hang up all of his new wall art! We also moved the train table from the nursery into his room and after a few days of things being very cramped I realized I could slide some of his bigger playsets underneath. So much better!

► Other random shopping ~ 1) New label maker - I thought Orson broke my old one & I tried to fix it, breaking it for good in the process. Whoops! The screen was already shot so it is no big loss. 2) New battery for the laptop - ours will no longer hold a charge & the cord is broken so it falls out at the slightest breath (which quickly shuts down the computer!). Hopefully it will get a lot more use with this fix! 3) Something gigantic to go over our mantle! Hoping to get it hung this week & share a pic with you next time.

Saturday, April 6, 2013

How to Hang Frames the Easy Way!

Hanging a group of frames can be very frustrating ~ even if you figure out the spacing, all of the hangers are in different spots! A while ago I saw a tool that someone made for frame hanging that I knew would be a big help (she saw the idea on HGTV, go figure!).

Handy Frame Hanging Tool

All you need is a long & narrow piece of wood and a nail that is slightly longer than the wood is thick. The original girl used a clothespin, but I think you’ll want something a little longer for most frames. I used a piece of scrap wood, though if you can find a nail short enough I bet a paint stirrer would work even better! Hammer your nail through the board so that the tip and the head of the nail stick out a little on each side.

Since I am doing a group of frames, I made a template for arranging them. I taped a few sheets of wrapping tissue paper up on the wall and then marked the center point of the wall vertically and horizontally. (I marked the horizontal center in two spots & connected them with a line to give me a level line to work from.)

Creating a Template

From that I drew the outline for the center frame, then added the other frames 3” apart. For this arrangement I’m using all 8"x10" frames ~ laid vertically/portrait for the corners and center, and horizontally/landscape in between. (The lines went off the paper a little, but it did not matter.) For a single frame you may just want to make a mark or two on the wall to show the placement, or even just eyeball it. Now we can use our handy new tool!

Hold the tool from the top with the nail at the bottom and hook your frame onto the nail head (using the frame hanger) like this.

Using the Tool

Here I had my husband hold the tool so you can get a better view! Hold your frame up against the wall, aligning it with your template. Once the frame is in a good spot, press the top of the frame towards the wall and you will feel the tip of the nail cutting into the wall a little. Now you have a mark exactly where your real nail needs to go!

Marking the Spot

Repeat this, using each frame to mark the spot where it will go on the wall. (Even if several of the frames are the ‘same’, I would use each one to mark it’s spot in case the hangers are in slightly different spots) To keep them from getting mixed up, you may want to mark the hanging spot for one of the bottom frames first, then cut the paper away from that area and hang the frame. Then you can work upwards, row by row, until all of the paper is gone. I knew I would have trouble spotting the nail marks if I pulled down the whole template, so I cut away the paper this way to easily keep track of them.

Finished Frame Arrangement

And here is the finished arrangement! It took me a while to draw out the template, but the frames were hung in a few minutes with the help of this tool. (The pictures are all photos I took a few years ago.Underneath the frames you can see our new red cabinet, organized with diaper boxes until I can find some nice storage bins!) What's your favorite way to hang frames?

Wednesday, April 3, 2013

Wednesday Manicure: Easter Egg Nails

I’ve been wanting to try the ‘ziplock bag’ technique for a while now and thought it would be perfect for making Easter egg nails! In some ways it was a bit trickier than I had expected, but most of those problems could be fixed next time.

First I painted my nails with Color Club "Wild at Heart", Orly "It’s Up to Blue", Kleancolor "Metallic Green", Color Club "Daisy Does It", and Color Club "Sparkle and Soar" (one color per nail). Everything but the blue had such a nice shimmery finish, so I added a couple of coats of Sinful Colors "Pearl Harbor" to it, a fine glitter topcoat.

Easter Egg Nails

The idea behind a ziplock bag manicure is that you paint onto a ziplock bag or some other smooth surface, let the polish dry, and then you can peel it off and apply it to your nails. This can be used to paint a complex design, or you can cut a solid sheet of color into small shapes.

For my smooth surface I like to use the smooth backing paper from a sheet of stickers (Orson goes through a lot of them!). I haven’t tried using a bag yet to compare, but the polish pops off this paper so easily! As I painted my nails I also painted a square of color on the sticker paper, about 2 coats for each. When dry, the color peeled up pretty easily, but it was so thin & fragile, I think I’d use more coats next time for durability.

Later I used some zig-zag & scalloped craft scissors to cut small strips from the sheets of color. I applied a line of topcoat where I wanted the strips and carefully placed them on the nails, trimming the sides where they hung over the edge of the nail. Here I met more problems ~ once the strip touches the topcoat you can’t adjust it, so you’ve got to be careful about the centering and angle from the start. Also, the color sheets I made were a little too small to hold and cut easily, so bigger is better! I added one of these curved strips to each nail along with a straight strip or two and lines of dots with my nails dotters.

Monday, April 1, 2013

Monday: Getting Things Done

Work continues to be *insane*, and I don't think I'll get a break for another month. A while ago I added a note to the site saying that I was going to stop taking orders in May (because of the new arrival) so be sure to get your orders in now. Ever since then I've been bombarded! Last month I had my highest sales ever, about twice what I make some months, but that also means twice the stress. On the plus side I have been able to knock out almost all of our pre-baby shopping list, and all of this work is making life with a newborn sound a lot less hectic.

This week I...

♦ Did a lot of Easter crafting with Orson! First I got the idea from The Active Toddler to make some 'stained glass' eggs. First I folded a paper towels into fourths and cut out an egg shape (you can also use coffee filters) and got Orson to color them with markers on a cookie sheet. I made sure he used at least 2 colors per egg and then let him spray them with water when he was done. The ink spread out really well & they turned out so pretty! (Not that you can tell from the first picture!)

Stained Glass Eggs, 1 (O-13)

The last egg is mine. It's funny, because I drew zig-zags, stripes, and dots, and it all merged into a rainbow blur! These are definitely not something you want get detailed with.

Stained Glass Eggs, 2 (O-13)

♦ Then we made a chick with some hand-print cut outs. I think I saw the idea with some painted hand-prints, but until I get some good washable paint I'm having to avoid painting crafts. I traced some cups for the body & head and should have found something a little larger! I put down the glue & Orson is really good at placing the shapes. He had me hang him high on the window so he could fly. :)

Hand-print Chick (O-13)

♦ We also dyed Easter eggs, which Orson was begging to do all week after seeing the kit. He picked the colors, added some stickers, and then wanted to eat one right away, haha. I played around with one egg, drawing circles with the white crayon, dipping in a color, and repeating. The results were faint but pretty. Next time I'd start with yellow before adding the first circles so they won't be so blindingly white compared to the others.

Easter egg

♦ We put away 4 more freezer meals (and tried the "Cream of" soup mix with yet another recipe).

♦ Put those payments to good use! I bought the last needed cabinet (this white one for our Master bath), a lovely crib from Craiglist (poor Justin has to pick these things up), and some stuff for Orson's room ~ new curtains, a clock, and some wall art!

♦ And I finally got to hang the nine 8x10 frames ~ Justin found them! Later this week I'll share some pictures on how I aligned everything to hang them.