Wednesday, September 23, 2015

Miniwax Polyshades Review

A few months ago we had some money budgeted towards house improvements and I went on a massive hunt for new bedroom furniture. We love our bed frame, but we desperately needed a new dresser and some nightstands. Every night I scoured Craigslist and Wayfair and every site I could think of, but I kept coming back to a few Craigslist listings for a vintage furniture store an hour away. After a few weeks I decided to bite the bullet and just make the drive, since I knew they had some great pieces & great prices. Luckily I was able to squeeze a dresser and two nightstands in the back of our HHR (and close the back!), so the trip was well worth it!

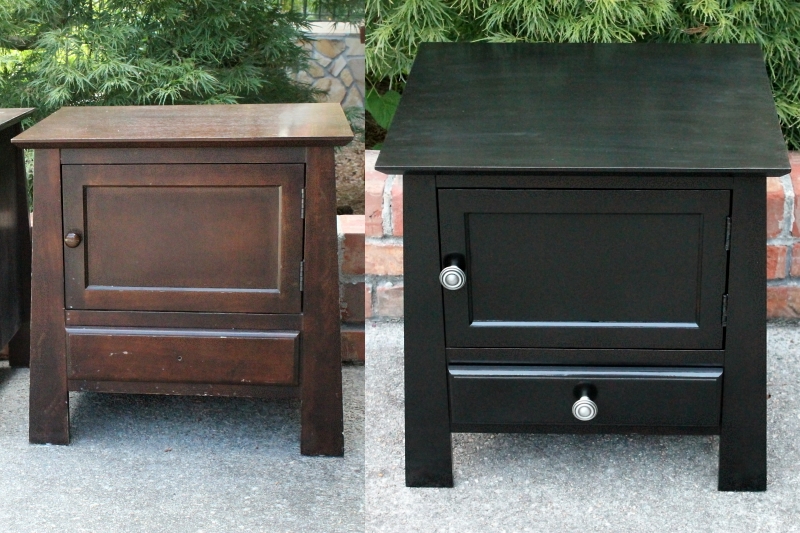
I was planning on painting the furniture to match the dark brown espresso color of the bed, but after seeing how close the nightstands already were to the bed, I started wondering if there was a way to just darken them a little.

Nightstands, 1

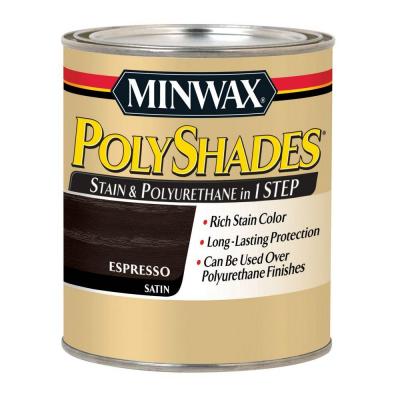
After some quick Googling I found a few blogs raving about Miniwax Polyshades, a tinted poly coat that you can brush right over an existing stain to darken it. I was sold! I ran to the store and grabbed a can in the Espresso color in the Satin finish and got ready to work.

Miniwax PolyShades

If you're looking for a quick review, let me tell you up front that this stuff was TERRIBLE and I WOULD NOT RECOMMEND IT! Now that that's out of the way...

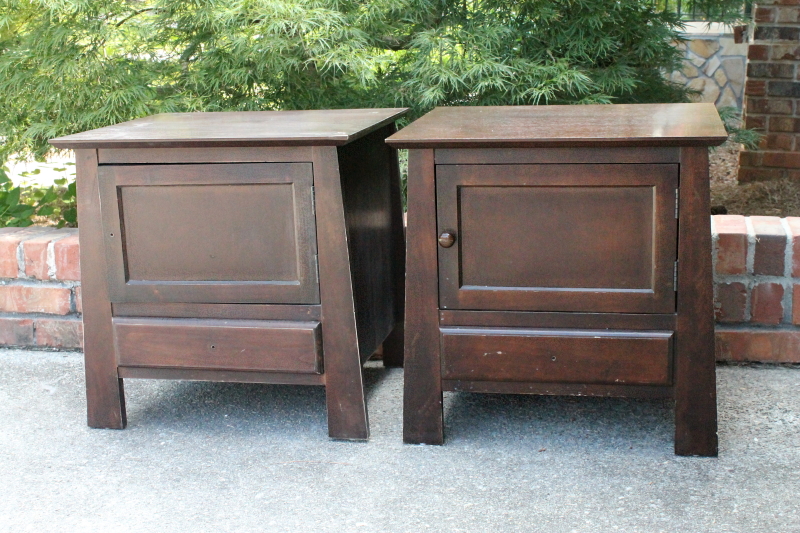
First the nightstands needed a light sanding. On the left you can see one with the knobs removed and sanded, and un-sanded on the right. You can see that the nightstands had quite a few knicks and scratches, but the stain did fill those in nicely.

Nightstands, 2

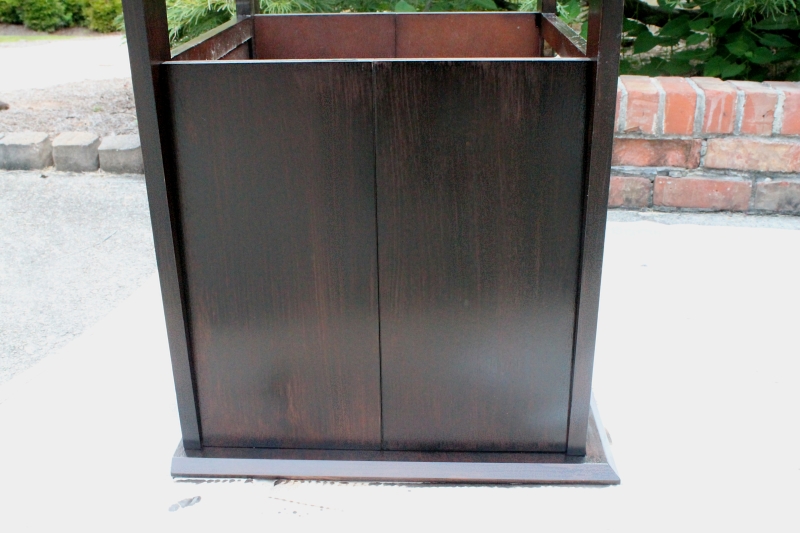
Then I used a cheap brush to apply the first coat. It went on super streaky, but I could tell the color would build up and it would work better with a nicer brush so I was still optimistic. I was so glad that I applied most of the stain with the stands upside down like this, because the stain was very drippy and it would have been a mess if they had been turned the other way.

Nightstands, 3

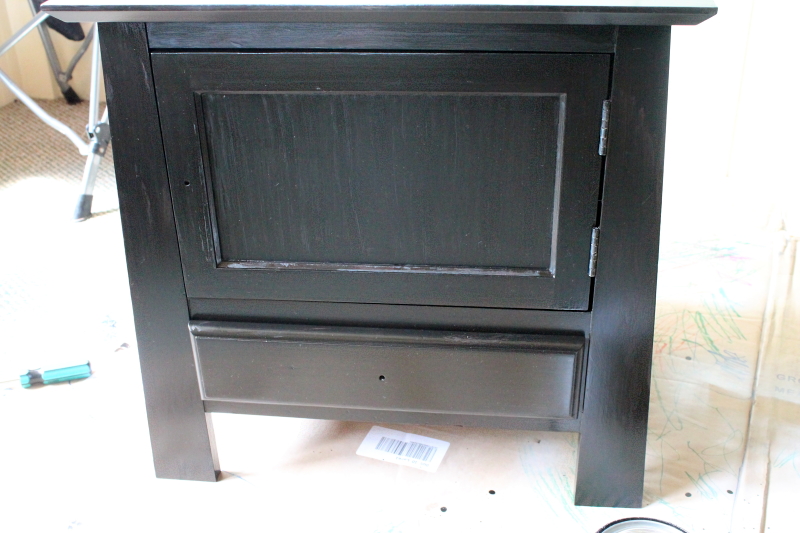
I bought a fancy $8 natural bristle brush (which ended up getting ruined & tossed) and the stain did go much smoother, but it dried so fast that you ended up with brushstrokes and streaks no matter what. After a few coats it still looked pretty crappy in some areas. The front of this nightstand looked particularly beaten up ~

Nightstands, 4

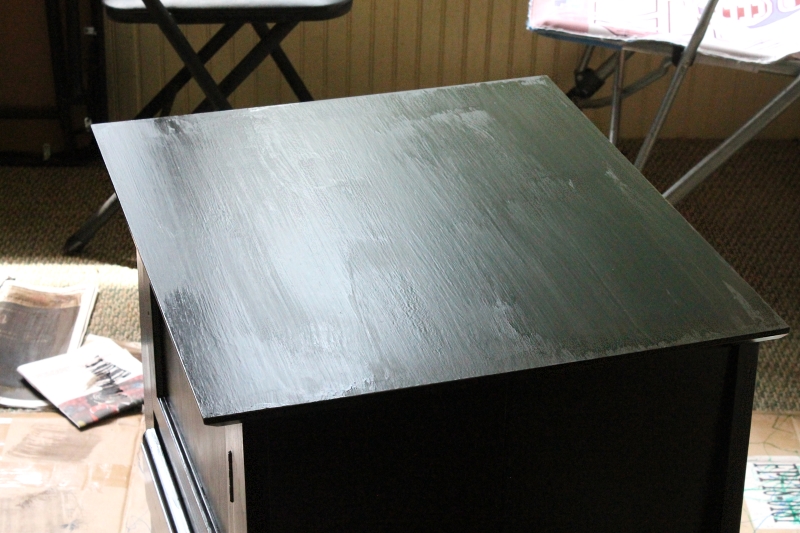
And the top showed every brushstroke ~

Nightstands, 5

At this point I went online again looking for help, and came across the Home Depot site. PolyShades had absolutely terrible reviews there, with people complaining about streaking, dripping, and all of the problems I had been dealing with. Most said the project would have been so much easier if they had just used a normal stain to begin with, and it took forever fighting with the PolyShades to get a half-decent result. The only positive reviews were by people who had sprayed on the stain instead, which supposedly works well, but even those reviews agreed it was terrible brushed on. At least I knew I wasn't alone!

Several reviews recommended wiping it on with a sock, so I raided my husband's drawer, grabbed some gloves, and tried another coat. Once again, the stain did go on much smoother and I was able to work quicker. Finally the color was pretty uniform, though there was some streaking between glossy and matte on the tops ~

Nightstands, 6

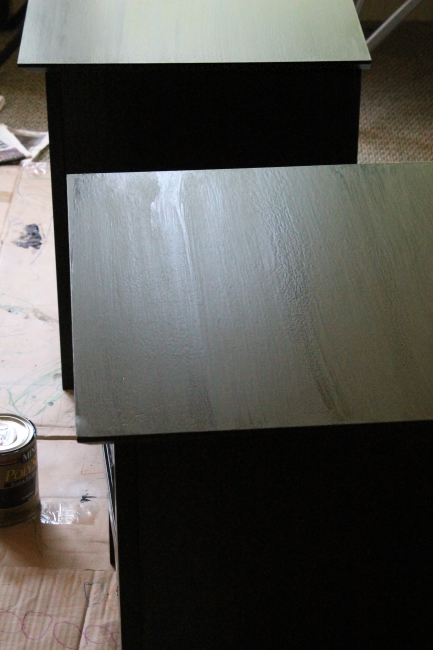
Some of the reviews I read mentioned painting two things with the same can and one would end up glossy and one matte, so there is definitely some issue with getting a uniform shine. I figured this was the best that I could get with the Polyshades and hoped that my topcoat would cover up the shine difference.

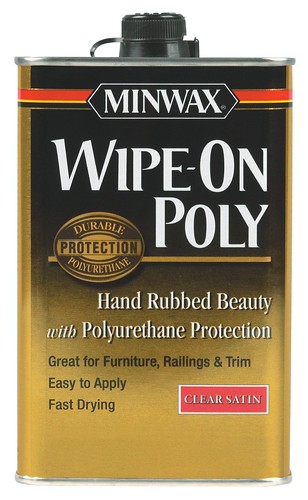
For a topcoat I used Miniwax Wipe-on Poly ~

Miniwax Wipe-on Poly

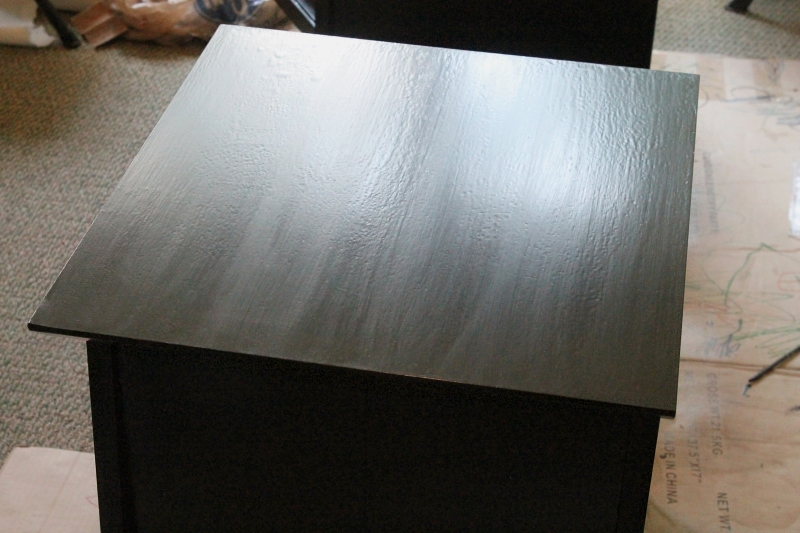
It did even out the shine a bit, though you could still see some streaking under a strong light. Luckily I don't think you'll be able to see it at all in our bedroom ~

Nightstands, 7

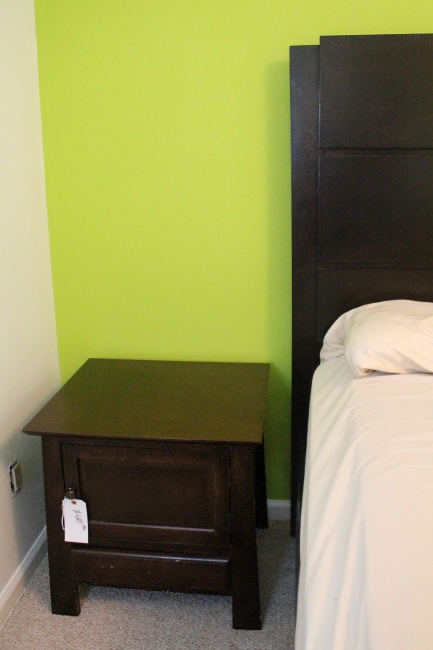
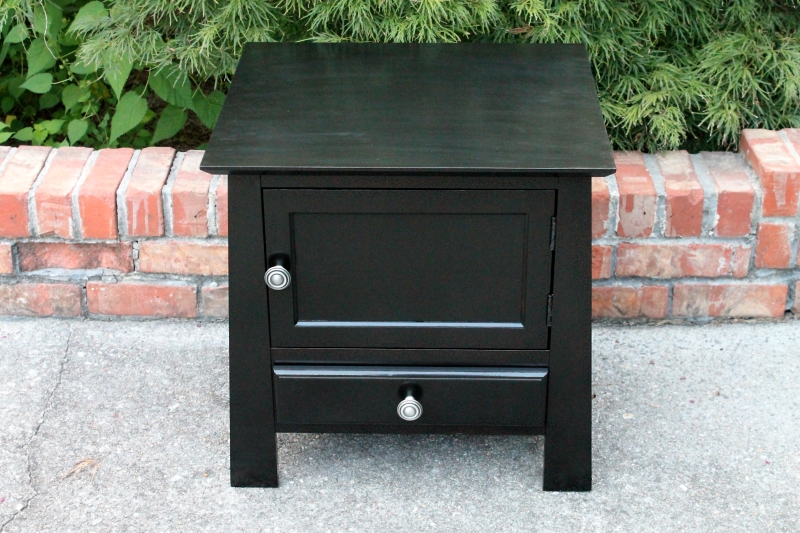
I attached some new knobs and a new magnetic clasp and the nightstands ended up looking almost new! With all of the coats of stain, they ended up looking more black than 'espresso', but they look fine next to our bed.

Nightstands, 8

So, I was able to get a pretty decent result, but only after much fighting with the PolyShades & the problems they create. For the dresser I'm going to try a 'real' stain, although this process has made me a little nervous about it! If all goes wrong, I'll break out the paint after all.

Nightstands - Before & After

Thursday, September 17, 2015

Mini Biscuit Pizzas

When I saw these Mini Biscuit Pizzas, I thought they just might be a big hit with the kids. The dough is a little tricky to spread out thin enough, so I do that part and they have a great time loading on the sauce & toppings (with a little guidance!). We've made them several times lately, and one morning I even whipped one up to stick in Orson's lunchbox (then Pandora and I made some of our own at lunch time).

Mini Pizzas, kids working

Just take one Grands Homestyle Biscuit and spread it out a little in your hands. Lay it on a baking sheet and press (or roll) it out more until it is about 6 inches wide. You can fit four per pan.

Mini Pizzas, kids

With my narrowest pan I had to make long ovals rather than circles for them to fit.

Mini Pizzas, long

Spoon on some of your favorite sauce and spread it out with the back of the spoon. The kids like to use tomato/spaghetti sauce, but I always reach for BBQ sauce or ranch dressing for mine! (With chicken, bacon, onion, and sometimes mushrooms. So good! I've converted many people to Chicken Bacon BBQ pizza.) Sometime soon I really want to try for something Asian with a creamy peanut sauce. Yum!

Mini Pizzas, BBQ & Ranch

Sprinkle on a little shredded cheese, most any kind is fine, and then round up your favorite pizza toppings. Pepperoni, chicken, bacon, sausage, peppers, pineapple, onions... whatever you like! Everyone can customize their own, so picky eaters will be happy. And it's a great chance to experiment with new flavors!

Bake at 400 F for 10 minutes, or until edges are golden brown, and serve.

The kids were so proud!

Mini Pizzas, Orson

Mini Pizzas, Panda

If you are in a rush, I recently made a similar pizza on a tortilla for a quick kid lunch. (Just broil for a few minutes until the cheese is melty.) It wasn't quite as good, and seemed a little greasier, but I've always got tortillas on hand!

Monday, September 14, 2015

Spinach Roach?

Is that a roach crawling across my spinach?

Spinach roach?

A closer look...

Spinach roach?

It's just a really badly designed logo (upside down)!

Spinach Logo

Friday, September 11, 2015

5:2 Update - Week 34, Month 8

This month I am down another 2 lbs., which is not bad considering I've been doing less. I've missed 1-2 exercise days each week just from being busy & bumped up my calorie amount on diet days (700 calories) to keep me from getting burnt out. I'm just happy to keep the number going down!

I don't mind the slow progress, but some times I think, 'I should really bust my butt the next few weeks, and I could knock off another 5 lbs. easy!'... And then life happens, and there are yummy foods around, and I continue to do the bare minimum. It's really hard to avoid food when you work at home, 1 foot away from the pantry!

5:2, 8 months, down 32 lbs.

Panda managed to sneak into my 8 month pics! They don't look much different from the 4 month pics, but I thought I'd share anyway.

The funny thing is, at 178 lb. I am just under the 'obese' mark now on the height/weight charts. I've always been pretty muscular (and even more so now with my daily strength exercises), so I think my numbers rub a bit high.

Thursday, September 10, 2015

Using Baby Wipes to Remove Carpet Stains

I'll admit it. I only vacuum if we have guests coming over. And whenever I do manage to clear the floors and vacuum, I find that not everything disappears ~ there are always new little spots on the floor. This happened before we had kids too, but of course it's much worse with two little ones running around!

I used to get down on the floor & scrub out the stains with carpet cleaner, water, a toothbrush, and paper towels. Until one day I happened to be cleaning up a fresh spill with a baby wipe, and realized that it cleaned up an old spot too. Now I always reach for the baby wipes, and I've only come across one or two mystery stains that they didn't remove. Here's a little before & after from a recent cleaning day ~

Baby Wipes on Carpet Stains - before
It doesn't matter what brand you buy, but personally I would avoid the 'unscented' type, because ironically, those things really stink! Just grab a wipe and rub at the stain. Use your nails/fingers to really dig in there, and the spot should disappear pretty quickly (some are more stubborn than others, or course!). It does take a little elbow grease, but no more than my old carpet cleaners did. And we always have baby wipes on hand!

Baby Wipes on Carpet Stains - after

Tuesday, September 8, 2015

Chicken Pot Pie Crescent Ring

A few weeks ago I shared a low calorie Chicken Pot Pie Stew and I'm already back with another pot pie recipe! This one is not diet fare, but is a super simple & pretty Chicken Pot Pie Crescent Ring recipe from the Pillsbury site.

Chicken Pot Pie Crescent Ring

Have you ever made a crescent ring before? They are easier than they seem and end up looking so gorgeous! Just lay out the pieces in a circle (overlapping in the center a bit), pile on your filling, fold the ends in, and bake.

Chicken Pot Pie Crescent Ring

I sprinkled on a little dried parsley for color, but most any herb would work. And make sure to drag everyone in the kitchen to ooh and ahh over the pretty ring before you start cutting it up.

Chicken Pot Pie Crescent Ring

The finished ring was delicious! In the past I've always avoided using the frozen veggie mix in my pot pies, cutting and measuring out my own so I could choose the mix. And I've got to say... I think this was as good if not better than my veggie mix! Just make sure to grab the bag with no lima beans, haha. This recipe used Cream of Chicken soup, but I'll probably switch to Cream of Potato next time.

I also want to see if I can cut down on the bread a bit. I make a killer breakfast crescent ring with scrambled eggs, ham, and cheese that I need to share on here soon. It divides the dough into triangles instead of the rectangles and forms the ring with only 1 tube of crescent rolls instead of 2. Perhaps this recipe has too much filling to cram into 1 tube of dough, but it's worth a try!

Even without these changes this one is a winner, so give it a try! You can find the full recipe here.