Monday, August 31, 2015

Super Simple Headband Holder Tutorial

Pandora was quite the bald baby her first year. Our grocery store had a $1 bin for hair accessories, so I stocked up on headbands in every color and started putting them on her whenever she'd let me. By 2 she was covered in blond curls, but had come to love headbands & wears them all the time. And so I started searching around Pinterest for some way to organize our tumbling pile!

I found a few cute options (like covering an old oatmeal container for a stand), but my favorite was this hanging holder. With a few paper towels rolls, fabric, ribbon, fake flowers, and hot glue, you can make your own!
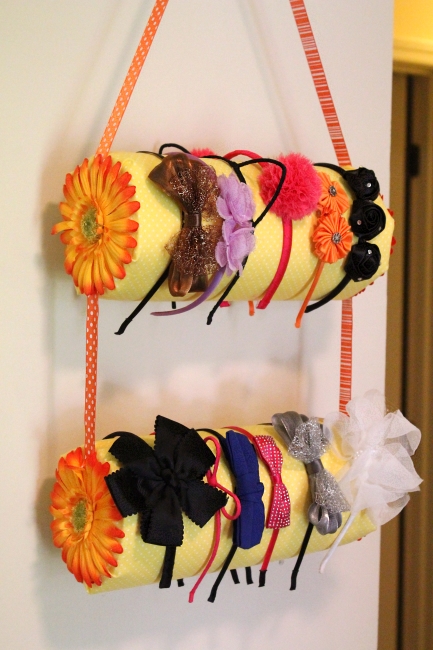
Headband holder tutorial, 1

1) Test the thickness ~ Before you start, test some headbands on your paper towel roll to see if you've got a good fit. I bought some rather narrow ones & had no problems, but if you have thick rolls you may need to remove a few sheets until they are a good size. If you do this, run a line of hot glue along the edge of the last towel and secure it to the roll.

2) Wash & cut your fabric ~ The measurements will vary a little based on your paper towels rolls, but you'll need enough fabric to wrap around your roll and tuck in on the ends with a little extra. My fabric pieces were about 18" x 23".
Headband holder tutorial, 2

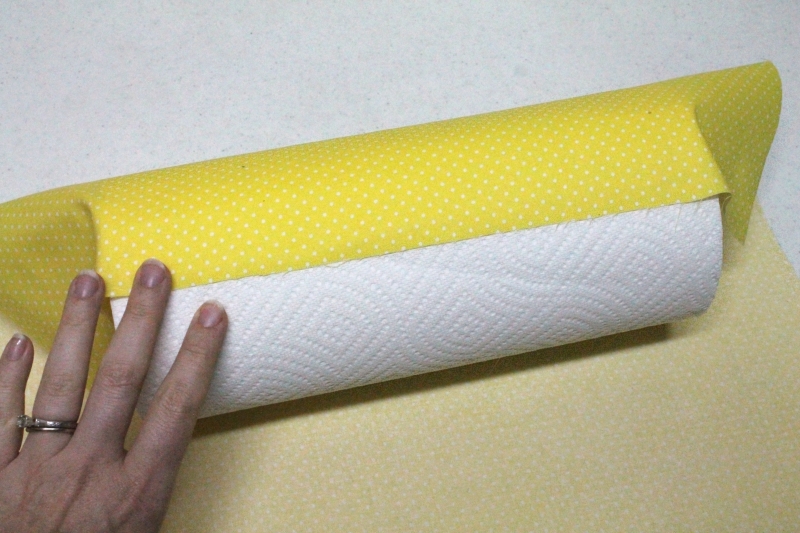
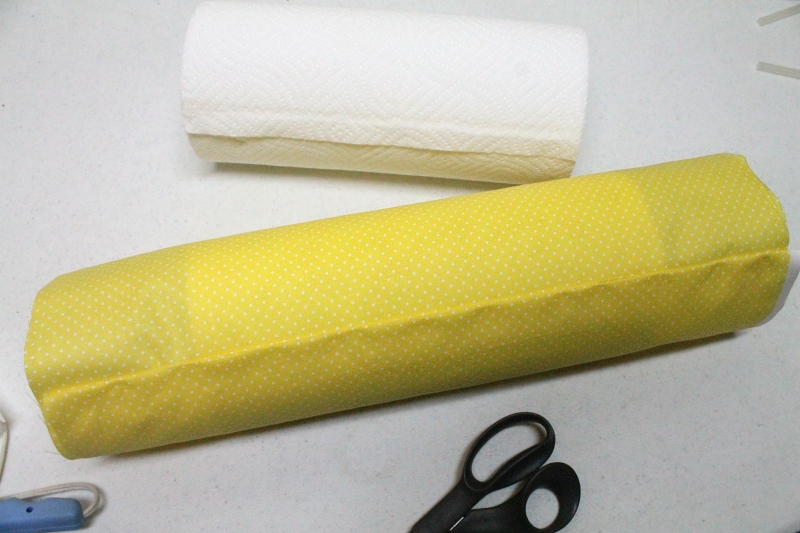
3) Roll it up ~ Place your paper towel roll in the center of the fabric and glue one edge to the roll. Fold over the other end about 1" and glue down, then glue that side to the roll as well.
Headband holder tutorial, 3

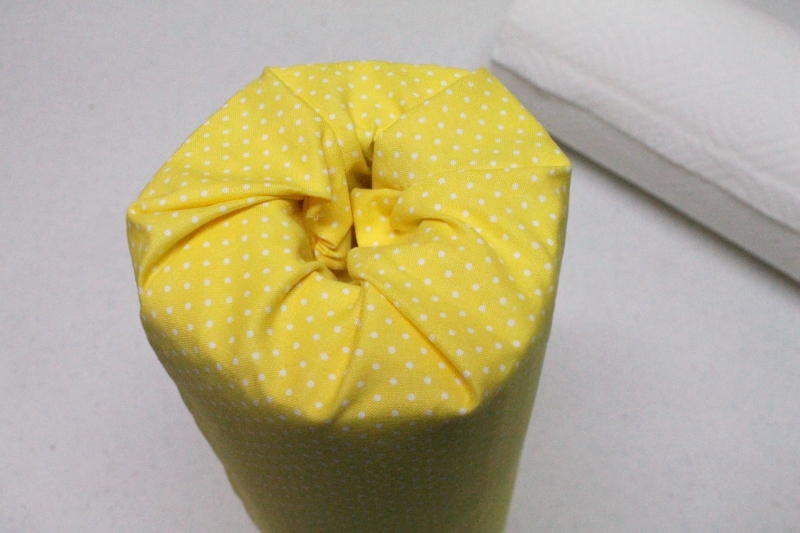
4) Tuck it in ~ Glue along the inside of the paper towel tube, then quickly tuck the fabric ends into the tube. If you need to fix the shape or any of the pleats, you can glue the pleats down as needed. But don't worry too much, the sides will mostly be covered!
Headband holder tutorial, 4

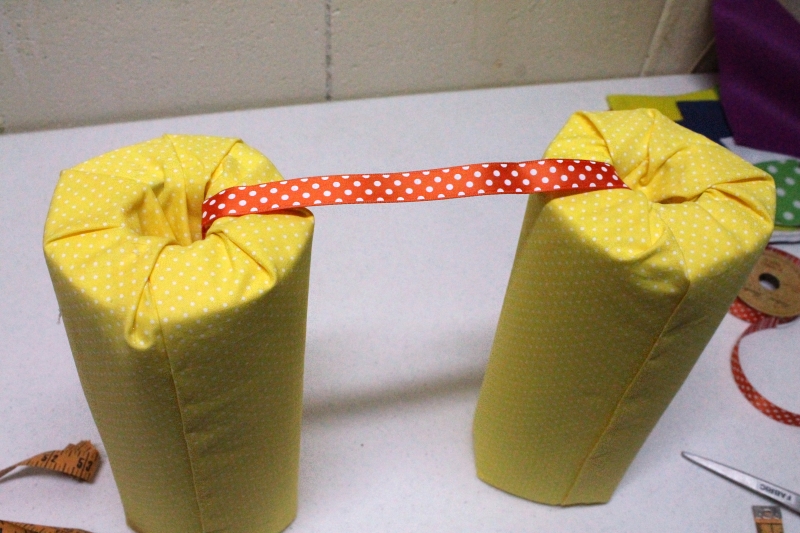
5) Attach the rolls ~ You can make this holder with only one roll if you don't have many headbands, but we definitely need two! Once your rolls are covered in fabric, decide how far apart you want them to be and cut some ribbon 2-3 inches longer on each end. I made mine 8" apart. Start with the fabric seams facing you (this will become the back) and make sure to measure the distance before gluing your second roll in place to keep the distances the same on each side.
Headband holder tutorial, 5

6) Attach the loop ~ Along the top you will need a long piece of ribbon for you holder to hang from. Mine was 14" long, plus extra on each end. Tuck the ribbon into the holes and glue like before (on the opposite side from your first ribbon).
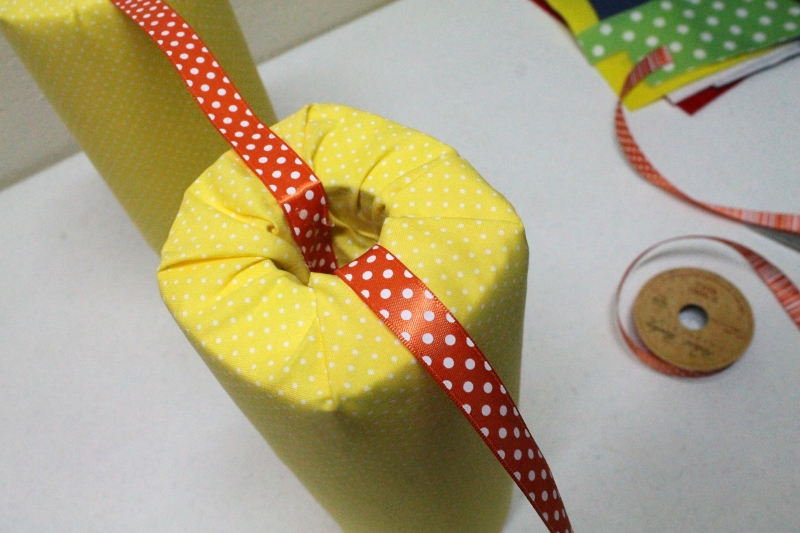
Headband holder tutorial, 6

7) Test it out ~ Even with measuring, my rolls seemed to hang a little crooked. Don't be afraid to pull the ribbon off and glue it again until it looks right. Hot glue is forgiving!

8) Add the flowers ~ Remove your fake flowers from their stems. Run glue around the hole of the tube and add a flower on each end. If you have a large flower like these, you might need to add another line of glue towards the ends of the petals to help secure them.
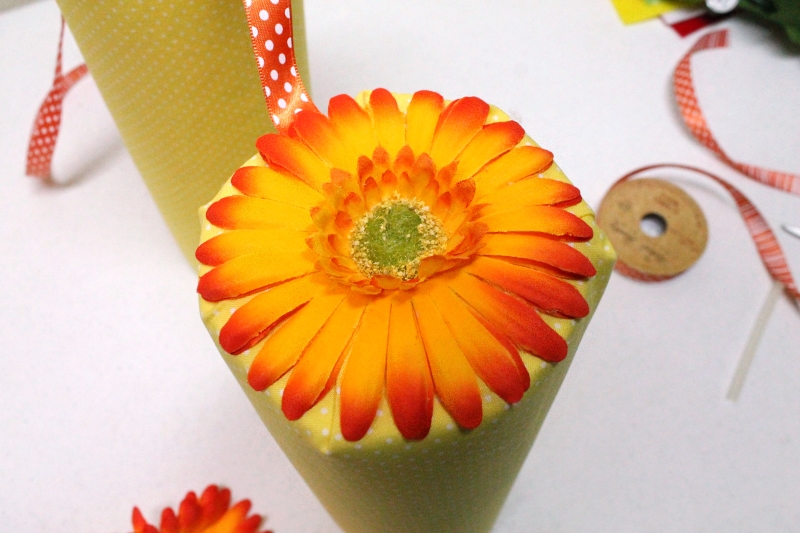
Headband holder tutorial, 7

9) Hang! ~ These holders work well on a doorknob or any large hook. I hung mine on an old curtain rod hook. I like how it holds it out from the wall, but might add an embellishment to hide the screws later on.
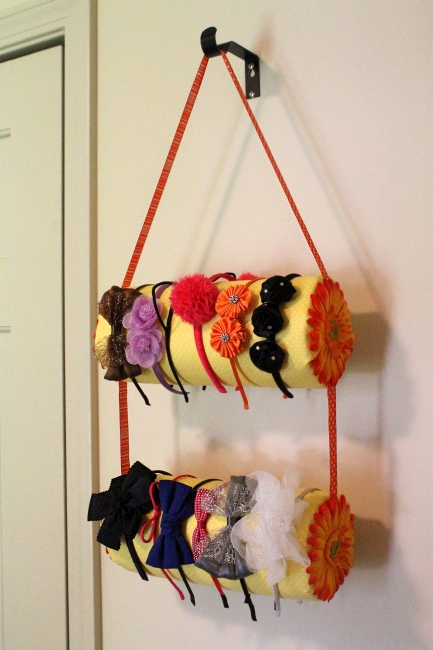
 Headband holder tutorial, 8

 Unfortunately shortly after I took these pictures we lost two of those headbands. I went on eBay and found some replacements, and grabbed a few colors we've been missing... and now I need to add a third row! It looks really nice with about 5-6 headbands per row, but 8 is getting too crowded. Luckily I have more ribbon and flowers, so I can easily grab another paper towel roll and some more fabric and add on another row sometime.

Once I actually sat down to make this it was a super quick & fun project. I love how it turned out!

 Headband holder tutorial, 1

Tuesday, August 25, 2015

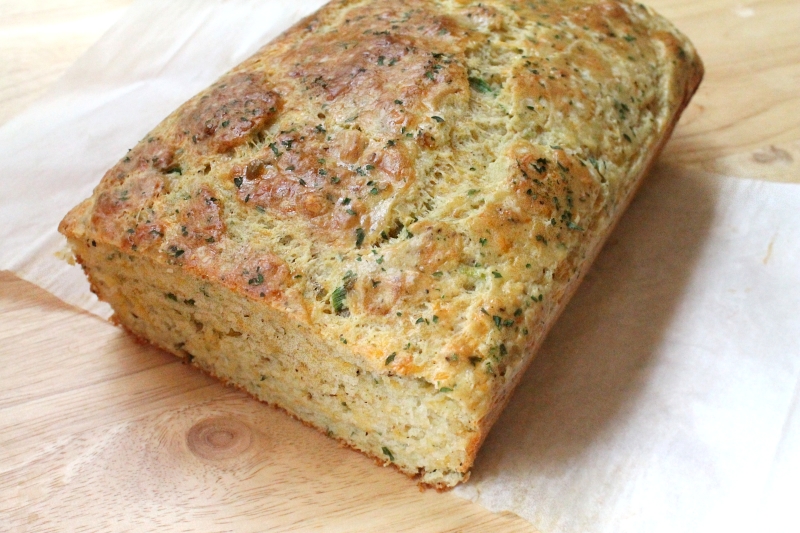
Cheesy Buttermilk Bread

Last week I had an unopened pint of buttermilk in the fridge that was about to expire. I started searching on Pinterest for ways to use it up quick, but most of the recipes I came across only used a tablespoon or two. Finally I found this delicious looking bread that uses over a cup of buttermilk, and it was also a perfect excuse to use up the big block of cheese we had in the fridge too. 


I changed up quite a few things from the original recipe, like omitting the olives and sun dried tomatoes, and also switching some measurements from grams to cups. The dough mixes up super quickly with just a few stirs (no mixer needed!) and needs no rising time, so it is super easy to make! And super cheesy.... mmmmmm.


Cheesy Buttermilk Bread


Cheesy Buttermilk Bread 

2 1/4 cups all purpose flour
2 tsp. dried parsley (or 2 Tbsp. fresh)
2 tsp. baking powder
1/2 tsp. baking  soda
1/2 tsp. ground thyme (or 1/2 Tbsp. fresh)
1/2 tsp. salt
1/2 tsp. black pepper 

1 1/4 cups shredded sharp cheddar
1/2 cup grated Parmesan
2 Tbsp. thinly sliced green onion

2 eggs
1 1/4 cup buttermilk
2 1/2 Tbsp. olive oil
Egg wash (optional) - 1 egg beaten with 2 tsp. water
Coarse salt and/or extra parsley for garnish


1) Preheat oven to 350 F. Butter a large loaf pan and either line it with buttered parchment paper or dust with flour. Set aside.

2) Fluff your flour with a fork before measuring and then use a spoon to lightly scoop it into your measuring cups. (This keeps it aerated & light, similar to sifting.) In a medium bowl use a fork or whisk to stir together the dry ingredients ~ flour, dried parsley, baking powder, baking soda, thyme, salt, & pepper.

3) Stir in the cheddar, Parmesan, and green onion. 

4) In a small bowl, beat the eggs with a fork or whisk. Stir in the buttermilk and oil until well mixed. Make a well in the center of the dry mixture and pour in the wet ingredients. Stir together to form a thick, sticky batter.

5) Scrape the batter into your loaf pan and spread it out evenly. For a nice brown color on top, brush the top of the batter with the egg wash. Sprinkle on some coarse salt and extra parsley (or fresh thyme) for color.

6) Bake for 45 minutes, until a small skewer inserted in the middle of the loaf comes out clean. Let cool in the pan for a few minutes and then lift out with the parchment paper. 

Tuesday, August 18, 2015

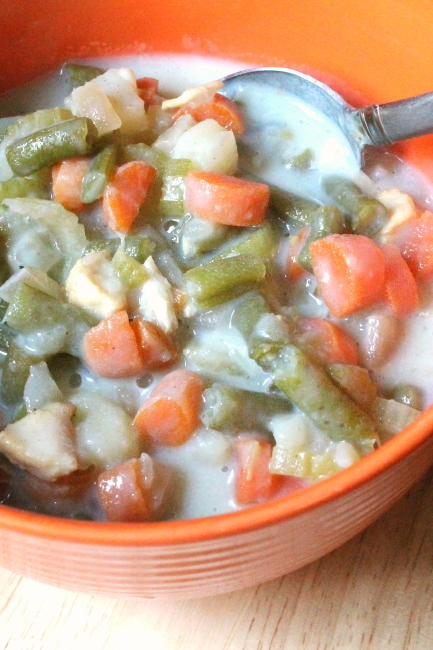
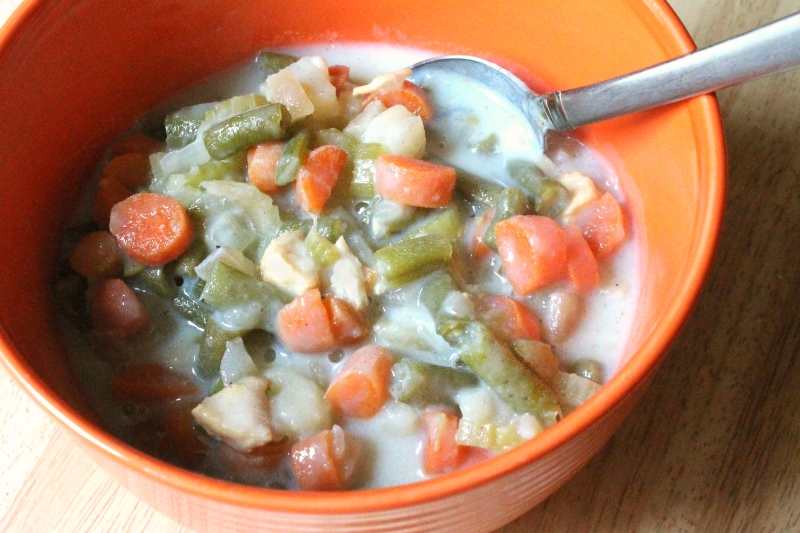
5:2 Chicken Pot Pie Stew (204 calories)

I found this super low calorie recipe for Veggie Pot Pie Stew and was easily able to add some chicken and even more veggies and still keep it under 200 calories. This one is tasty, hearty, comfort food!

5:2 Chicken Pot Pie Stew (204 calories)


Chicken Pot Pie Stew

1 cup onion (60)
2 cups celery, sliced (about 2 stalks, 40)
2 cups potato, 1/2" cubes (200)
2 cups carrots, sliced (104)
2 cup fresh green beans, trimmed & cut small (80)
4 oz. cooked, chopped chicken (136)

1.5 cups water (0)
1.5 tsp. chicken bouillon (10)
1 tsp. dried thyme (4)
1/2 tsp. salt (0)
1/2 tsp. black pepper (1)

2 Tbsp. cornstarch (20)
2 cups skim milk (160)


1) Add all ingredients except for the cornstarch and milk to a large pot (4 qt.) and bring to a boil over high heat. Reduce to medium-high, cover, & cook for 30 minutes. (Stir the bottom every 10 minutes to keep from burning.)

2) In a small bowl or cup, mix the cornstarch with 2 Tbsp. of the milk and stir together with a fork until smooth. And the cornstarch and the rest of the milk to the pot and cook for 5 minutes?, until thickened.

Calories- 204 for 1/4 (about 2 cups)

5:2 Chicken Pot Pie Stew (204 calories)

Friday, August 14, 2015

5:2 Update - Week 30, Month 7

Not much happening this month. The first two weeks I was so busy working on home renovations that I could not find the time to get back to regular exercising. I told myself it was only a few more weeks until school started and I would get back on track then. We kept up with our 2-days-a-week diet and my weight stayed the same.

Then we pigged out one weekend, and I knew I needed to get back to exercising a week earlier than planned to make up for it! My husband was also starting work that week, so I couldn't go crazy working on house stuff all day anyway. 

School is back in this week and I am back to a nice routine. I'm still doing about 10 minutes of Pilates for strength (1 Cassey Ho video) and about 10 minutes of Zumba cardio (3 songs). And I've been breaking it up a little throughout the day. It's a lot easier to convince myself to workout for only 10 minutes, or even 3 minutes, here & there. And since I'm not drenched in sweat afterward I don't even have to change in and out of workout clothes! So nice.

Progress ~ 
Since I wasn't doing much this month, my weight only went down about 1.5 lbs., but that finally bumped me past the 30 lb. weight loss mark! Woohoo! Nearly all of my measurements went down a little too, so I think that is a good sign that cutting my exercise time basically in half was not a mistake.


Monday, August 10, 2015

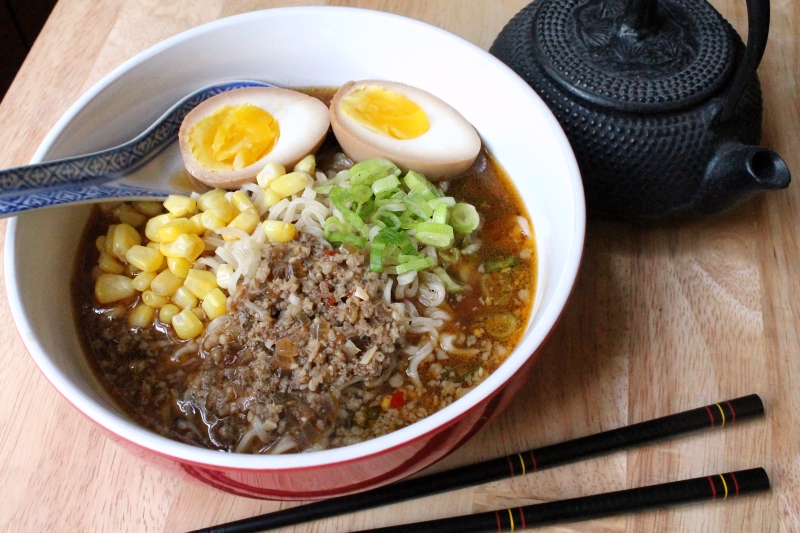
Japanese Miso Ramen


Two years ago I posted about a Miso Ramen recipe we tried from the book Takashi's Noodles. I didn't really like the amounts used, or the way things were put together, but the recipe was a great starter point for some tweaks along the way.

I like what I said about ramen in that post, so I'll just quote it here! "Now if your only experience with ramen is with those dirt cheap instant noodle packs, let me tell you.. there's a whole other world out there! That's like going through life having only eaten pizza in the elementary school cafeteria, not knowing it also comes in a million varieties, & the difference good ingredients can make. Ramen shops in Japan usually make their own noodles, might spend 20 hours making the broth, can mix up lots of variations, and guard their secret recipes."

Japanese Miso Ramen (under 500 calories)

(For those of you counting calories, I've added the amount for each ingredient so you can easily make tweaks without having to re-calculate everything. Anything marked with an asterisk* may vary a lot based on what you buy, so make sure to compare your label.) 


Japanese Miso Ramen
 
Broth ~
3 Tbsp. minced onion (11)
2 tsp. sesame oil (87)
2 tsp. minced garlic (0)
1 tsp. grated ginger (1)

¼ lb. mild pork sausage (Tennessee Pride, 400*)
3 Tbsp. cup awase miso (90*)
4 cups water (0)

2 Tbsp. hoisin sauce (60*)
2 Tbsp. soy sauce (20)
1 ½ Tbsp. sesame seeds (78)
1 Tbsp. chicken bouillon (3 cubes, 15)
1 tsp. tobanjan (optional, 5)

1) Combine the onion, sesame oil, garlic, and ginger in a medium saucepan (4 quart) over medium-low heat. Cook, stirring often, for about 4 minutes, until the ingredients are soft and fragrant.

2) Mix in the sausage and increase the heat to medium. Cook for 4 minutes, breaking the browned meat apart into small pieces.

3) Add the miso and stir, letting the heat melt it, until blended smoothly. Stir in the water and raise the heat to high.

4) Add the hoisin sauce, soy sauce, sesame seeds, bouillon, and tobanjan. Bring to a boil and skim any skum off the surface. Reduce the heat to low and keep warm until ready to serve.


Ramen ~
4 (3 oz.) packs of dried ramen noodles (discard flavoring packets, 1520*)
5-6 Ajitsuke tamago, sliced in half (optional, but awesome, 450-540)
3/4 cup frozen corn kernels, warmed (113)
2 green onions, white & green parts, sliced (10)

1) Cook the ramen noodles, following package instructions, or microwave each pack in water for 4 minutes. Drain well and divide among 5-6 bowls. (You can also warm the corn in a little water in the microwave.)

2) To garnish like the picture ~ Place the egg halves on one side of the bowl. Next to that, add the corn on one side and green onions on the other. In the remaining space, pour the broth into the bowl and the sausage will collect on top of the noodles. Serves 5-6.

Calories - 492 for 1/6th (with 1 tamago), or 572 for 1/5

Thursday, August 6, 2015

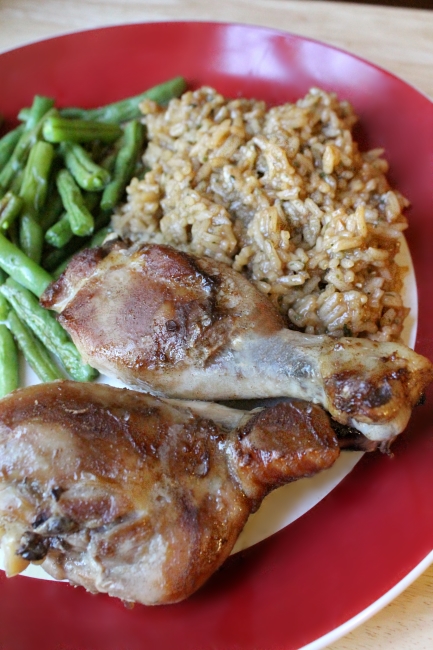
Chinese Roast Chicken with Coriander Rice

This recipe is a longtime favorite in our family, another great find from Soy and Pepper. The drumsticks marinate in a tasty Chinese seasoning overnight, then they just need to be popped in the oven about an hour before dinner. I even marinate them in the baking pan, so it's a super easy dinner (as long as I remember to mix up the marinade the night before! That's the toughest part). The leftover sauce gets mixed into rice, and we usually serve some roasted green beans on the side.

The rice also gets mixed with some coriander leaves, otherwise known as cilantro, so I suppose it should be called "Cilantro Rice". I am not a cilantro fan, though we do enjoy the dried flakes in a few recipes (like this one), so I'm going to stick with the original recipe name and pretend like they are two different things. If you are a cilantro lover, you might want to load it with the fresh stuff instead.

Chinese Roast Chicken and Coriander Rice

(For those of you counting calories, I've added the amount for each ingredient so you can easily make tweaks without having to re-calculate everything.)


Chinese Roast Chicken with Coriander Rice

1/3 cup soy sauce (53)
1/4 cup sake (80)
3 Tbsp. honey (204)
2 tsp. minced garlic (4 cloves, 0)
2 tsp. sesame oil (87)
2 tsp. grated ginger (2)
1 tsp. five spice powder (0)
10-12 chicken legs/drumsticks, skin removed (2220 for 12)

1.5 cups uncooked rice (900)
3 cups water (0)
1 Tbsp. dried coriander/cilantro flakes (or 3 Tbsp. fresh, 5)


1) Combine all the marinade ingredients with the chicken legs and marinate overnight, or at least 2 hours. (If you have room in the fridge you can go ahead and marinate them in the pan covered with wrap.)

2)  Preheat oven to 350F. Place the chicken legs and marinade in a roasting pan with a tall edge and cook for 30 minutes.

3) Turn the chicken legs over and roast for another 15-20 minutes, until the chicken is cooked through and the juices run clear.

4) While the chicken is cooking, mix the rice and water in a medium pan. Bring to a boil, give the rice a stir, then reduce the heat to low, cover, and cook for 15 minutes. Remove the chicken from the roasting pan and dump in the rice and coriander flakes, stirring to mix well. Serves 5-6.

Calories - 592 (for 2 drumsticks and 1/6 rice)


Tip: If you decide to leave the skin on instead, place the drumsticks under the broiler for a few minutes to brown and crisp the skin afterward.

Monday, August 3, 2015

Chicken BBQ Bacon Dip

My teacher husband starts back at school today, so we crammed in as much as we could last week. Painting, priming, touchups, staining furniture, cleaning, school supply shopping... and a trip to the lake in there somewhere. I've still got some work to finish on the furniture, but hopefully in a week or two the master bedroom makeover will be ready for a big reveal.

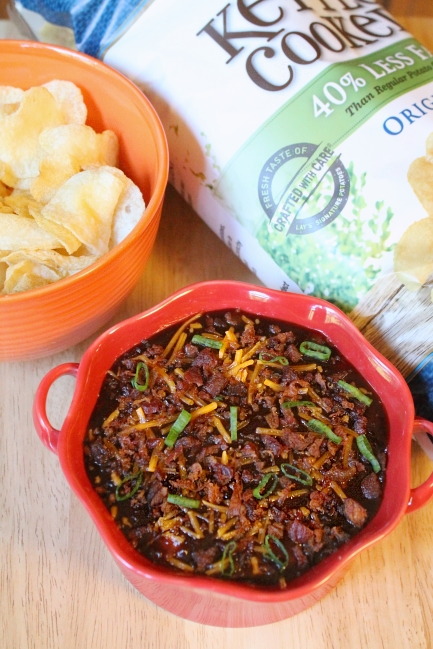
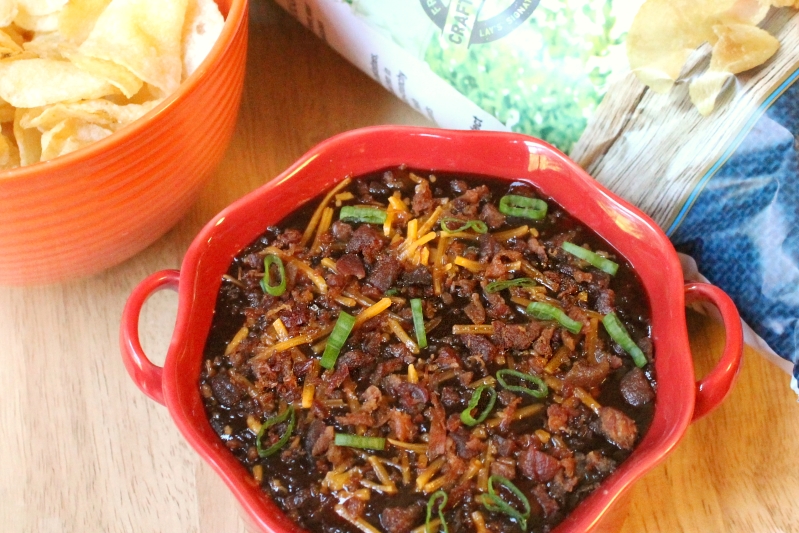
Chicken BBQ Bacon Dip

Saturday we got the chance to relax with some friends, good food, and fun games. I made a cheesy, chicken, BBQ dip that I've been working on a while, and I think it's finally right (adapted from here). The dip tastes incredible, but the first time I made it, we tried scooping it only to have our chips break every time. And we are talking thick Kettle chips! We figured it was the layer of cheese on top... perhaps it had hardened too much? I rearranged the layers & tried again and it was still un-scoopable! Unless you spooned some on your plate, then it was fine? We wondered if it was the layer of chicken towards the top that time, and were determined to try again.

So this time around I ditched the layers and mixed everything together, topped it with the sauce and garnishes, and I think it worked much better. You're probably still going to want to spoon some on your plate for dipping, but it was able to pass the chip test as-is. Either way, this recipe only takes a few minutes to throw together and is a big time winner. Our friend said he wished he could dive into a vat of the stuff!

Chicken BBQ Bacon Dip


Chicken BBQ Bacon Dip

8 oz cream cheese
¼ cup mayonnaise
½ teaspoon granulated garlic
½ teaspoon salt
1½ cups diced/shredded cooked chicken
1 cup shredded cheddar cheese (+ more for garnish)

½ cup BBQ sauce
2 Tbsp. real bacon bits (or 2 slices, cooked & crumbled)
1 green onion, thinly sliced


1) Preheat your oven to 375 F.

2) In a microwave save bowl, heat the cream cheese for 1 minute (or longer) until it stirs easily. Stir in the mayo, garlic, and salt until well combined, then mix in the chicken and shredded cheese. Spread into a 1 quart casserole dish (I used two smaller dishes, so the pictures show a half batch).

3) Top the cheese mixture with the BBQ sauce, then garnish with about 2 Tbsp. of shredded cheese and then the bacon bits. Bake, uncovered, for 15 minutes. Top with sprinkle of green onion slices and serve with original Kettle Chips.