
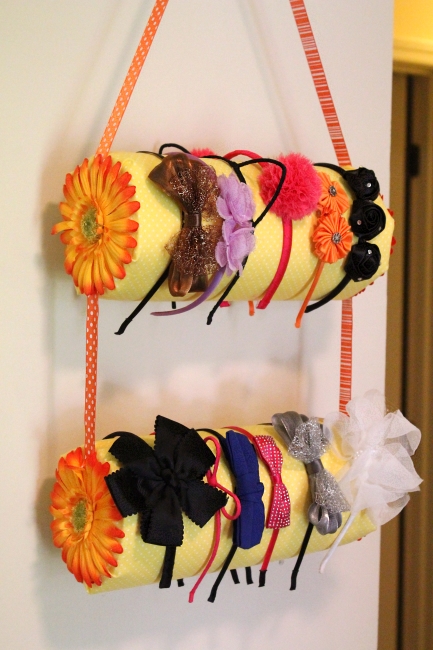
I found a few cute options (like covering an old oatmeal container for a stand), but my favorite was this hanging holder. With a few paper towels rolls, fabric, ribbon, fake flowers, and hot glue, you can make your own!
1) Test the thickness ~ Before you start, test some headbands on your paper towel roll to see if you've got a good fit. I bought some rather narrow ones & had no problems, but if you have thick rolls you may need to remove a few sheets until they are a good size. If you do this, run a line of hot glue along the edge of the last towel and secure it to the roll.
2) Wash & cut your fabric ~ The measurements will vary a little based on your paper towels rolls, but you'll need enough fabric to wrap around your roll and tuck in on the ends with a little extra. My fabric pieces were about 18" x 23".
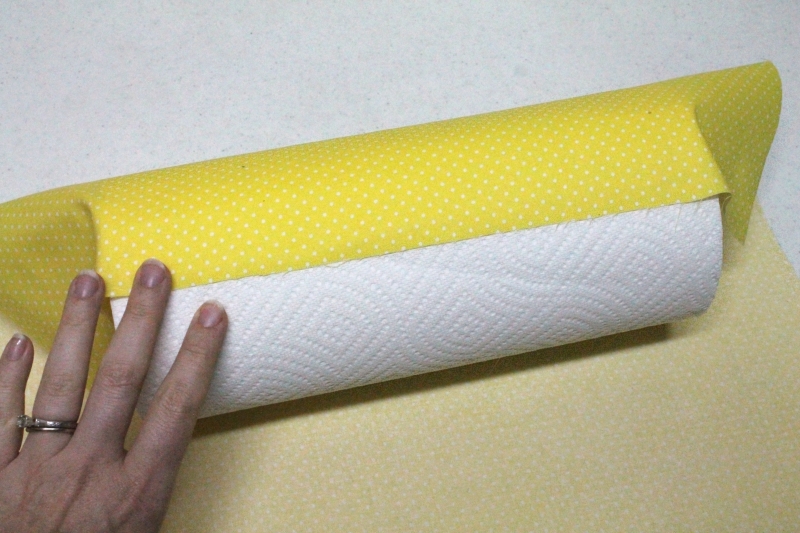
3) Roll it up ~ Place your paper towel roll in the center of the fabric and glue one edge to the roll. Fold over the other end about 1" and glue down, then glue that side to the roll as well.
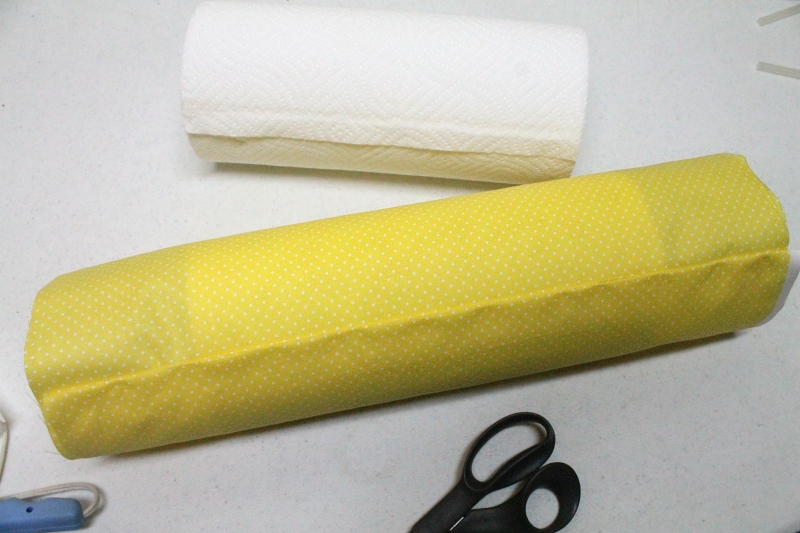
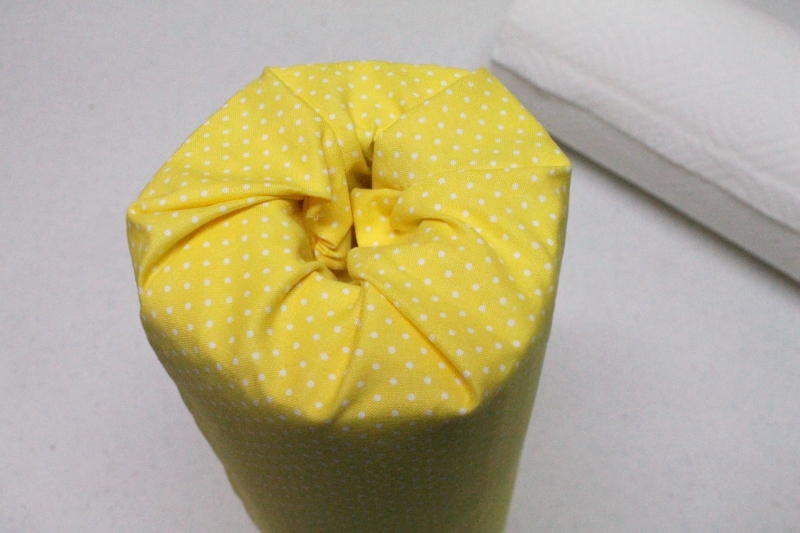
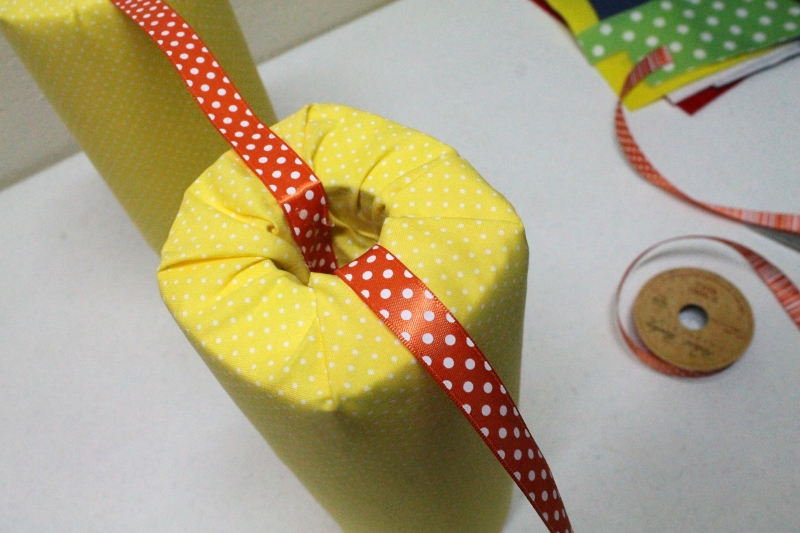
4) Tuck it in ~ Glue along the inside of the paper towel tube, then quickly tuck the fabric ends into the tube. If you need to fix the shape or any of the pleats, you can glue the pleats down as needed. But don't worry too much, the sides will mostly be covered!
5) Attach the rolls ~ You can make this holder with only one roll if you don't have many headbands, but we definitely need two! Once your rolls are covered in fabric, decide how far apart you want them to be and cut some ribbon 2-3 inches longer on each end. I made mine 8" apart. Start with the fabric seams facing you (this will become the back) and make sure to measure the distance before gluing your second roll in place to keep the distances the same on each side.
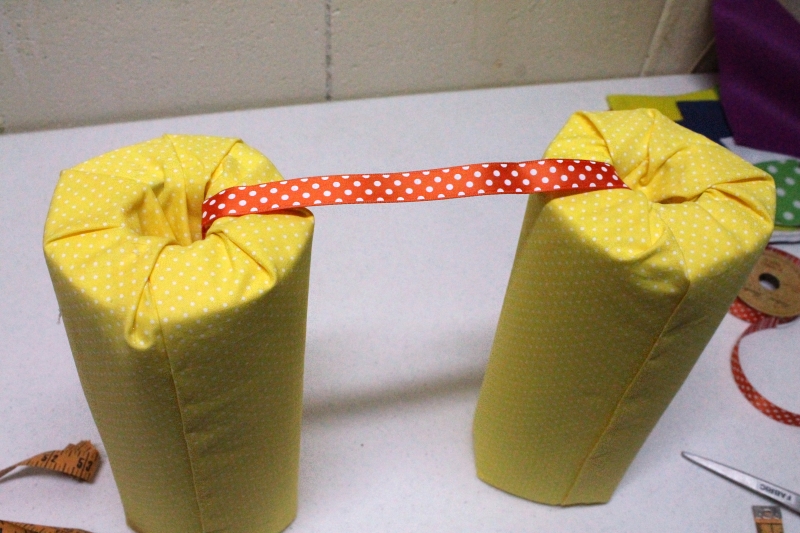
6) Attach the loop ~ Along the top you will need a long piece of ribbon for you holder to hang from. Mine was 14" long, plus extra on each end. Tuck the ribbon into the holes and glue like before (on the opposite side from your first ribbon).
7) Test it out ~ Even with measuring, my rolls seemed to hang a little crooked. Don't be afraid to pull the ribbon off and glue it again until it looks right. Hot glue is forgiving!
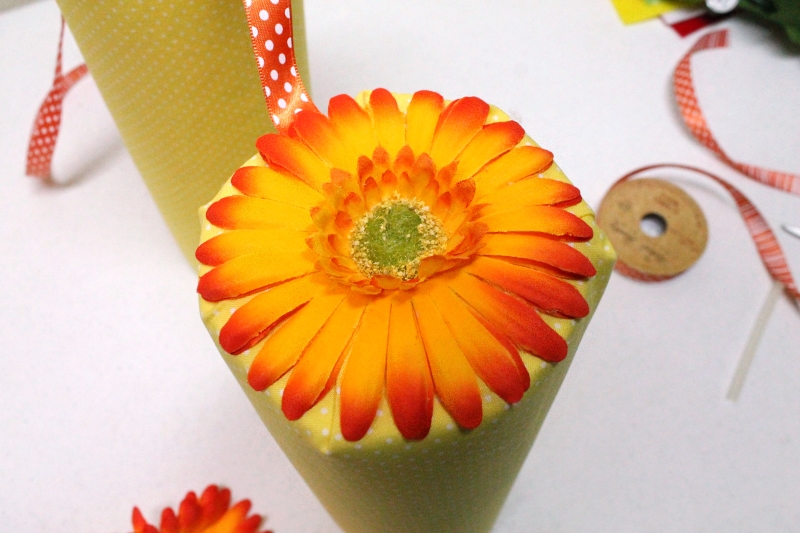
8) Add the flowers ~ Remove your fake flowers from their stems. Run glue around the hole of the tube and add a flower on each end. If you have a large flower like these, you might need to add another line of glue towards the ends of the petals to help secure them.
9) Hang! ~ These holders work well on a doorknob or any large hook. I hung mine on an old curtain rod hook. I like how it holds it out from the wall, but might add an embellishment to hide the screws later on.
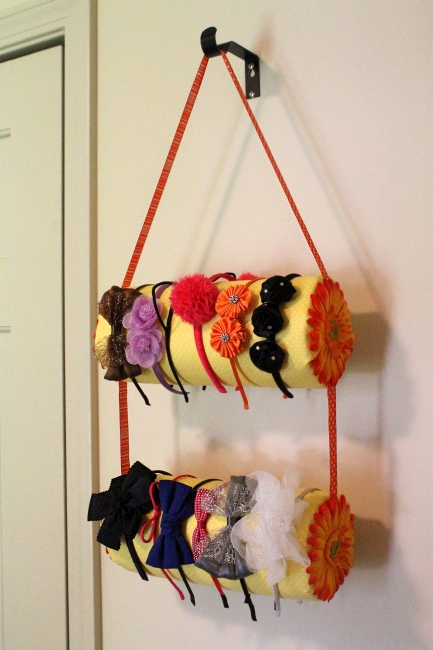
Unfortunately shortly after I took these pictures we lost two of those headbands. I went on eBay and found some replacements, and grabbed a few colors we've been missing... and now I need to add a third row! It looks really nice with about 5-6 headbands per row, but 8 is getting too crowded. Luckily I have more ribbon and flowers, so I can easily grab another paper towel roll and some more fabric and add on another row sometime.
Once I actually sat down to make this it was a super quick & fun project. I love how it turned out!
2 comments:
Love this! What thickness of ribbon did you use? It looks good proportionally. Thank you for this simple and straight forward tutorial.
Thank you! Looks like it is just under 3/4" (5/8"). I think you could even go up to an 1" without changing the ratios much.
Post a Comment