
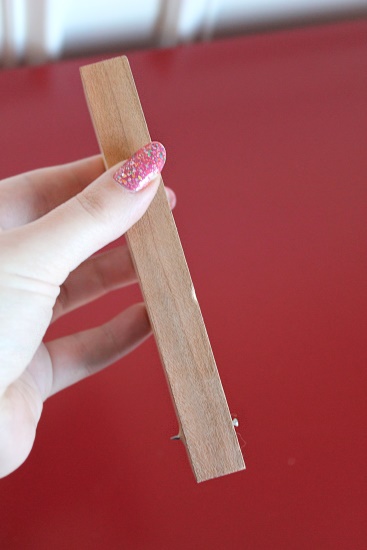
All you need is a long & narrow piece of wood and a nail that is slightly longer than the wood is thick. The original girl used a clothespin, but I think you’ll want something a little longer for most frames. I used a piece of scrap wood, though if you can find a nail short enough I bet a paint stirrer would work even better! Hammer your nail through the board so that the tip and the head of the nail stick out a little on each side.
Since I am doing a group of frames, I made a template for arranging them. I taped a few sheets of wrapping tissue paper up on the wall and then marked the center point of the wall vertically and horizontally. (I marked the horizontal center in two spots & connected them with a line to give me a level line to work from.)

From that I drew the outline for the center frame, then added the other frames 3” apart. For this arrangement I’m using all 8"x10" frames ~ laid vertically/portrait for the corners and center, and horizontally/landscape in between. (The lines went off the paper a little, but it did not matter.) For a single frame you may just want to make a mark or two on the wall to show the placement, or even just eyeball it. Now we can use our handy new tool!
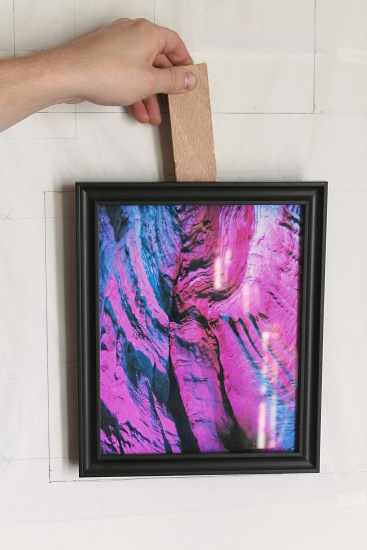
Hold the tool from the top with the nail at the bottom and hook your frame onto the nail head (using the frame hanger) like this.

Here I had my husband hold the tool so you can get a better view! Hold your frame up against the wall, aligning it with your template. Once the frame is in a good spot, press the top of the frame towards the wall and you will feel the tip of the nail cutting into the wall a little. Now you have a mark exactly where your real nail needs to go!
Repeat this, using each frame to mark the spot where it will go on the wall. (Even if several of the frames are the ‘same’, I would use each one to mark it’s spot in case the hangers are in slightly different spots) To keep them from getting mixed up, you may want to mark the hanging spot for one of the bottom frames first, then cut the paper away from that area and hang the frame. Then you can work upwards, row by row, until all of the paper is gone. I knew I would have trouble spotting the nail marks if I pulled down the whole template, so I cut away the paper this way to easily keep track of them.
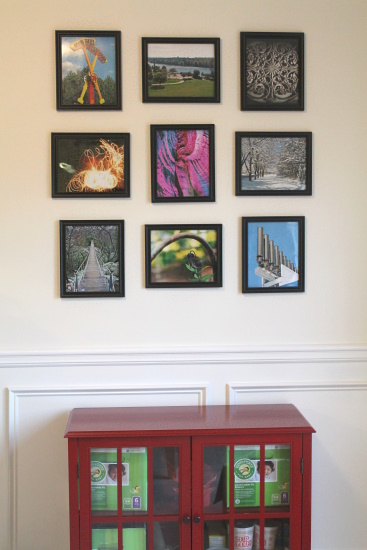
And here is the finished arrangement! It took me a while to draw out the template, but the frames were hung in a few minutes with the help of this tool. (The pictures are all photos I took a few years ago.Underneath the frames you can see our new red cabinet, organized with diaper boxes until I can find some nice storage bins!) What's your favorite way to hang frames?
No comments:
Post a Comment