Nail stamping plates ~
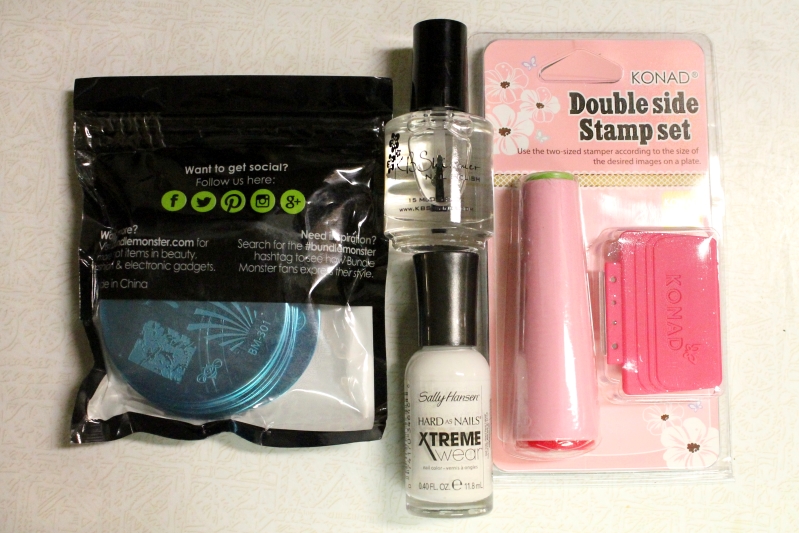
There are a lot of brands out there, and a lot of variety in quality and price. For good, cheap plates, I recommend anything from Bundle Monster, Cheeky, or the Born Pretty Store brand. For this kit I got the Bundle Monster 2012 Collection, which has 25 plates (6 images per plate) for about $20. (I actually wanted to buy this Cheeky set, since the girls liked mine so much, but it wasn't going to arrive in time.)
By the way, if you have any plates that you know you won't use any of the images from, I've had good luck selling them on eBay. Sometimes I will buy a set, sell a few of the plates, and completely cover the cost of the set!
Top coat ~
For a general, quick drying top coat, I recommend INM "Out the Door". You can find it at most beauty supply stores and some drug stores for about $5. Anyone who paints their nails at all definitely needs a good fast drying top coat. They make the whole process so much easier!!
After stamping, you can use any top coat over the stamp, but you have to brush it on very lightly (and try not to brush over the area many times) or it will smear the art. Sometimes, no matter how gentle I am, it still smears a little and messes up my hard work! After a while I discovered a top coat that will not smear your nail art - KBShimmer "Clearly on Top". With shipping it's a little pricey, so you may want to order more than one bottle at a time to help lower the cost. I like to use a cheaper brand under the stamping and save this stuff to use on top. I only included this top coat in the kit, but would recommend getting both if you can.
Stamping polish ~
Most polishes will not work for stamping, but there are a lot that will. If a polish is thick enough to cover your nail with one thin coat, then it might work for stamping too. Fast drying polishes often work well, and you can always do a test stamp on paper to test one. For this kit I bought Sally Hansen X-treme Wear in white, but my top choice is Pure Ice "Silver Mercedes" (or "Silver Star") since it is only $2 if you can find it. To find more polishes that will work, you can do a good search for stamped nails, or here is a good comparison post that features some cheap brands (Sally Hansen, Wet N Wild, Sinful Colors, & Kleancolor).
Stamper and Scraper ~
For the kit I bought the Konad double stamper & scraper, which is what I use. I've also heard good things about some of the stampers on Born Pretty Store, and you can even use a credit card as a scraper, but I find I get a cleaner print with the metal one (though it does scratch up the plates a little). Use a nail file to buff the rubber ends of the stamper before you use it the first time.
In the kit I printed out a copy of the directions below, which talk about the other few supplies you will need (Q-tips, nail polish remover, and paper towels). It really helps to see someone stamp before trying it yourself, so make sure to check out some YouTube tutorials if you haven't seen it done before.
Directions ~
1) Paint your nails like normal with a base color, then top with a fast drying top coat (like INM "Out the Door" or KBShimmer "Clearly on Top") and let dry.
2) Gather your stamping supplies ~ your stamper & scraper, the stamping plate with the design you want to use, and a stamping polish. (Before you use your stamper the first time, buff the rubber with a nail file to rough it up a bit & you will get a much cleaner print.)
You will also need Q-tips, nail polish remover, and paper towels for clean-up between nails. (Remove the blue film from the front of your plate if you have not used it before.) Fold a paper towel and place your stamping plate on top.
3) Scrape & stamp ~ Working quickly, dab a line of stamping polish across the top of the design and then use your scraper to pull it across the design & fill the engraved design with polish (scrape a few times if needed). Press the stamper down onto the design, and see if you picked up a clear print. If so, stamp it on your nail by rolling from one side to the other. (If not, clean it off and try again.)
4) Clean-up ~ Using the Q-tips, clean your stamper and plate with nail polish remover in between stamps, rubbing hard to clean out any tiny lines. If the image did not stamp well on your nail, you can also lightly clean off the stamp with nail polish remover and try again (thanks to the top coat, it won't remover your base color).
5) Finishing ~ Stamp as many nails as you wish, then clean the stamp off your skin with a Q-tip. Top the stamping with KBShimmer "Clearly on Top" and let dry. (If you use a different top coat, apply very lightly to keep from smearing the stamp, and try not to brush many times.)
It can take a little practice to get the hang of it, so don’t worry if you have trouble at first. You may want to try it out on paper before you do your nails. You can also do a search on YouTube for “nail stamping tutorial” and there are lots of great videos to show you the steps and give tips. Happy stamping!
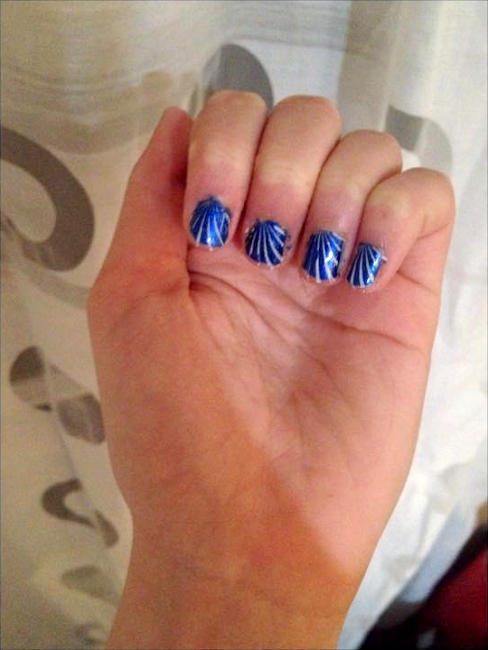
A few days after giving them the kit, they sent me a picture of their stamping. Pretty good for their first time! I'm so glad they were able to get it to work so well.


No comments:
Post a Comment