
We celebrated the first day of Christmas break by making some fun 'gingerbread' houses with the kiddos. They are pretty obsessed with candy, so they could not wait to start decorating! My kids are 2.5 and 5.5, so we went with small graham cracker houses and store bought frosting to keep things easy.
Since my kids are little I made sure to assemble the houses early & let them dry out to become a little sturdier. I had a little trouble assembling the first house, but felt like a pro by the fourth one, so I took step-by-step pictures to share the tips I learned along the way.
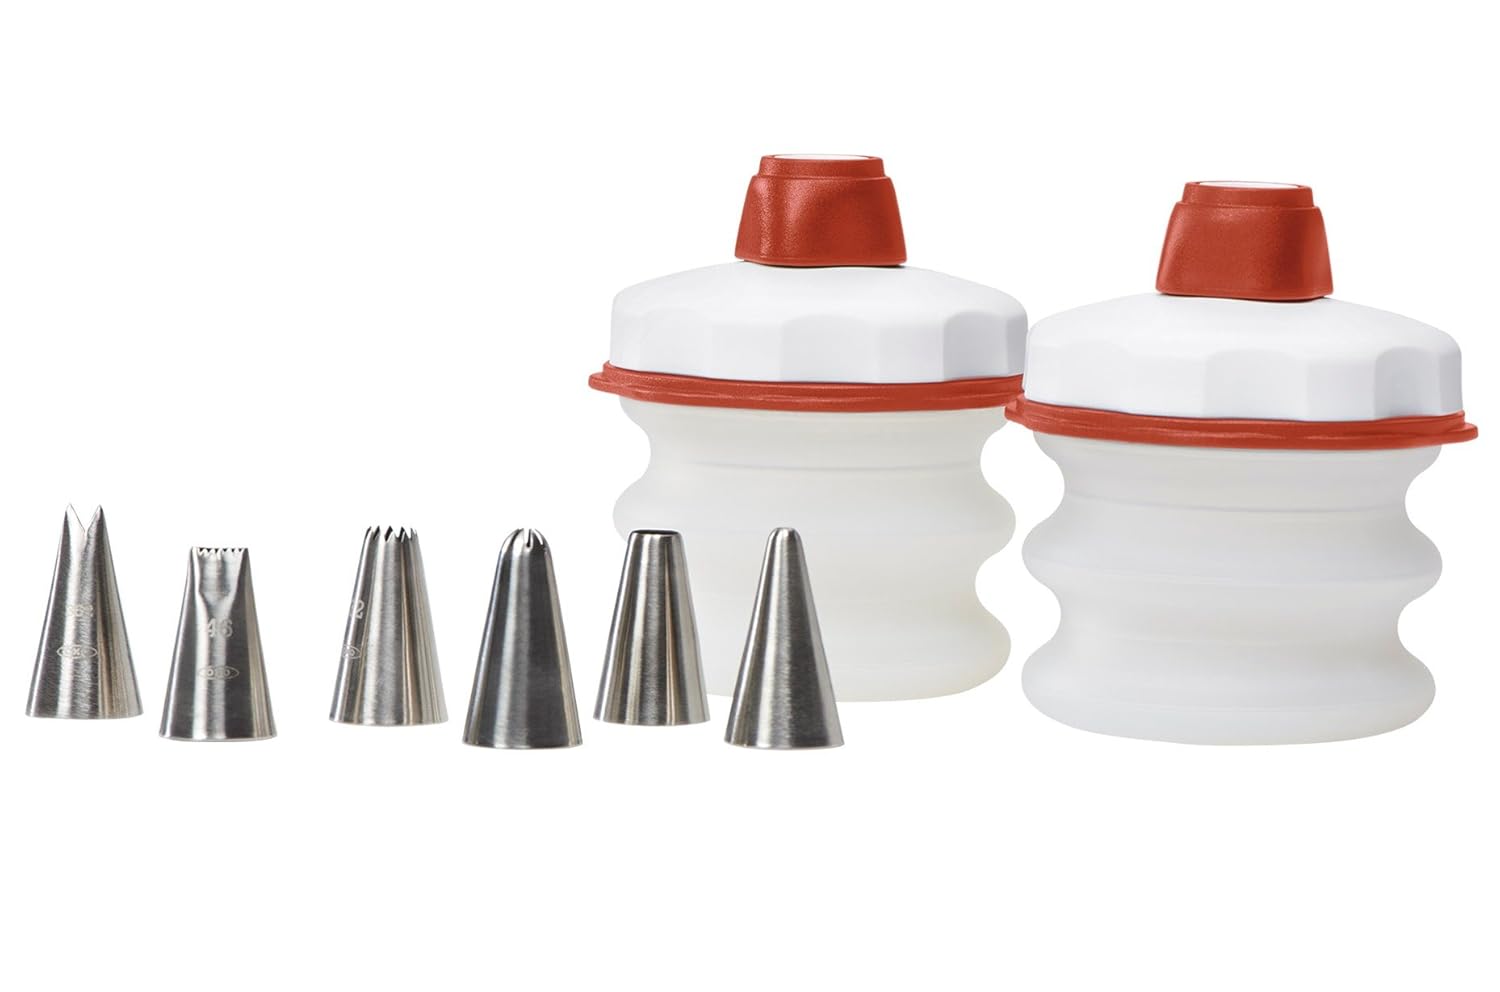
To apply the icing, I'm using these awesome cake decorating bottles I got for my birthday. Pastry bags have always felt super awkward to me, but these were easy to use!
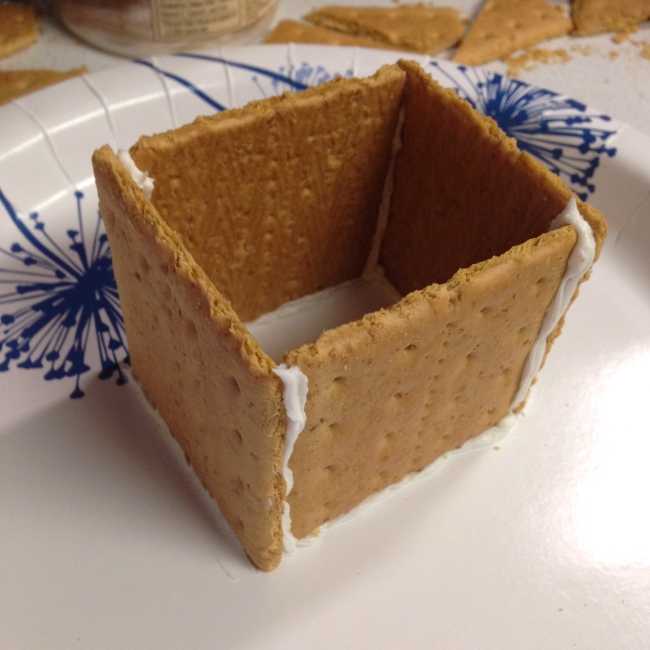
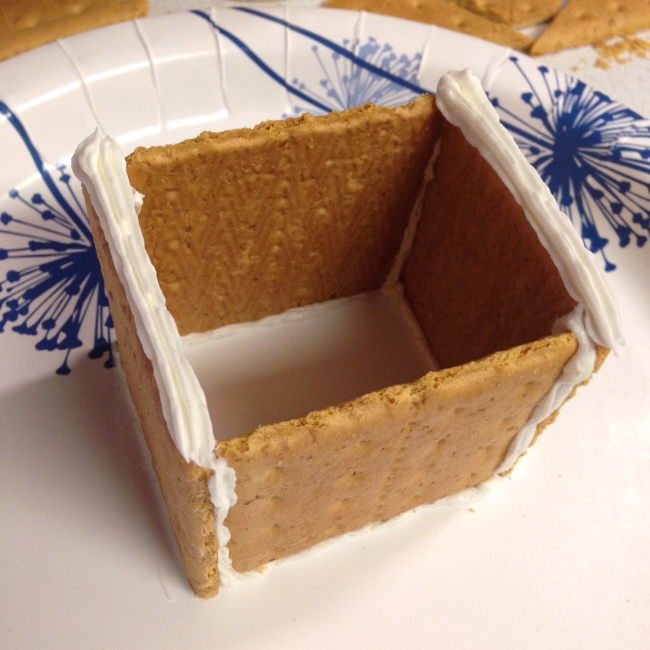
1) To start, ice three edges of a cracker and place it on your plate (facing away from you). It's OK for the perforation to run horizontal or vertical, but make sure to place all of the crackers the same way. This will be the back of your house.
2) Ice the bottom edge of another cracker and place it to the right of the first one, against the outer edge. (You want the side crackers to be on the outside of the front & back or you will have trouble placing your roof later!)

3) Ice three edges again and place that cracker in the front (inside of the right cracker).
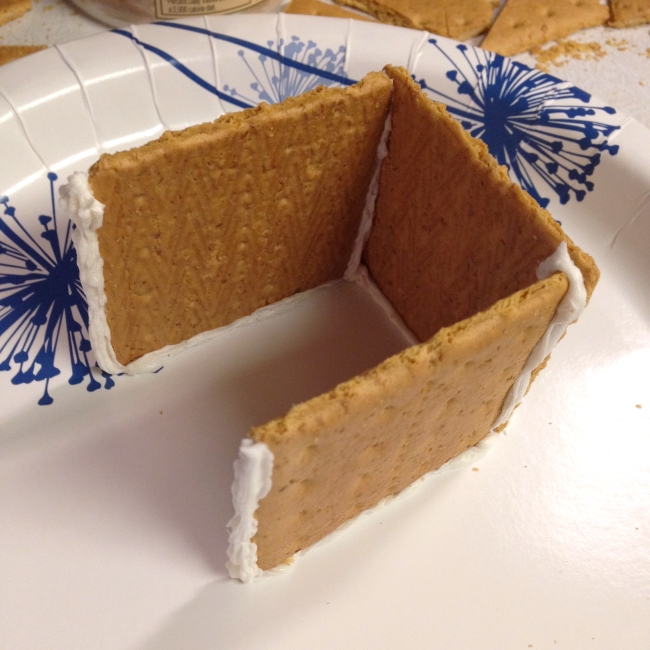
4) Ice the bottom edge of another cracker and finish off your four walls by placing this on the left, outside.
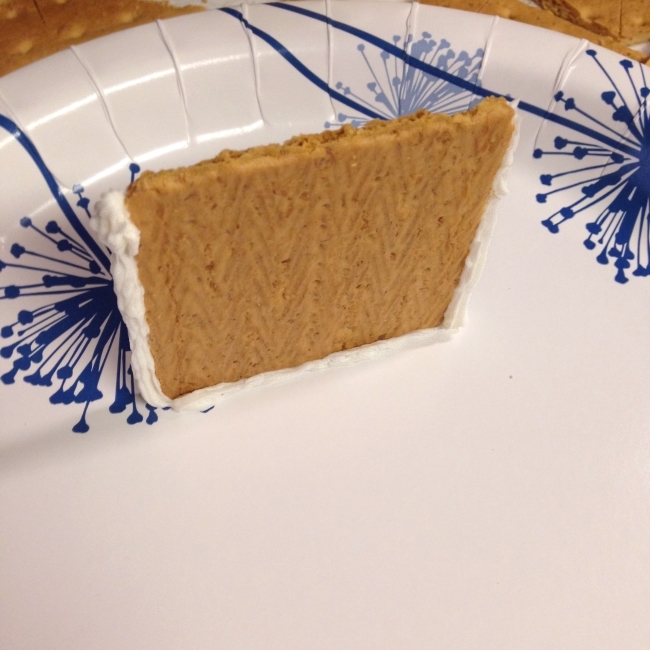
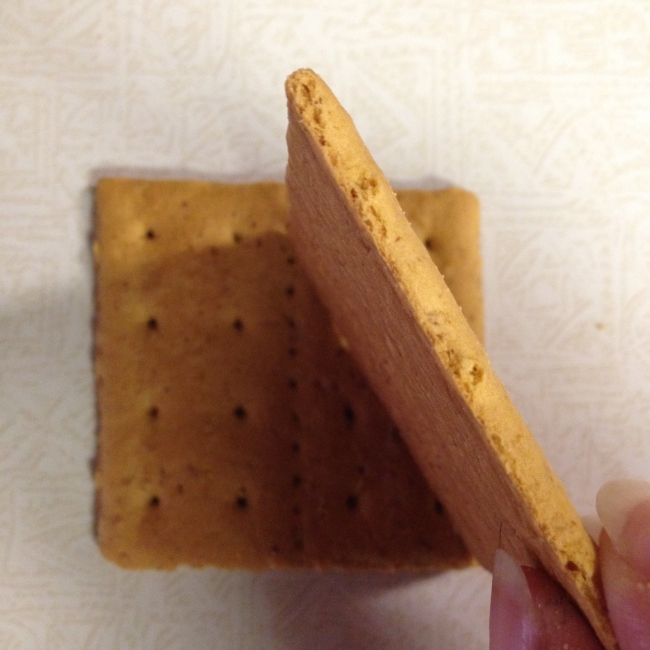
5) Now let's cut a triangle shape to hold our roof. This may differ a little based on the size of your crackers, so figure out your angle by holding a cracker from the bottom corner to the center line. Notice where it hits the center line, then choose a spot a little lower so that your room can overhang the edges a bit. The lower the spot, the bigger the overhang.
6) My cracker was about as tall as the top line of dots, so I chose to mark the height between the top two lines of dots. Using a serrated knife, saw a little to mark a line, and then connect that center spot to your bottom corners.
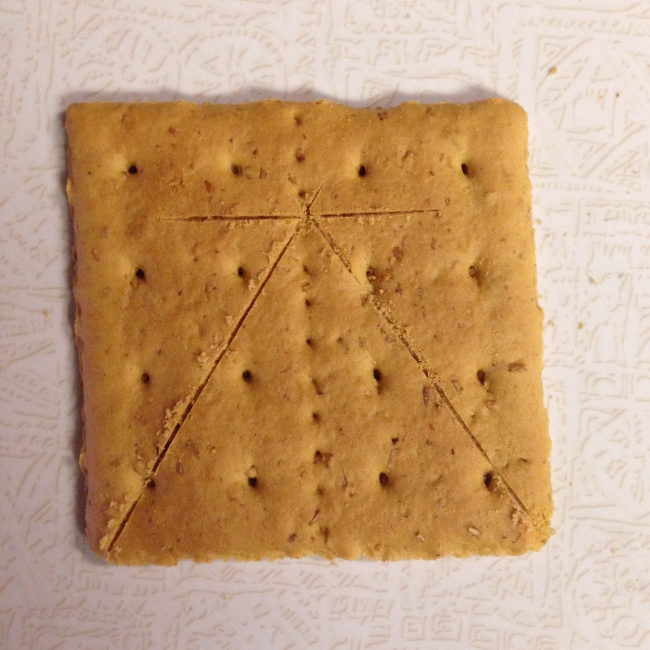
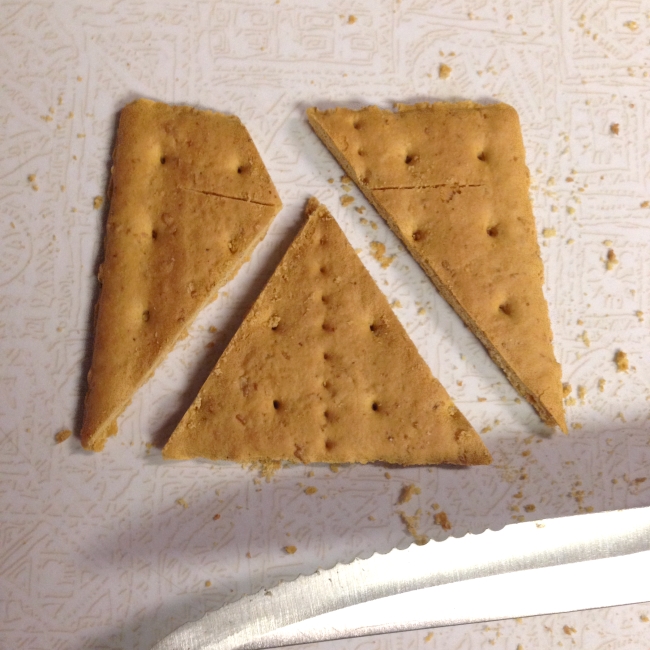
7) Now lightly saw through the cracker to create your triangle. You will need two for the house.
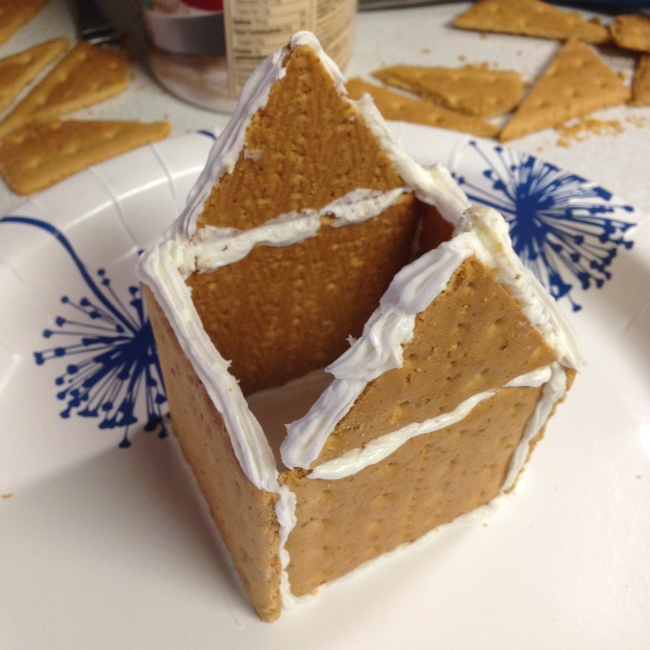
8) Before we attach our triangles, add a line of icing along the top of the side crackers. You'll be glad this is already done in a minute!
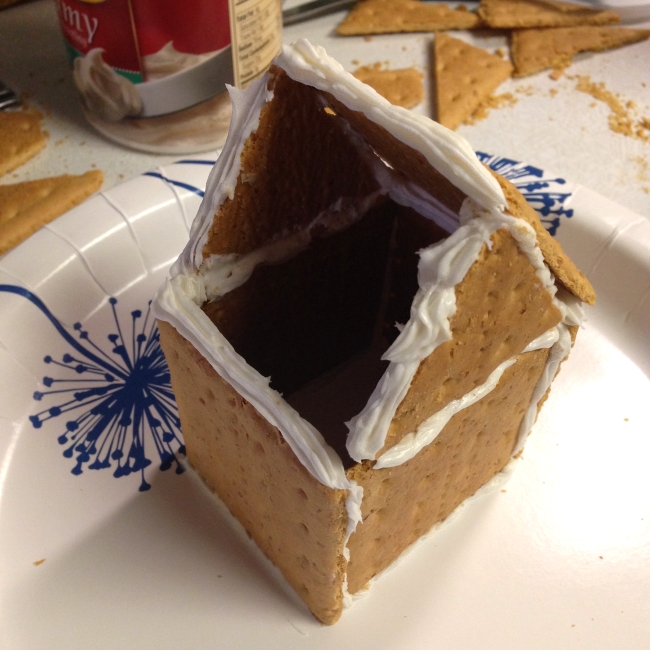
9) Ice all three sides of the triangles and balance them on the front and back. Don't worry if one falls in, just stick it back on there.
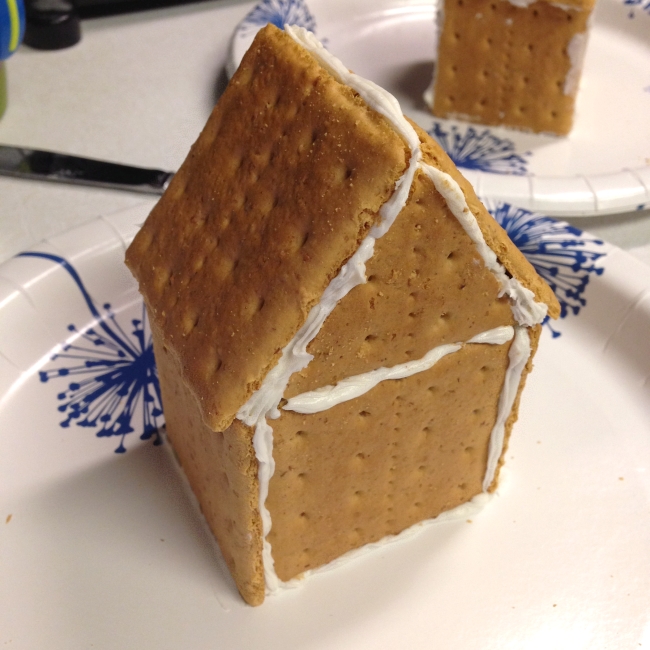
10) Add a cracker for the roof. Remember that it will overhang the walls a bit, not rest on top of them.

11) Add a line of icing along the roof top...
12) And slap the last cracker on there. If the roof is uneven (hangs lower on one side) you can shift & adjust them now. There will be some gaps between the roof and bottom of the triangle, so squeeze a little icing in there and you're done!
If you get the chance to stop by Walmart or a craft store, I love Our Best Bites' suggestions of making royal icing (with meringue powder) to assemble the house & really cement it together, and to use cake rounds for the base. We built ours on paper plates and the rim made it hard to decorate the base of the house. Next time I think I'll try both of tips, but this year we had to make do with regular icing.
Even with buttercream, we only had one house try to fall apart ~ when I brought my son his, the first thing he did was pull his house off the plate! Daddy switched his house with Orson's and I patched the broken house a little, but it was a bit unsturdy after that. Kids are full of surprises!
I'll share our decorated houses in the next post!
I'll share our decorated houses in the next post!
No comments:
Post a Comment