
- Red, white, and blue nail polish
- Fast Drying Topcoat
- Scotch Tape & scissors
- Clean up supplies (nail polish remover, q-tips, etc.)
- Optional: silver polish
First, apply a base coat (if you have one) and then paint your nails white. (I would definitely not recommend the white polish I used, but that's all I had!)

Clean up around the edges of the nail as needed and add a coat of your fast drying topcoat. The topcoat dries the nails super quickly so you move on to the next step without waiting all day! (I use INM Out the Door but there are a lot of good options like Seche Vite, CND Air Dry, etc.)
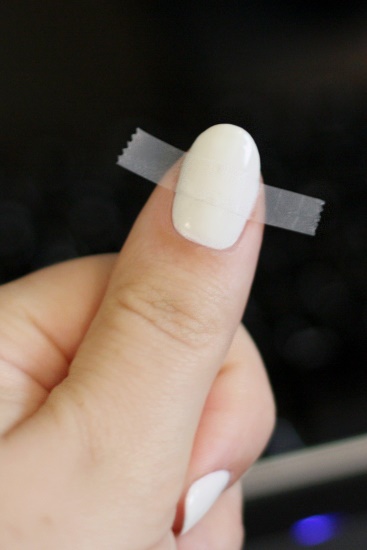
Cut down a piece of Scotch tape to about 1/3 the height of your nail. For my thumb I needed about 1/2 the tape width, with smaller strips for smaller nails. I worked one nail at a time, but cut two strips so I would have the same size for the opposite nail (like the same size for both thumbs). Lay the strip across the center of your nail, pressing it down well to get rid of any air bubbles or folds. Make sure to press it down into the crease on each side of the nail as well.
Use your blue polish below the tape and red above, adding another coat or two as needed. (I used an ancient Wet N Wild for the blue and China Glaze Ruby Pumps for the red) Carefully peel off the tape, hopefully revealing nice straight lines!

I did have a few spots where the polish leaked under the tape a little but was able to clean this up pretty easily with polish remover and a metal tool with a small point (you could use something like the point on a metal nail file). Dip the tip of your tool into the polish remover and then gently scrape off the mistake. If you end up with a bead of polish remover sitting on your nail you just dab it with the corner of a paper towel to remove it.
Clean around your nails again (I had a lot of blue to clean up!) and then use your top coat again. Try not to brush over the same area twice to help avoid one color streaking into another - one stroke down each side of the nail & one in the center with a well-loaded brush should be enough. (Unfortunately my blue streaked an abnormal amount, so I touched up my center stripe with some more white)
Optional: add some silver stars!
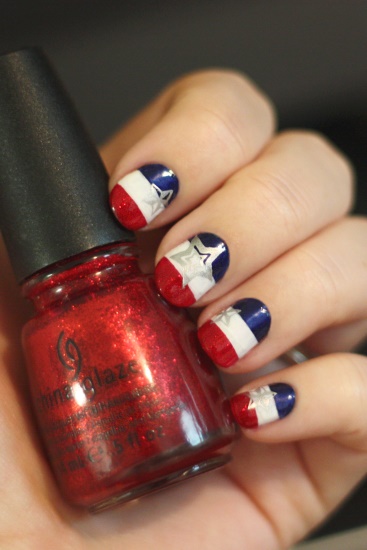
You could follow this tutorial to create some nail stickers with your tape & scissors or a star shaped hole punch, free-hand some stars by dipping a toothpick or nail dotter into silver polish, or stamp some on. If you make a mistake you should be able to easily wipe it off with some polish remover (because of the topcoat) and try again!
I stamped the thumb & middle finger with the star on BM05 and used the star from BM206 for the rest. And of course, top it off with another coat of your topcoat! I love that stuff.
No comments:
Post a Comment