
Justin and my favorite thing about the fair is the foods, so this is my homage to all of the fried goodness! I found lots of great images in the Cheeky summer stamping set & used Sally Xtreme Wear “Black Out” for the base color. There is a lot going on in this manicure, so I’ll break it down by nail.
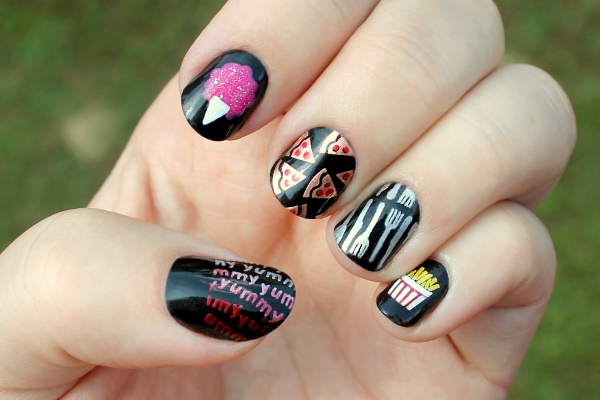
Thumb ~ Even the giant Cheeky stamps will barely cover my large thumbnails, so to make it easier on myself I blocked off the bottom of the nail with some Scotch tape and stamped the image sideways so I had plenty of wiggle room. The “yummy” image comes from Cheeky plate CH42. To create a gradient I laid out half Pure Ice “Silver Mercedes” and half No Miss “Palmdale Paprika” (metallic red), blending the two at the center a little with a stick, and then scraped and stamped like normal.
Pointer ~ I was planning on stamping some soda cups from CH41 with white or silver, but I could not get a clean stamp from that one. I used a dotting tool instead to create an easy cotton candy with Jessica “Smitten Kitten” (pink) and brushed on some Sinful Colors “Pinky Glitter” for shimmer. Then I added a small triangle of white with a small nail art brush and Milani “White on the Spot”.
Middle ~ For the pizzas I stamped with plate CH41 and Essie “Penny Talk”, then dotted the pepperonis with No Miss “Palmdale Paprika”.
Ring ~ The silverware is from CH42 and stamped with Pure Ice “Silver Mercedes”. I definitely had to do a few touch-ups with this image!
Pinky ~ For the fries I made my first stamped nail decals! You can see an awesome tutorial for this technique here, though I had to add some of my colors from the back and some from the front. I took a few pictures of the process and will be posting a mini tutorial for these soon.
No comments:
Post a Comment