

Well, apparently I still don’t have good polishes! The colors are better but barely visible, only seen in the brightest spot of light.
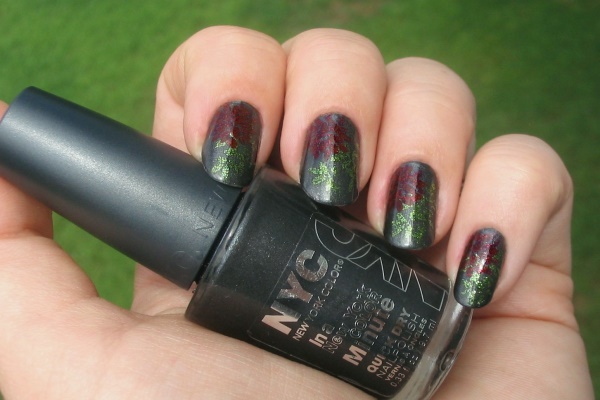
The base is a dark metallic gray, NYC “Bowery Black”, and I stamped the leaf with Kleancolor “Metallic Green” and Bundle Monster plate BM-208 (the green is a little too sheer in this case, but shows up OK on some colors). I then stamped the flower with plate BM-06 and Konad Special Red. While this polish is meant for stamping it was totally lost over the dark color, I think you would need something metallic to stand out. I stamped over the flower with China Glaze “Ruby Pumps” to give it a little shimmer but it was still not clear at all.
I’ve bought three duds so far In my quest to find a red that will stamp over black. Who knew that would be so hard to find? I did some comparison stamping of the three & will post that for you soon.
After that fail I wanted to do something pretty & tried this stained glass look with my new striping tape. The colors were so much prettier in real life - the picture does not do this one justice!
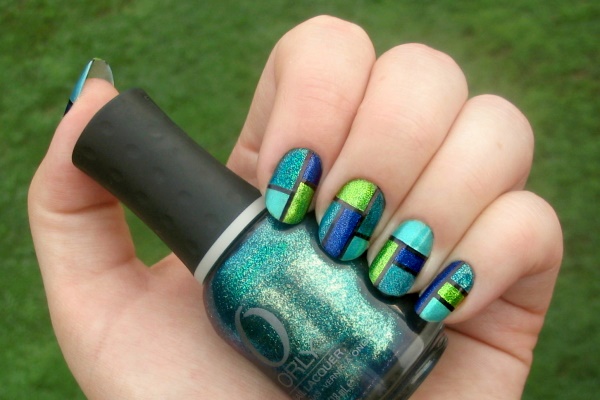
Looking at the pointer finger, the colors used were - (top left) ORLY’s “Halley’s Comet”, (top right) Color Club “Cold Metal”, (bottom left) Sally Hansen “Marine Scene”, and (bottom right) Kleancolor “Metallic Green”. The black lines were added with the striping tape.
I followed the directions from the video, using one polish as a base color ("Marine Scene"), laying down tape as a guide for the colors, and then replacing that with new tape at the end. I would recommend doing one coat of each color, removing the tape, and then adding however many coats are needed so that it doesn’t get built up at the sides of the tape or dry too much before you pull the tape up.
The technique worked well but it was slow going. I’ve never worked with the tape before & it was much harder to manipulate those tiny pieces than I had expected! I do think I would get quicker at it with practice but by the time I’d finished my left hand I had no motivation to replicate that on my right hand. (Working at home it’s not like anyone is even going to see it!)
Unfortunately the striping tape does not want to stay down at the nail tip, no matter how much top coat you put over or under it. I was constantly trimming the end and filling in the missing line with a Sharpie! I bought my set of tape for super cheap on eBay & wondered if it was just a lousy brand, but looking online it seems most people have problems with it lasting. Taping side-to-side seemed to stay better, and perhaps some pricier or wider brands stick better, but I’m skeptical. So sad!
No comments:
Post a Comment