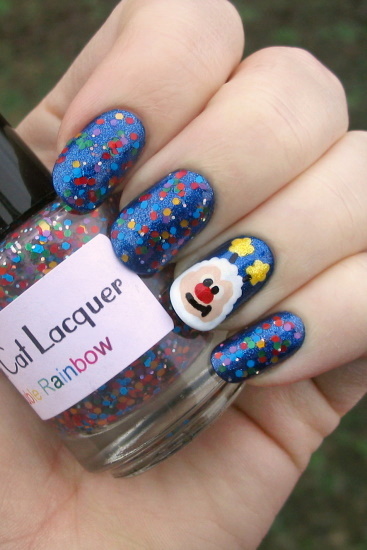
It's Twink the Sprite from Rainbow Brite!
The glitter topcoat you see in the picture was the inspiration for the manicure. I fell for this "Rainbow Brite" polish when I saw the swatches on ThePolishAholic. I've been wanting to try some matte glitters & the colors really did scream 'Rainbow Brite', a childhood favorite, so it was added on my very short wishlist.
The polish has since changed names to "Double Rainbow" (I'm sure we can all guess why!), and you can see the colors are much more vibrant than in my picture. I'm not really sure about the matte glitter, everything but the blue seems shiny to me? The polish also had a chemically smell, but it applied easily & is a lovely topper!
While thinking of Rainbow Brite, I realized that the Sprites from the show could easily be created with a nail dotter. I tested it out on a nail wheel & then took step-by-step photos for a tutorial!
For this manicure you will need ~
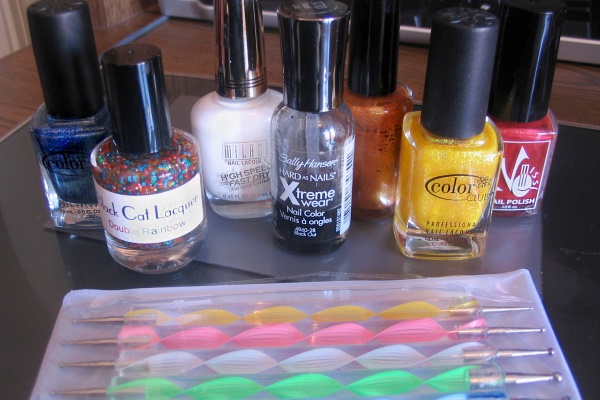
Nail dotters and polish in blue, a rainbow colored glitter topcoat, white, black, khaki/flesh colored (or some sort of brown), yellow, and red. The exact shade does not matter that much, but pictured above is Color Club "Cold Metal", Black Cat Lacquer "Double Rainbow", Milani "White on the Spot", Sally Hansen Xtreme Wear "Black Out", an unlabeled coppery polish, Color Club "Daisy Does It", and No Miss "Palmdale Paprika".
For the nail dotters I'll be referring to the sizes as XS, S, M, L, and XL. We'll be using XS-L.
1) Paint your nails with a blue base coat on all nails (and clean up edges). Add your rainbow glitter to all but the ring fingers. Coat everything with a fast drying top coat & let dry for a while.
2) On the ring fingers ~ Yellows tend to be a bit transparent, so we're going to lay down some white first for the stars. Use the S dotter to draw two tiny white stars at the top of the nail. (Dot the point of each star and then drag in towards the center) Use the L dotter and create a row of dots curving down.
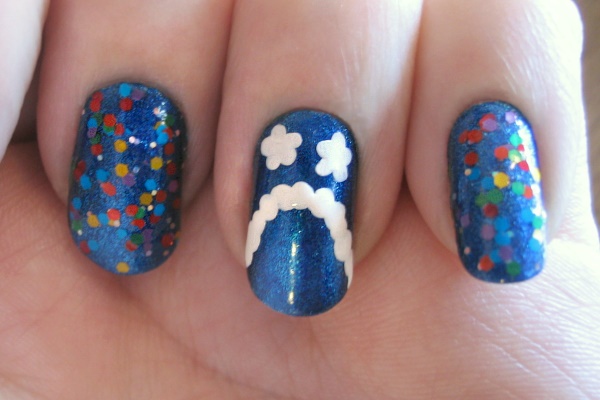
3) Using the XS dotter (or a small striping brush/toothpick), draw a thin black line from each star to the curved line. Fill in the area below the dotted curve with a coat of white & let dry for a minute. Add a second coat (or more) as needed and let dry all the way through.
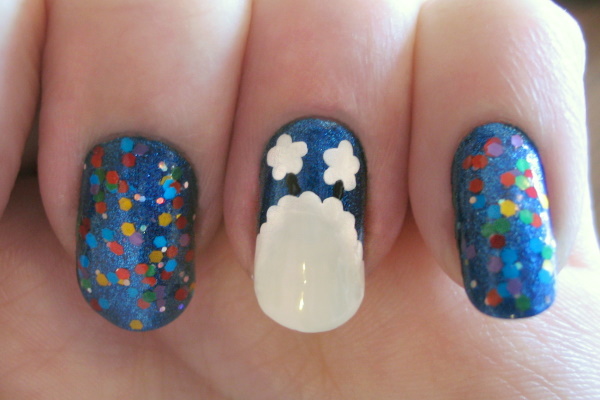
4) I did not have a good khaki/flesh color for his face, so I mixed a coppery color and white half & half and it was perfect! With the L dotter, add the khaki color to create the face shape ~ two humps at the top and extended on the sides for the cheeks. With the S dotter, go over the stars with your yellow & let it all dry.
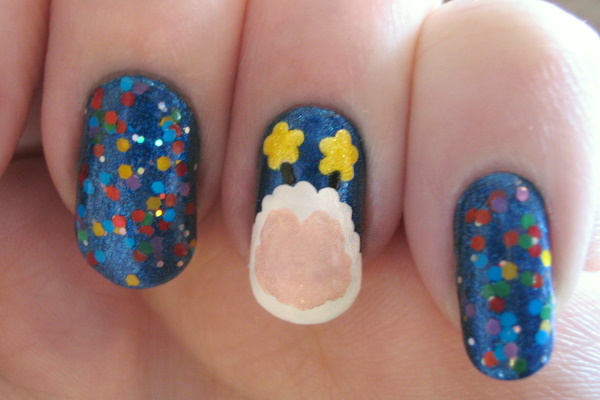
5) With the M dotter, add two white dots for the eyes. With the L dotter, move back & forth to create an oval shape underneath for the nose (let dry).
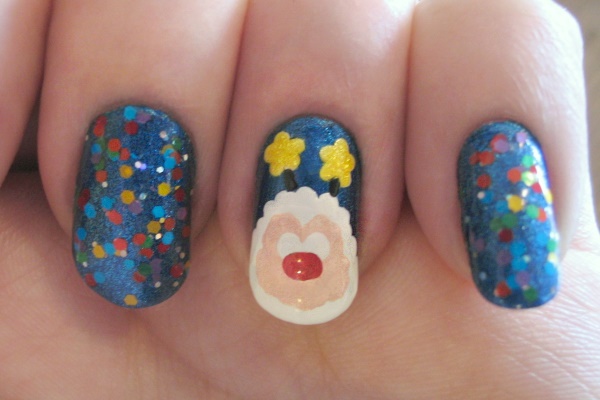
6) With the S dotter, add black pupils to the eyes. Then, using the XS dotter, finish it off by drawing on the mouth. Let this all dry for a while before applying your fast drying topcoat to keep it from smearing.
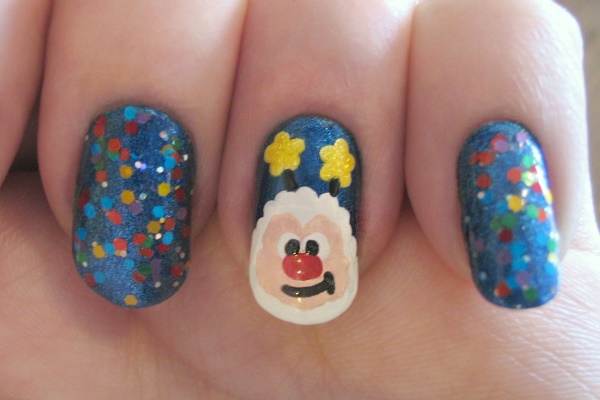
The sprite turned out so cute on my left hand! My right hand looked a little wonkier, but it's definitely doable with your 'off hand'. I hope you'll give this a try!

No comments:
Post a Comment